Create a Skyscape with Stylism v2.3 AG Block Shadow's Vanishing Point
6 minute readIn this tutorial for the Stylism v2.3 update, we are going to make a skyscraper image using the new ‘Vanishing Point’ feature as part of the AG Block Shadow tool. However, we’re going to use it in a reverse kind-of-way. Instead of looking down on the buildings we are going to look up to the sky and use the scaled block shadow to give the illusion of tall buildings reaching the sky. For artistic licence this is going to be a vector art image rather than a highly detailed photo type image.
The first step is to create our background layer on an artboard set to 1600px x 1200px.
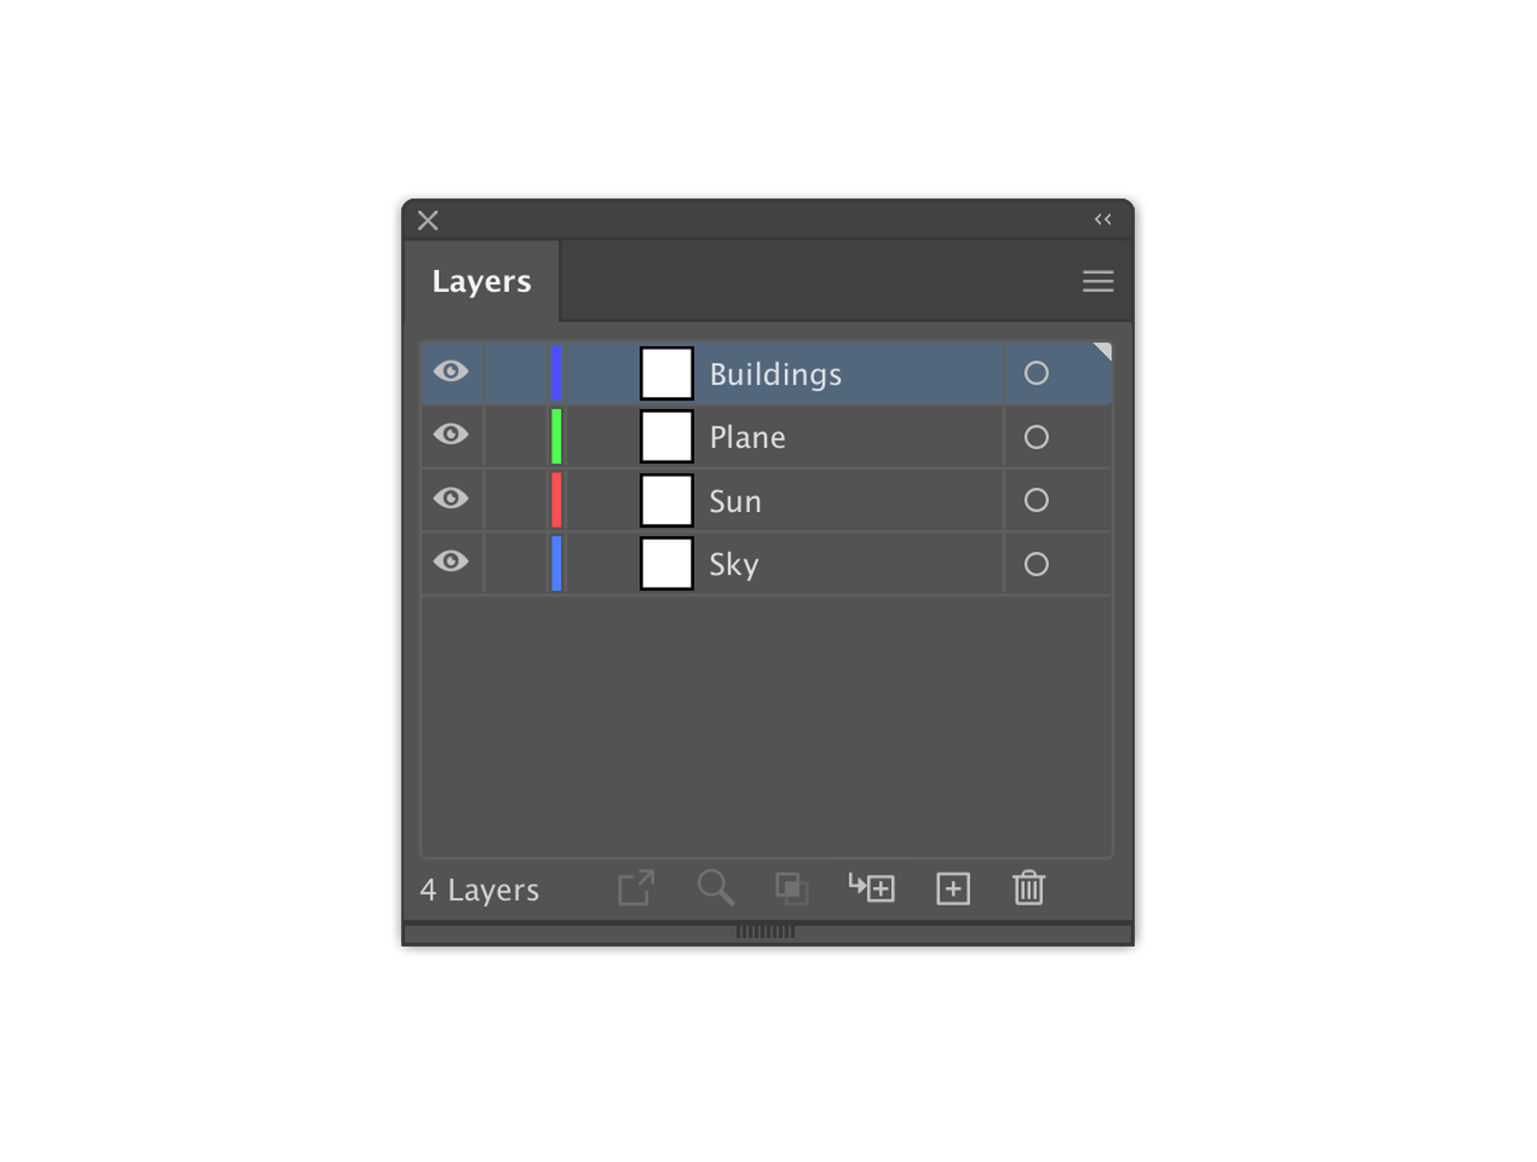
Before we go ahead and start adding elements, we will create layers for each part of the image: Sky, Sun, Plane and Buildings.
We’ll also need our AG Block Shadow panel open. This can be found in the Window > Stylism > ... menu.
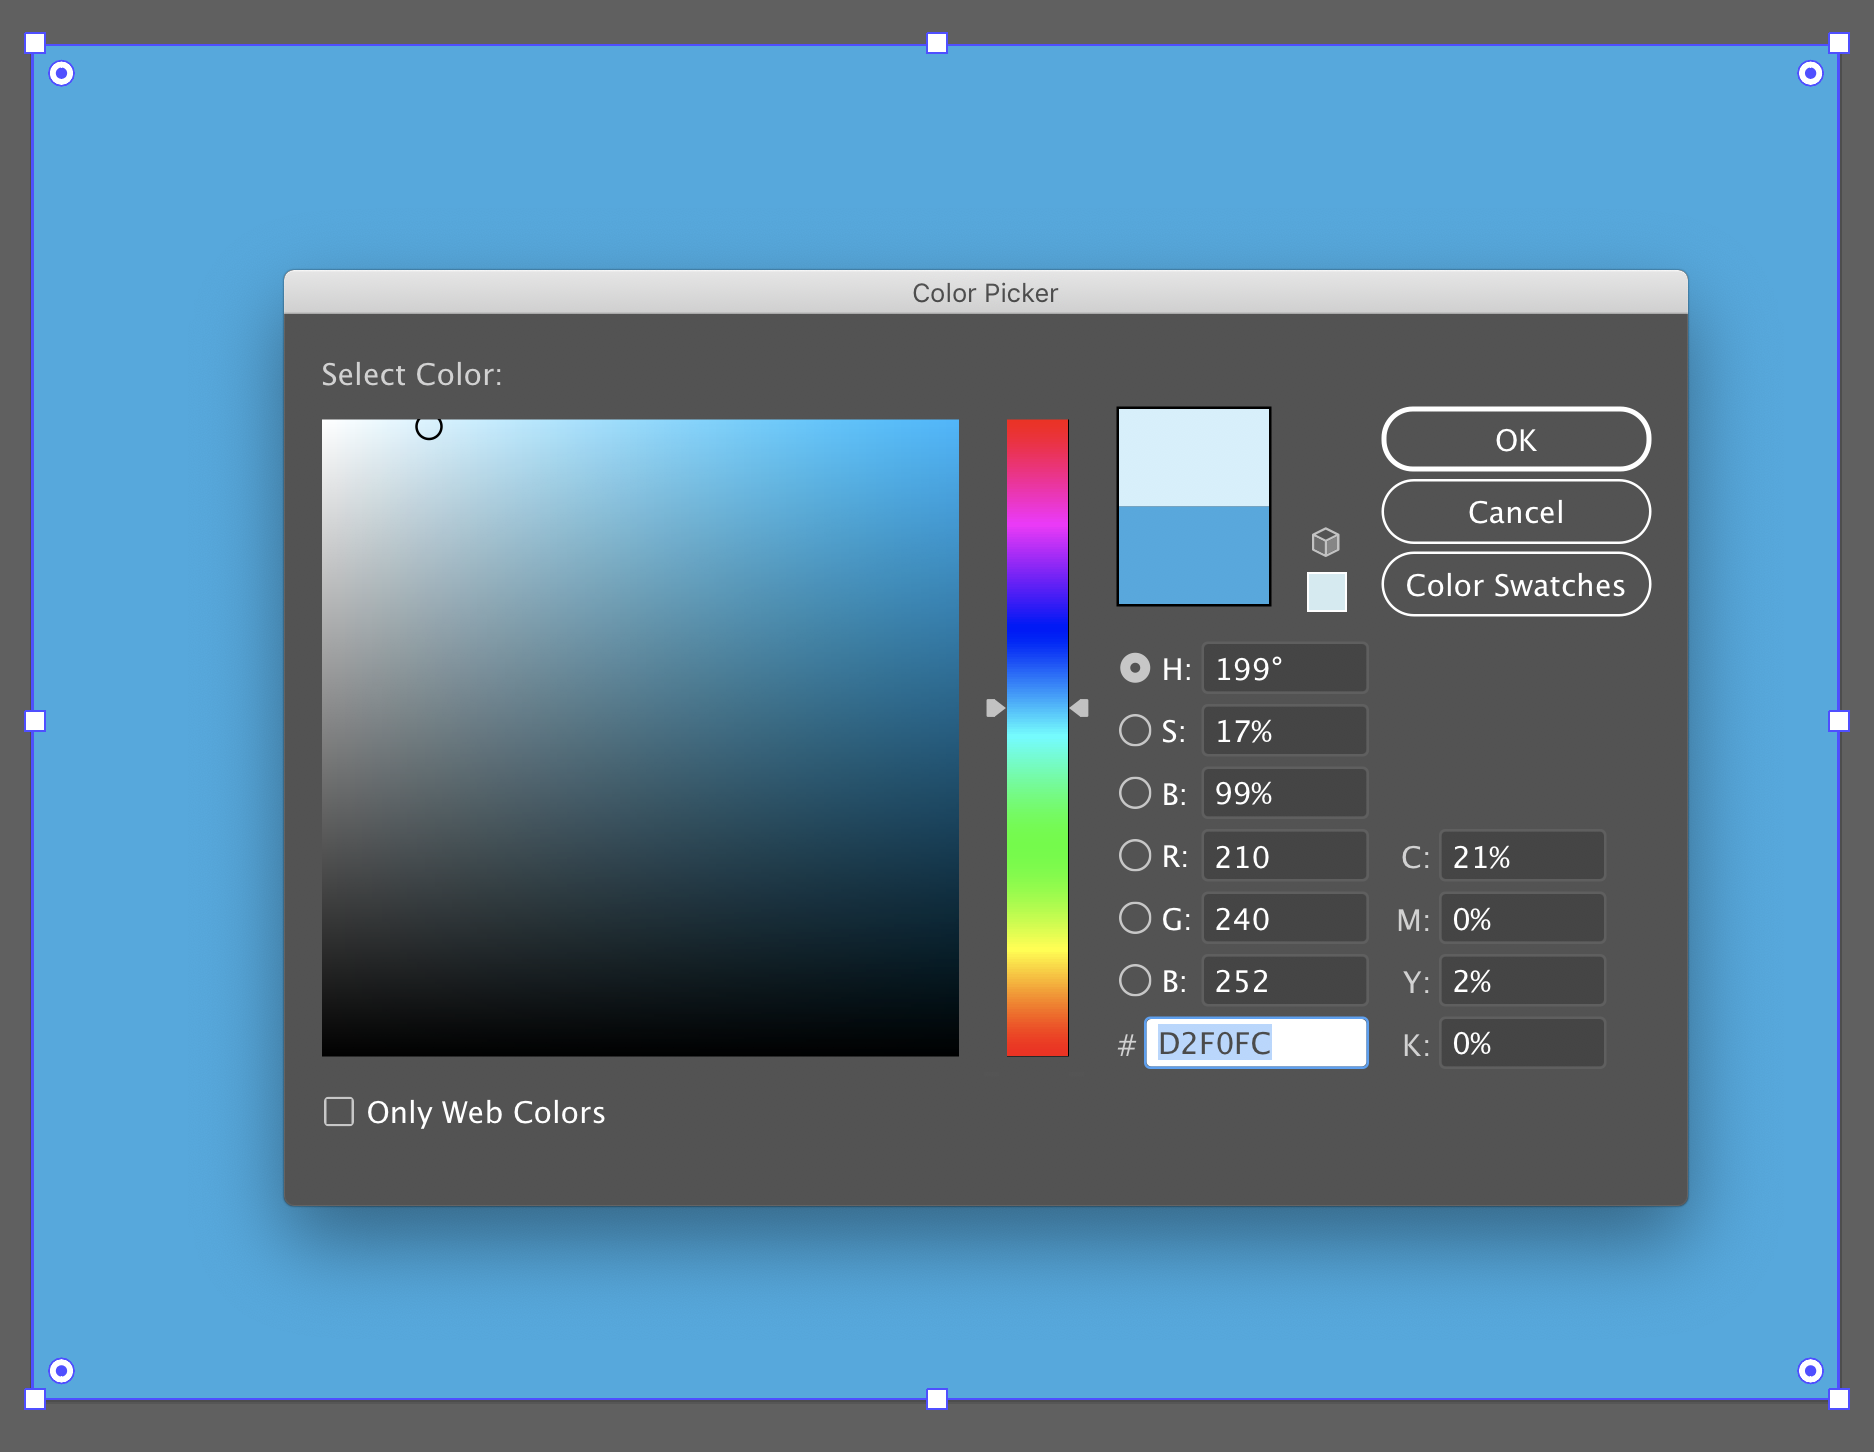
On the sky layer, draw out a rectangle to fill the document and color this light blue (for example, #D2F0FC). This will be our sky, and we can always adjust it later if needed. Lock the sky layer in the layers panel.
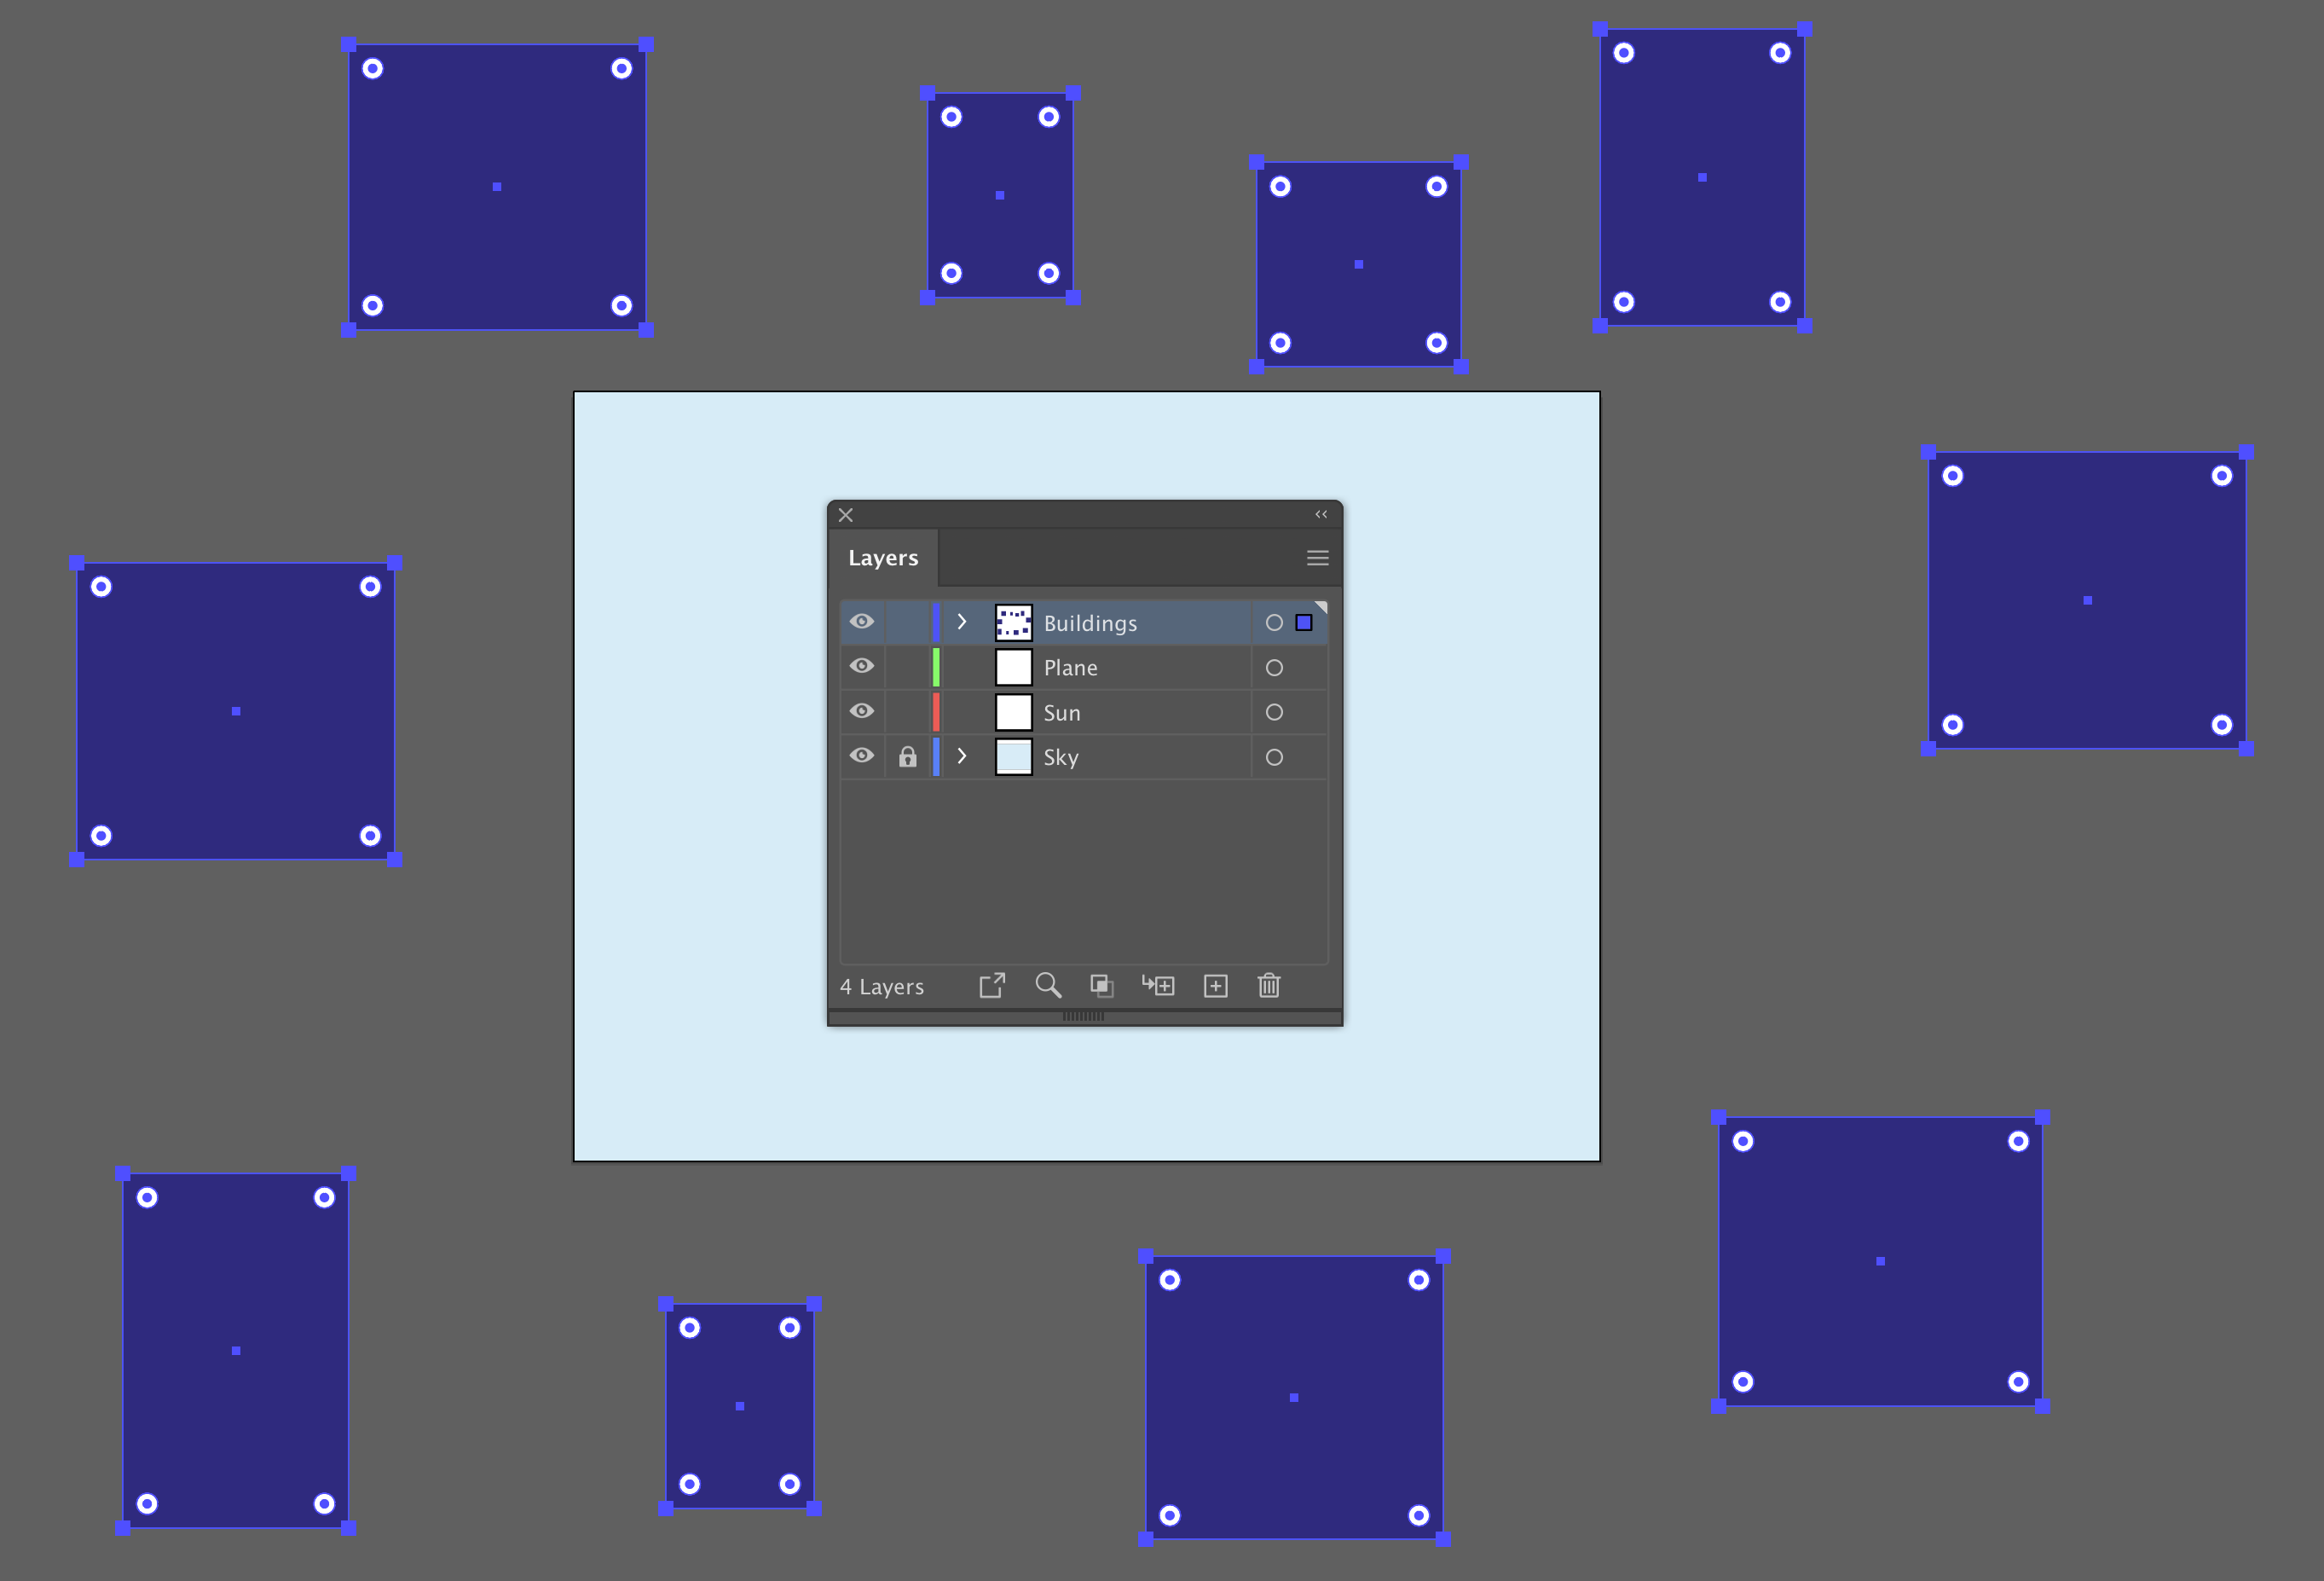
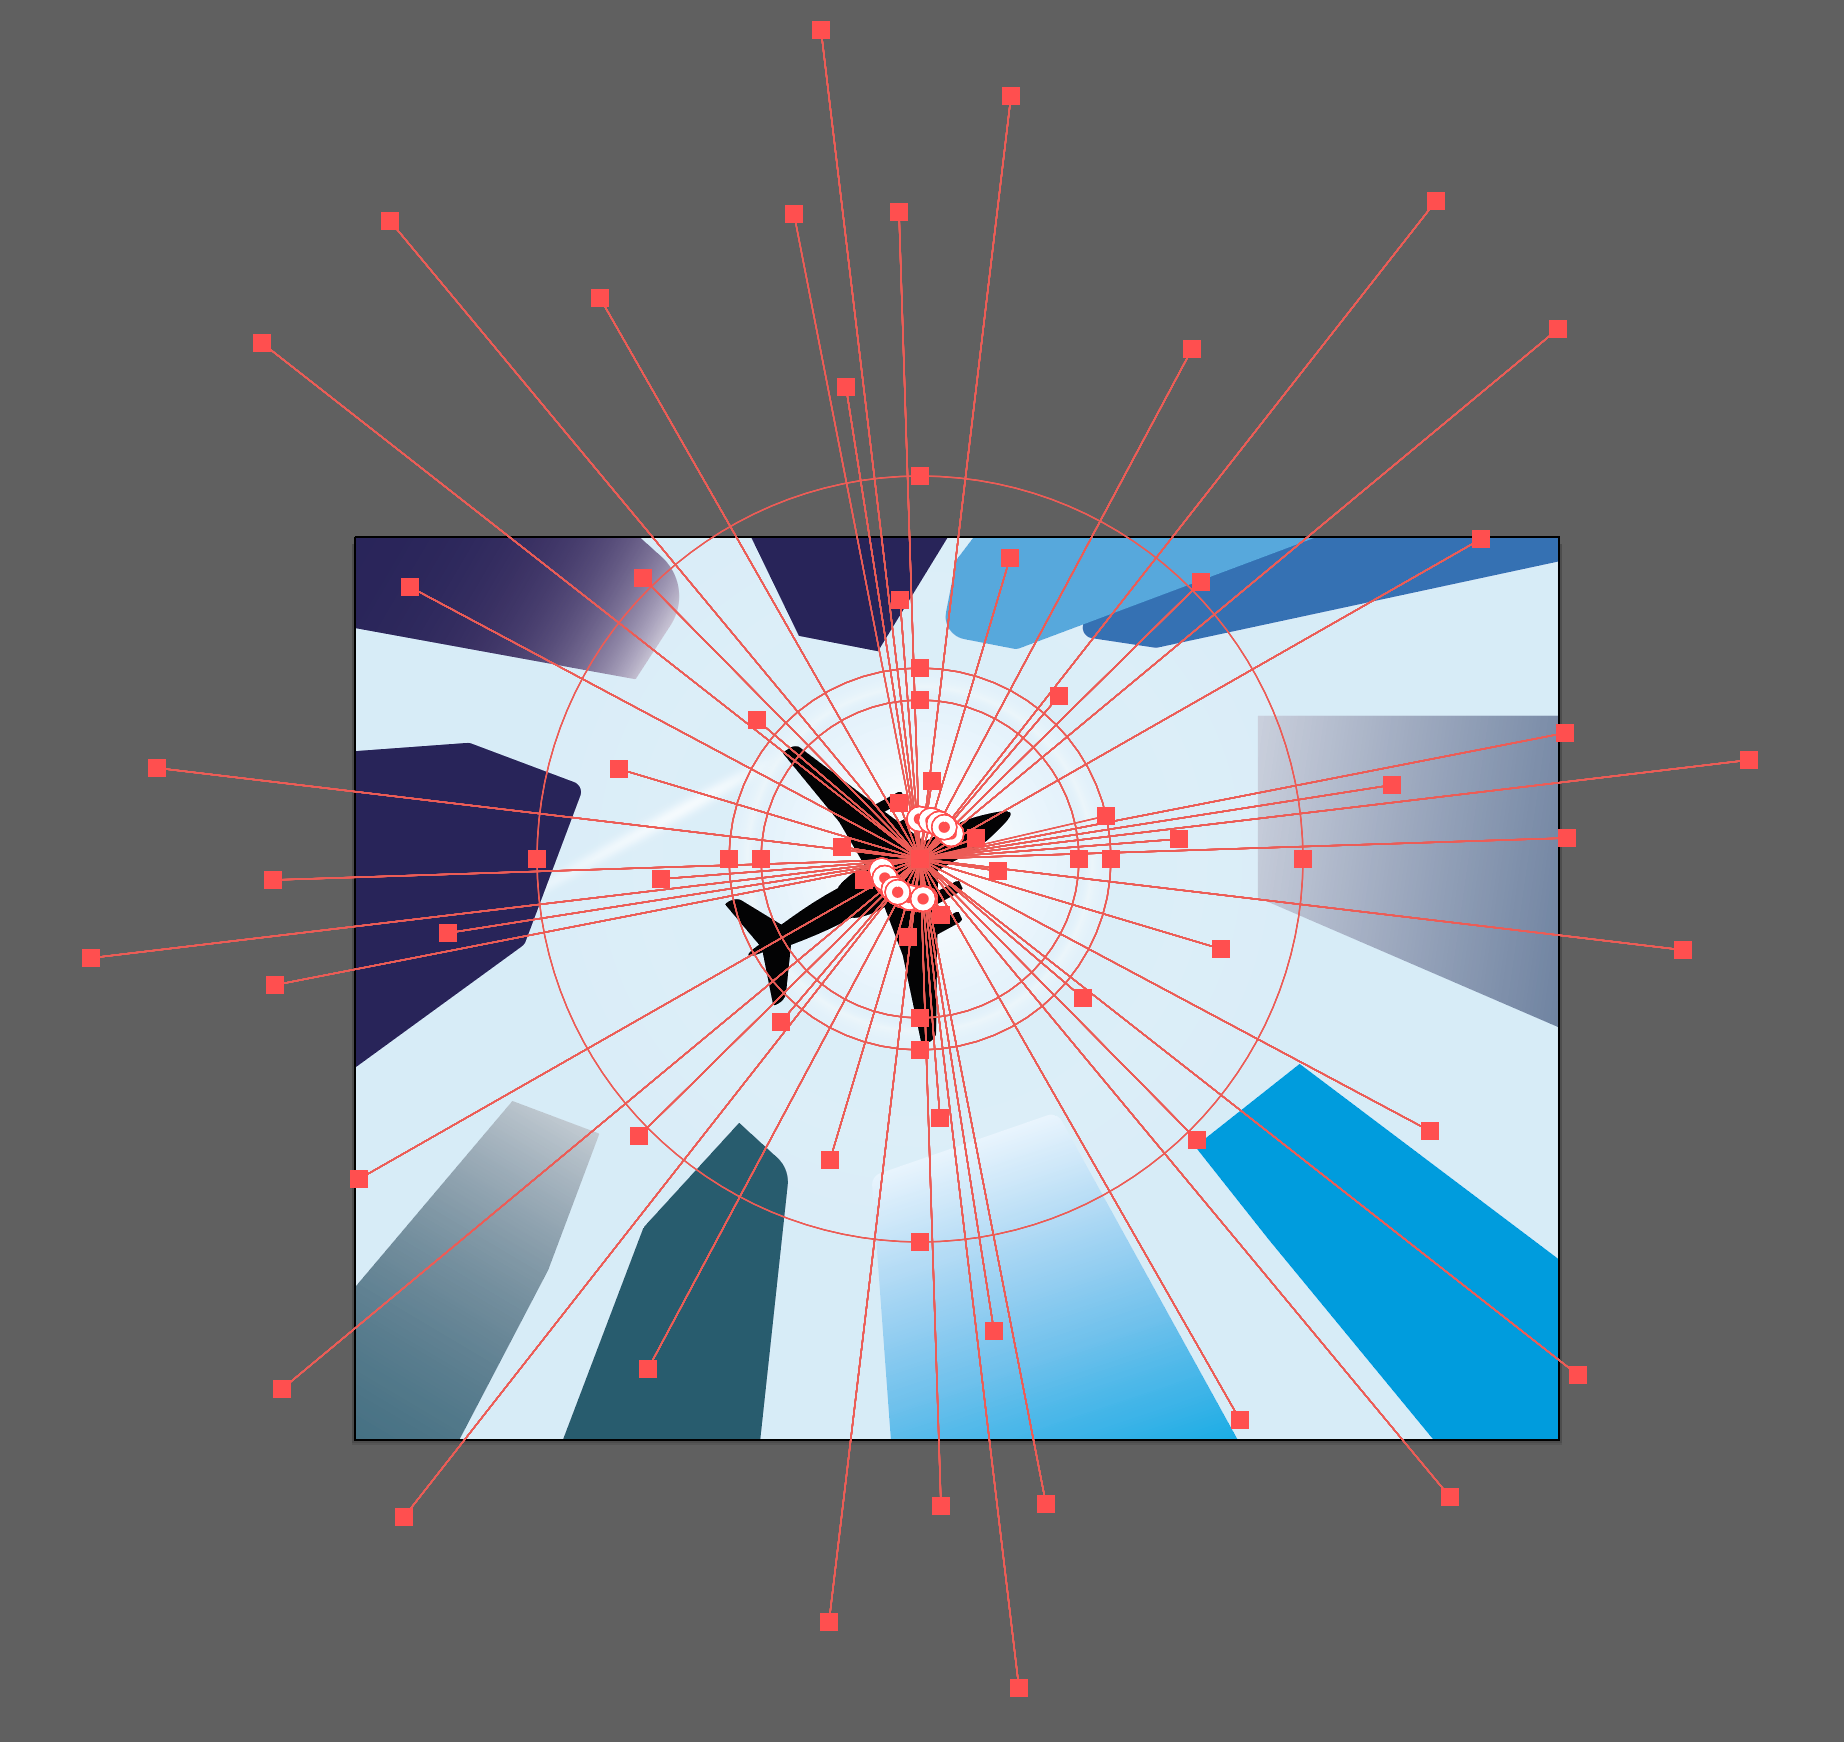
Next, we'll add our buildings. Select on the ‘Buildings’ layer, and start drawing various squares and rectangles around the outside of the document on the pasteboard area, not in the artboard area. We place them as such because we are pulling the shadows in from the shapes to give the perspective view. For now, it doesn’t matter what color the shapes are.
Draw about 10 different shapes around the artboard. We can always remove or add more later. The block shadows will be applied to the individual objects and rely on the AG Block Shadow tool to maintain a common vanishing point.
Now we have our shapes, the next step is to apply the block shadow effect.
Ensure you have selected all the shapes within the layer, but NOT by clicking on the layer target ("meatball") – make sure you select them all manually, eg. by marquee-selecting. Then, as a workflow tip, open the AG Block Shadow panel's fly-out menu and choose Reset to Defaults. This cleans up any previous settings you have used.
Return to the AG Block Shadow panel's fly-out menu and select Show Advanced Parameters.
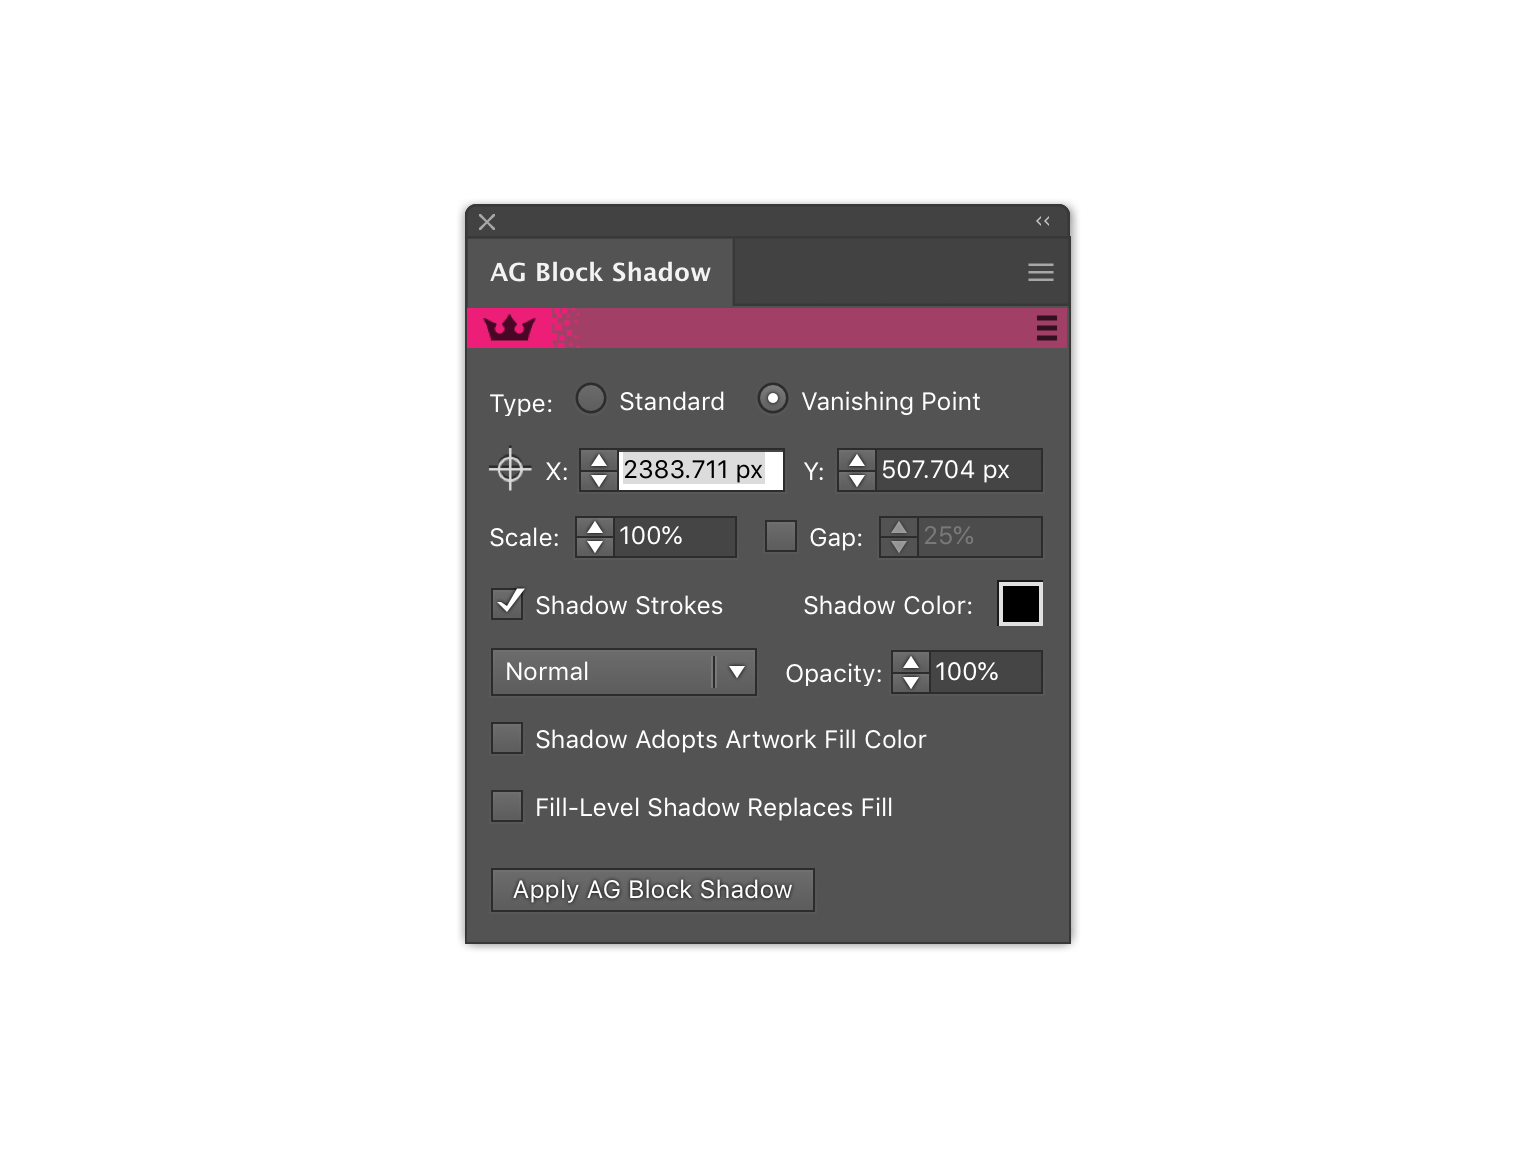
Next, on the AG Block Shadow panel, click on the Vanishing Point radio button. Change the Scale to about 35%. Then set the vanishing point X and Y coordinates to 100px each. This gives us a shorter depth of perspective to begin with; we can soon alter this manually.
Click Apply AG Block Shadow button in the bottom of the panel.
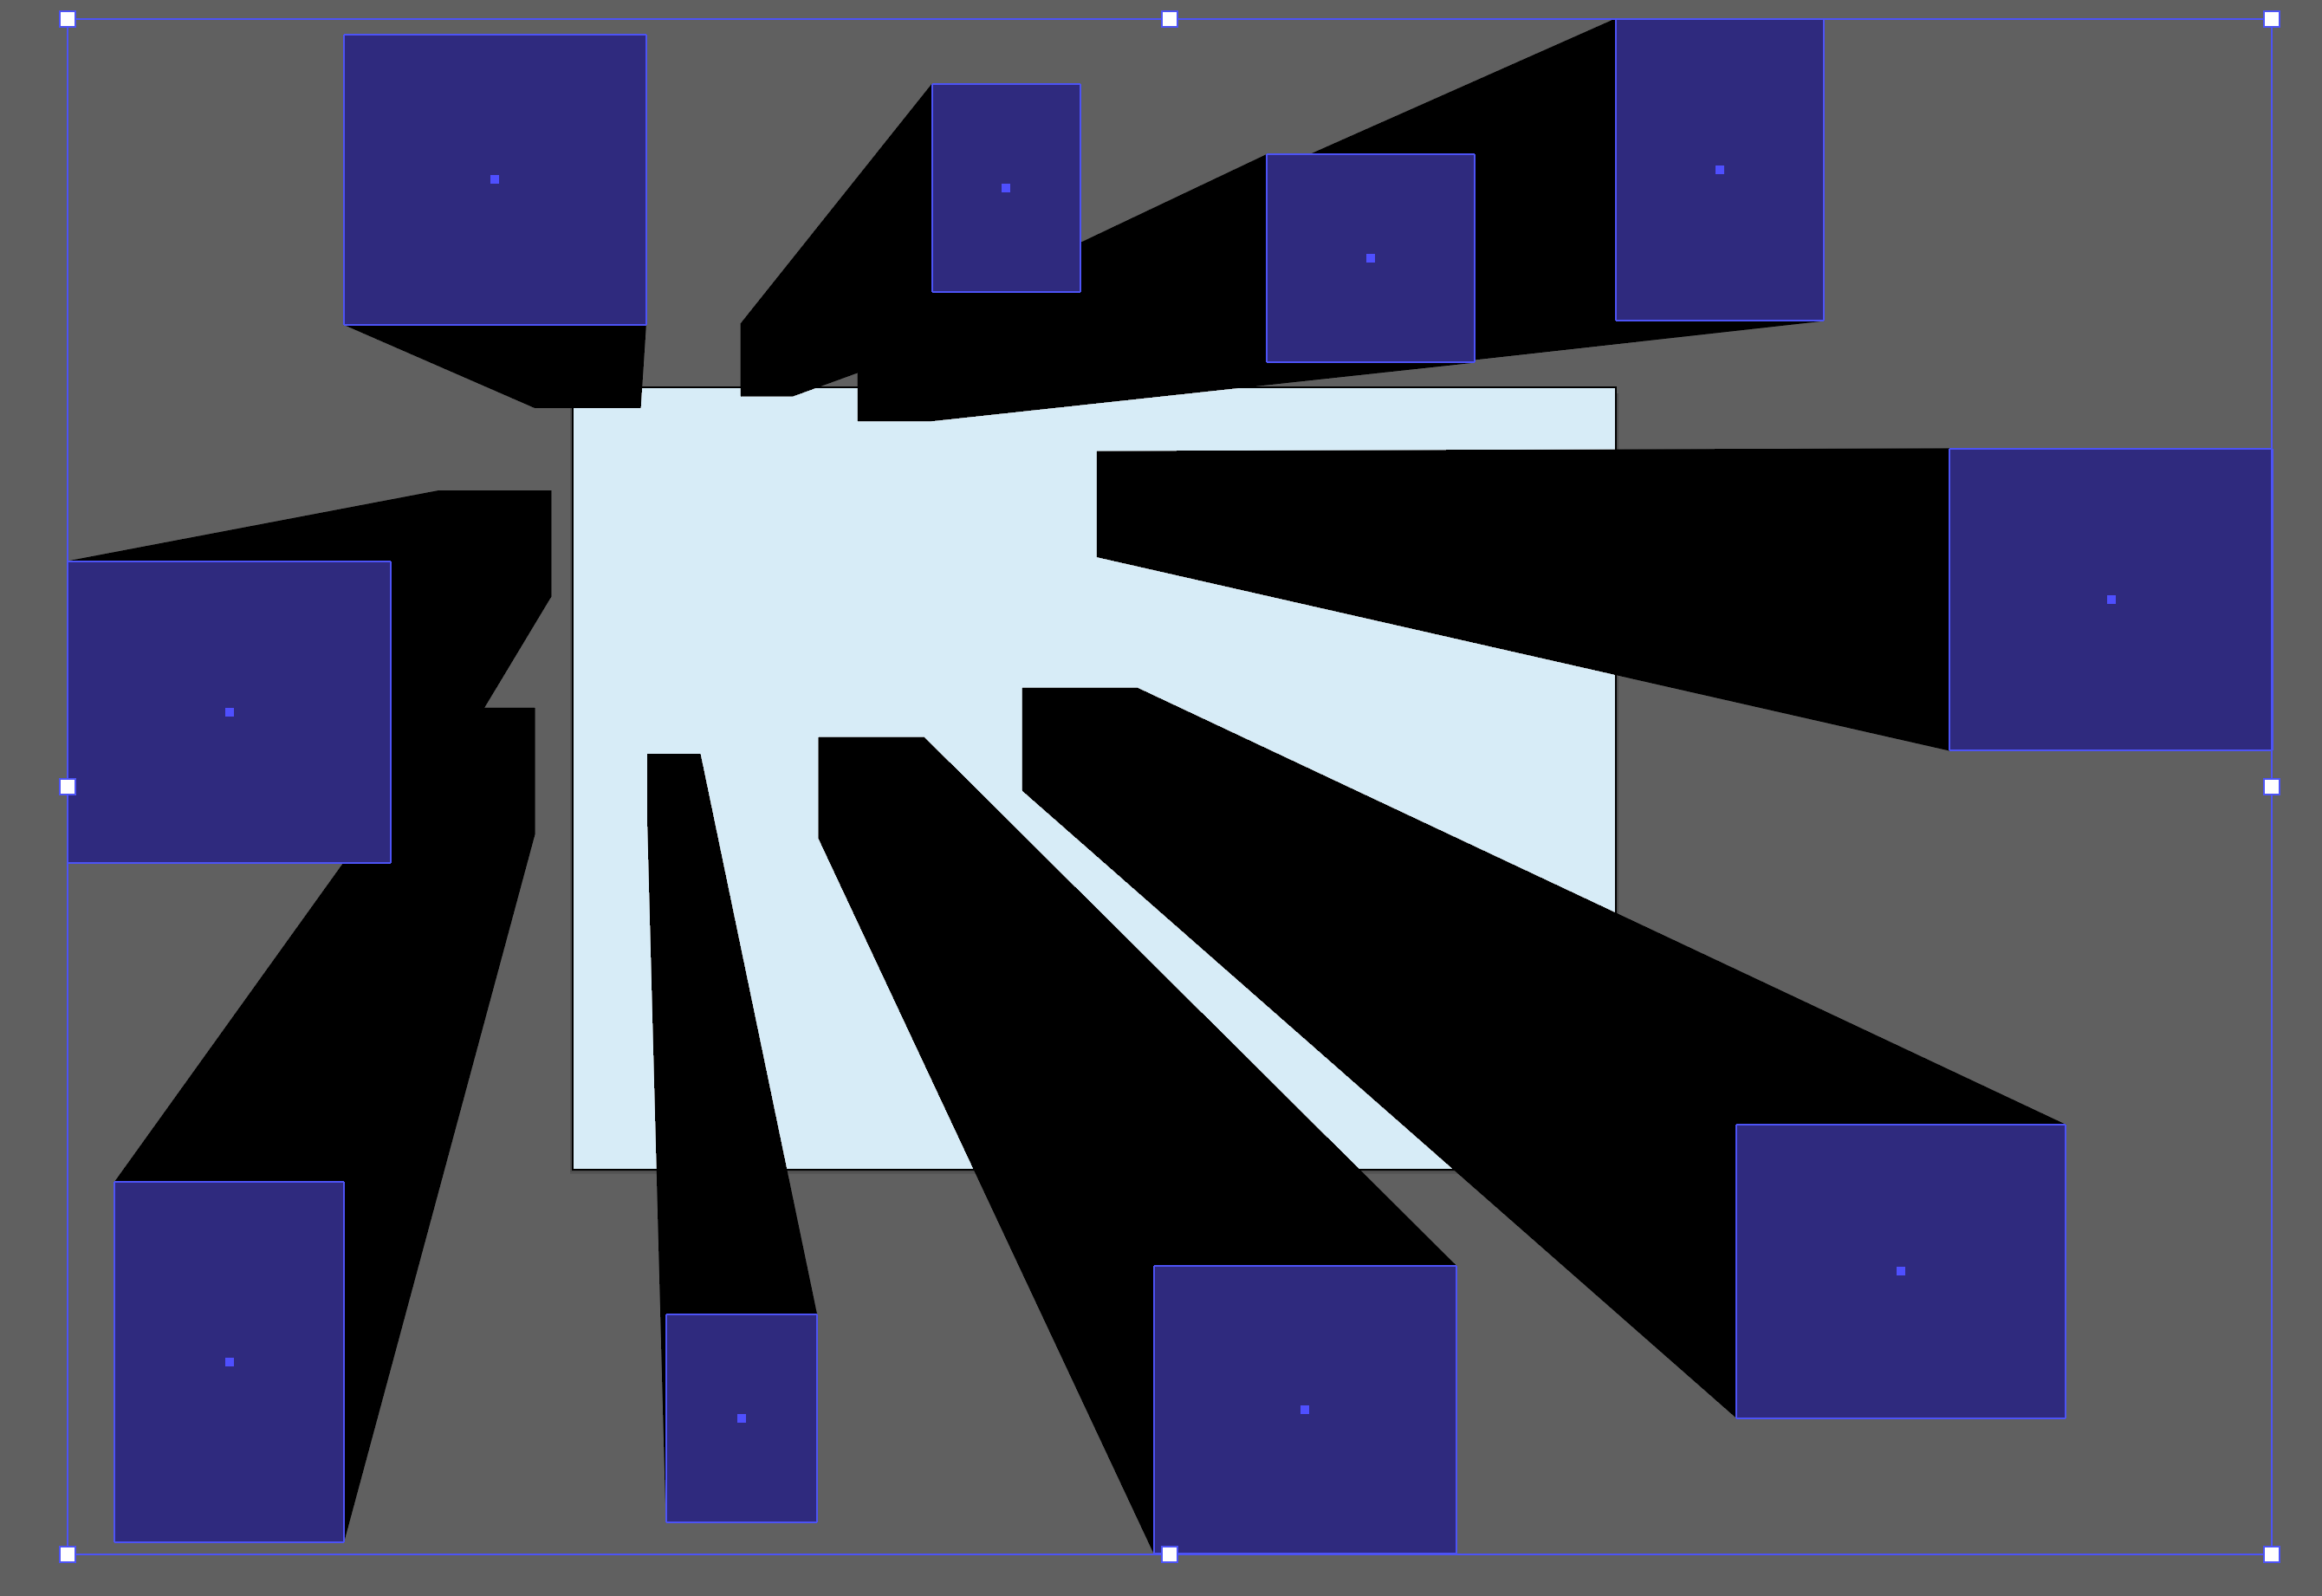
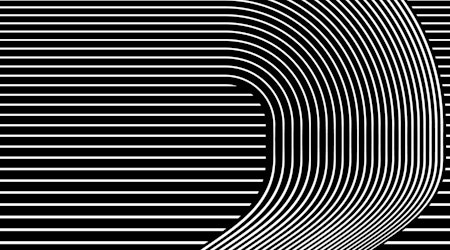
At this point we have a default block shadow applied, regardless of the color of our shapes.
We want to have multiple colored shapes, so we will now tick the Shadow Adopts Artwork Fill Color option. This enables the shadows to take on the color of the shapes, allowing us to change the colors of each shadow with ease.
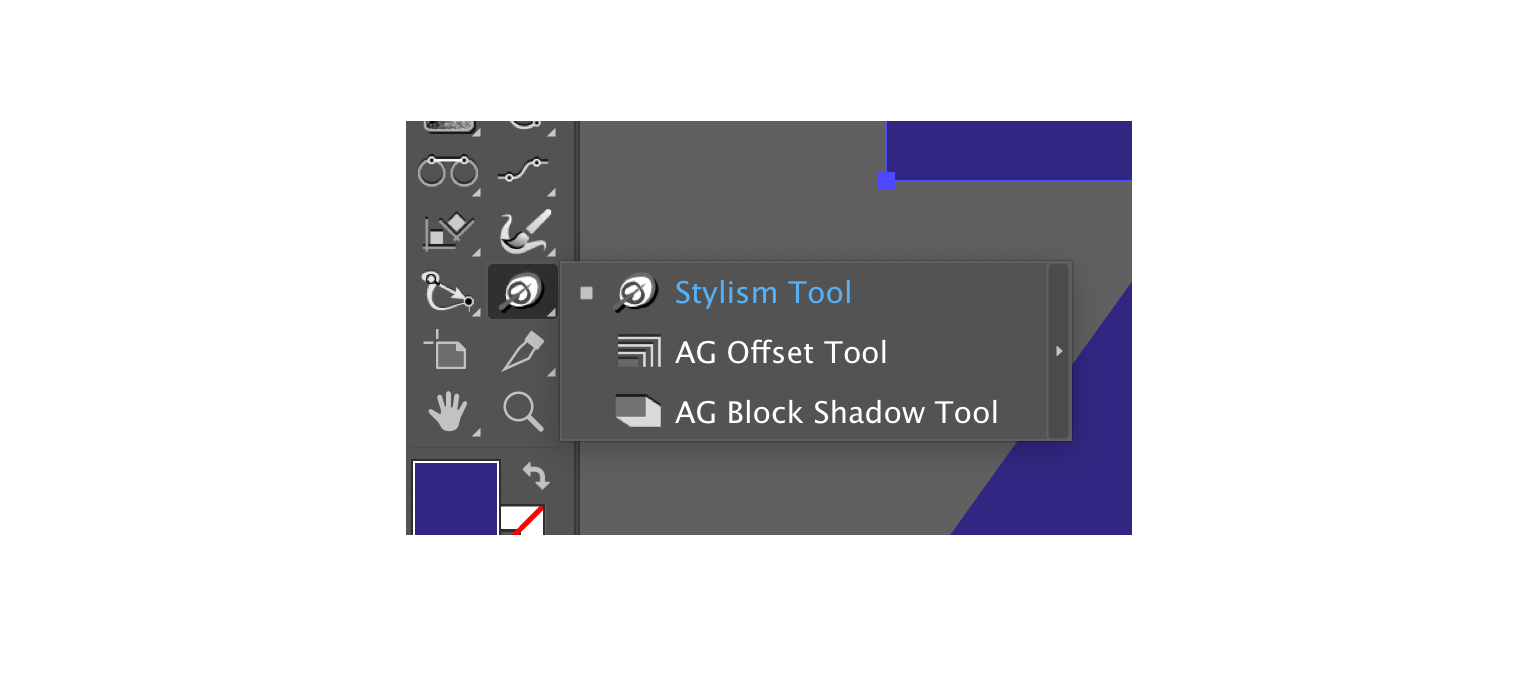
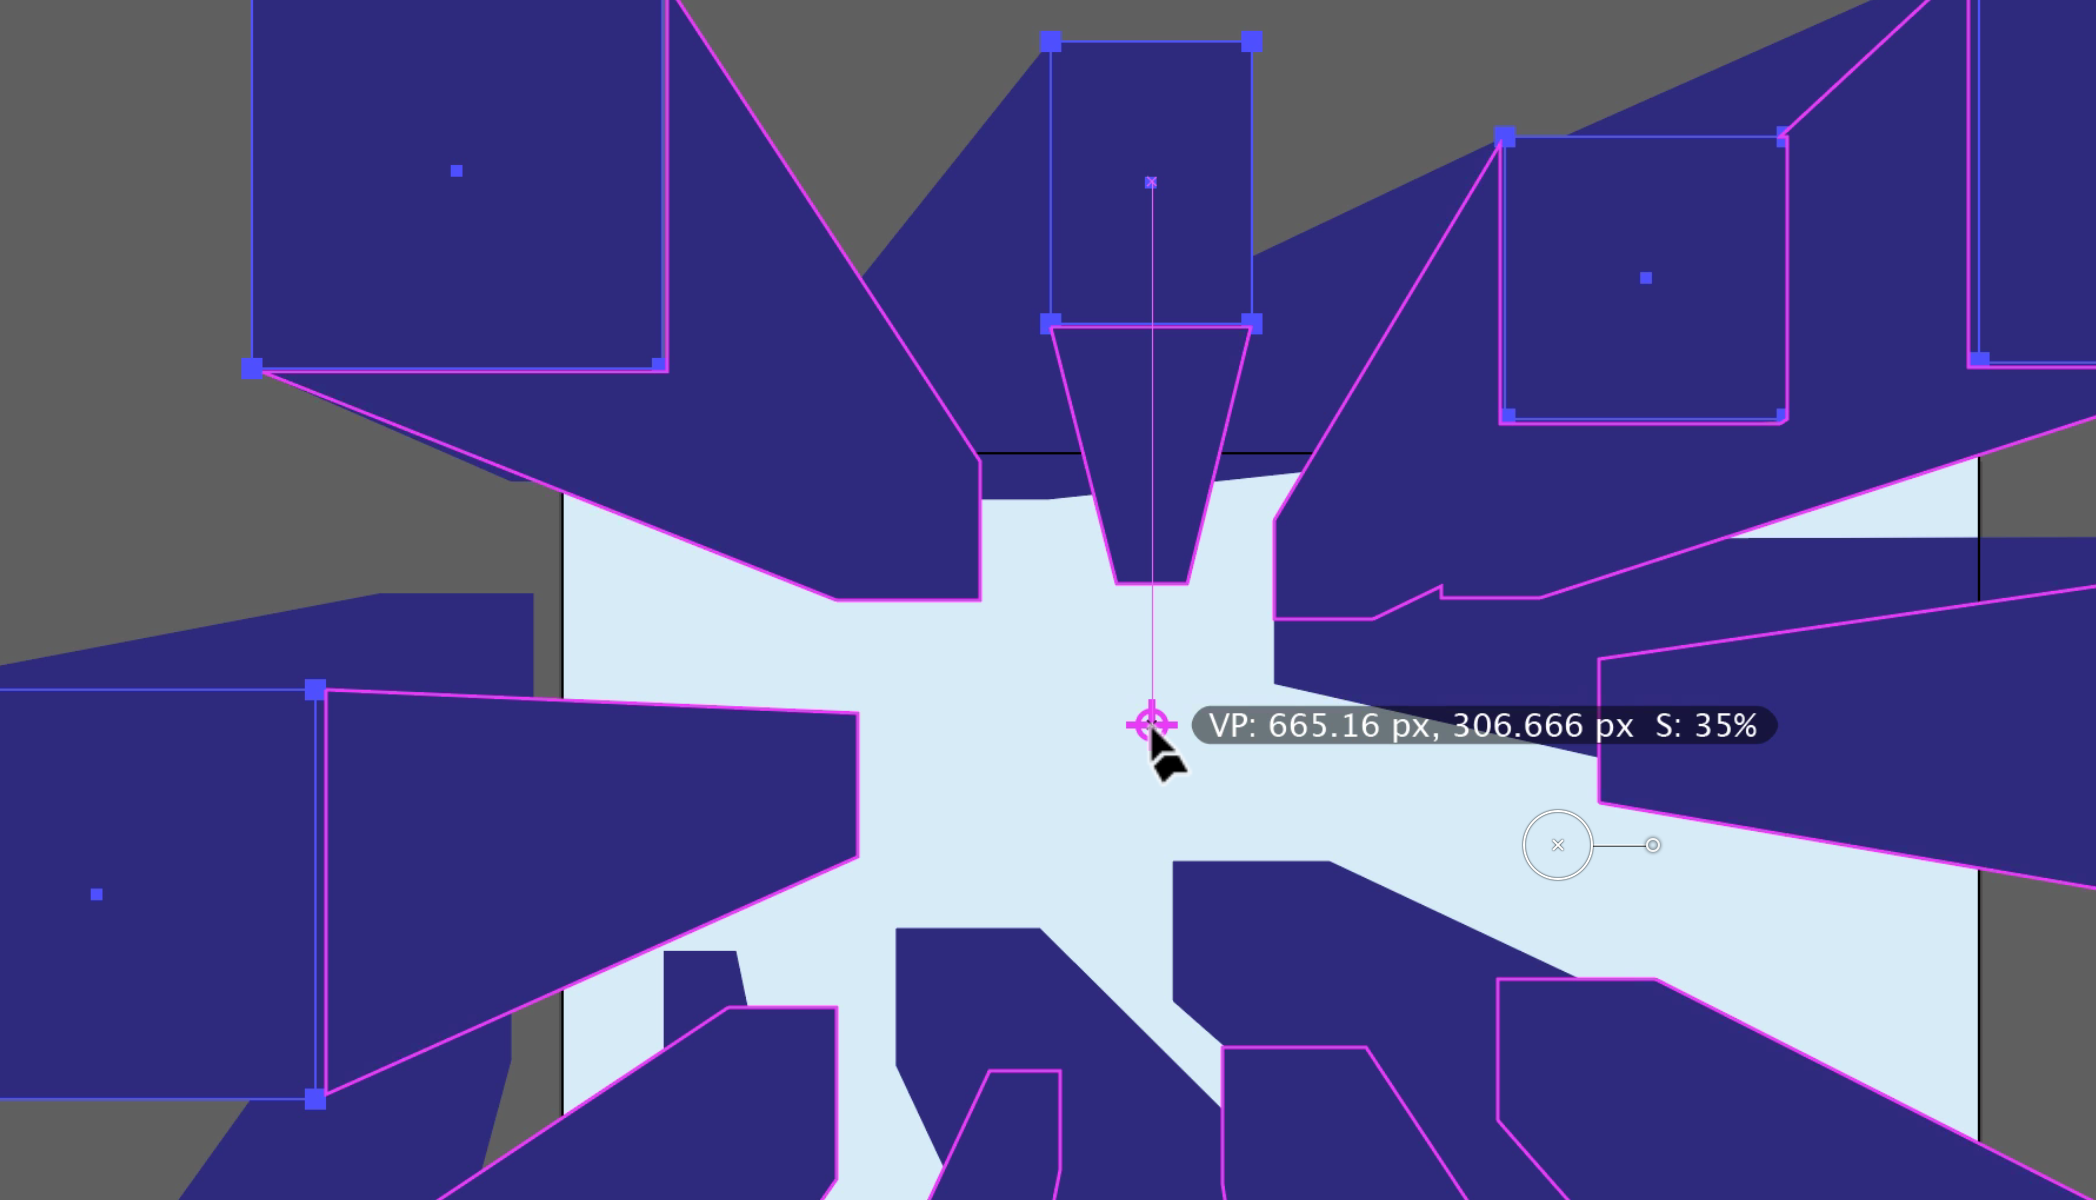
Before we start adjusting colors, we need to tweak the vanishing point location determining each of the shadows. To easily do this, select the AG Block Shadow tool in the toolbar. If you can’t see it, just click-and-hold on the Stylism toolbar icon (the butterfly) and the Block Shadow tool is stacked under.
Problems locating the Block Shadow tool? Please watch this video.
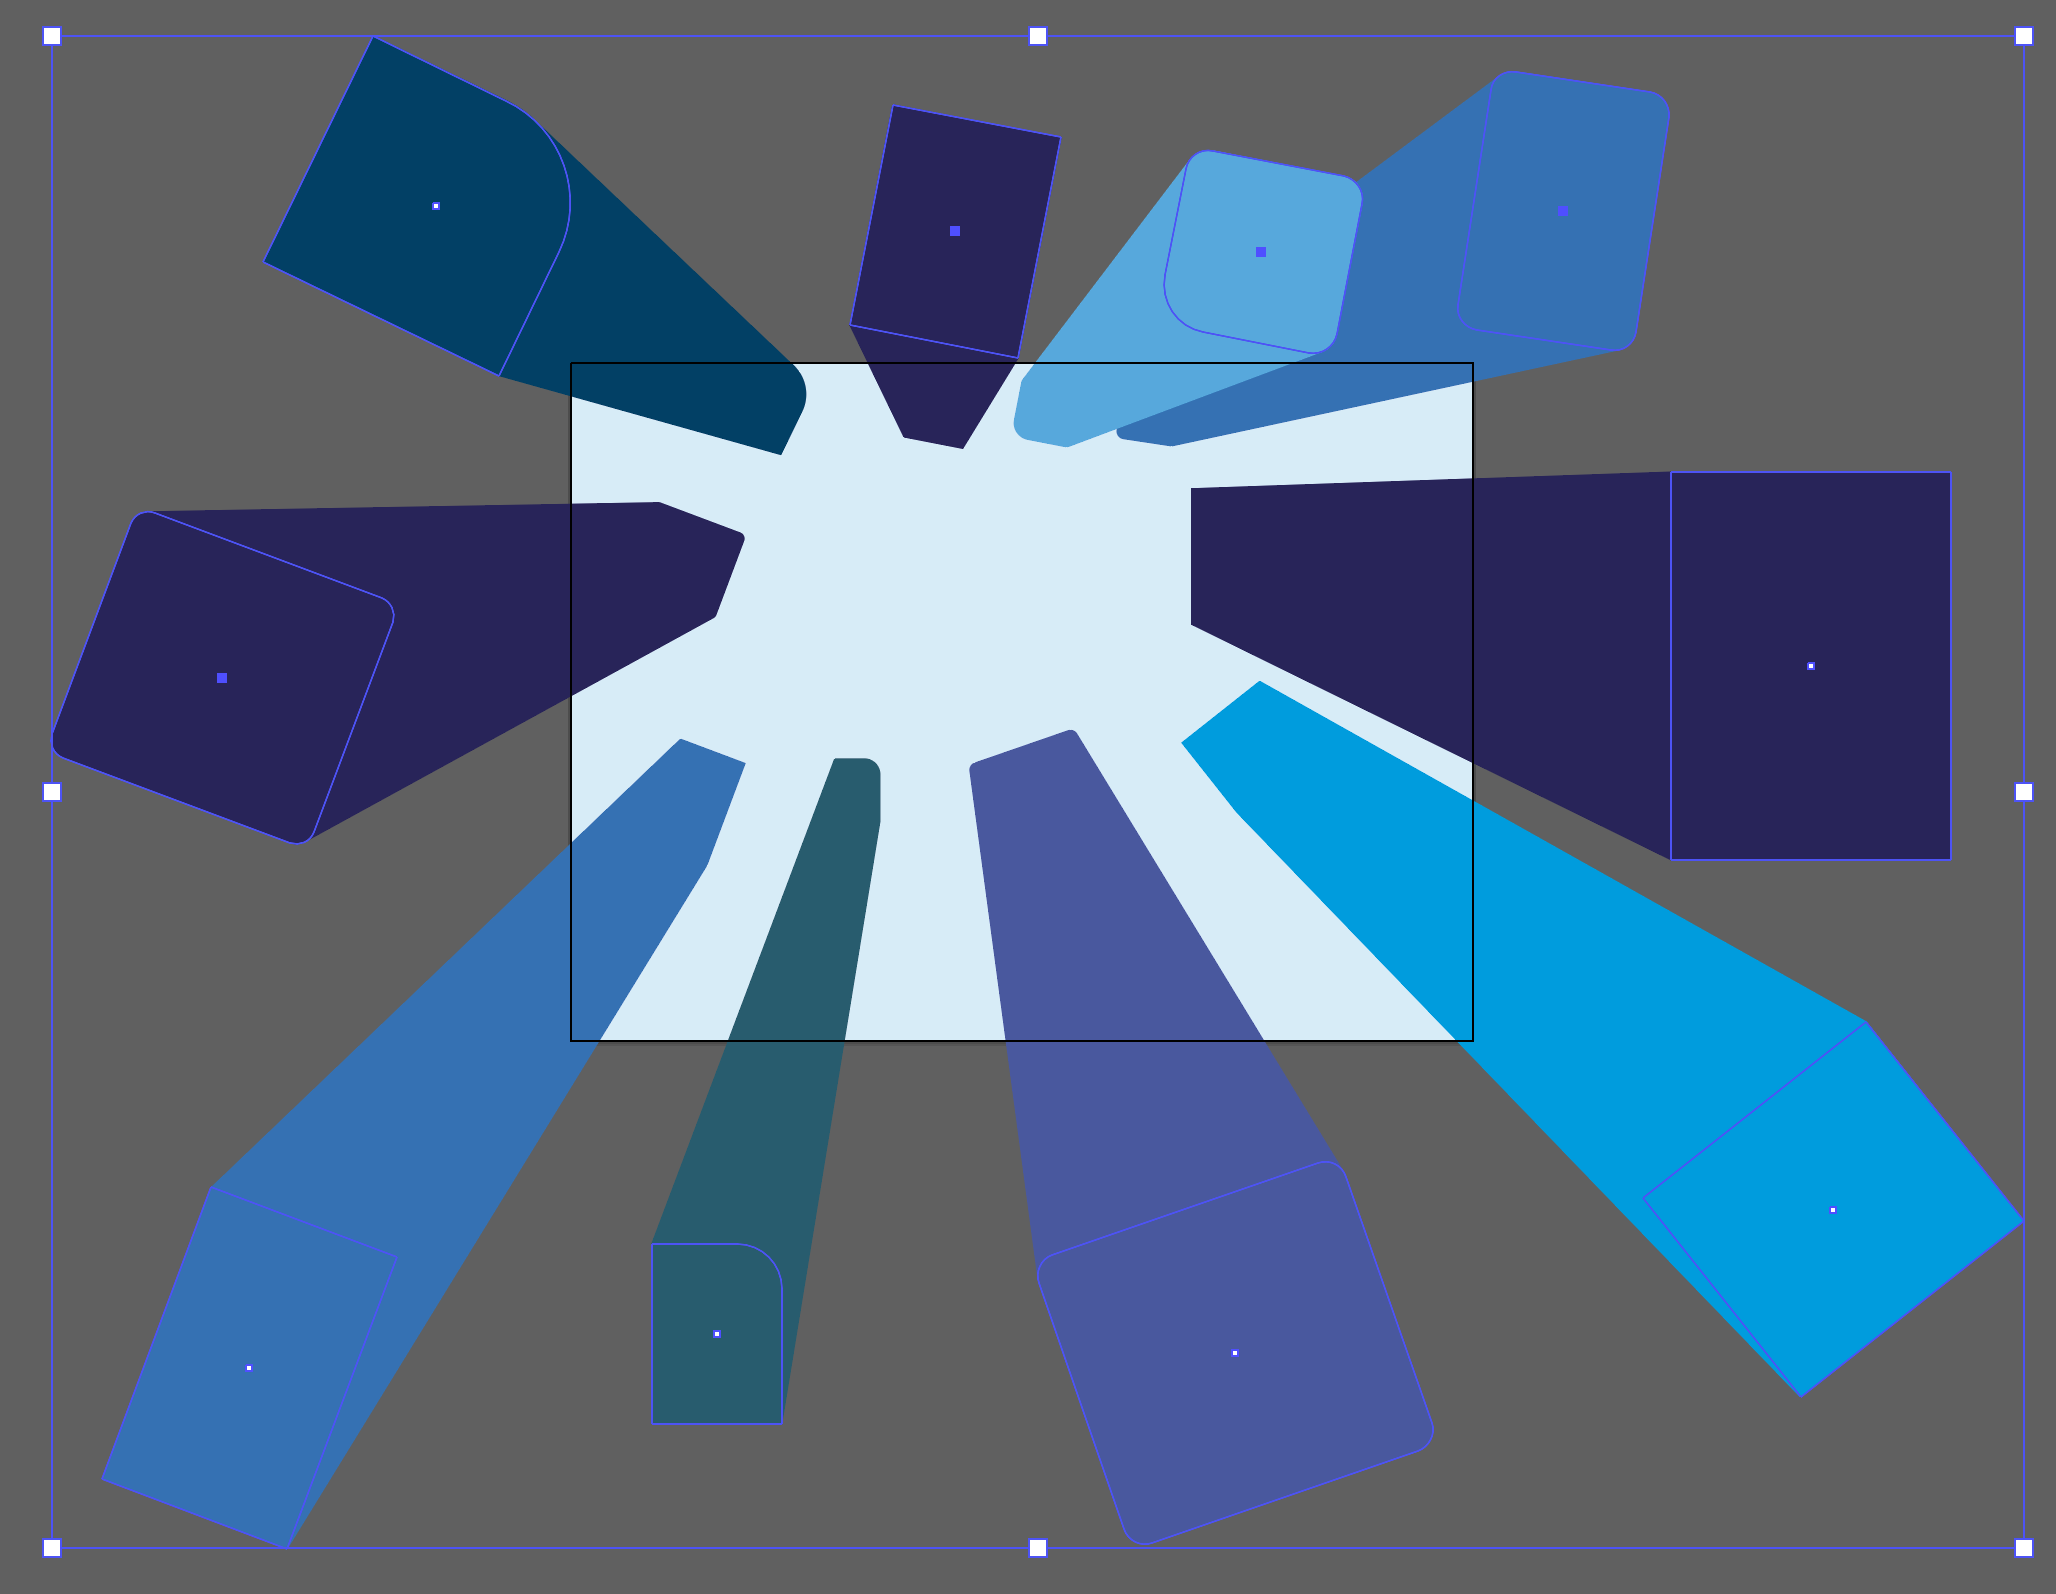
Let’s go ahead and start changing some building colors. I am sticking to blue hues for this particular example. Just use the native Swatches panel and adjust the colors as you wish.

The next step is to rotate some buildings randomly. Manually adjust each one; you can also resize some as you do so. You can also move some further in and out to make the blocks less uniform, but keep the base objects for each building outside the artboard area as only the shadows will cover the artboard.
You can also just a small amount of rounded corners to some building shapes to break up the straight lines.
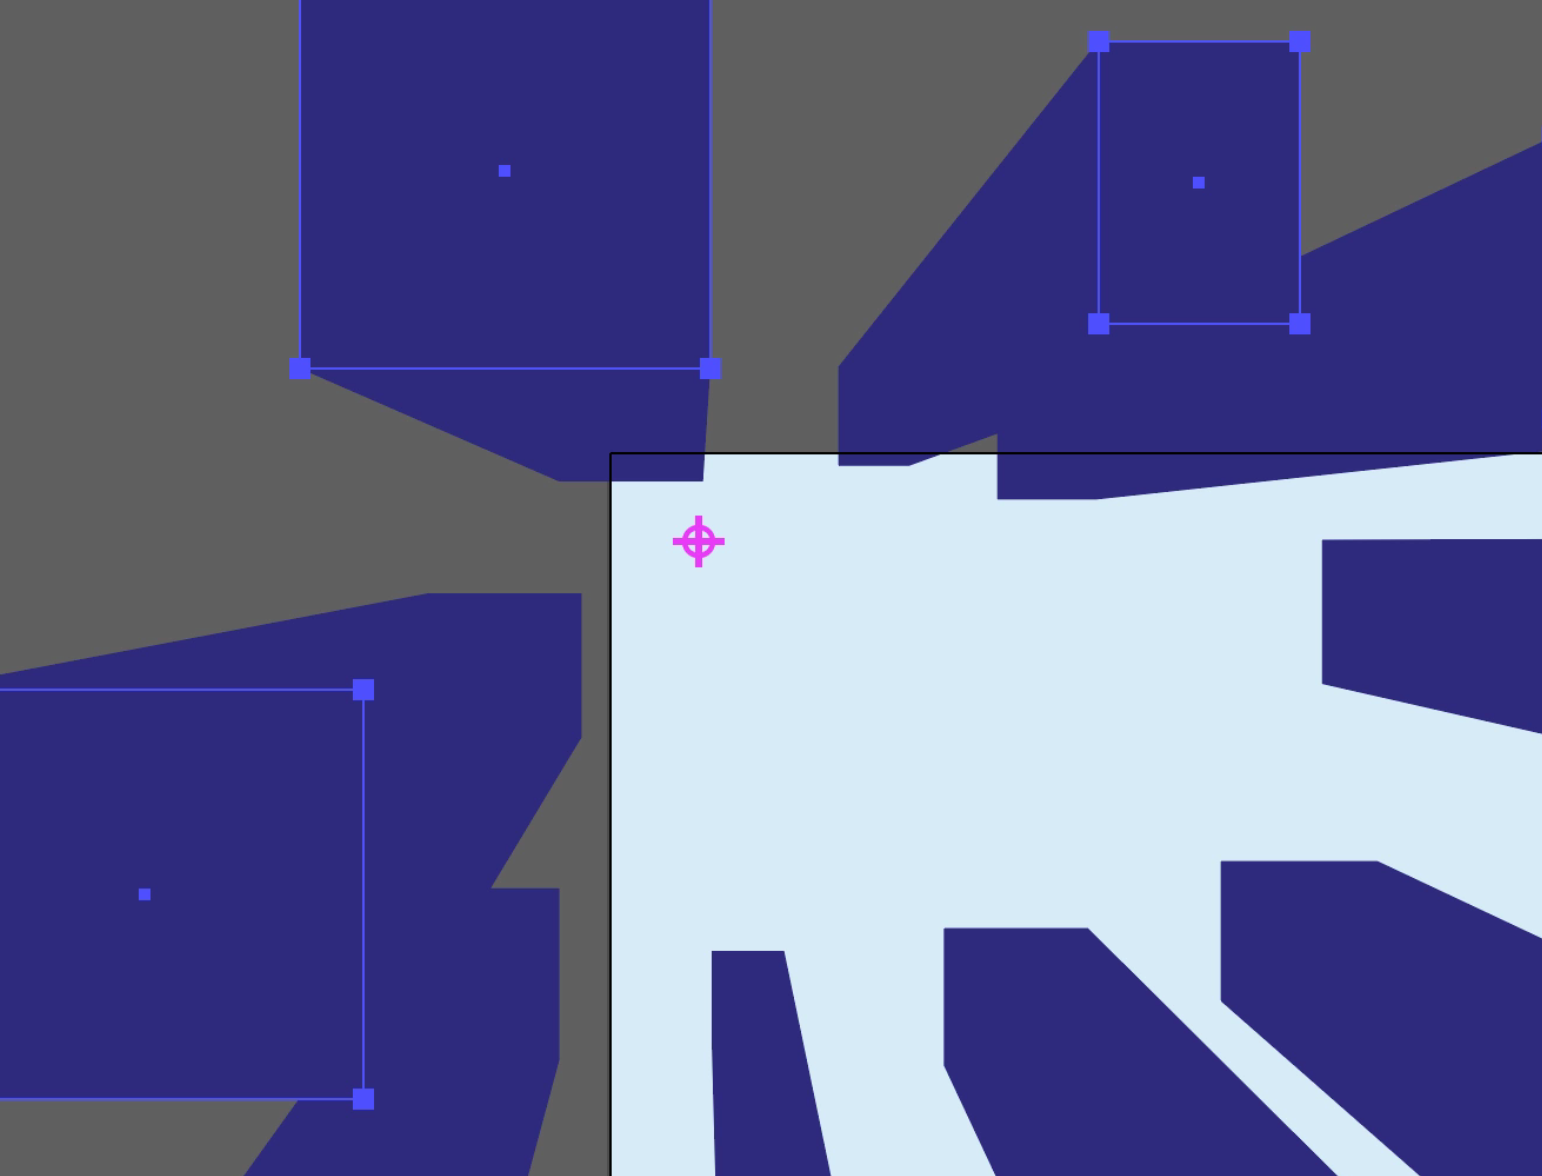
Once you have all the shapes laid out, you can still adjust the vanishing point to get the best effect. The easiest way is to use the AG Block Shadow tool and click-and-drag the vanishing point "target" annotation.
Now we have our buildings laid out, let’s grab an aircraft silhouette vector from a stock library or create one. I used Adobe Stock #73461413 – a collection of planes.

Copy and paste the plane into our document onto the ‘Plane’ layer.

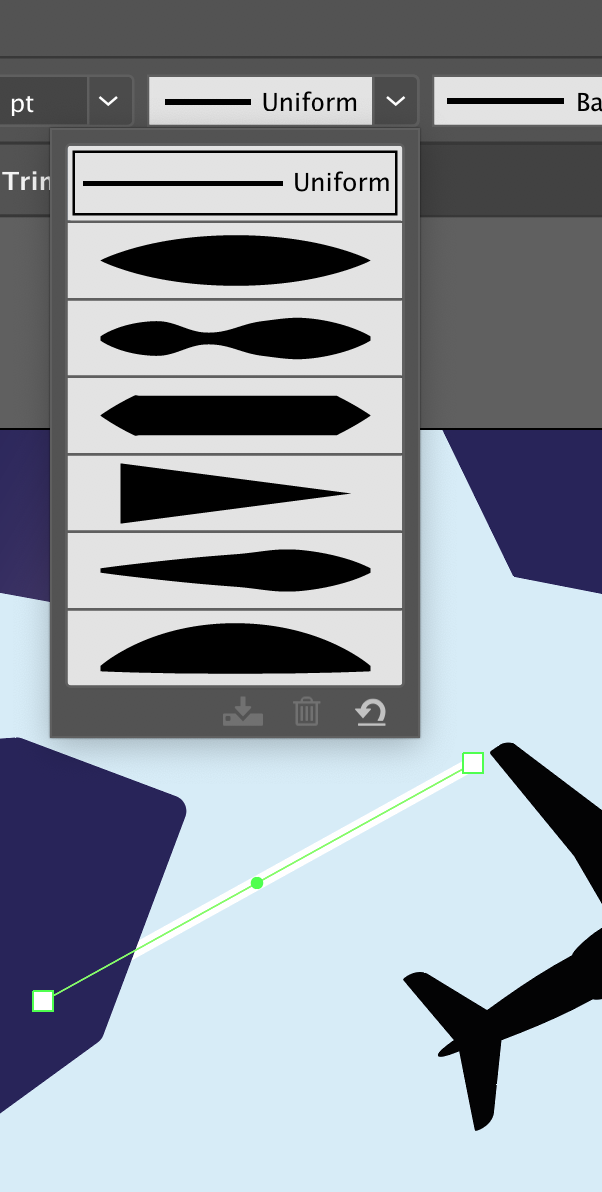
Now draw a line trailing both wing tips, as shown. Set them with a white stroke and change the stroke weight to about 12pt, then change the width profile to the stroke so that it tapers from thick (wing tip) to thin.
Next, using the core Stylism tool, add a Gaussian blur as desired. Then duplicate this and add to the other wing.
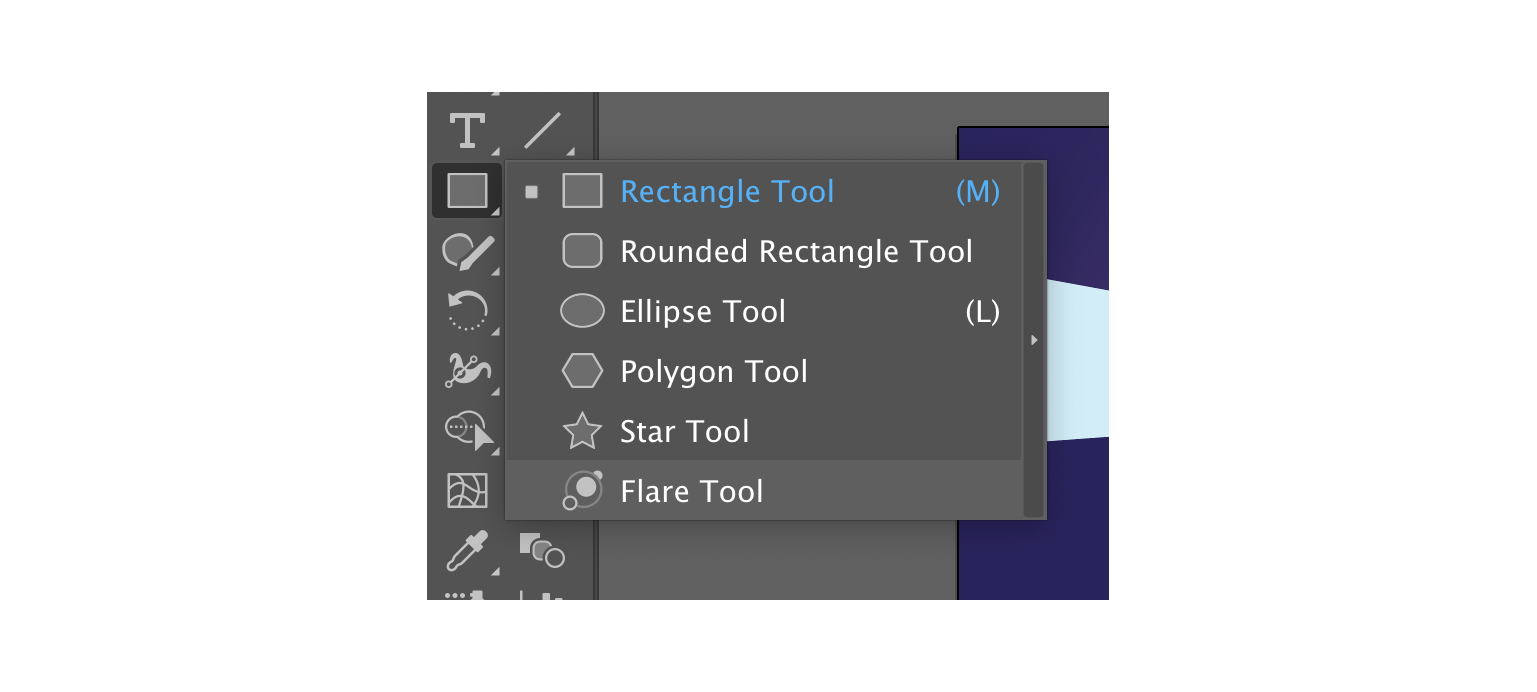
The final piece is a tool rarely anyone uses, so let’s make it feel welcome – the Lens Flare tool! With the ‘Sun’ layer selected, select up the Lens Flare tool (stacked under the native Shape tool). Click-and-drag out your sun effect using the flare tool.
At this point you can also select a few of the building shapes and apply a gradient; dark at the base, light at the top of the building, to add some depth effect.
There you have it... a plane flying overhead on a sunny day, something we hope to see again in the near future!
Have a play with the updated features in Stylism and see what you can create.