
Create neon text effect with Stylism and Adobe Illustrator
8 minute readIn this tutorial you will learn how to quickly create a neon text effect using Inner Glow, Outer Glow, Transform effects and Appearance panel. Thanks to Stylism, the control over effect parameters became much easier.
Step 1
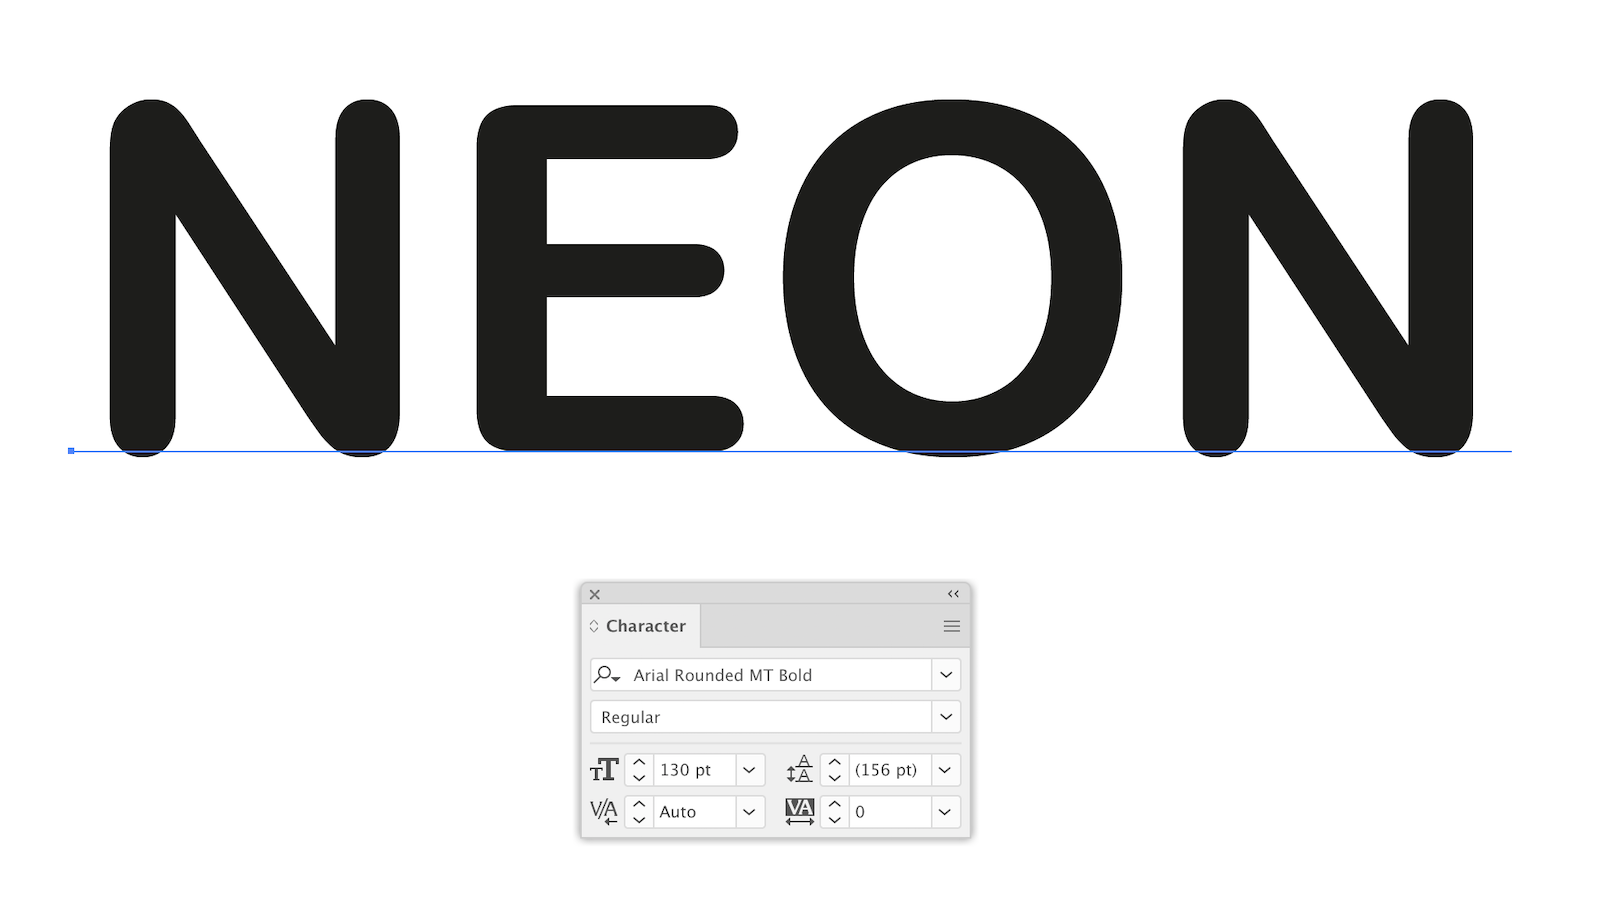
Use the Type Tool (T) and type the word "NEON". we used Arial Rounded font for this.
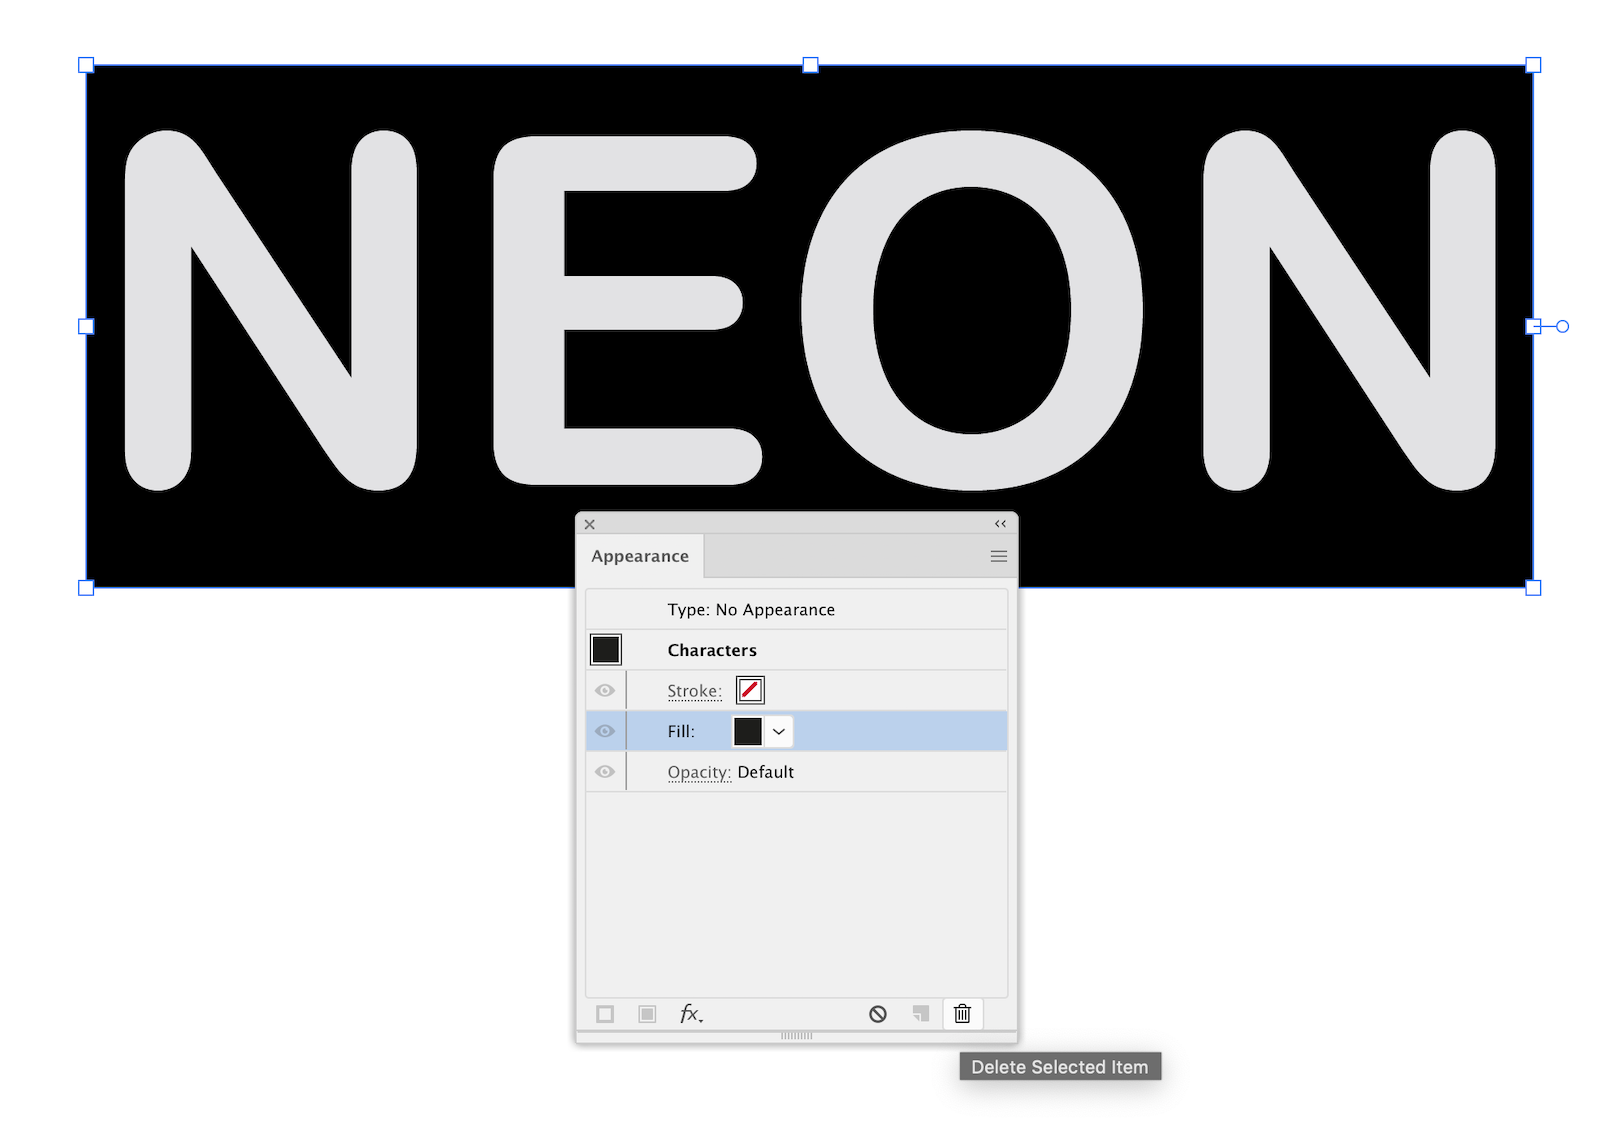
Open the Appearance panel (Window > Appearance). Double-click on the Characters in the panel, then remove the black fill.
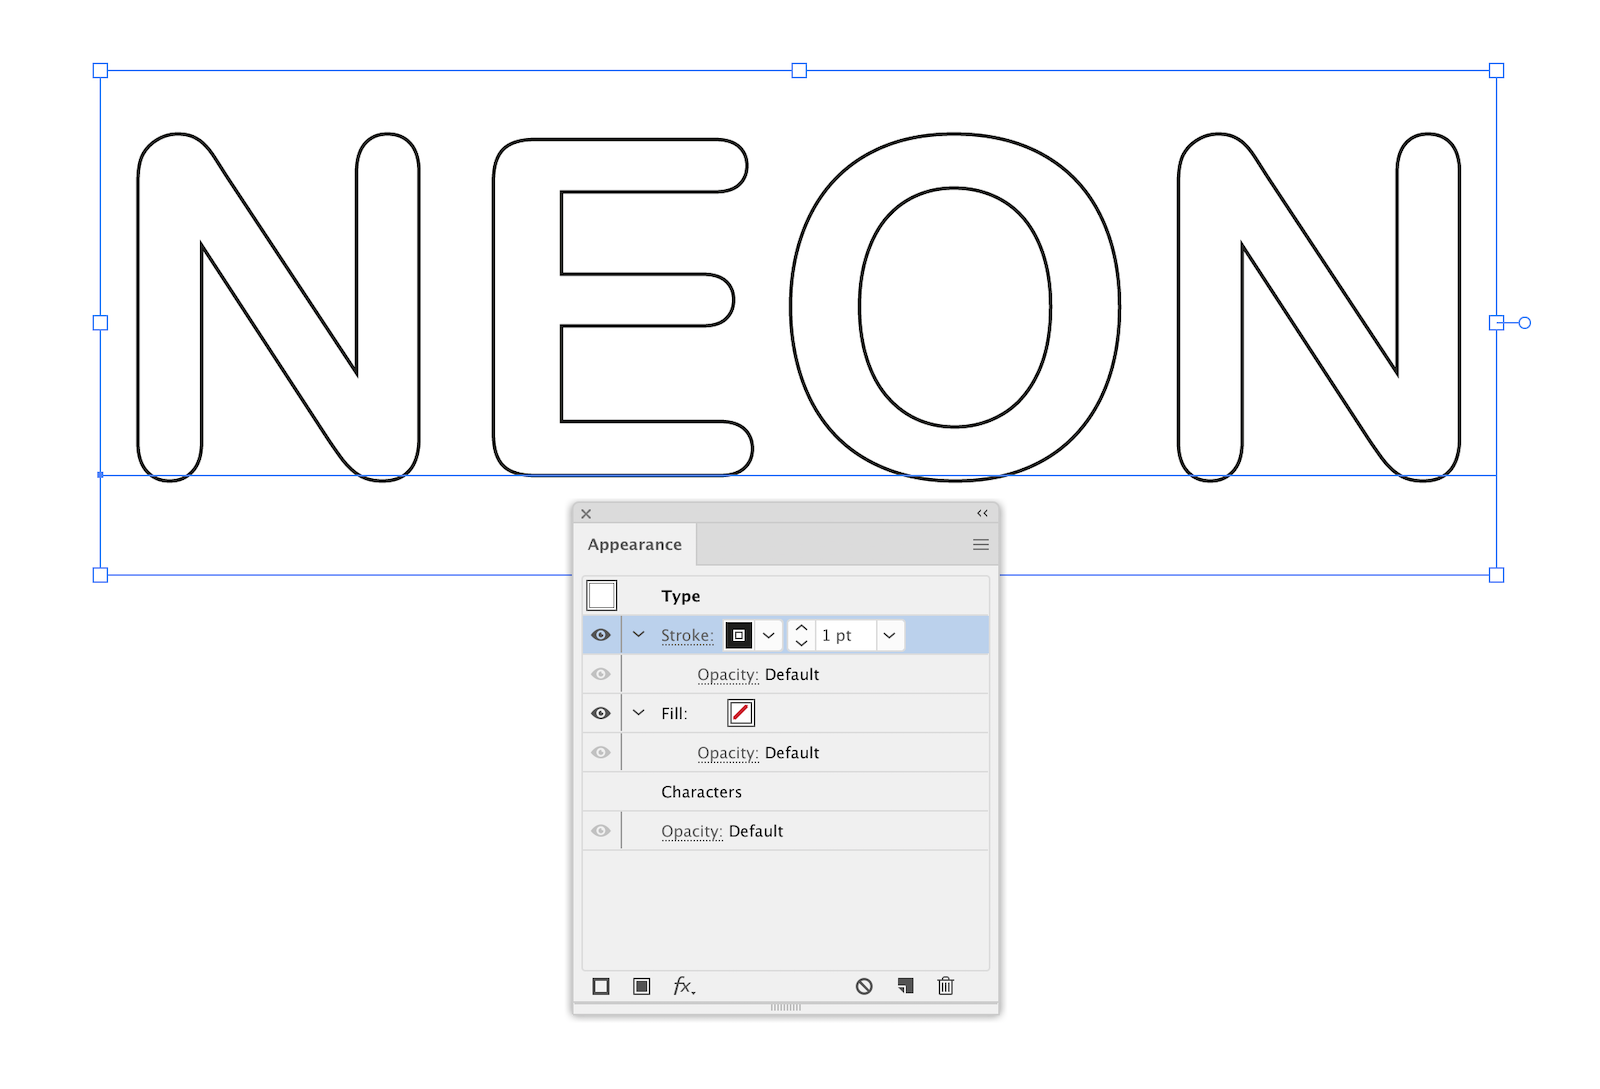
Now double-click on Type: No Appearance.
Add new stroke in the Appearance panel.
Step 2
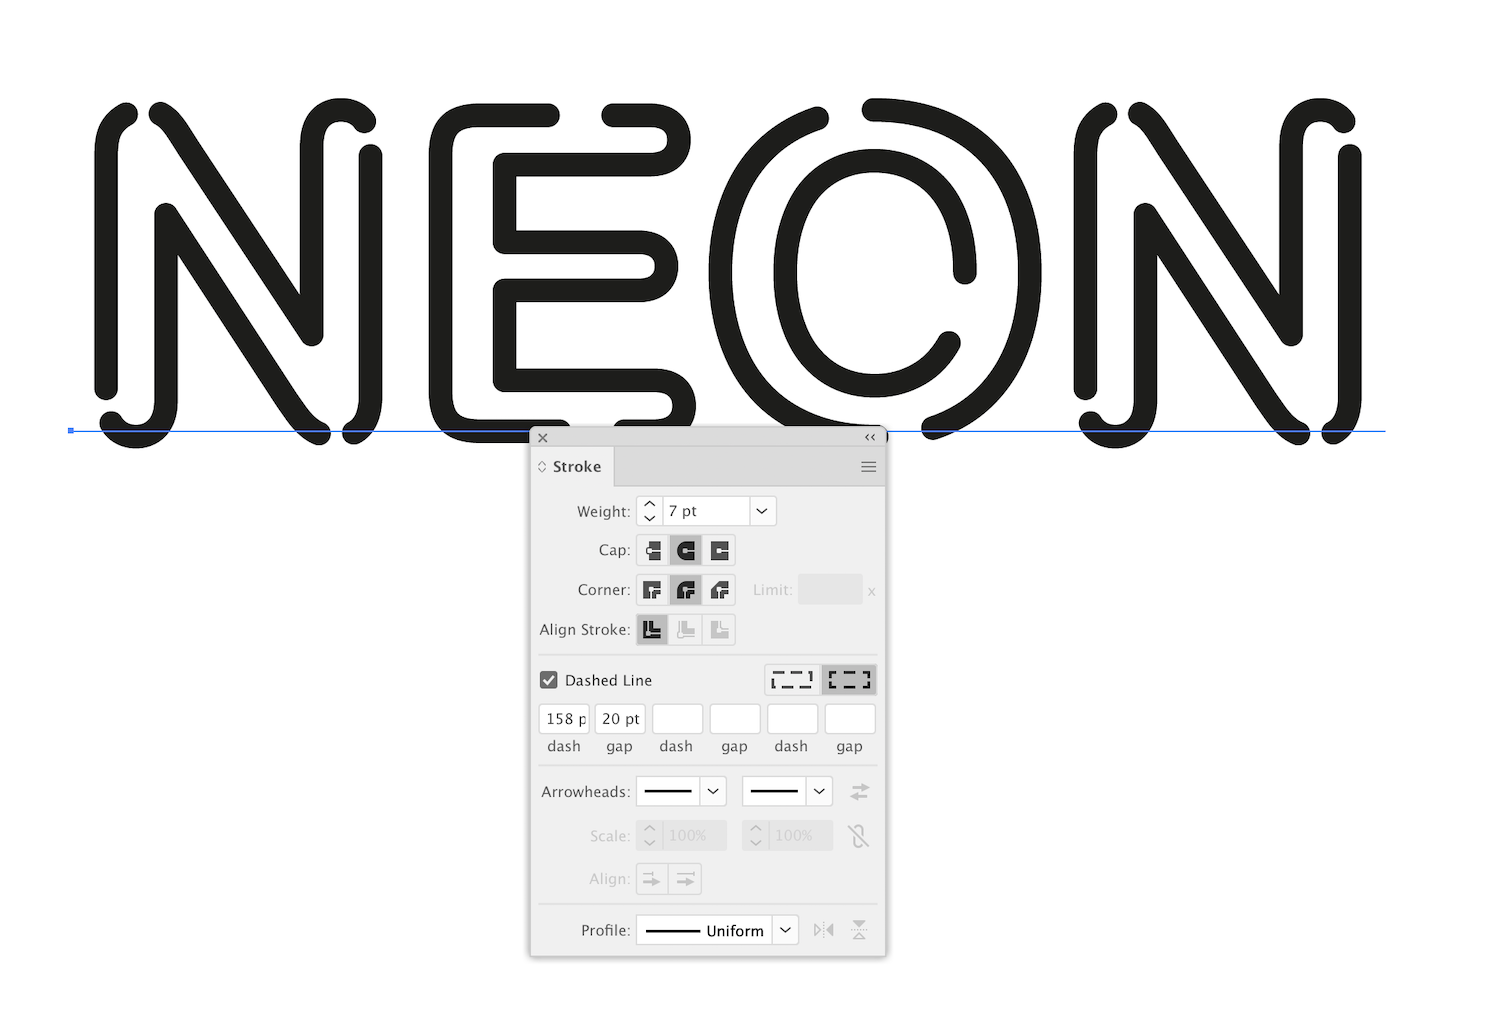
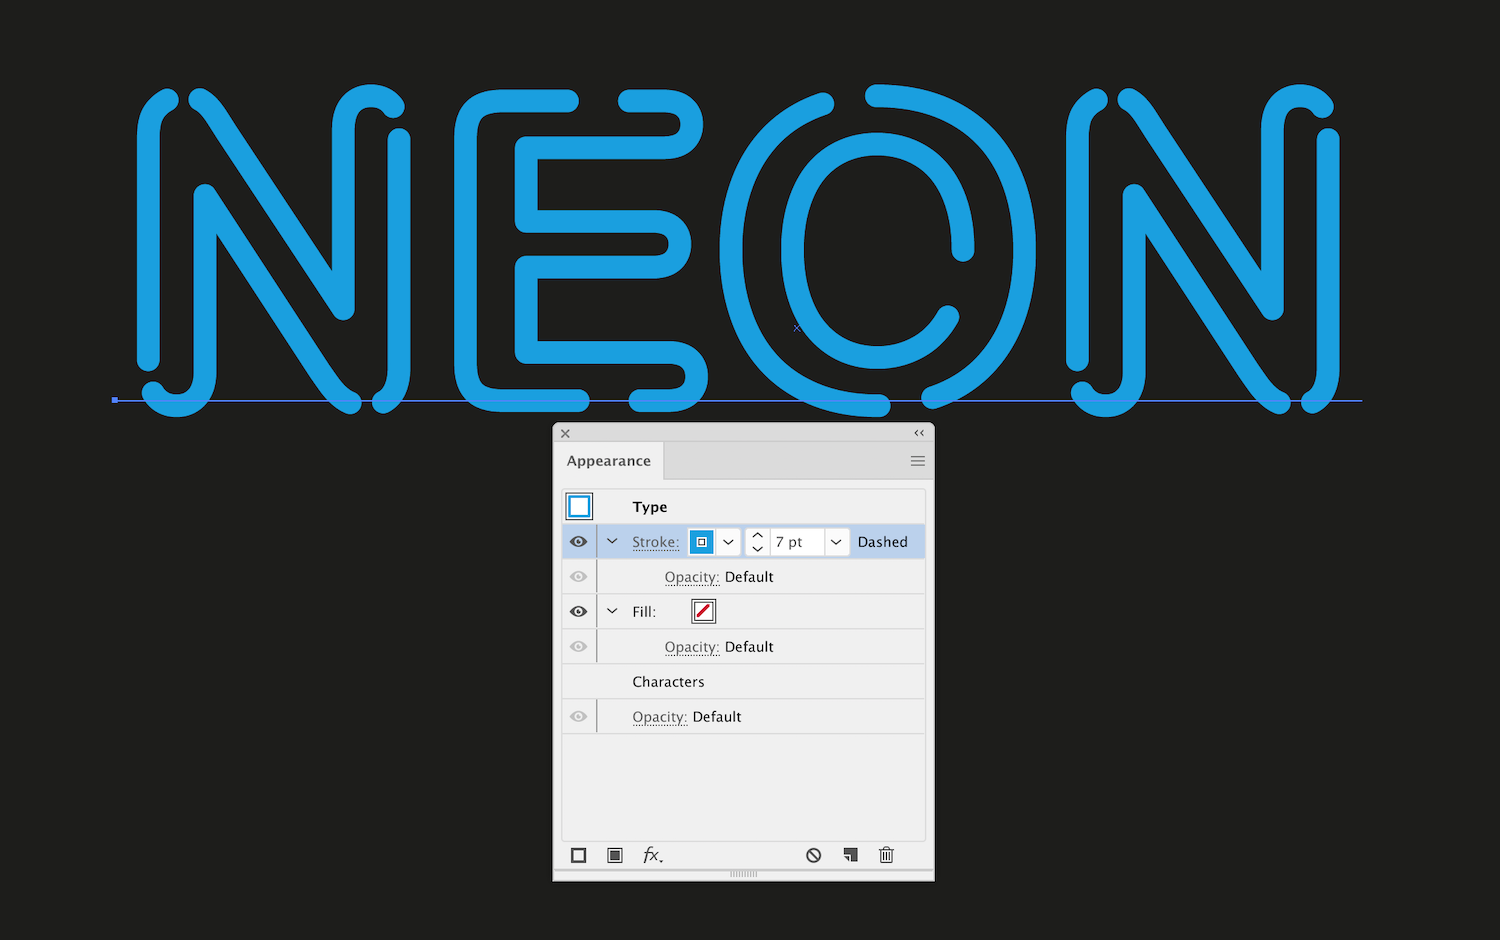
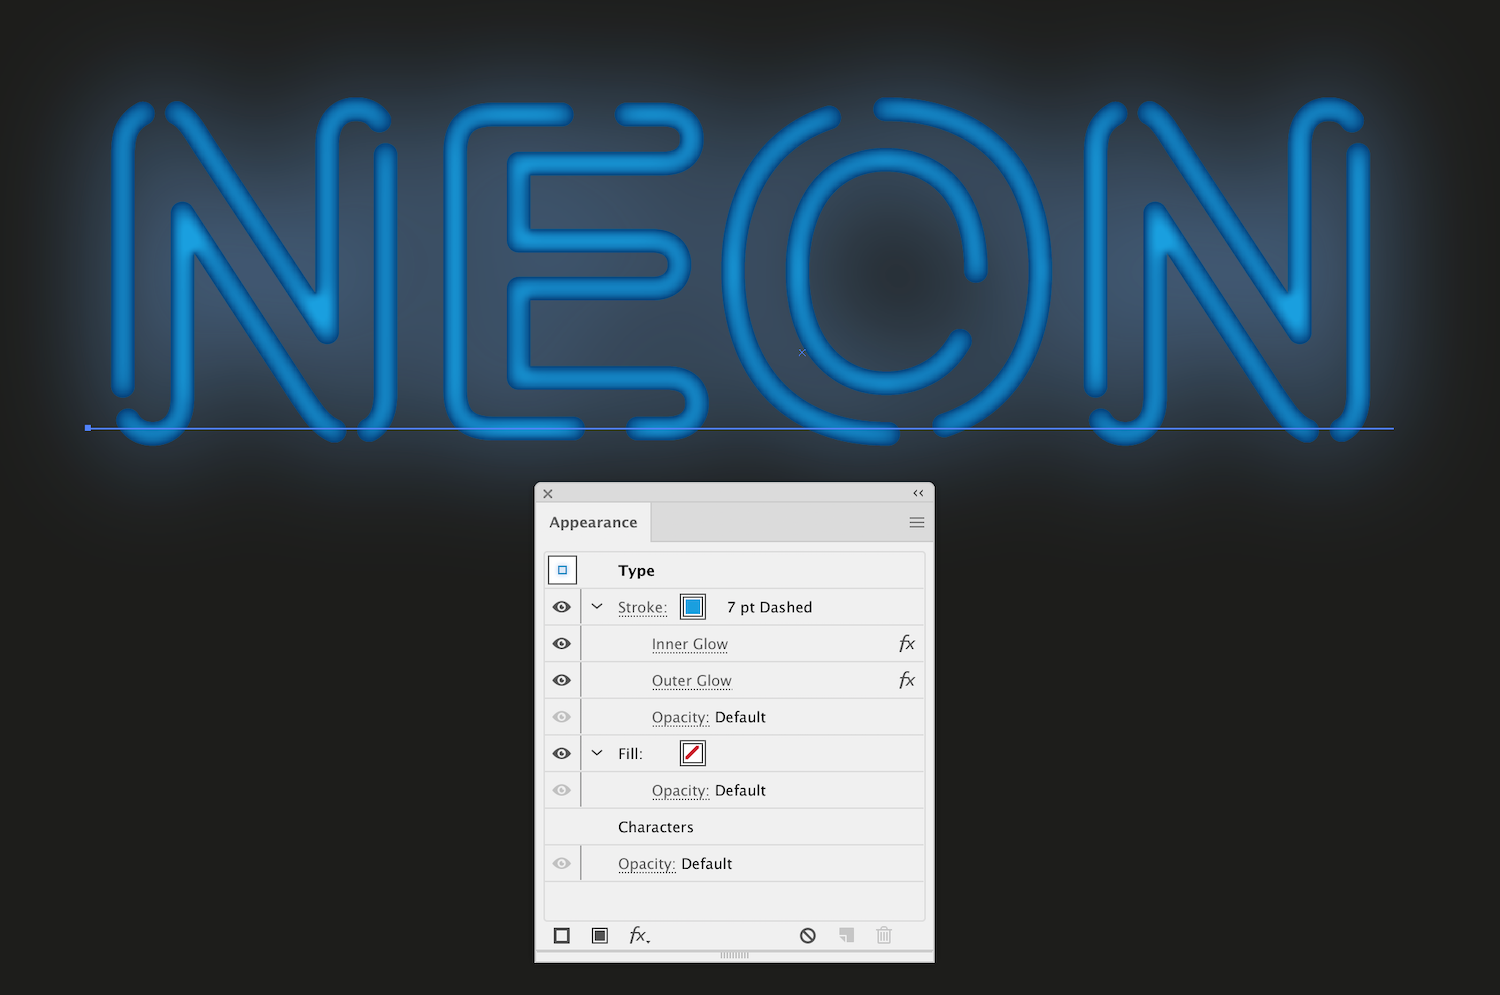
Increase the width of the stroke, select the Round Cap and Dashed Line options in the Stroke panel. Pick these values for the dash and gap, to get the result as shown in the picture below.
Recolor stroke into blue color, then place the text on a dark background.
Step 3
To create the neon effect, we will be using the Stylism. Open the plugin panel (Window > Stylism > Stylism panel). Now click on the Inner Glow Effect button.
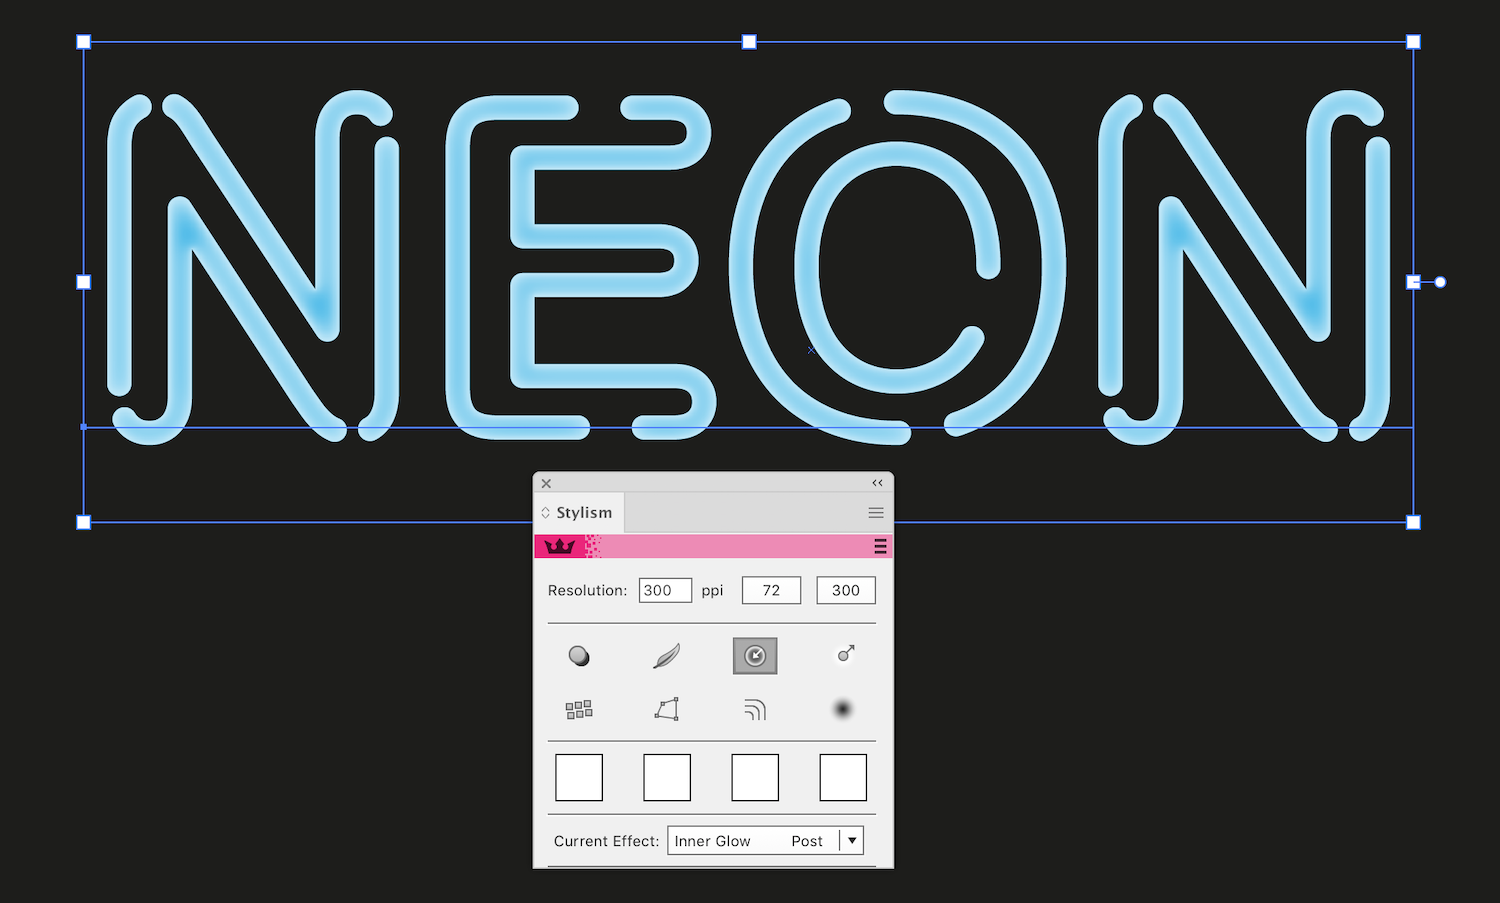
An annotation appears on the object, which allows to control the effect parameters without opening the dialog box. Set the Multiply blending mode, reduce the Blur radius and swap the white color with dark blue color.

Step 4
Click on the Outer Glow Effect button in the Stylism panel.
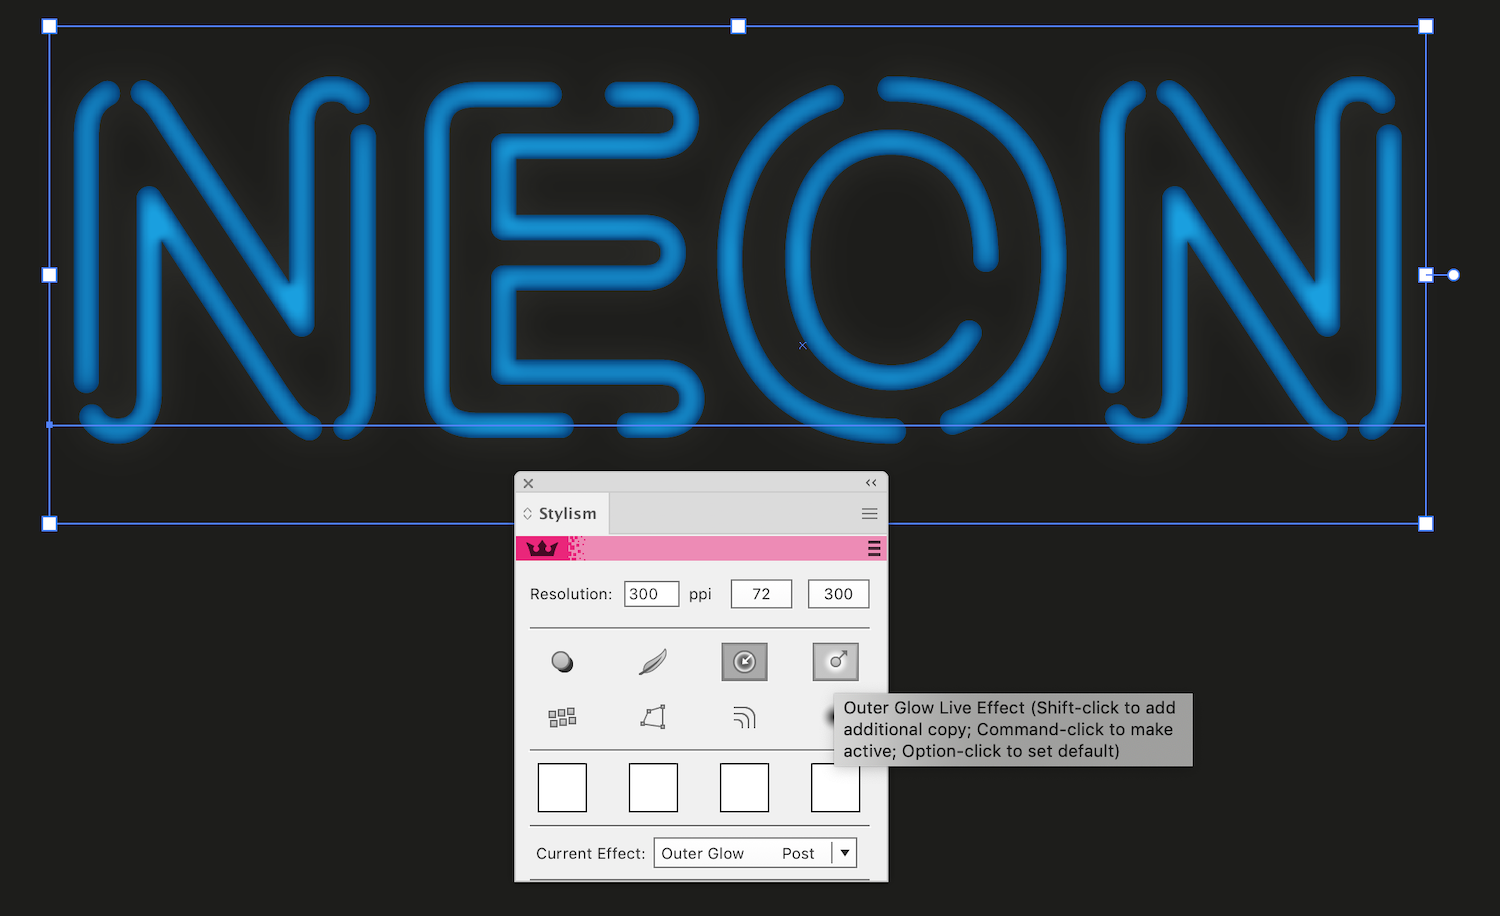
Choose the blue color, increase the opacity to 100% and set 16px for the Blur radius, using the annotation system as before.

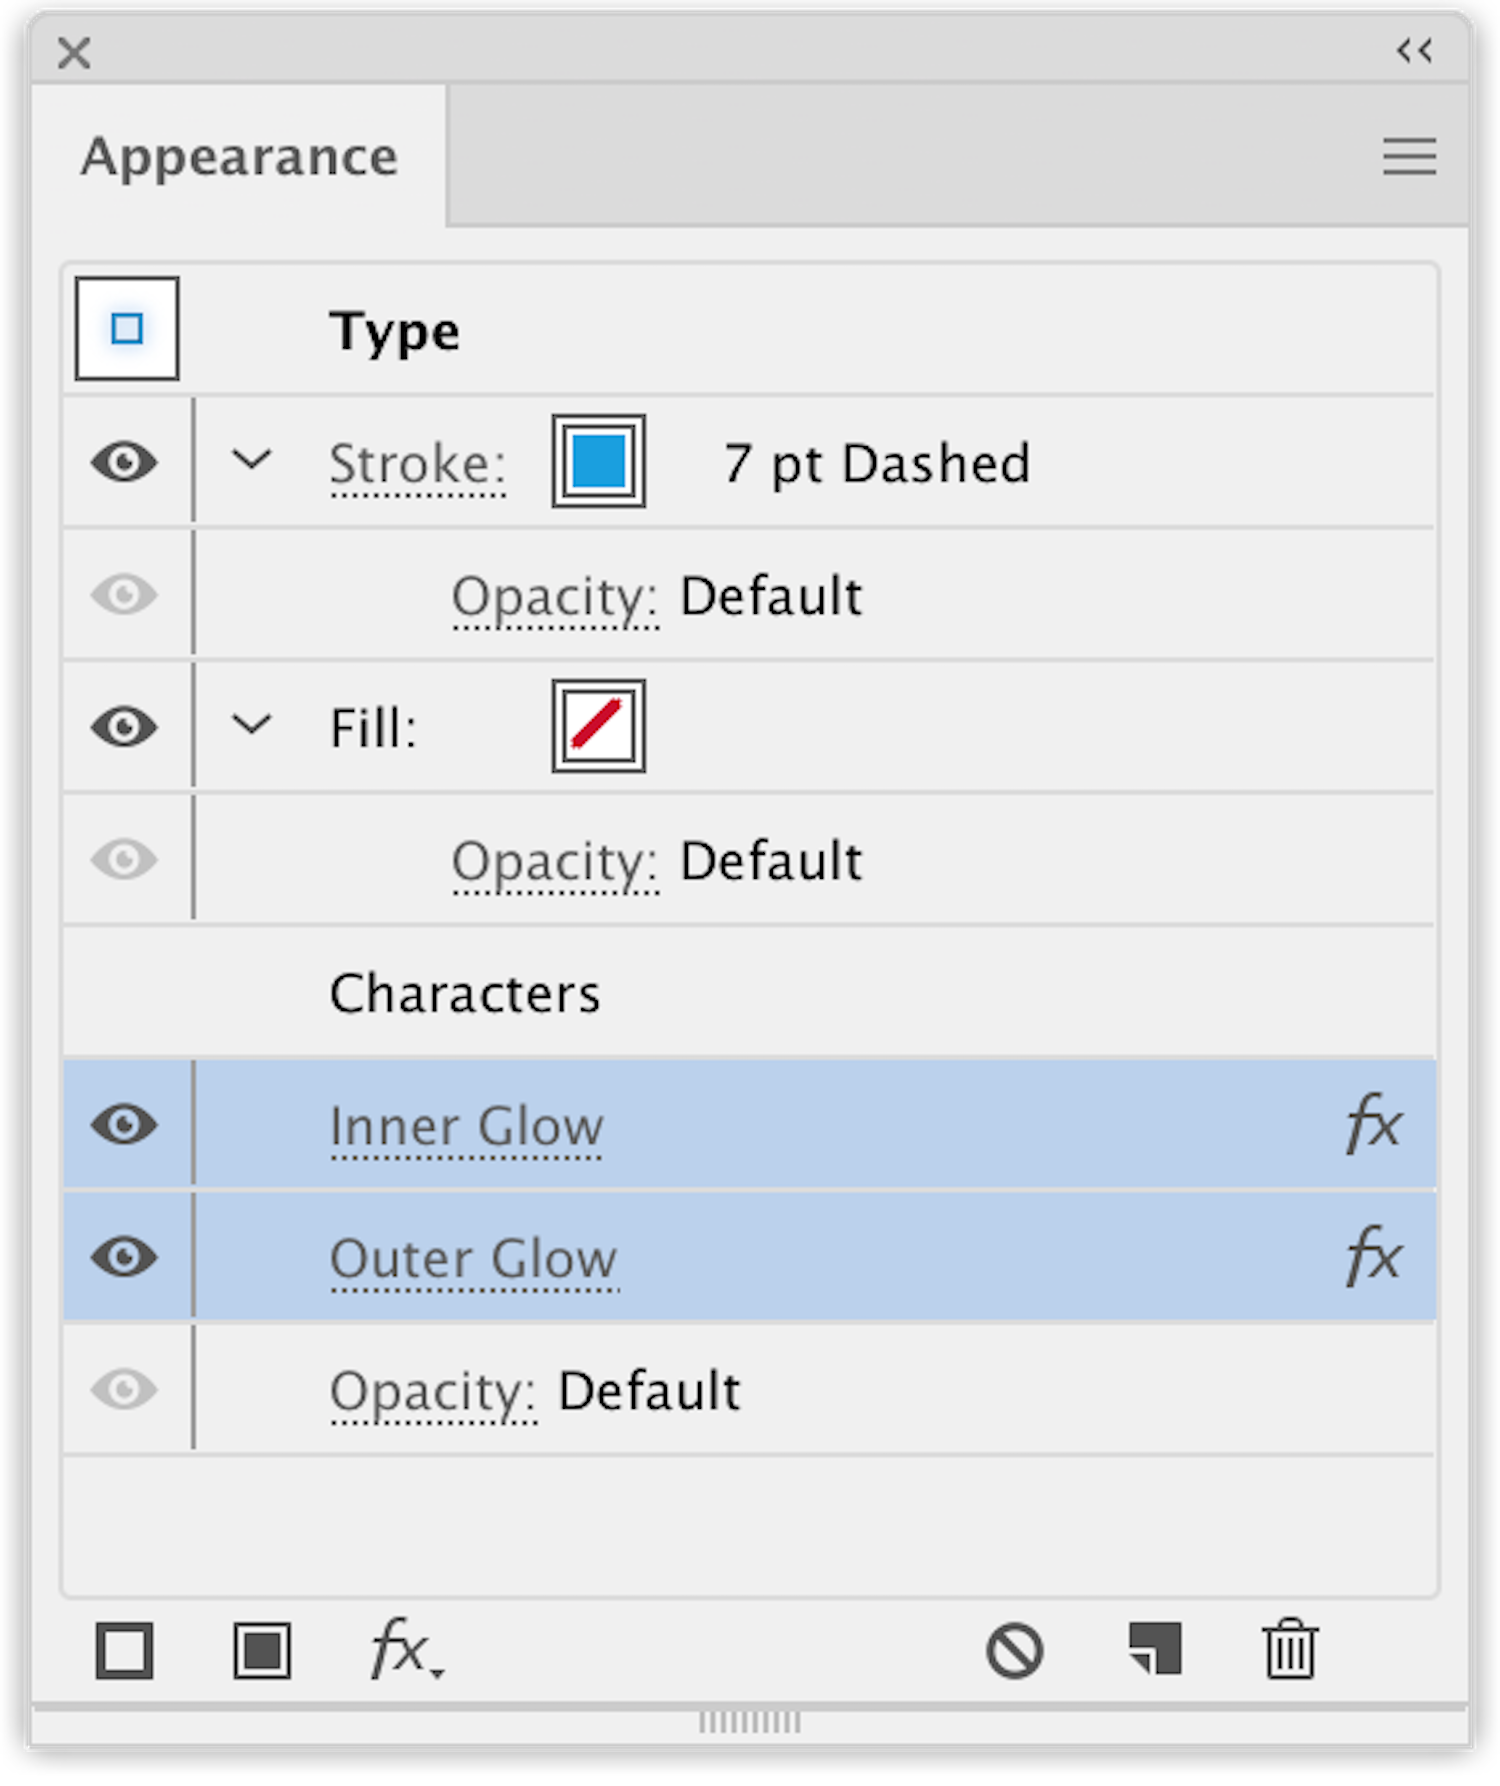
Apply the Inner Glow and Outer Glow effects to target blue stroke in the Appearance panel.
Step 5
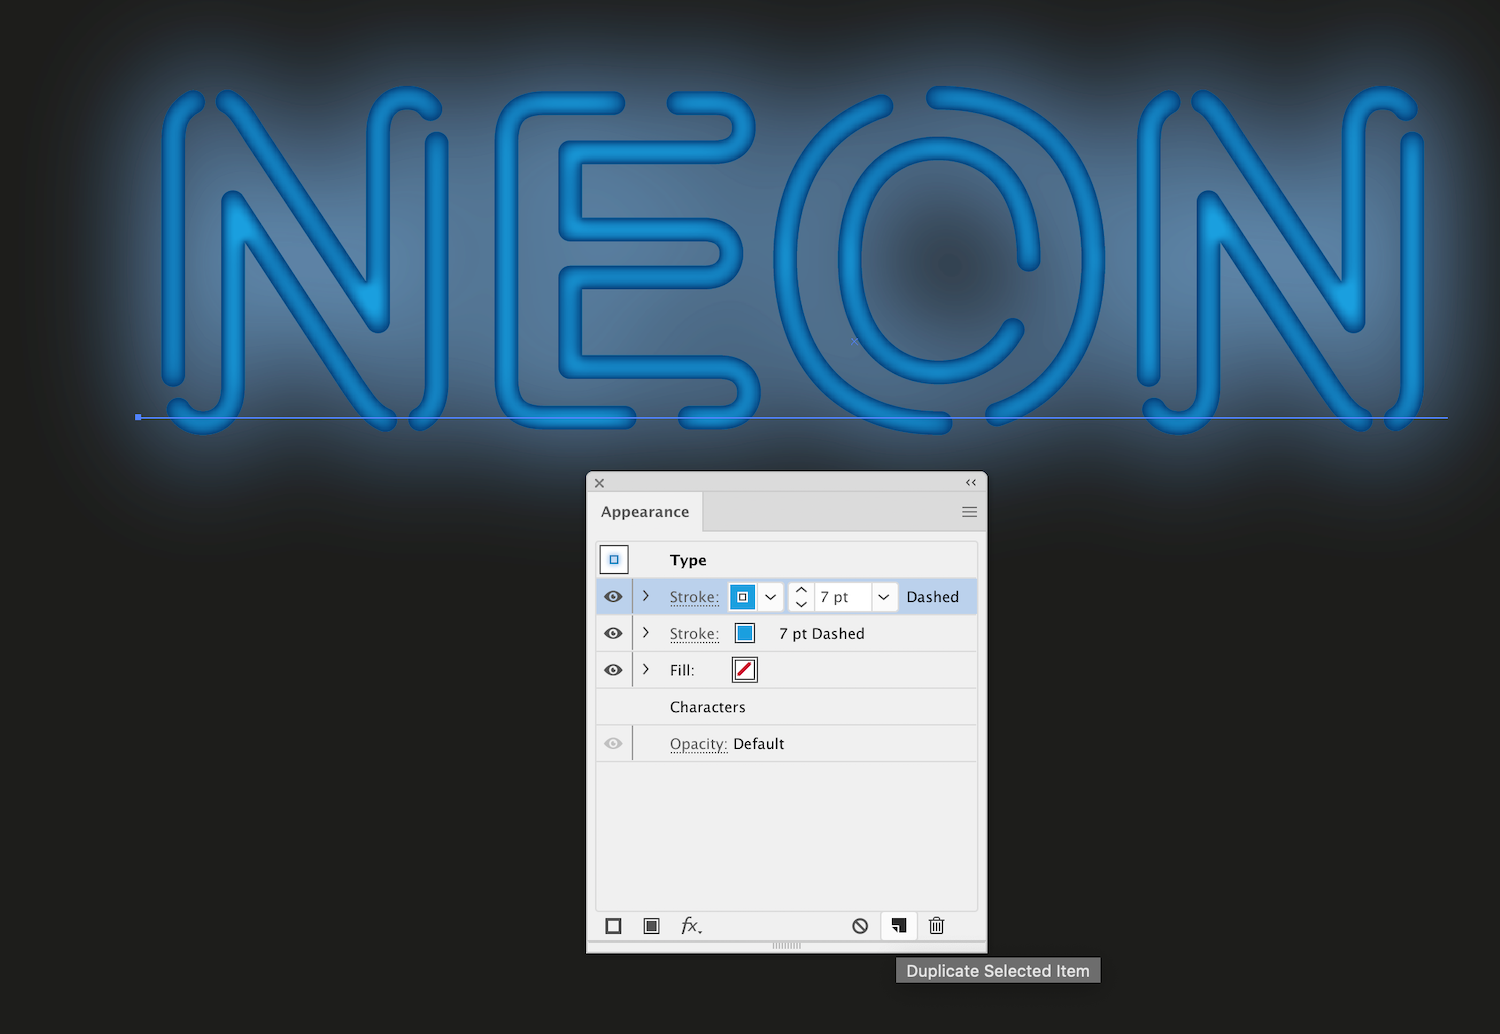
Create the reflection from neon letters. Duplicate stroke by clicking on the Duplicate Selected Item in the Appearance panel.
Now click on the Transform Effect button in the Stylism panel.
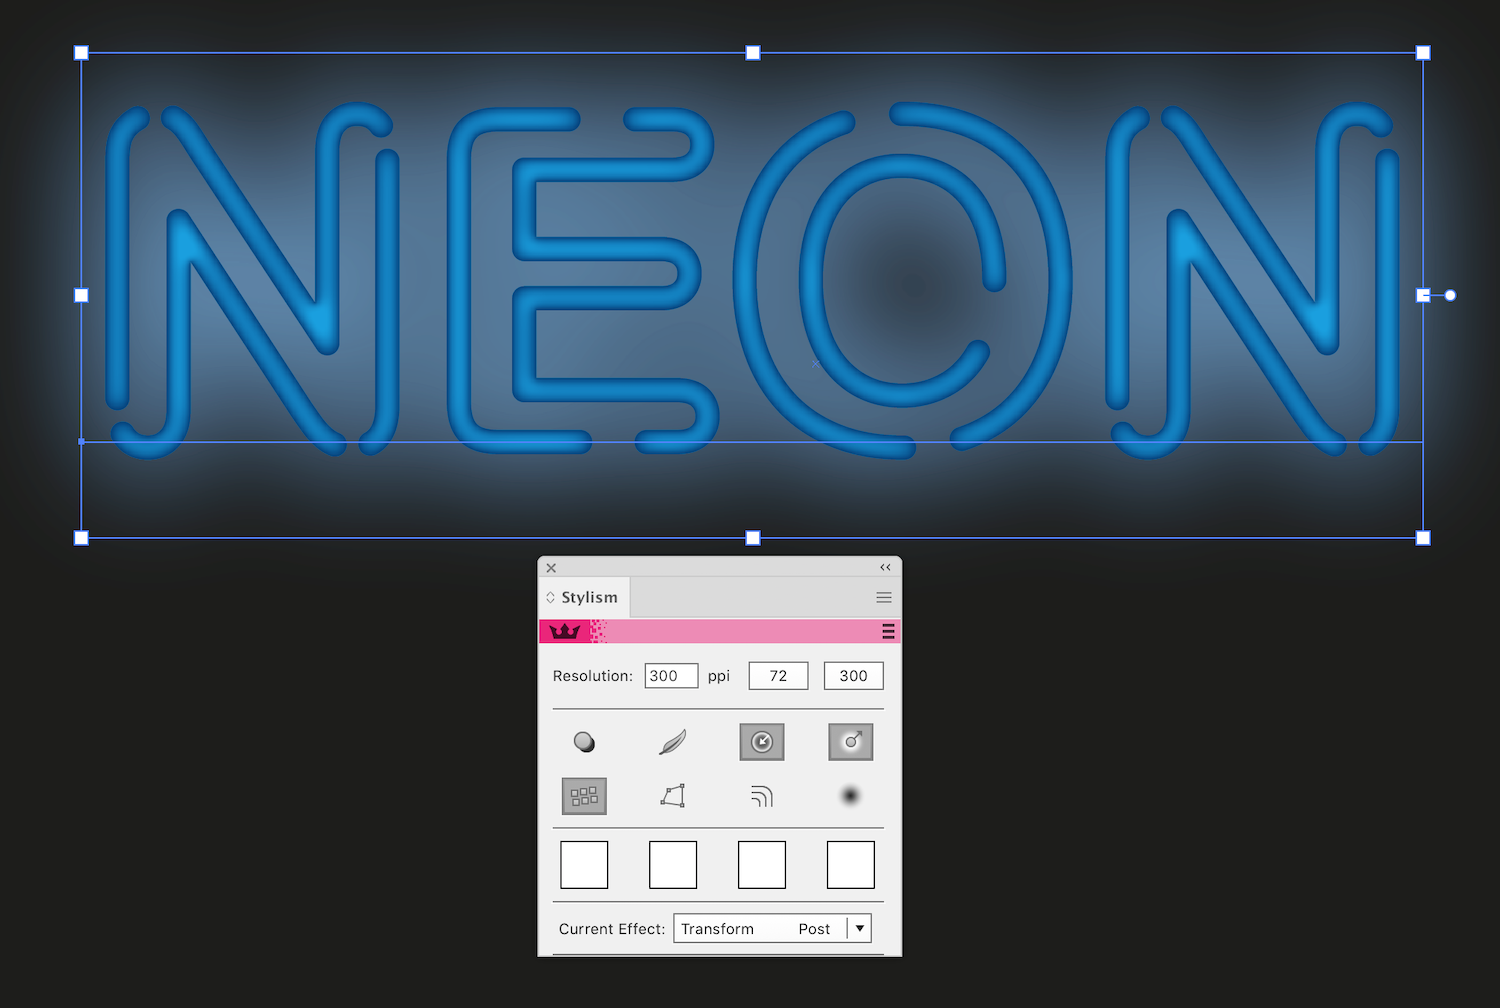
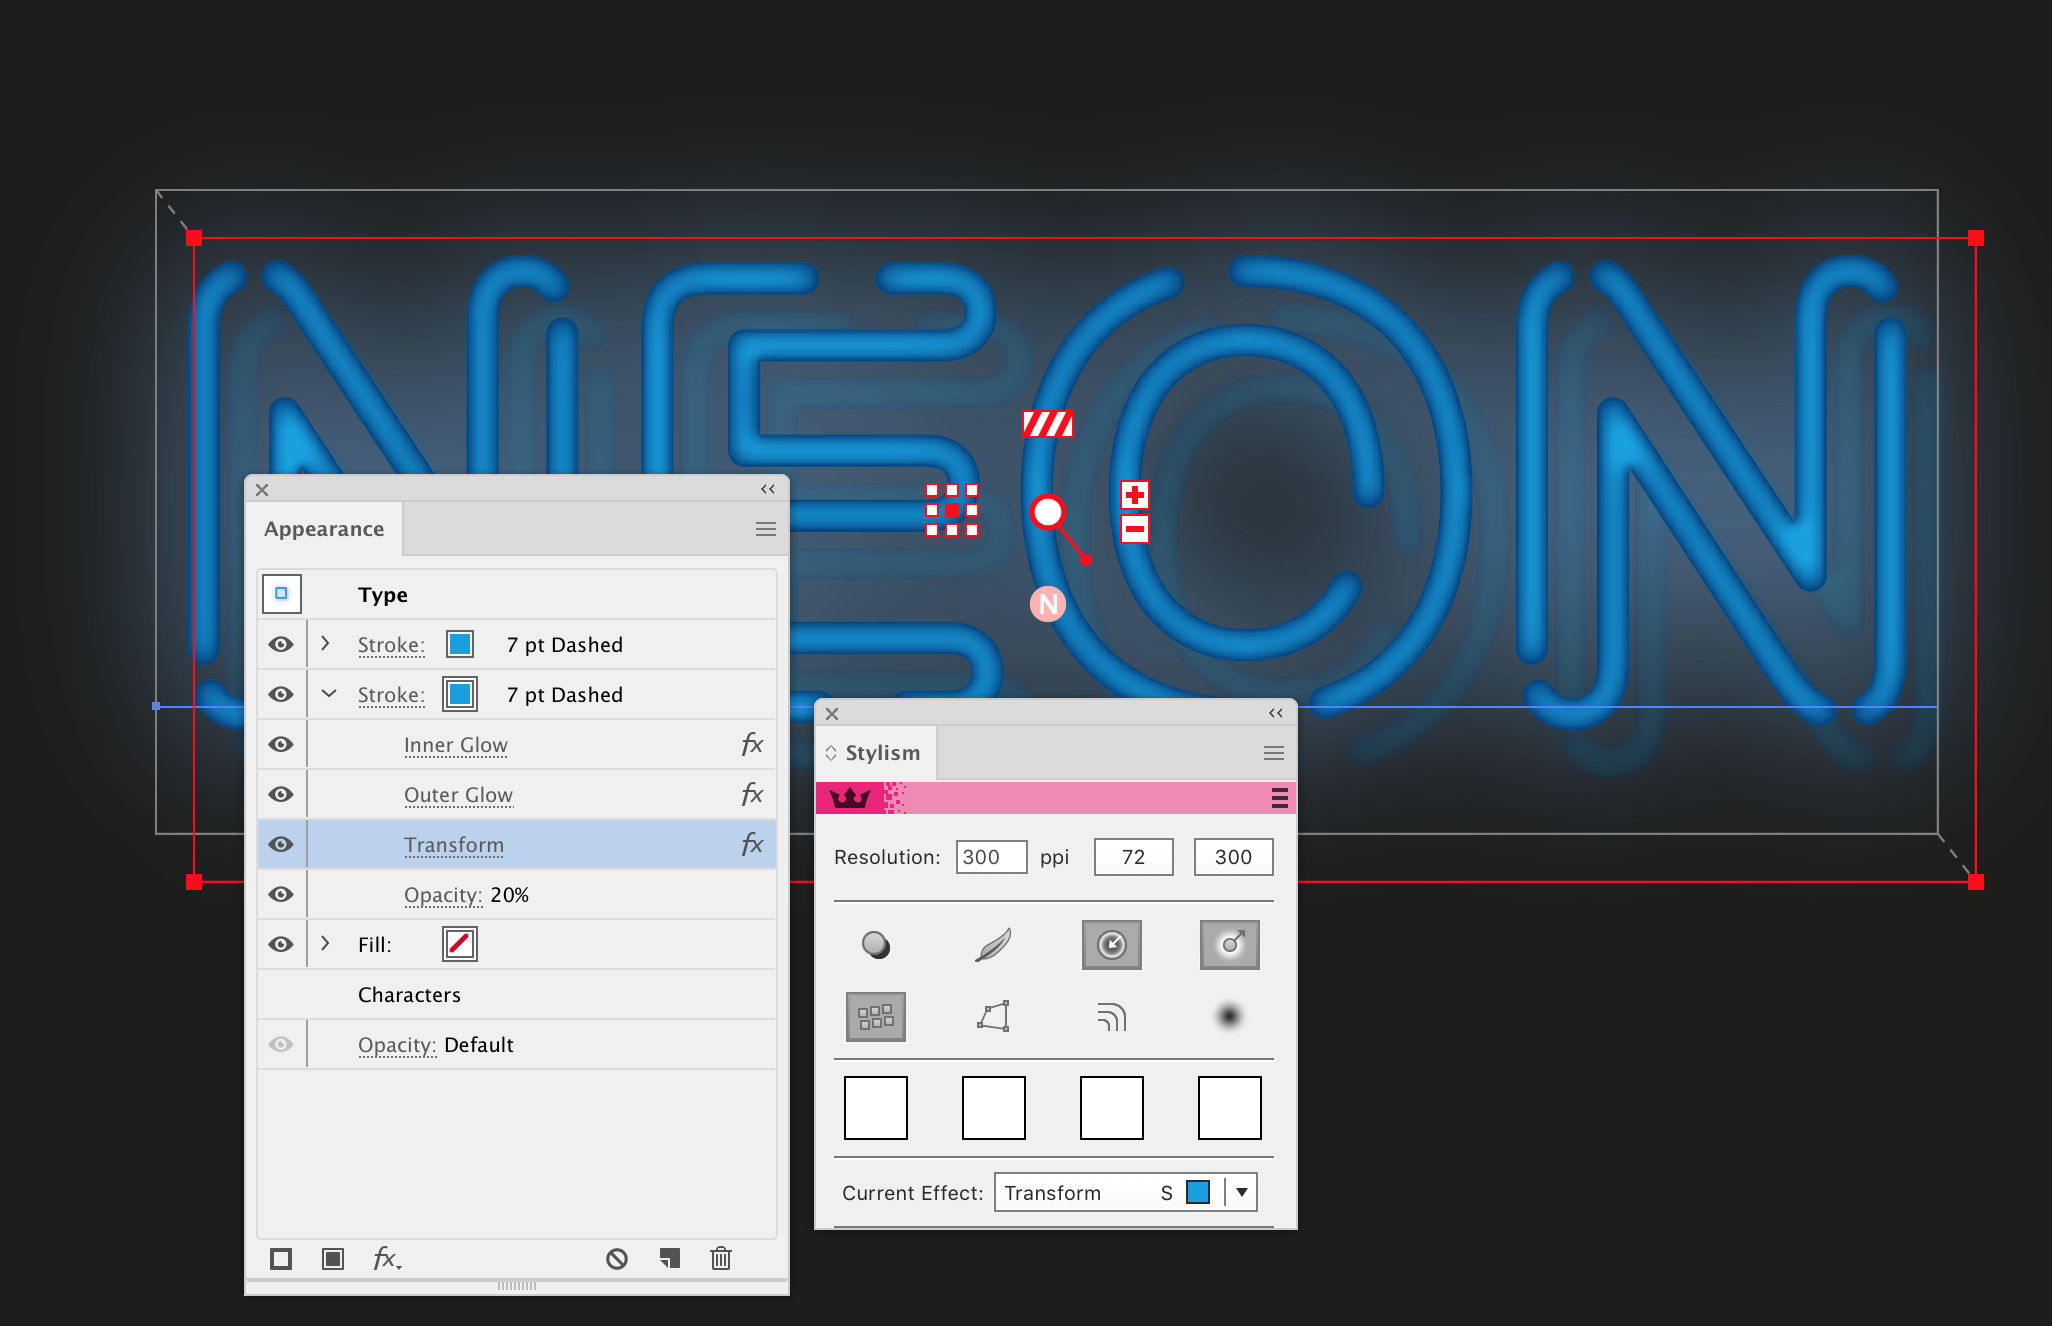
Apply Transform Effect to the lower stroke and reduce opacity down to 20% in the Appearance panel. Move the bounding box of the annotation system slightly down and to the left.
Reflection is ready.
Step 6
Now create some light flashes. Apply the black and white radial gradient to the fill.
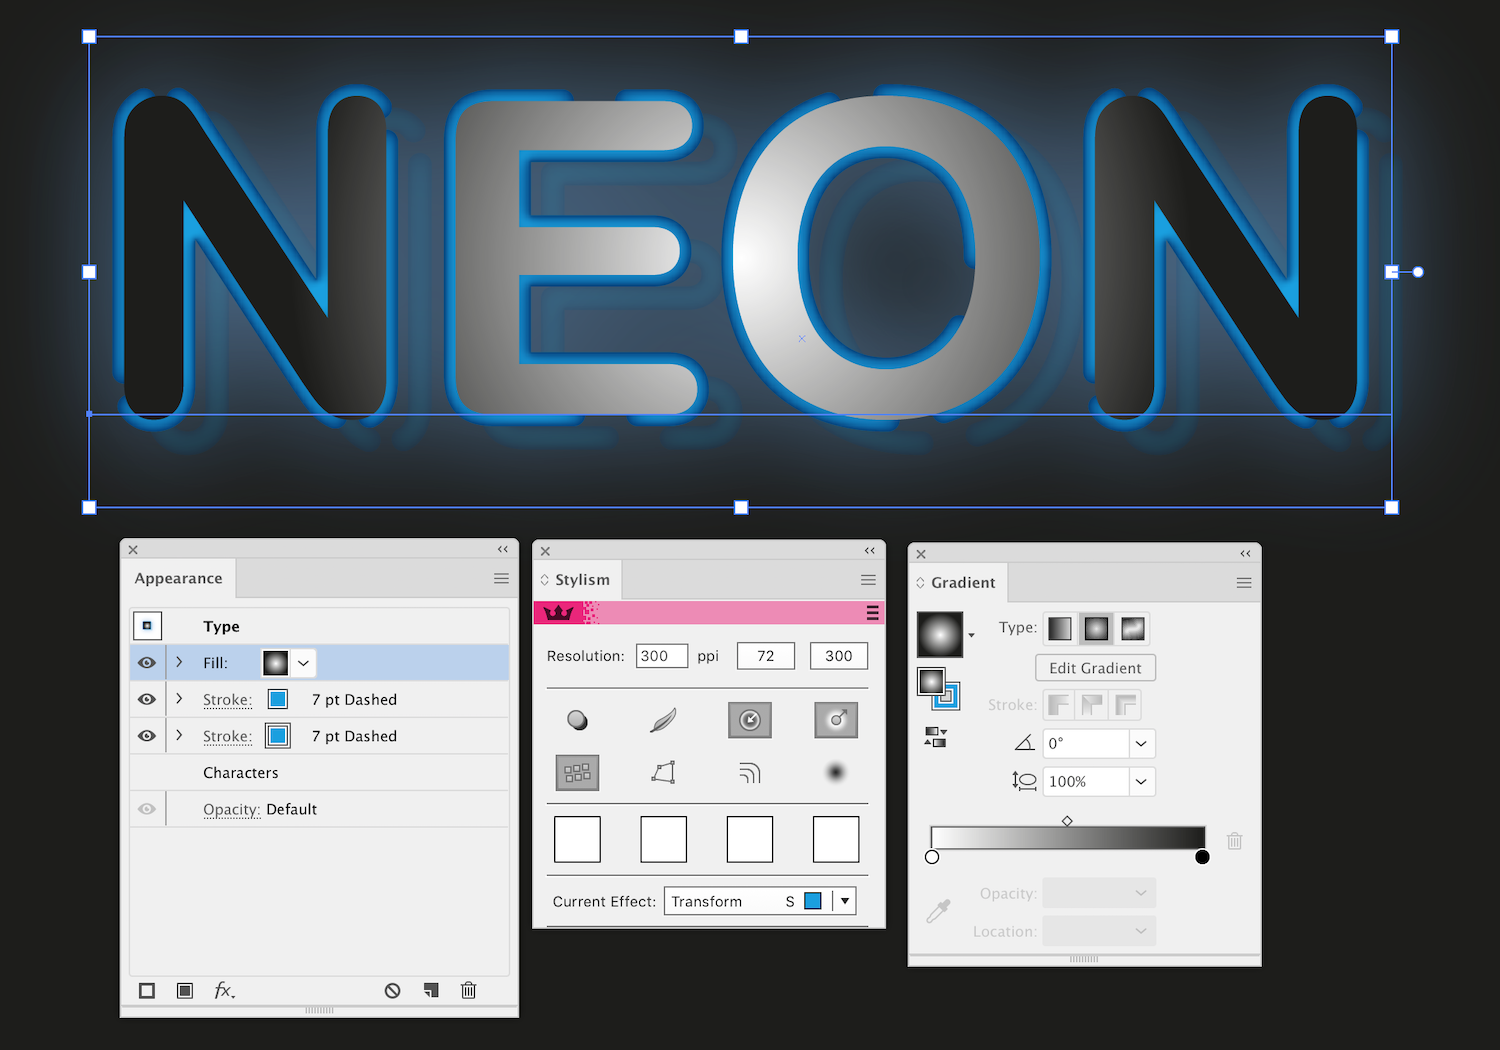
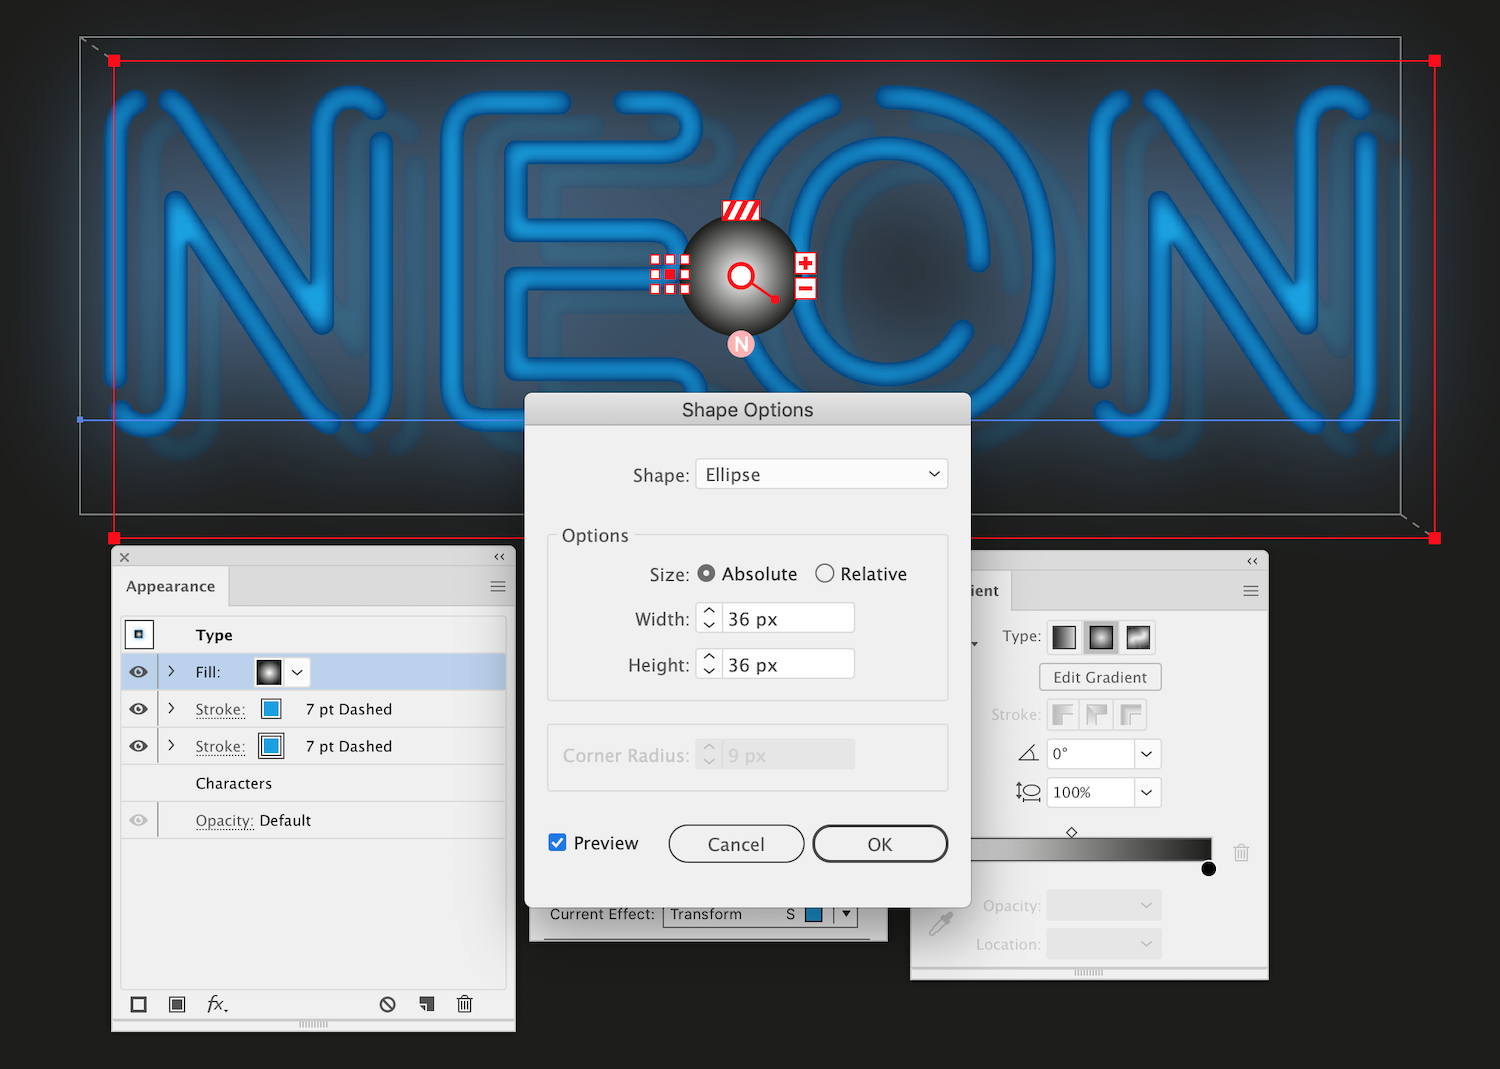
Keeping the target fill selected in the Appearance panel, go to Effect > Convert to Shape > Ellipse … and select the Absolute option in the dialog box.
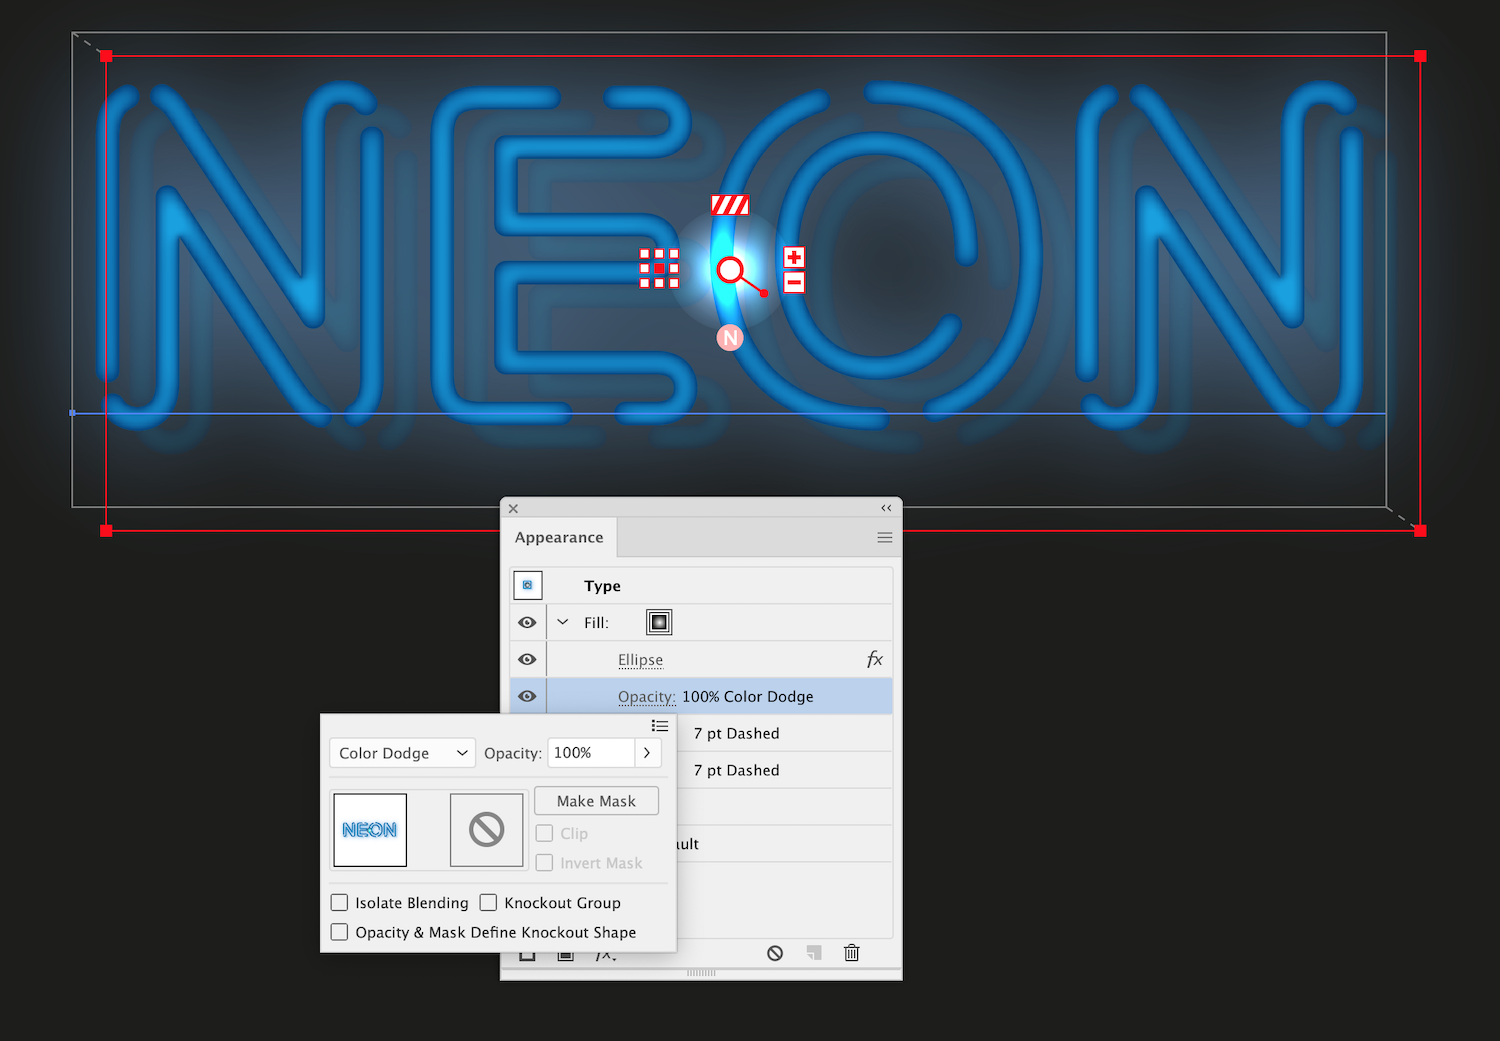
Apply to this fill the Color Dodge blending mode in the Appearance panel.
Step 7
Click on the Transform Effect button in the Stylism panel while holding Shift. This will allow us to add a second Transform Effect to the text. Apply the latest Transform Effect to the target fill, then move the bounding box so that the light flash was exactly in the right place.
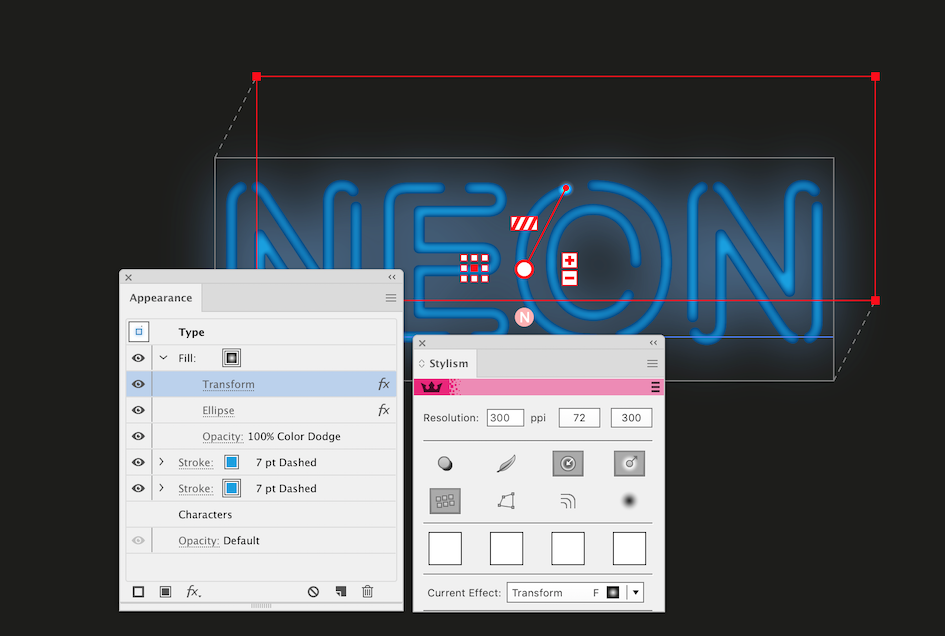
Thanks to Stylism, we did not have to pick up the effect parameters.
Step 8
Duplicate fill three times in the Appearance panel, then using Stylism, place the light flashes in different parts of the text.
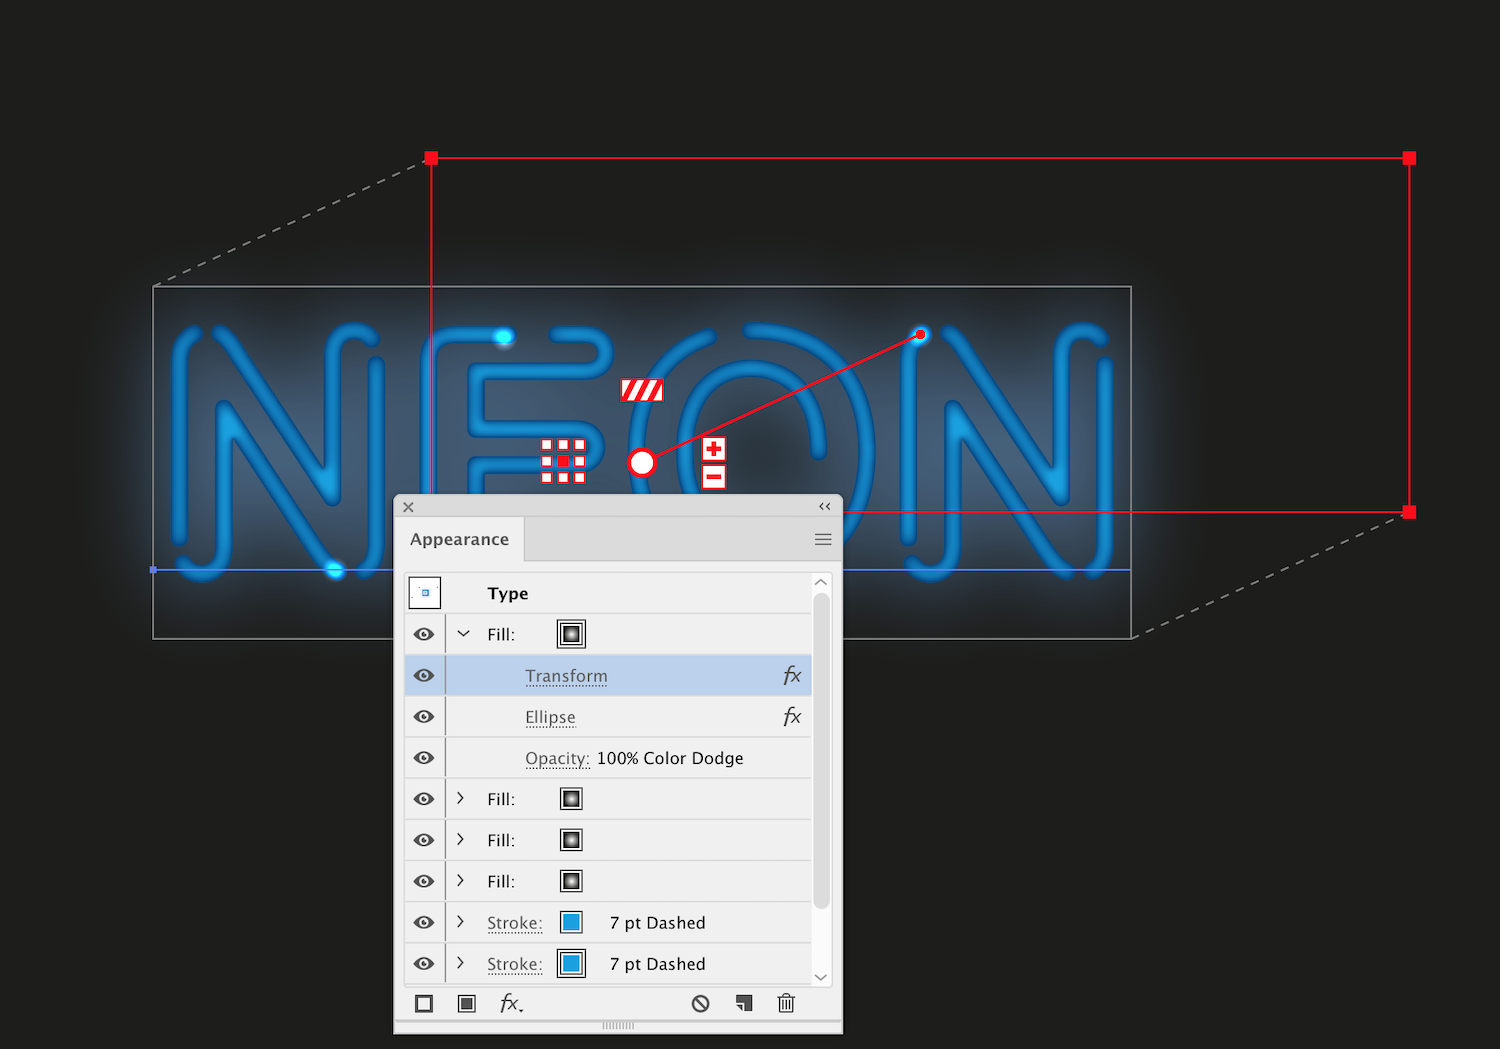
In order to activate the necessary annotation system select one of the Transform effects from the drop down menu of the Current Effect in the Stylism panel to arrange the effect. Once you've done those steps, your neon text effect is ready.