Randomino Randomino

Randomize in Illustrator

All 21 plugins and a year of updates.

Subscribe now »
  • Easily break away from uniform vector artwork
  • Quick-and-easy randomization tool
  • Panel-based randomization of color, position, rotation, scale, Effects, etc.
  • Advanced controls, including probability distribution for more natural results
  • Store, recall and automate with custom presets

Quick and Easy Randomization

Interactively randomize your artwork and generate completely unique designs in just a few clicks. No need for scripts to shake up an object's scale, rotation, position or hue/color with the Randomini Tool (part of the Randomino plugin). Roll the dice repeatedly with your artwork, safe in the knowledge that you can preview before you commit.

Control your Randomness

Take charge of your art with advanced randomization through the Randomino panel. Being random doesn't mean you lose control; randomize color, rotation, move, scale, and more in steps. Randomize common native and Astute Graphics Live effects and fully determine how random your designs are with our simple probability graphs and range limits.

Randomly Distorted

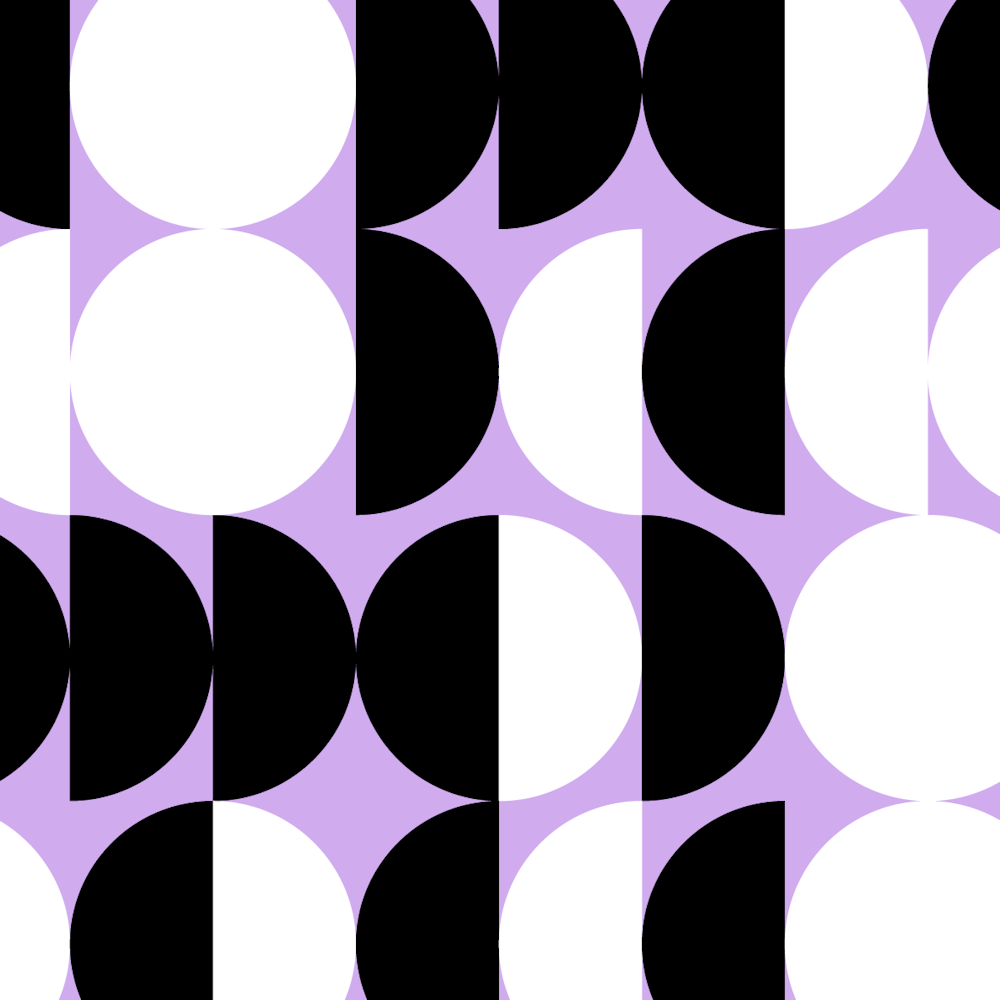
Randomly distort vector shapes, paths, and text non-destructively with the Perturb Live effect, which gives your finer roughen control in Illustrator. Ideal for producing hand-drawn styles and avoiding the rigid appearance of vectors.

2-10 Minute Tutorials

Set aside just 2-10 minutes and learn a new vector-based skill. Whether you’re an illustrator beginner or vector pro, you will find an invaluable nugget, or 50, to help you save time and be more creative in Illustrator!

Beginner

You don't have to be an expert in Illustrator to use Randomino. The mini tool inside Randomino called Randomini is an interactive and easy-to-use tool. It allows you to quickly apply common vector artwork randomization.

Intermediate

Know your Roughen from your Perturb? Find out what's possible with our intermediate video. Perturb is a live Effect available within the Randomino professional plugin for Adobe Illustrator. This Effect can non-destructively randomize vector artwork point and handle placement.

Advanced

Are you an Illustrator whizz and plugin expert? Then check out our most advanced tutorials on Randomino.

Overview

Randomino is a plugin for Adobe Illustrator which lets you randomize the colors, sizes, rotations, positions, and other attributes of one or more art objects. It consists of the Randomini tool, which allows quick randomization of several common attributes; the Randomino panel, which allows more precise control of randomization of all the supported attributes; and the Perturb Live Effect and panel, which is tailored for the subtle distortion of path objects.

Getting Started

After installing the plugin, the Randomini tool will show up in Illustrator’s main toolbar (which must be in Advanced mode: View > Toolbars > Advanced).

The Randomino panel will appear in the main menu under Window > Astute Graphics > Randomino. It is shown here with default settings: 

The Perturb Live Effect may be applied both through the main menu (Effect > Randomino > Perturb...) as well as through the Perturb panel, which will appear in the main menu under Windows > Astute Graphics > Perturb:

The Randomini Tool

The Randomini tool allows randomization of selected artwork using an on-screen widget which is similar to that used by several other of Astute Graphics’ plugins, Stylism and Texturino.

When one or more art objects are selected and the Randomini tool is in use, its widget will appear, initially centered over the bounds of the selected art (it may later be repositioned; see below). By using the cursor to click or drag parts of the widget, the artwork can be edited. Except for Hue, all changes are previewed using outlines and are not actually applied to the art until the Apply button is clicked or the Enter key is pressed. Therefore, if you change your mind and decide not to randomize the art, simply switch to another tool and the art will remain as it was. All parameters are retained between uses of the tool. When not over a widget control, the cursor for the Randomini tool has the shape of a die showing various random faces. When nothing is selected, the Randomini tool can be dragged to marquee-select artwork. 

1. Rotation arm and control: Dragging the rotation control changes the angle up to which each piece of art will be randomly rotated around its bounding box center, in either a clockwise or counterclockwise direction. For example, setting the rotation arm at a 24-degree angle will cause the preview art to be rotated anywhere from -24 degrees to 24 degrees:

The rotation control may be double-clicked to set the rotation value numerically. Holding down the Shift key when dragging the control causes it to be constrained to steps of 10 degrees. Holding down Command/Ctrl while dragging it enables “Slow-Drag,” which moves the control as if all cursor movements were reduced tenfold, allowing for fine-tuning.

2. Scale slider and thumb: Dragging the scale thumb changes the value up to which each piece of art will be randomly scaled from its bounding box center. For example, setting the scale value to 150% will cause the preview art to be scaled anywhere from 100% to 150%:

The scale thumb may be double-clicked to set the scale value numerically. Holding down Shift while dragging the thumb causes the scale values to be constrained to integer values. Holding down Command/Ctrl enables “Slow-Drag”, as per the Rotation control. 

3. Offset slider and thumb: Dragging the offset thumb changes the value up to which each piece of art will be randomly offset (shifted in position). For example, setting the offset value to 6pt will cause the preview art to be moved anywhere from 0 to 6 points. The offset direction is randomly chosen.

As with the scale thumb, the offset thumb may be double-clicked to set the value numerically, Shift-dragged to constrain the value, or Command/Ctrl-dragged to enable “Show-Drag.”

4. Apply button: Clicking the Apply button applies the currently displayed random rotation, scaling and offset to the selected art, as previewed. Immediately afterwards, since the art is still selected, new random parameters will be selected and previewed, allowing you to quickly apply multiple randomizations. To automatically deselect the art after applying the randomization, hold down Shift while clicking the Apply button. Pressing the Enter key has the same effect as clicking the Apply button unless no art is selected, in which case it opens the tool preferences dialog.

5. Hue button: Clicking the Hue button immediately randomizes the hues (strokes and fills) of the selected art. Note that black (which has zero brightness) and white (which has maximum brightness) are not affected by changing the hue. Also note that grouped objects are only affected if they have a stroke or fill applied in the Appearance panel at the group level, unless the “Ignore Grouping” preference is enabled (see below). Type objects are only affected if they have a stroke or fill applied in the Appearance panel above the Characters; to change the color of individual characters, use the Randomino panel.

6. Center control: The center control may be dragged to reposition the entire widget. Double-clicking the center control resets all parameters to their default values (i.e., no rotation, no scaling, and no offset). 

Randomini Preferences

Doubleclicking the Randomini tool in the toolbox (or pressing the Enter key when nothing is selected) will bring up the Randomini preferences dialog:

1. Annotation Color: Allows you to change the color of the widget along with the previewed art (default is red). When dragging with the tool, you may also change the annotation color on the fly by pressing the ‘C’ key.

2. Ignore Grouping: Controls how grouped objects are treated. When this preference is enabled, grouped objects will be treated as if they were ungrouped:

The Ignore Grouping preference may be toggled on the fly while dragging by pressing the ‘G’ key.

3. Informational area: Shows a brief description of each preference setting when the cursor is being held over it. 

The Randomino Panel

The Randomino panel allows precise randomization of selected artwork with finer control and more options than the Randomini tool. Additionally, it allows you to operate on text characters and to save and recall your favorite randomization settings. The panel will configure itself differently depending on the attribute you are randomizing and whether you are picking random values from a range of values or from a list of discrete values.

Randomino Panel: Common panel controls

Most kinds of randomizable attributes are controlled using numerical parameters. Opacity is one such attribute, and the panel, when set to Opacity kind, demonstrates controls common to most of the other kinds.

1. Kind popup menu: Chooses the attribute to be randomized, from among: Color, Live Effects, Movement, Opacity, Rotation, Scaling, Stacking Order, and Stroke Weight.

2. Range/List popup menu: Selects which method of choosing values to use. In Range mode, values are randomly chosen from anywhere within a continuous range of values (as shown, 0% to 100%). In List mode, values are randomly chosen from among a list of discrete values (as shown, 50%, and 100%). 

3. Distribution curve (range mode only): Selects (among four models) how values are randomly chosen from a range. The green curve represents the probability of choosing a value from a given location in the range, with zero being the bottom x-axis.

a) Linear distribution: all values within the range are equally likely to be chosen.

b) Bell curve (Gaussian) distribution: values at the center of the range are most likely to be chosen, with values becoming less likely the further they are from the midpoint (“outliers”). This is also known as a “Normal” distribution, and is prevalent in the natural world.

c) Half-Bell curve (Half-Gaussian) From Left distribution: values at the start of the range are most likely to be chosen, with values becoming less likely moving towards the end of the range.

d) Half-Bell curve (Half-Gaussian) From Right distribution: values at the end of the range are most likely to be chosen, with values becoming less likely moving towards the start of the range.

4. Value input boxes (range mode only): The values between which the random value will be chosen according to the specified distribution. The mid-value is only displayed when the Bell curve (Gaussian) distribution is active.

5. Step checkbox and value (range mode only): When enabled, whatever random values are chosen will be rounded to be multiples of the specified step. Note that this may cause the final value to lie outside the specified range. For example, if the range is 0 to 14, and the step is 5, the only values that will be chosen are 0, 5, 10, and 15.

6. Randomize button: Clicking the button randomizes the art using the parameters currently displayed on the panel.

7. Ignore Grouping checkbox: Acts the same as in the Randomini tool; when enabled, grouped items will be treated as if they were ungrouped. For example, consider a group of 10 squares. Applying a random rotation to the group would normally rotate the ten squares together, as a group. But when the preference is enabled, each square is independently rotated by a different amount, as if the squares were not grouped.

8. Value list (list mode only): The values from which one will be randomly chosen. Duplicates are allowed if the Allow Duplicates checkbox is enabled (see below).

9. Add button and input (list mode only): Adds the specified value to the list. 

10. Delete button (list mode only): Deletes one or more selected values from the list.

11. Allow Duplicates checkbox (list mode only): When enabled, allows the same value to be added to the list more than once. This can be useful for modifying the frequency of each item. For example, if the list were to contain 0, 0, 0, and 90, then roughly three-quarters of the returned values would be zero and one-quarter would be 90. If duplicates exist in the list and the checkbox is changed from ticked to unticked, those duplicates are immediately removed.

12. Flyout menu

A. Access to preferences dialog (see below).

B. Saving and managing settings: Saving a setting lets you store the set of panel options and settings that are currently being displayed in the panel, which can then be instantly recalled later. Saved settings can also be applied through an action.

C. Default settings: Restores the panel to its default values, retaining the randomization kind that is currently active.

D. Settings access: For organization and ease of access, each saved setting is found under a submenu according to kind. Picking the menu item loads that setting into the Randomino panel. If the preference “Apply Loaded Settings Immediately” is enabled, the setting is then applied to any selected art.

13. Panel banner menu: Provides links to the Astute Graphics website. 

Randomino Panel: Color Randomization

Changes the color(s) of the selected objects in a random way.

In Range mode, color is controlled using the Hue-Saturation-Brightness (HSB) model. Each of the three parameters may be independently controlled (or disabled entirely), with one restriction: all must use the same distribution model. Each parameter’s value may be entered in the numerical input boxes or adjusted by dragging the slider controls. Shift-clicking the thumb area resets the thumbs to the entire range of valid values.

1. Color Preview area: When all three color parameters are enabled, the preview area shows a random selection of colors which would be generated using the current settings. When only one or two of the three parameters are being changed, the preview area shows a selection of colors on top (a standard set 

if nothing is selected; otherwise colors from the selected art) and the same colors that would result from randomly changing their parameters.

2. Fills/Strokes/Whites checkboxes: You may choose to modify fill colors, stroke colors, or both. In addition, you can choose to affect white colors or not. Gradients (both standard and freeform) are modified on a stop-by-stop basis. Gradient meshes are modified on a selected node-by-node basis. Randomino does not change the colors of raster art.

Tip: If randomizing the colors of art seems to have no effect, check whether 1) the stroke or fill checkbox is disabled; or 2) you are attempting to modify the color of a group (which may not exist if the group does not have an independent fill or stroke) with the “Ignore Grouping” checkbox disabled.

4. Add From Selected buttons (list mode only): While colors may be added to the list one by one using the color picker interface, it is often useful to add several colors at once, either from the currently selected artwork or from the currently selected swatches.

Randomino Panel: Live Effect Parameter Randomization

It is often desirable to have the same live effect applied to a number of objects but with different parameters. For example, you might want to apply an AG Offset to many objects with different distance values:

Unfortunately, modifying each object one by one is time-consuming and tedious. However, using Randomino, you can instantly assign a random value across multiple objects to many different parameters from a number of common live effects:

  • AG Block Shadow: Position

  • AG Offset: Distance

  • Drop Shadow: Blur, Opacity, Position

  • Feather: Radius

  • InkFlow: Size

  • Inner Glow: Blur, Opacity

  • Outer Glow: Blur, Opacity

  • Phantasm: Brightness, Contrast, Hue, Hue (Colorizing), Saturation, Saturation (Colorizing), Lightness

  • Pucker & Bloat: Strength

  • Roughen: Size (Absolute), Size (Relative), Detail 

When the Randomino panel kind is set to Live Effects, one, and possibly two, additional popup menus will appear on the panel:

1. Effect menu: Selects the live effect or family of effects to randomize.

2. Parameter menu: Appears if there are multiple parameters available within the live effect or family and allows you to select the parameter.

v Artwork that does not have the specified live effect applied to it will not be changed; i.e., the live effect is not automatically added. 

Randomino Panel: Move Randomizatio

Moves, or offsets, the selected artwork in a random way. There are two different ways to specify movement: by distance and angle, or by horizontal and vertical components.

1. Angle type selector: When randomizing movement using distance and angle, the angle may be specified either as an absolute value or a value calculated by starting at a specific point and passing through a point relative to the art. When the angle is Absolute, all the objects will move in the same direction (though by differing amounts). When the angle is Relative, each object will, in general, move in a different direction. Relative angles are useful for causing art to appear to move towards or spread out from a certain spot. 

2. Relative Angle start point: The coordinates may be entered manually, or specified by clicking the small point setter icon to the right of the coordinate inputs, which enables a tool that allows you to click at the point’s position.

3. Relative Angle end point: may be specified as either the art’s bounding box center, the art’s first anchor point (for paths only), or the art’s last anchor point (for paths only).

4. Parameter checkboxes: When randomizing movement using horizontal and vertical components, the components may be enabled independently by ticking or unticking the corresponding checkbox.

5. Objects/Patterns checkboxes: Similar to Illustrator’s native Move dialog, movement randomization can be independently applied to patterns within the objects.

Randomino Panel: Rotation Randomization

Rotates the selected artwork in a random way. Note that each rotation value is applied to the artwork in its current orientation; it does not set an absolute amount of rotation (as only certain objects in Illustrator have absolute rotations).

1. Reference point selector: Determines whether the reference point (the point about which the rotation will occur) is relative to the position of the art, or at an absolute position. 

2. Relative reference point type: Selects what the reference point is relative to: the art’s bounds; the art’s first anchor point (for paths only); the art’s last anchor point (for paths only); or the artboard.

3. Relative reference point orientation: For Art Bounds and Artboard relative reference points, specifies the position of the reference point (top left, top, top right, middle left, etc).

4. Absolute reference point coordinates: The X and Y coordinates of the reference point.

5. Absolute reference point setter: Enables a tool that allows you to click at the reference point’s position. 

6. Objects/Patterns/Gradients checkboxes: Rotation can be applied to only certain attributes of the selected art. You can choose to rotate the art objects themselves, any patterns found within the art, or any gradients found within the art. 

Randomino Panel: Scaling Randomization

Scales the selected artwork in a random way. Note that the midpoint of the low and high scaling values is their geometric mean, not their arithmetic mean. 

1. Uniform/non-uniform button: Click to switch between uniform scaling (same amount in both the horizontal and vertical directions) and non-uniform scaling.

2. Reference point selector: Determines whether the reference point (the point from which the scaling will occur) is relative to the position of the art, or at an absolute position. 

3. Relative reference point type: Selects what the reference point is relative to: the art’s bounds; the art’s first anchor point (for paths only); the art’s last anchor point (for paths only); or the artboard.

4. Relative reference point orientation: For Art Bounds and Artboard relative reference points, specifies the position of the reference point (top left, top, top right, middle left, etc).

5. Absolute reference point coordinates: The X and Y coordinates of the reference point.

6. Absolute reference point setter: Enables a tool that allows you to click at the reference point’s position. 

7. Filter checkboxes: Scaling can be applied to only certain attributes of the selected art. You can choose to scale the art objects themselves, and any patterns found with the art. If the objects are scaled, you can choose whether or not to include any corners applied to the art, and strokes and effects that the art contains.

Randomino Panel: Stacking Order Randomization

Randomly changes the stacking (top-to-bottom) order of the selected objects.

1. Respect layers checkbox: When enabled, the restacked art will always remain within its current layer or sublayer (each layer or sublayer with selected art will be restacked independently).

Randomino Panel: Preferences

Choosing “Randomino Preferences...” from the Randomino panel flyout menu will bring up the Randomino preferences dialog:

1. Always Affect Text Objects at Character Level: When enabled, all selected text objects will be treated as if their contents were highlighted with the Text Tool. This affects their contents at the character level rather than the text object as a whole; for example, you can change the color of each character. The preference has no effect when randomizing Stacking Order. When randomizing using Move (Dist/Angle) or Move (Horiz/Vert), only the vertical component of the movement is taken into consideration (as movement is produced through baseline shifting of the text).

2. Apply Loaded Settings Immediately: When enabled, loading a saved setting through the panel flyout menu will immediately apply that setting to any selected art. You can always hold down the Shift key when selecting the setting to invert this behavior. To record applying a Randomino setting as an action, you must apply the setting when loading it, either by enabling this preference or by holding down Shift when choosing the setting.

3. Informational text area: Gives a brief description of each preference setting as the cursor is held over it. 

Perturb Panel

The Perturb panel is used in conjunction with the Perturb live effect, which allows you to independently move anchor points in the selected art in a random manner.

1. Distance controls: The maximum distance that each anchor point will be shifted (in a random direction); it may be adjusted with the slider or by typing a value into the input box. In Relative mode, the value is a percentage of the size of the object (as measured by the diagonal of its bounding box). In Absolute mode, it is a value in the current document units that does not depend on the path’s size. 

2. Crinkle controls: In general, Perturb is best for subtly changing paths; the distance parameter should be set to a value lower than the closest anchor points in the original paths. Otherwise, path segments can cross and the results are generally not desirable. However, the Crinkle parameter attempts to allow for higher distance values. When the Crinkle value is low, the closer each object’s anchor points are to each other, the more similarly they will be moved. This allows distortion of an entire shape without losing fine details within the shape. Regardless of Crinkle value, points that are coincident will be moved identically.

3. Seed button: Changes the random seed. Each seed value creates a specific set of random values which Perturb uses to offset the points. When applying the Perturb effect to multiple copies of one object, they will initially have the same seed and therefore look the same. Clicking the seed button will give each a new seed to each. To view the seed value or to set a specific seed value, Option/Alt-click the button.

4. Ignore Grouping checkbox: When this preference is enabled, grouped objects will be treated as if they were ungrouped. Coincident points of different paths in the group will no longer be locked together.

5. Apply button: Click to apply the Perturb effect to the selected artwork. To apply multiple Perturb effects to a single piece of artwork, use the main Illustrator menu item Effect > Randomino > Perturb, or Option/Alt-drag the Perturb effect in the Appearance panel. For example, the stroke and the fill of a path could be independently Perturbed. 

6. Copy popup menu: Chooses which Perturb effect to edit, when the selected artwork has multiple Perturb effects.

7. Flyout menu: Removes all top-level Perturb effects from the selected artwork. Note that if a Perturb effect is applied to an individual member of a group and the entire group is selected, the menu item will not be available.

8. Panel banner menu: Provides links to the Astute Graphics website.

Randomino technical specifications

Randomini tool

Quick and easy interactive randomization of selected objects:

  • Scale

  • Offset

  • Rotation

  • Hue (color)

Apply to group or group content option

Randomino panel

Advanced randomization control over:

  • Color

  • Live Effects

  • Move (Distance/Angle or Horizontal/Vertical offset)

  • Opacity

  • Rotation

  • Scaling

  • Stacking Order

  • Stroke Weight

Color randomization controls:

  • Hue and/or Saturation and/or Brightness

  • Ranges and/or step values for each

  • Alternate “Range” mode allowing only pre-selected color swatches to be used

  • Color chip preview

  • Apply to Fills and/or Strokes and/or Whites

Live Effect randomization:

  • Applied to selected artwork can have their settings randomized:

  • AG Block Shadow

  • AG Offset

  • Drop Shadow

  • Feather

  • InkFlow

  • Inner Glow

  • Outer Glow

  • Phantasm

  • Pucker & Bloat

  • Roughen

Advanced panel control:

  • Probability distribution (equal, increasing/decreasing or "bell curve" probability)

  • Ignore grouping option

  • Store and recall settings

  • Actionable for automation

Perturb (new) Live Effect

  • Randomly distort vector paths, shapes and text

  • Ideal for producing less sterile vector appearances

  • Distance and Crinkle controls (the latter allowing multiple paths to synchronize the change)