Complete guide to selections in Adobe
12 minute readThere's always the desire to learn some advanced feature in Adobe Illustrator, but sometimes getting there requires getting a little overview of the basics. In this article, I'll be showing you almost every conceivable way to make a selection using Adobe Illustrator. You'll learn quick shortcuts to toggle between different selection modes, how to make very complex selections, and how to have more control over your artwork. I'll be discussing native tools built into Illustrator and I'll also show you how you can leverage some Astute Graphics plugins to give you unlimited selecting freedom.
The standard and direct selection tools are at the base of getting started with making selections. You will frequently find yourself using the keyboard shortcut (V) for the standard selection tool, and (A) for the direct selection tool regularly.
Standard Selection Tool

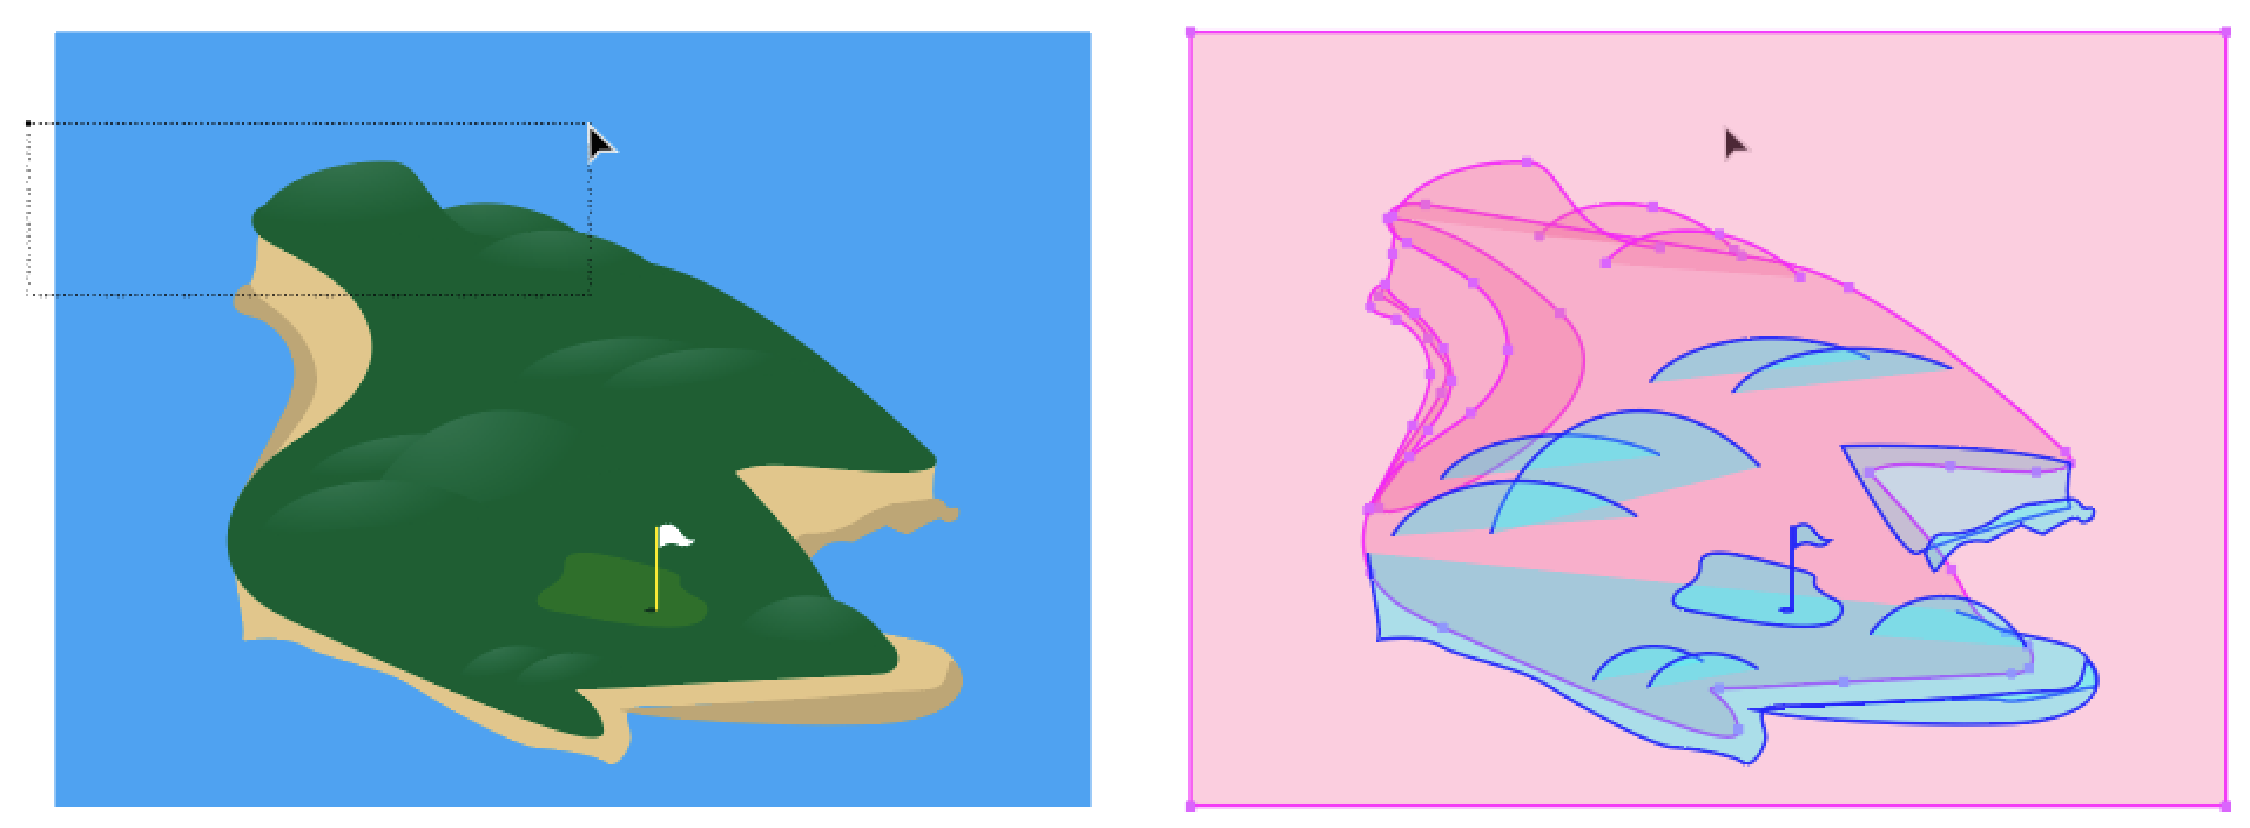
The standard selection tool is used for selecting one or more objects or shapes. You can simply click an object to select it and move it around, or by dragging out a marquee starting from a blank area of the artboard, you can select all objects that are touching the marquee.
Note: If multiple objects are grouped, you can double-click the group of objects to enter 'Isolation Mode'. This allows you to select each object that is contained within the group individually. If there are additional groups inside the first group, you can double-click each consecutive group to select those grouped objects individually and so on. By double-clicking a blank area of the artboard you can exit the isolation mode and the objects will remain grouped.
Direct Selection Tool

The direct selection tool is a bit more unique because it allows you to select individual points on an object or shape. With the same example as above, I'm using the direct selection tool. You may notice differences in which parts of the objects are selected compared to using the standard selection tool.
Quick Tip: When using any tool, you can quickly toggle to the selection mode by holding down CMD (macOS) or Ctrl (Windows). While the key modifier is pressed, you will have use of the most recent basic selection tool you have used. For example, if I was using the standard selection tool, and switched to the scale tool, holding down CMD on the keyboard will toggle the standard selection tool. When I release the CMD key, I will be back to using the scale tool.
Group selection tool

This is one of the less commonly used selection tools but it can be useful now and then. When using the group selection tool it allows you to select objects within groups, without using the direct selection tool. It is sort of a separate 'direct selection' tool, but for groups. The first object you select with the group selection tool will be selected directly. But with each additional time you select the same object, the objects in each consecutive group will be selected.
The Lasso Tool
Some might think of the lasso tool and magic wand as a bit gimmicky, but they can be very useful in certain situations. In the example below you can see a square I created. It has a point on each edge. I need to create a star with 4 points. Using the lasso tool, I can drag around the 4 edge points with one single action, rather than using the direct selection tool to select each point separately.
Using the lasso tool with PathScribe
One of the problems with the lasso tool is that it can only select anchor points. In the computer illustration below, I need to remove various objects in the pattern to thin it out. The lasso tool will give me the most control over making a selection, although I can't select all the objects fully. The PathScribe tool (part of the VectorScribe plugin) can help with this. I'll use the lasso tool to select at least one point on each object. Open the Pathfinder panel and use the 'select all points' button to completely select all objects.
Note: The lasso and PathScribe selection method also works well if the direct selection tool is used instead of the lasso tool.
Magic Wand

When you need to select objects that have similarities such as the same stroke or fill colors, the magic wand is a convenient way to make such selections without much setup. You can use the (Y) keyboard shortcut to get to the wand tool. By default, it's set to select objects with the same fill color with a tolerance of 32. This means that any objects that have a fill color that varies by about 32% from the selected object will also be selected.
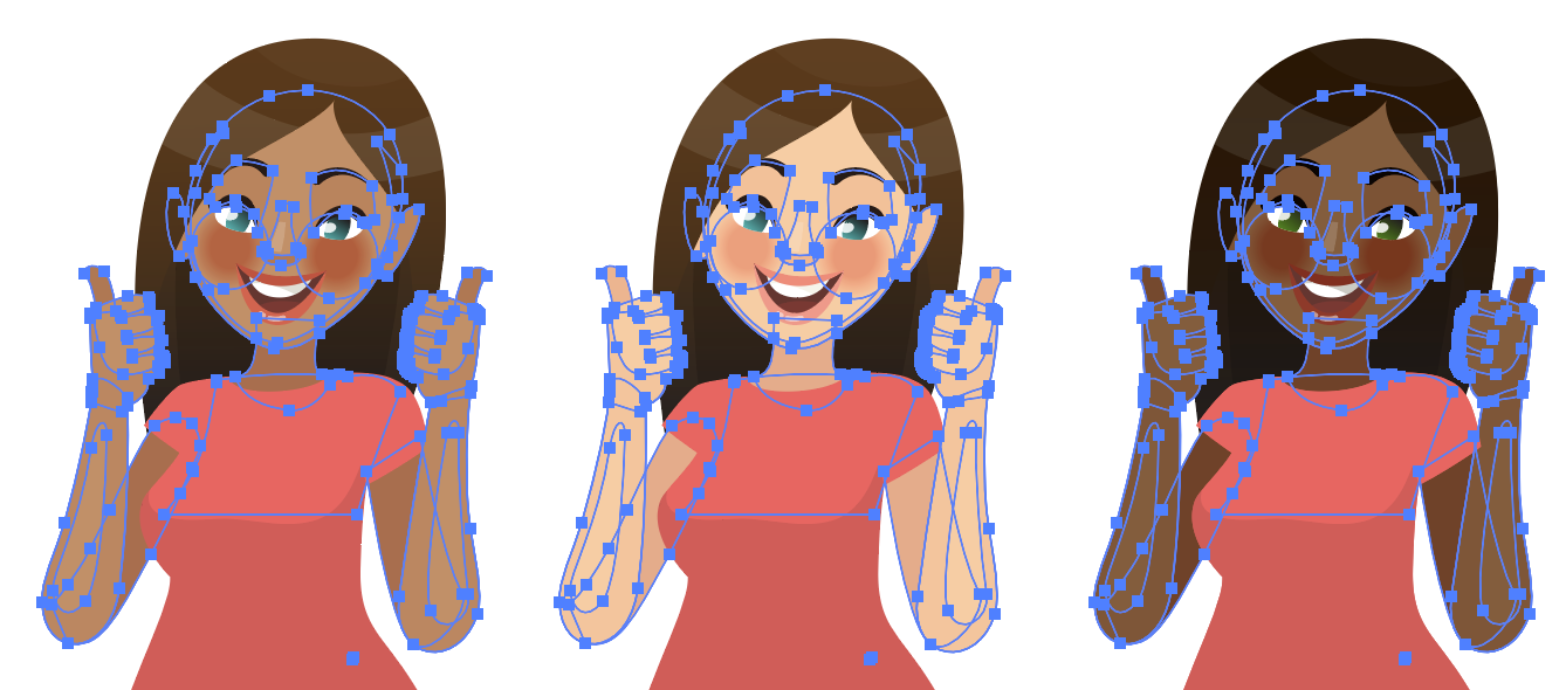
In the example below, I have a woman with a light skin tone. There is some variation in the skin tones, but all the other objects in the illustration are quite different. By using the magic wand, I can select a shape that is about in the middle of the color variation I need. With the default tolerance, I will only select the colors of her skin. I can then brighten or darken it as needed.
To change the tolerance, simply double-click the magic wand tool in the toolbar. Another way of doing this which I prefer is to hit ENTER on the keyboard. This will open the magic wand preferences. You can select a combination of the parameters and set any tolerance for each one. It doesn't allow complete control over your selection, but for quick and easy situations, it is a convenient solution. For making more complicated selections, I'll show you later how to use the Find and Replace plugin.
Menu Selections
Now that you understand the primary selection tools, I'll explain some of the menu selection items that can be very powerful.
Note: If you plan to use the Astute Graphics plugins, I would recommend skipping this section and reading the section covering the Find and Replace plugin. It has the same functionality as the select menu but adds many more features in an intuitive panel.
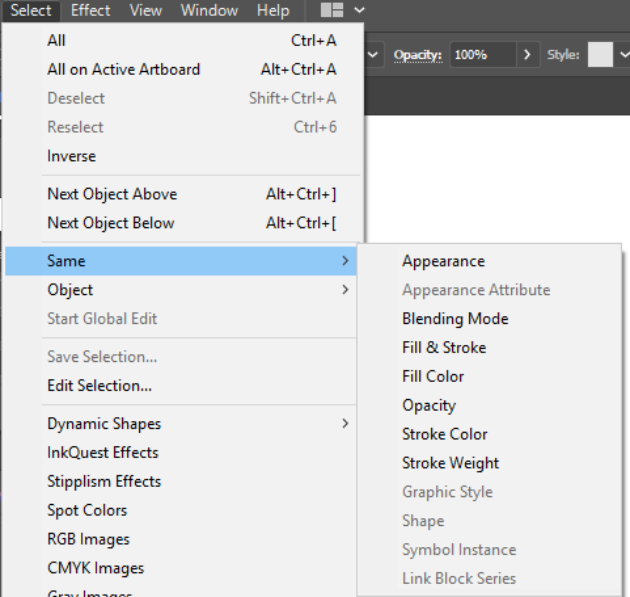
If you have an object selected, you can use the (Select > Same > Appearance) and all objects with the same appearance will be selected.
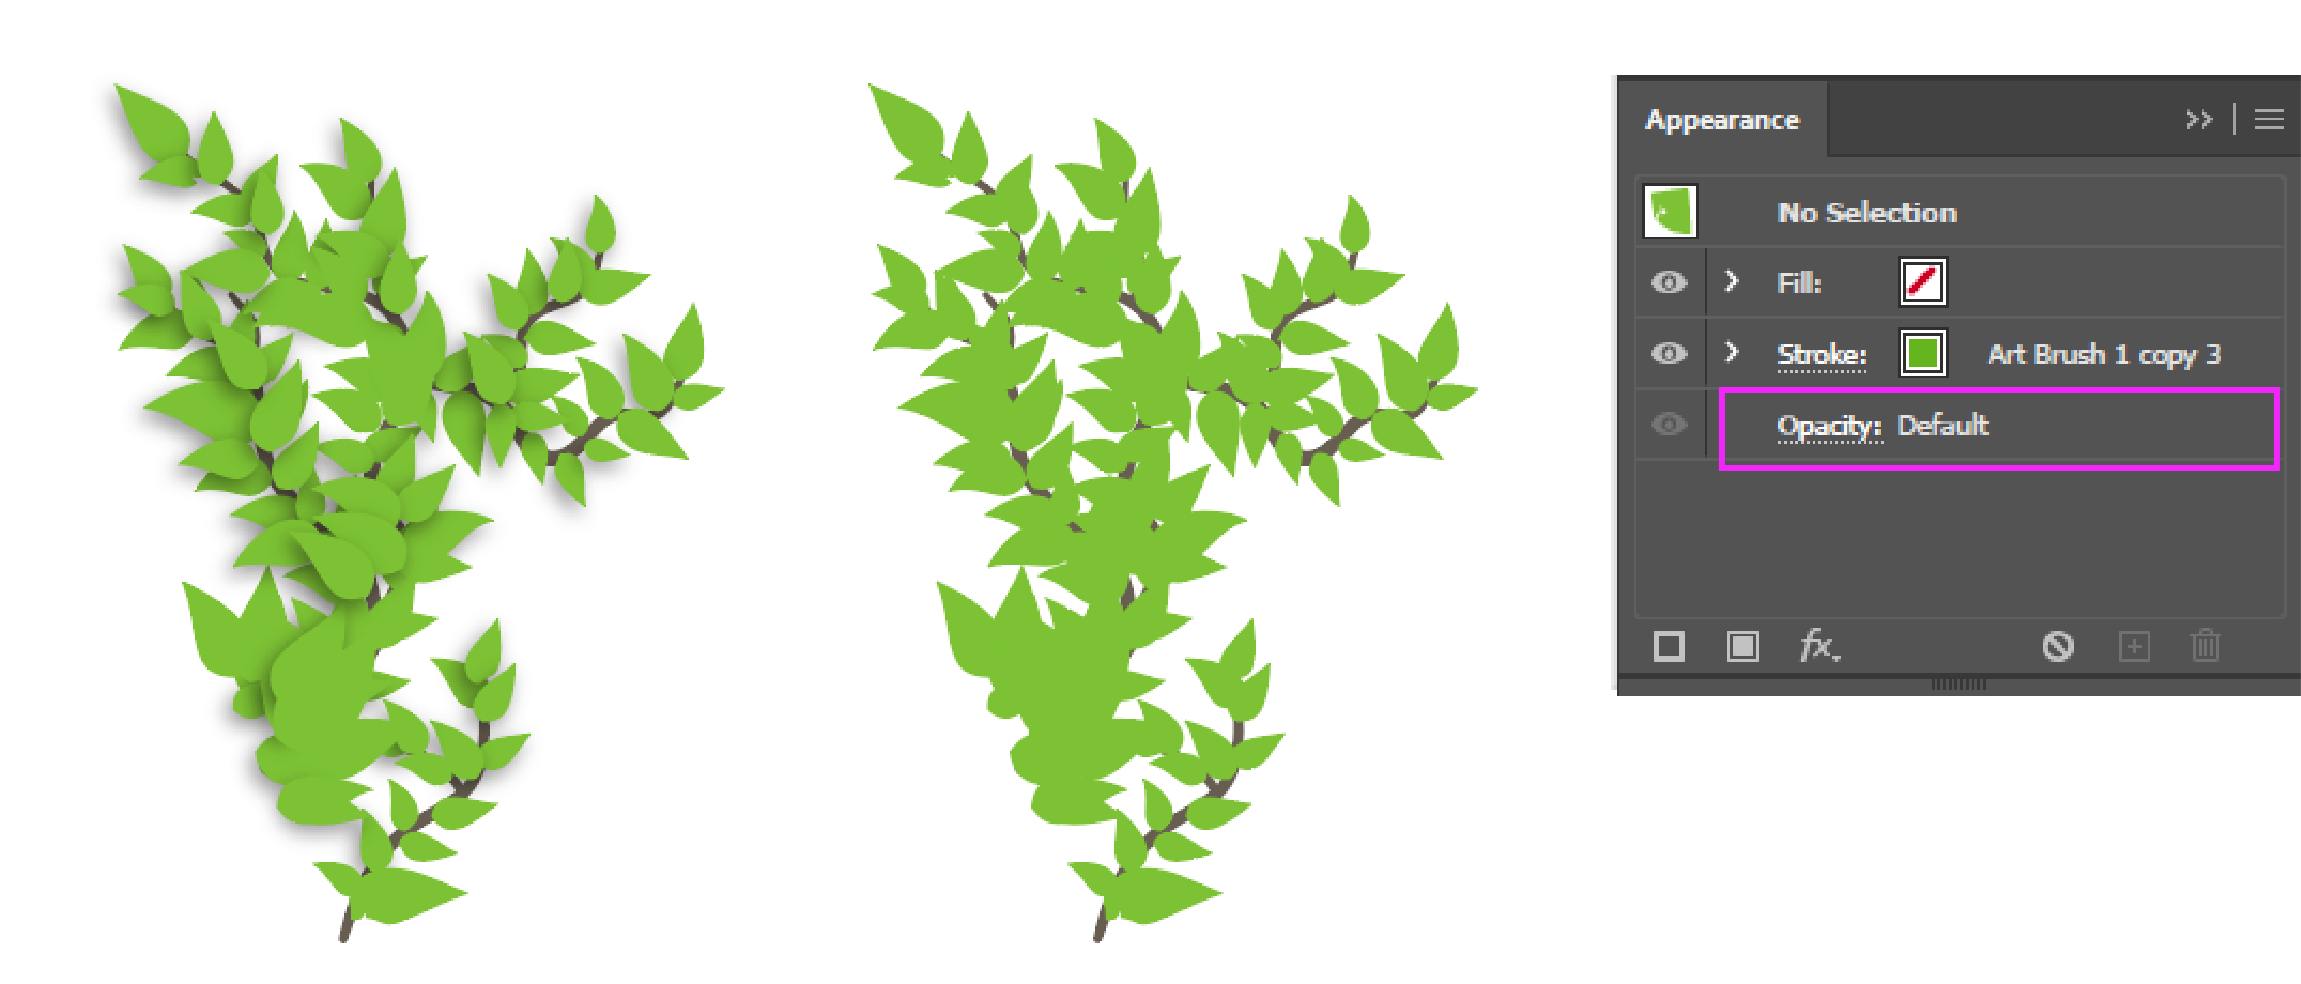
This can be very useful if you need to select objects that have a unique effect when other objects share the same color. This can significantly help in a situation where you need to adjust effects to objects. On the tree below, there are clusters of leaves. Some of these leaves have mistakenly been given drop shadows. If all the leaves are selected, there is no option to remove all the drop shadow effects, because the appearances show up as "Mixed".
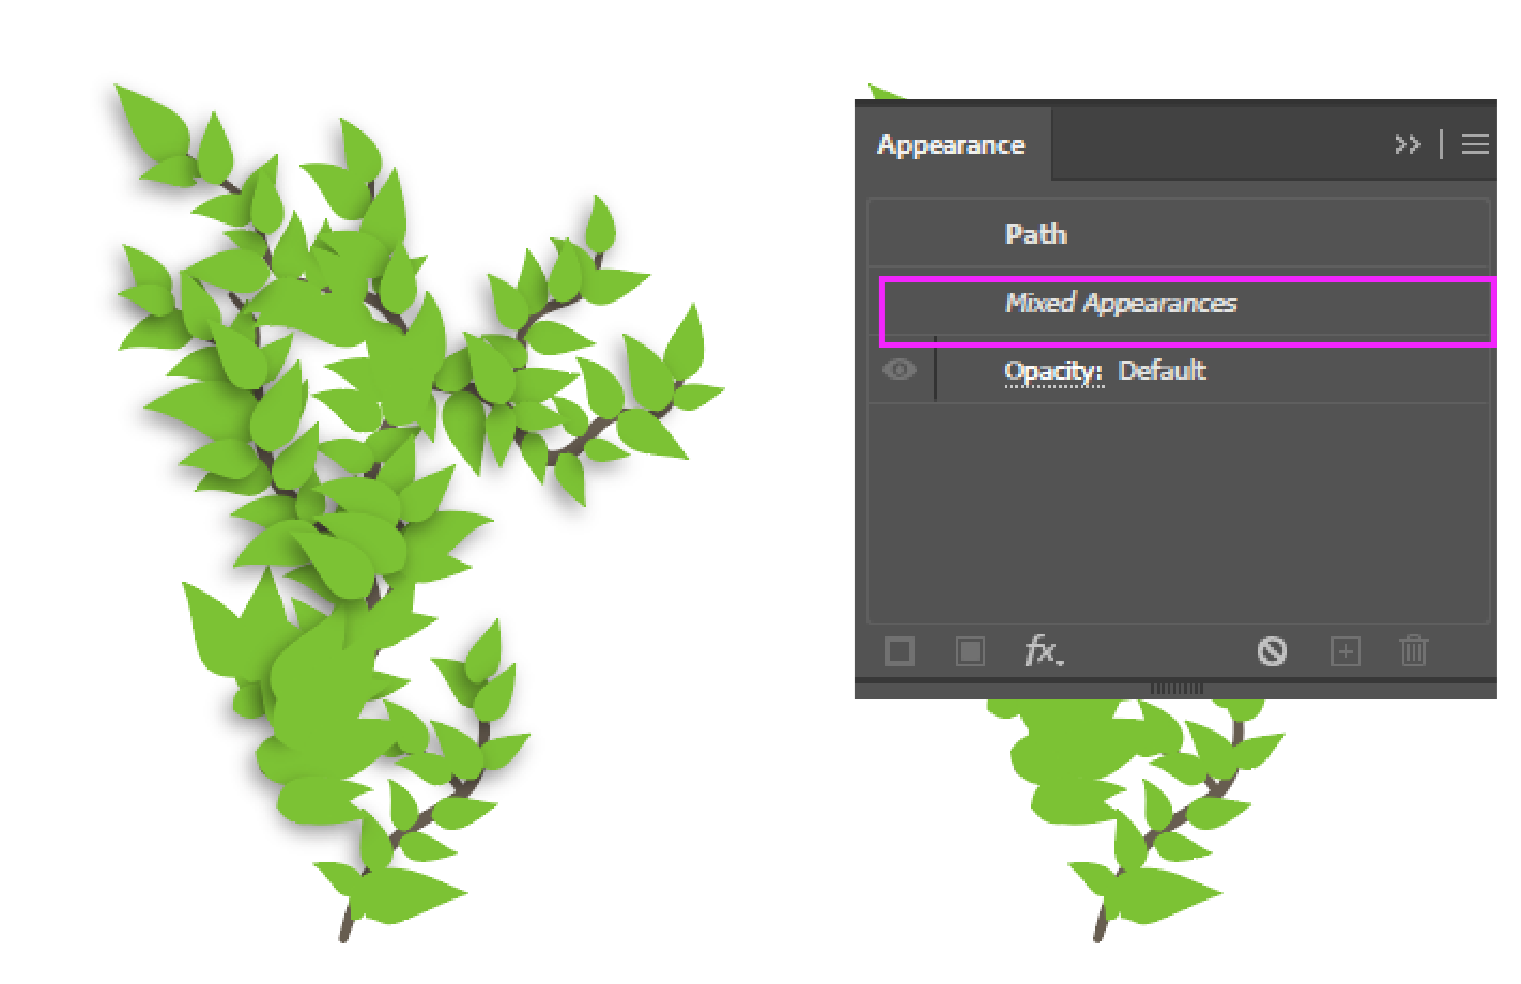
It would be difficult to pinpoint exactly which leaves do and don't have these particular shadows. Instead, I can select one leaf with a shadow, and go to (Select > Same > Appearance). In the appearance panel, I can now see the shadow effect, and remove it
You may also notice another option under the select menu (Select > Object…). There are several useful options in this menu. You can select stray points and remove them from the document, all objects on the same layer, and (in what I feel to be one of the most useful options) you can select all text objects. In this example below, I have some text objects, both point and area text. I need to change some attributes, such as font, color, and type. I can't select only the text with the magic wand tool, but I can select it using the (Select > Object > All Text Objects) option.
Saving Selections
Sometimes after making a difficult selection you may need to deselect the objects and make an adjustment elsewhere before you can edit the previously selected objects. It's not ideal when you have to go back and make the same selection again if you did a lot of work to select the objects in the first place. In a situation like this, you can save the selection, and then go back to it with the click of one button. With your desired objects selected, click the select item from the menu. Find the “save selection” button and click it. Name the saved selection in the dialogue and go back to the menu. You’ll now see that saved selection at the bottom of the dropdown.
Super Marquee
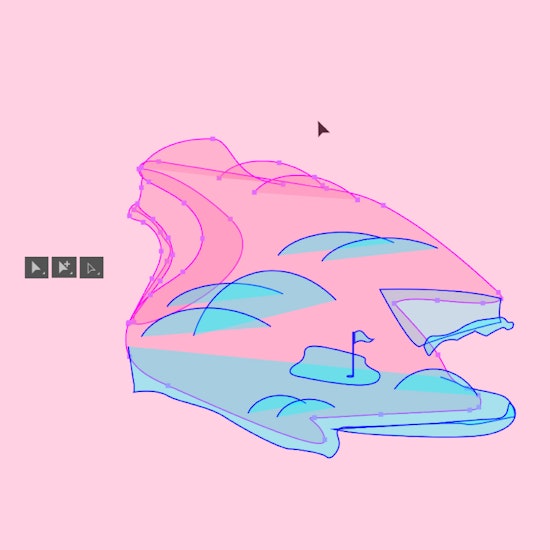
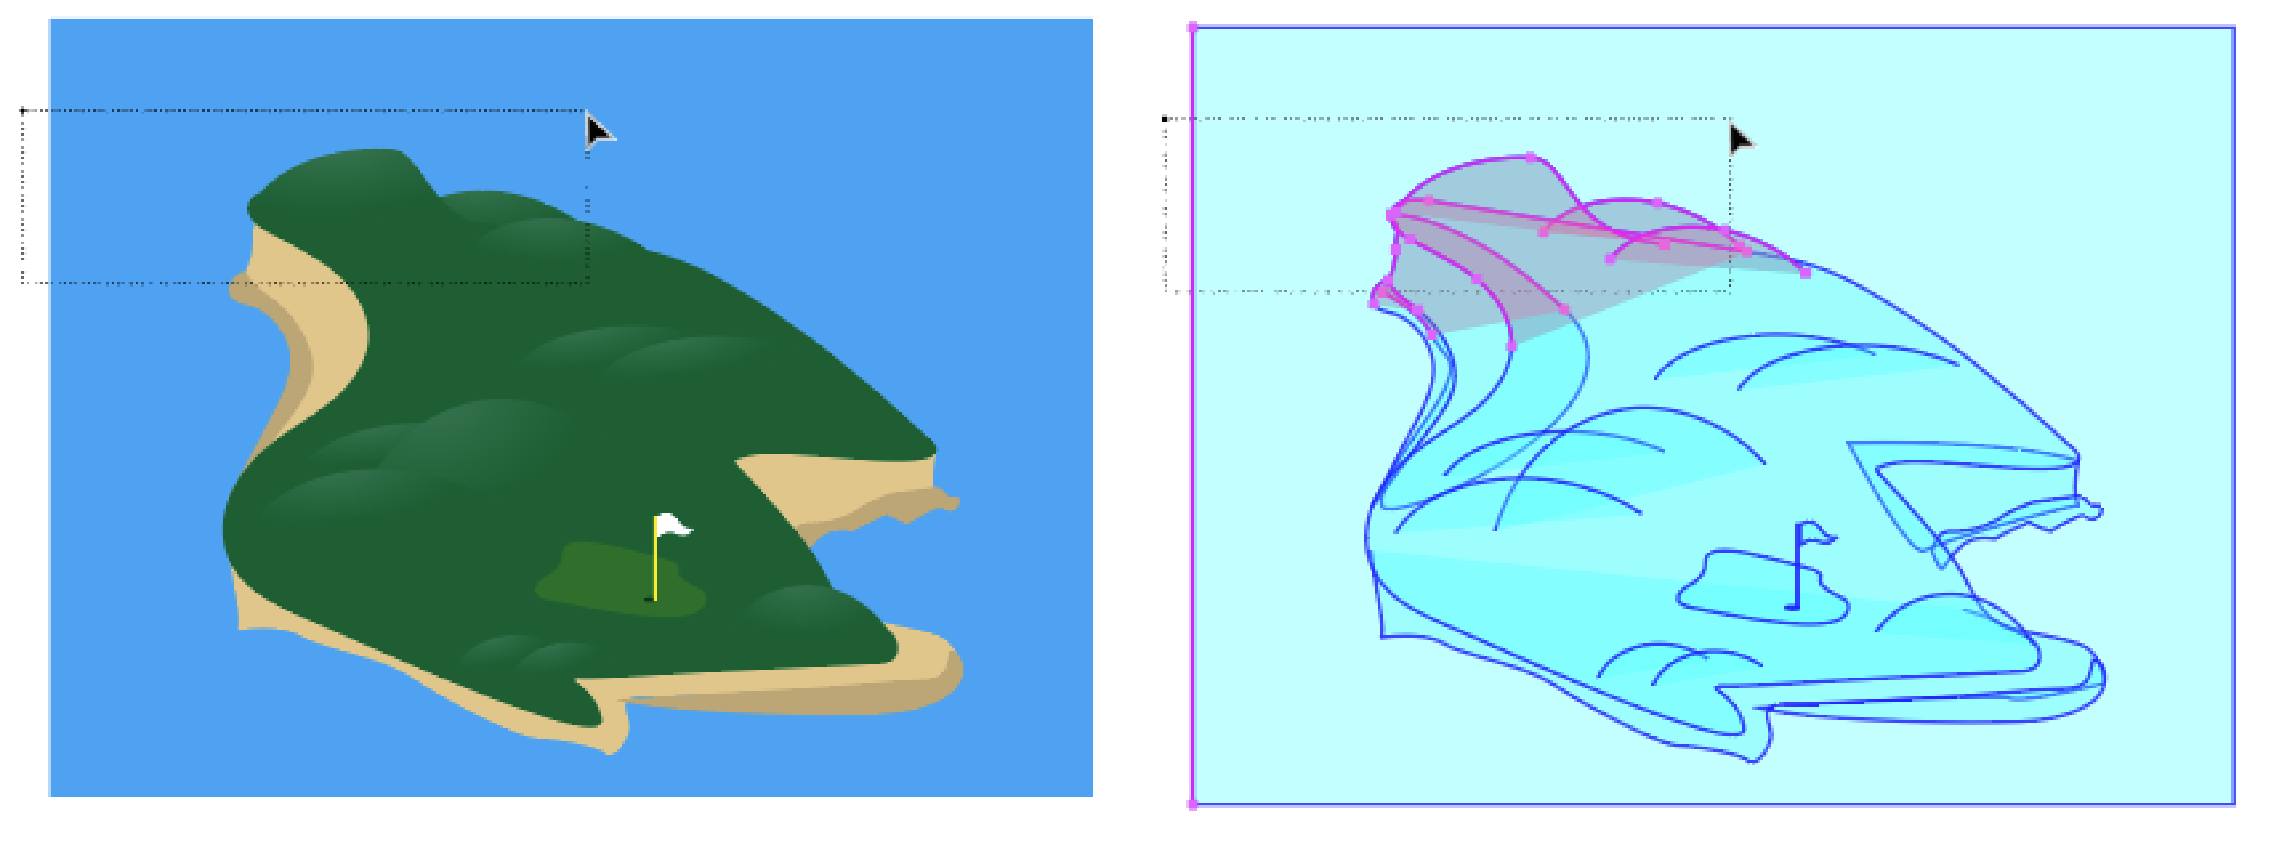
The Super Marquee Tool (part of the ColliderScribe Plugin) is an advanced selection tool for Adobe Illustrator. When making a marquee selection using the native Selection tool, it will select all objects touching the marquee. Super Marquee has the option to only select objects fully enclosed within the marquee. You can use the E shortcut to toggle enclosing mode.
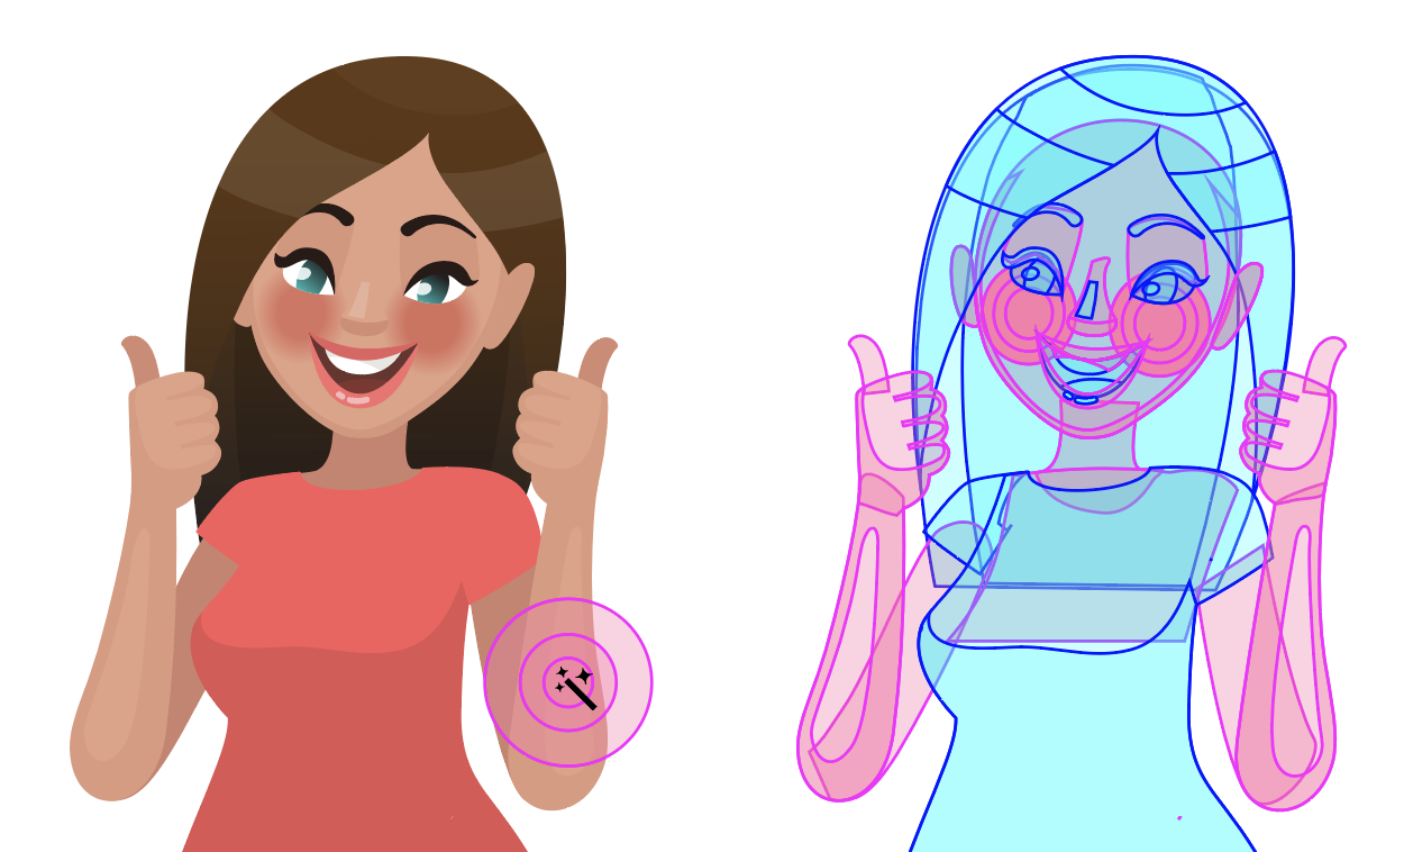
This is very useful when you need to keep certain objects out of a marquee selection. In the example, I need to select only the woman's arm. I can see that it's somewhat separated from other shapes that make up the illustration. It would be impossible to do this with a single marquee selection using the standard selection tool. Using the Super Marquee tool I can easily make a selection with a single marquee.

There are also situations where you may need to select a random variation of objects. Here I have a branch of leaves and I need to create some different colored leaves. Using the Super Marquee tool, I can use the R shortcut and toggle randomization mode. Everything contained by the marquee will be selected randomly. Using the S shortcut will re-randomize the selection, and the up and down arrow keys will increase and decrease the number of items randomly selected.
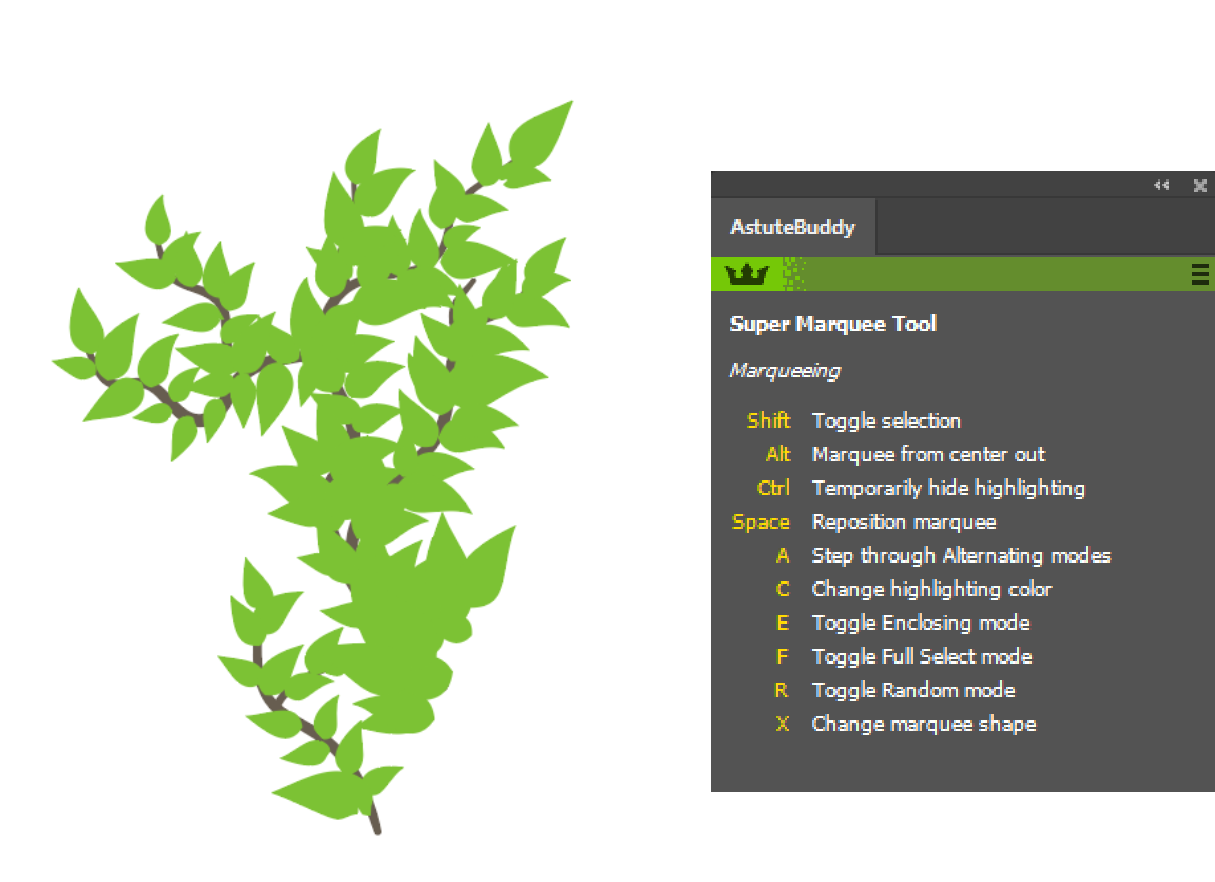
Note: Using the AstuteBuddy plugin will show you all the various shortcuts you can use to customize the selection modes.
Find and Replace
One of the most powerful selection tools in Adobe Illustrator is the Astute Graphics FindReplace Plugin. You can use it to make some of the most complicated selections and you can also automate the replacement of objects that are selected. To go more in-depth into some of the replacement features, you can view other find and replace articles. I'll be showing two examples below of how you can use the find and replace tool to make difficult selections.
Example 1
I have a stock computer illustration. It has parts on it that are black and other green spot colors. I need to add a secondary color to randomly selected green parts. I can't use the magic wand, because it will select ALL the green colors. I also can't use the Super Marquee tool because it will select from all the objects instead of just the green objects. I can use the green color.
Example 2
In the branch below, I have a wide variety of colored leaves. I need to create another version of the tree with fewer green leaves so it appears to be from a tree where some of the leaves have fallen. I want to make sure only the green leaves are selected, but I can't select all of them. Using the find and replace panel, I can set it to select colors that are close to green, and then option-click the selection button to select a random number of green leaves.
Select the World
Now that you know every possible way to select objects in Adobe Illustrator, there shouldn't be a single project that you can't figure out. Of all the tools we discussed, I have found that the Astute Graphics plugins have become such a vital part of my workflow. If you get to know them, I'm sure you'll agree.