10 Min Skills - Making sketch lines
4 minute readIn this tutorial we are going to show you how to quickly make hand sketched looking art with just three tools and a few simple steps.
You will need:
VectorScribe – Extend Path Tool
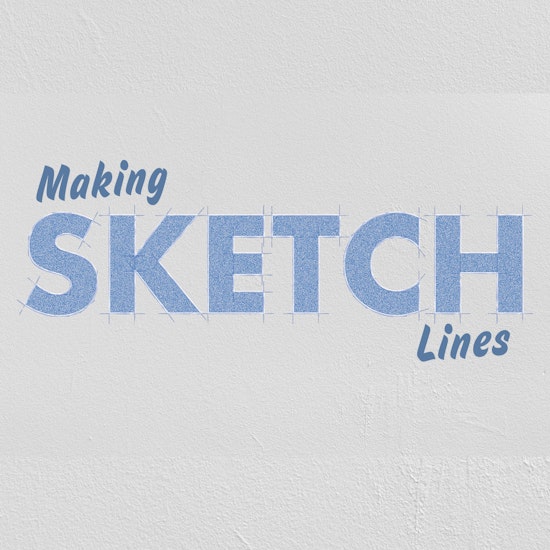
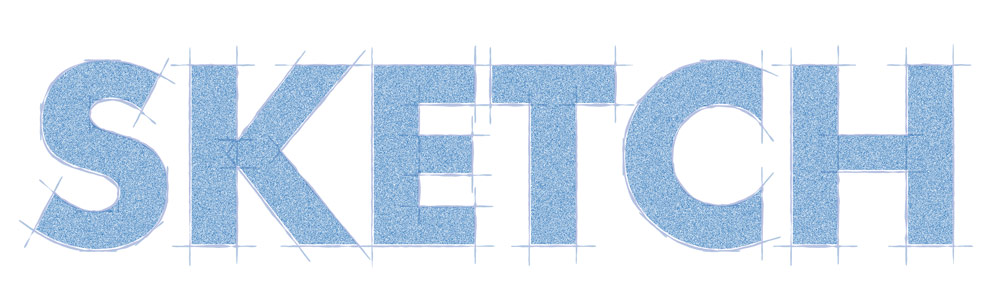
Step 1. First create a word on your document, in this instance we will use the word SKETCH. I have used FUTURA BOLD. Give your type a fill and then make a copy underneath and reverse the fill and stroke.

Step 2. We are going to expand the outlined version by going to Type > Create Outlines

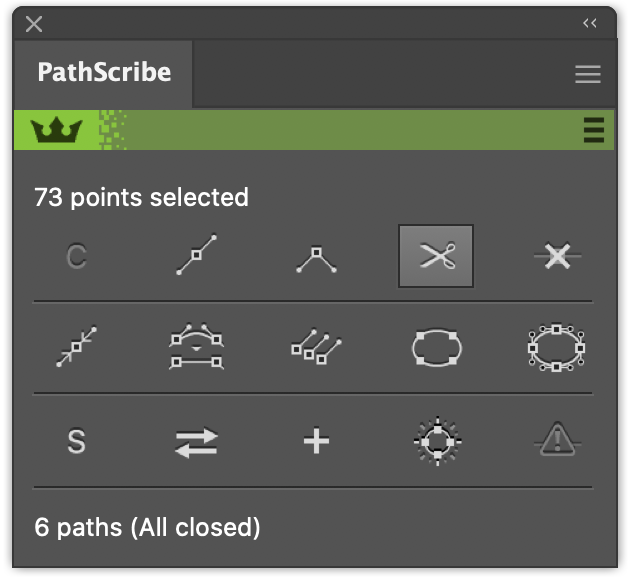
Step 3. Open up the PathScribe Panel (Window > Astute graphics > PathScribe) and with the outlined text selected, click on the scissors icon which is to split all paths in the letters. You won’t see any difference but you can now select each section of the letters individually.
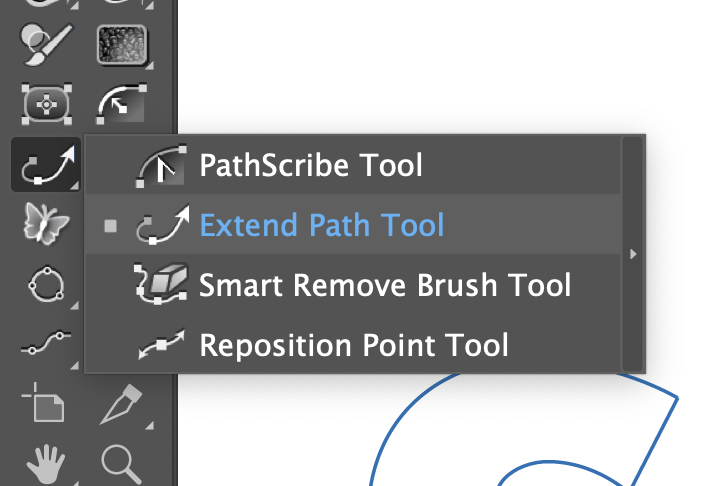
Step 4. Keep all the text selected and go to the tool bar and double click on the Extend Path tool. Make sure that in the prefs panel you have Extend All Selected Open Paths ticked. Move the tool to any point on the text and slowly drag horizontally out a little. You will see a small red annotation showing that you have a point selected to extend.
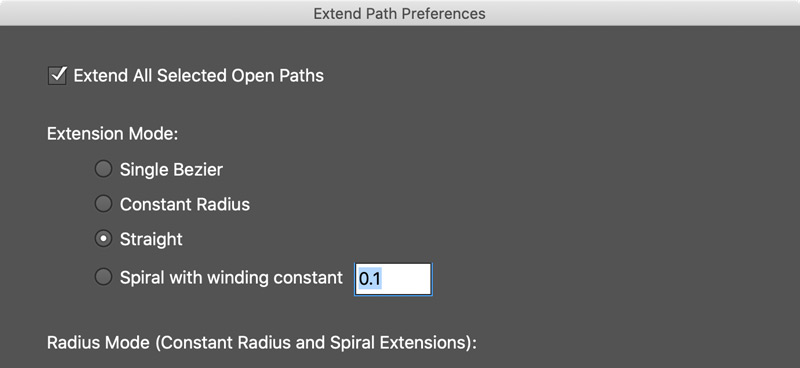
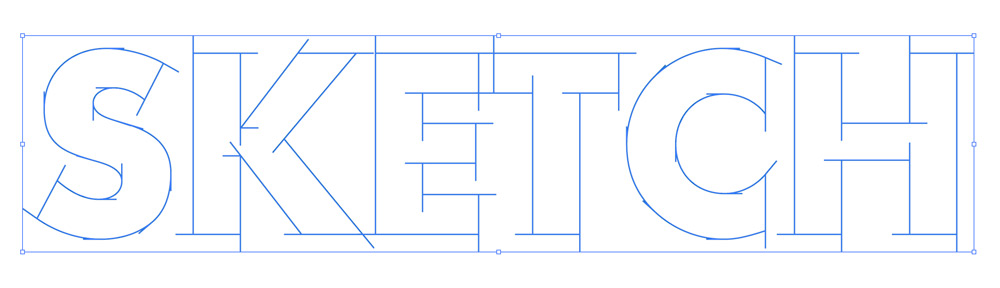
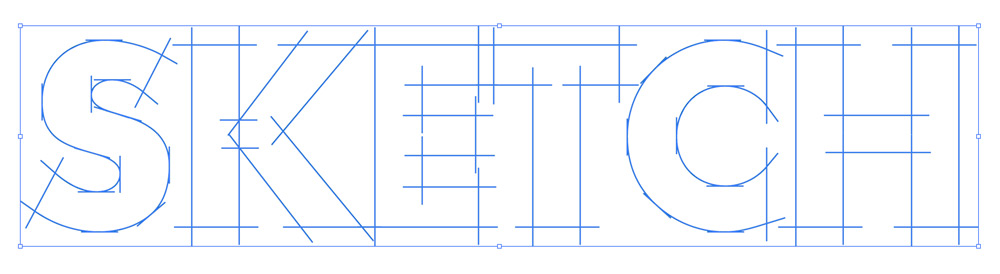
Step 5. Now do the same, from the same point and extend vertically. You will see that all the paths in the word extend in each direction.
Step 6. Now you have extended these paths, make sure you’ve downloaded the Pen & Paper Graphic Style Pack and open the pack up in your Graphic Styles Panel (Open Graphic Style Library > Other Library… > locate where you saved the pack to.
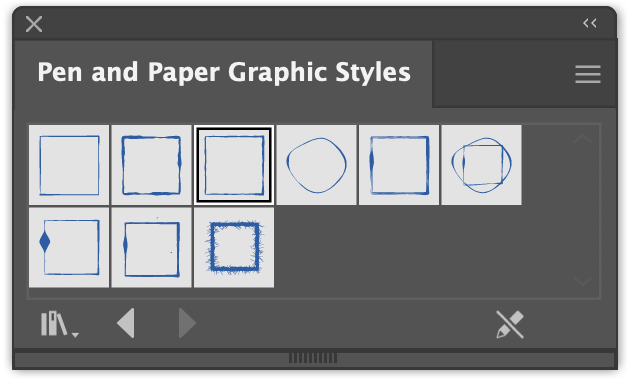
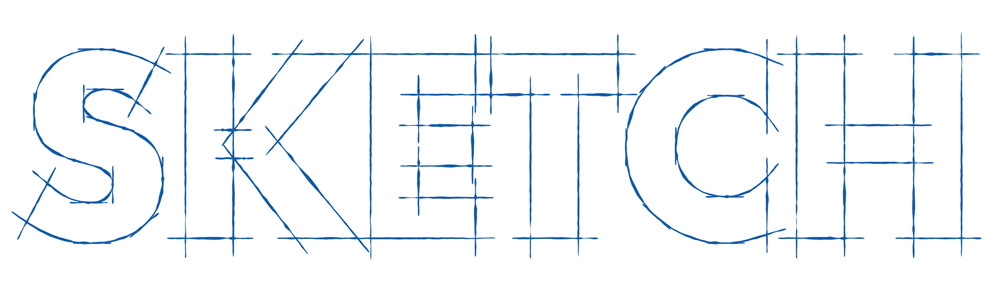
Step 7. With all the paths selected, chose any of the pen sthyles, preferably a thinner one such as ‘Technical pen on Rough Paper’. Once the style applies, reduce the opacity to about 35%.

Step 8. Now Place the original text we kept with the Fill color on top of the lined version, it doesn’t matter if it’s pixel perfect, just close enough.

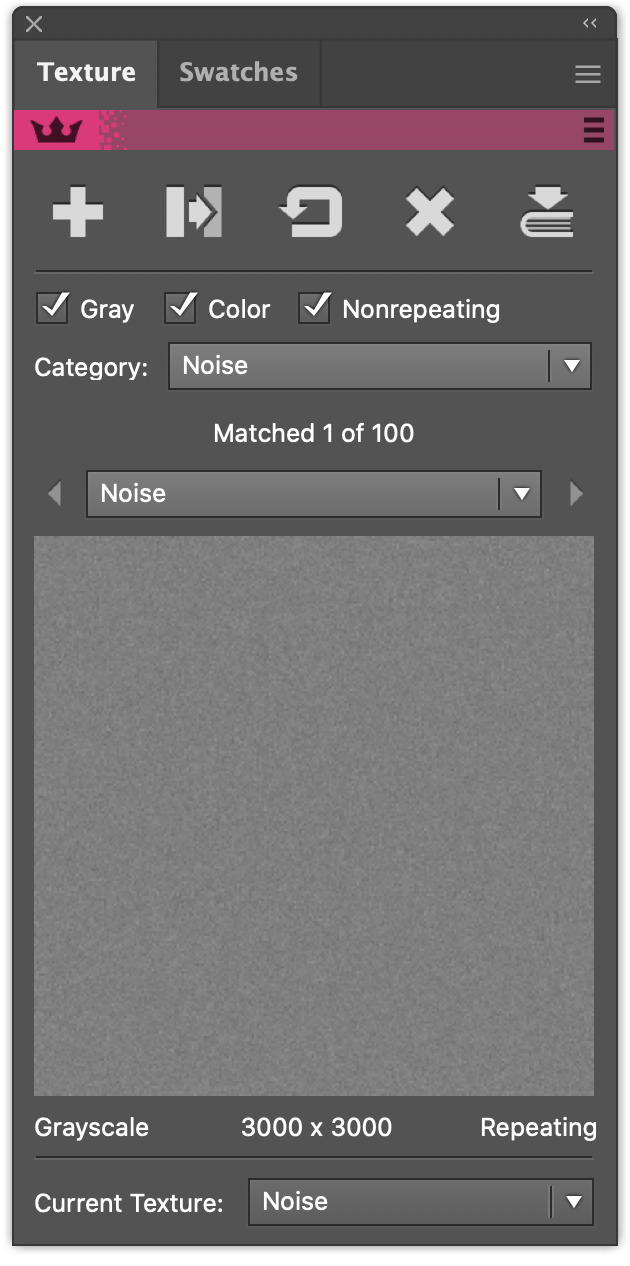
Step 9. Now we’ll add a texture to the filled text. Open Texturino (Window > Astute Graphics > Texturino) and select Noise (but play around with different textures, you can upload your own using Texture Manager in Texturino). Apply the texture. Now change the blend mode to Knockout, move this layer to the back and add a small 2pt white stroke. This just adds a little space between the sketch lines and the filled type
Step 10. Add a paper texture behind the text (this one is from Photo by Lorenzo from Pexels ) and in a few simple steps, 3 tools in your Subscription and a FREE pack available to all our subscribers you’ve created a really cool effect. You can still change the texture and also still extend or decrease the size of the sketch lines using Extend path.