How to create realistic vector brushes in Adobe Illustrator
5 minute readCreating custom vector brushes can take your artwork to the next level, whether you're aiming for loose ink strokes, expressive paint splashes, or detailed watercolor textures. These brushes let you combine the precision of vector art with the organic feel of real-world tools like markers, pens, and calligraphy brushes.
In this step-by-step guide, you’ll learn how to:
1. Download free brush artwork from Adobe Stock
Start by visiting Adobe Stock and searching for free assets that include:
Vector ink strokes
Marker or calligraphy pen lines
Paint splash or splatter effects
Graffiti brush patterns
Artistic splatter textures
Use search terms like vector brush, paint stroke, splatter texture, or ink pattern. Once downloaded, open the file in Illustrator. These files typically contain vector paths that you can convert into custom brushes.
Tip: Choose files with clean paths and minimal effects for easier brush creation.
2. Clean up the vector paths with VectorFirstAid
Stock files often contain unnecessary anchor points, clipping masks, or messy shapes. Before converting them into brushes, use VectorFirstAid to tidy them up.
Why this step matters:
Clean vector strokes mean:
Smaller file sizes
Faster Illustrator performance
Smoother, more natural brush behavior
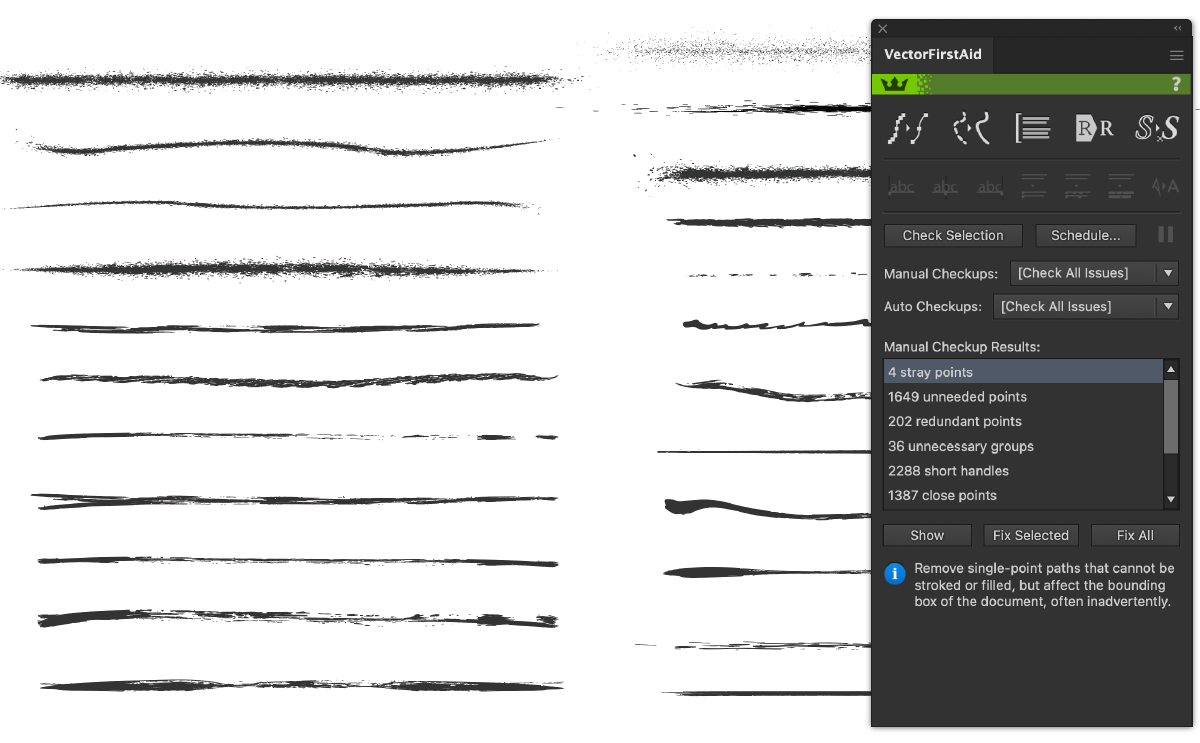
How to use VectorFirstAid:
Open the artwork in Adobe Illustrator.
Go to Window > Astute Graphics > VectorFirstAid.
Select the brush stroke you want to clean and click Check Selection or Check Document.
Click Fix All to remove redundant points, unused swatches, and unnecessary complexity.
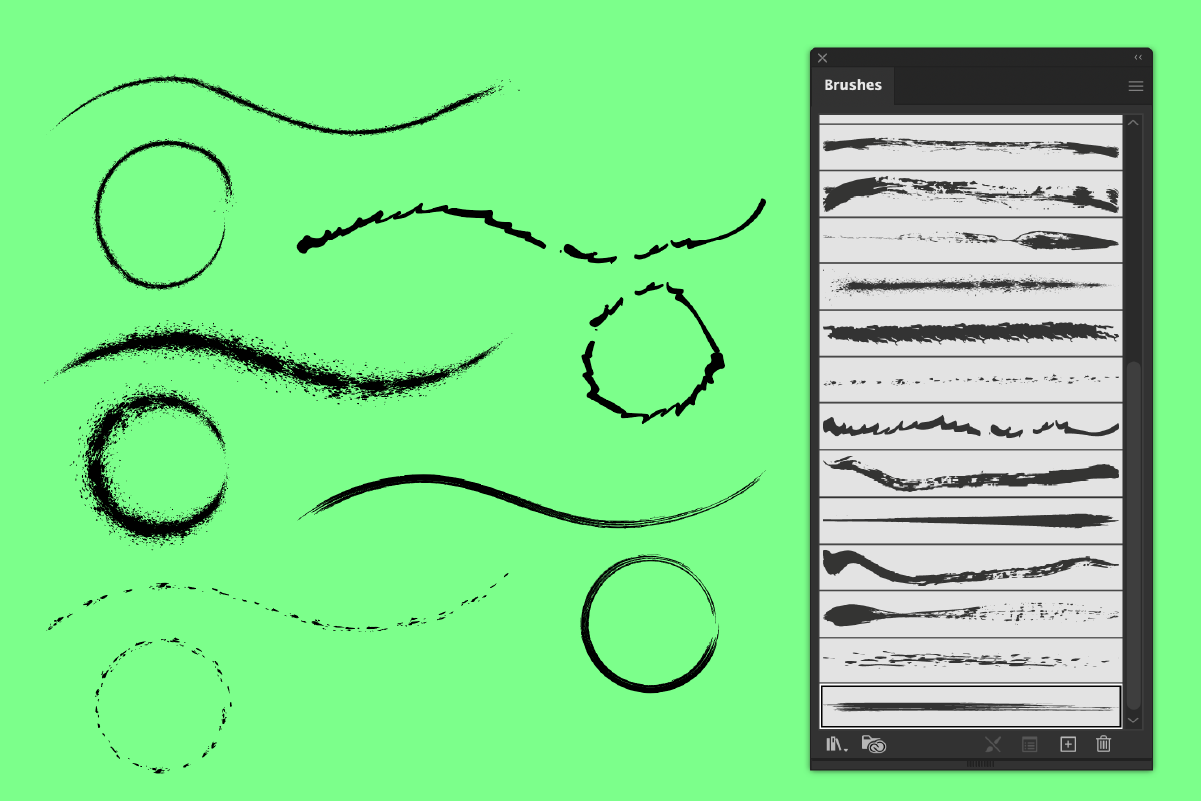
3. Create a custom Art Brush in Adobe Illustrator
Now that your vector artwork is clean, you can turn it into a reusable Art Brush.
Steps to create your brush:
Select the entire vector brush path (you may need to group all the paths together if, for example, they contain splats or splashes).
Open the Brushes panel (Window > Brushes).
Click the plus (+) icon and choose Art Brush.
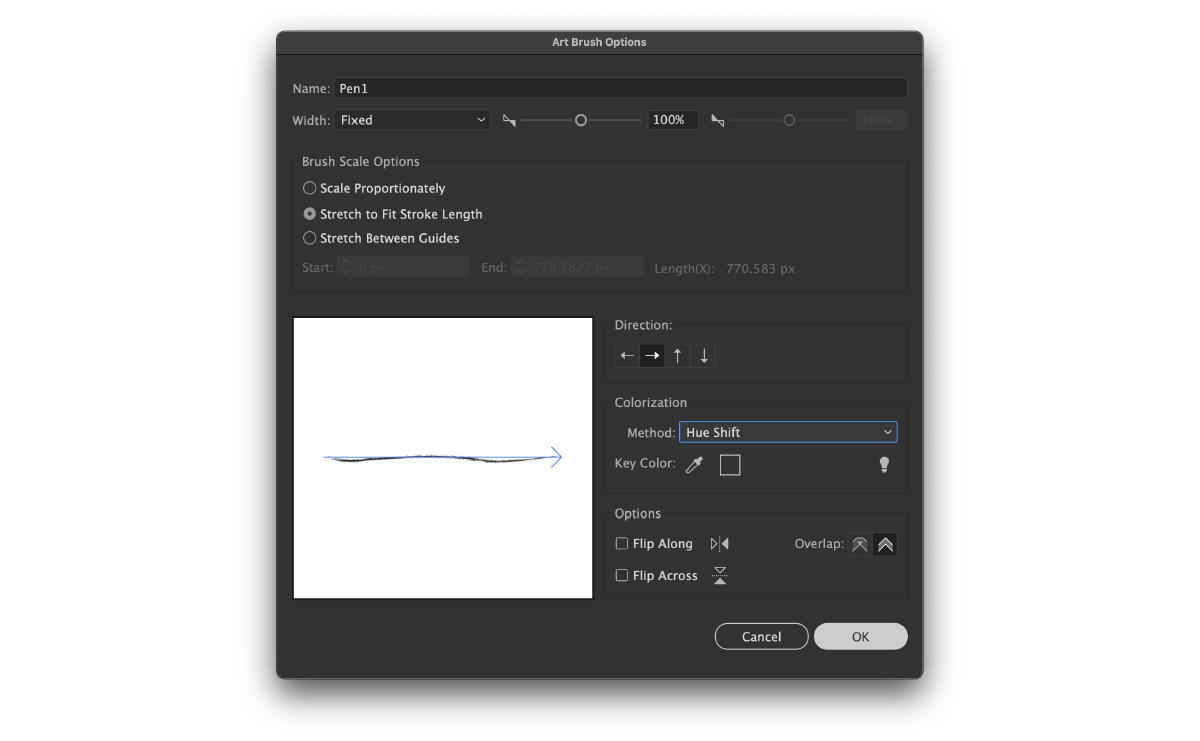
In the Art Brush Options dialog:
Name your brush.
Set the direction (left to right works for most strokes).
Choose Stretch to fit stroke length.
Select Hue Shift if you want the brush to change color when applied to different strokes.
Click OK, and your custom brush is ready to use.
Apply it to any closed or open path.
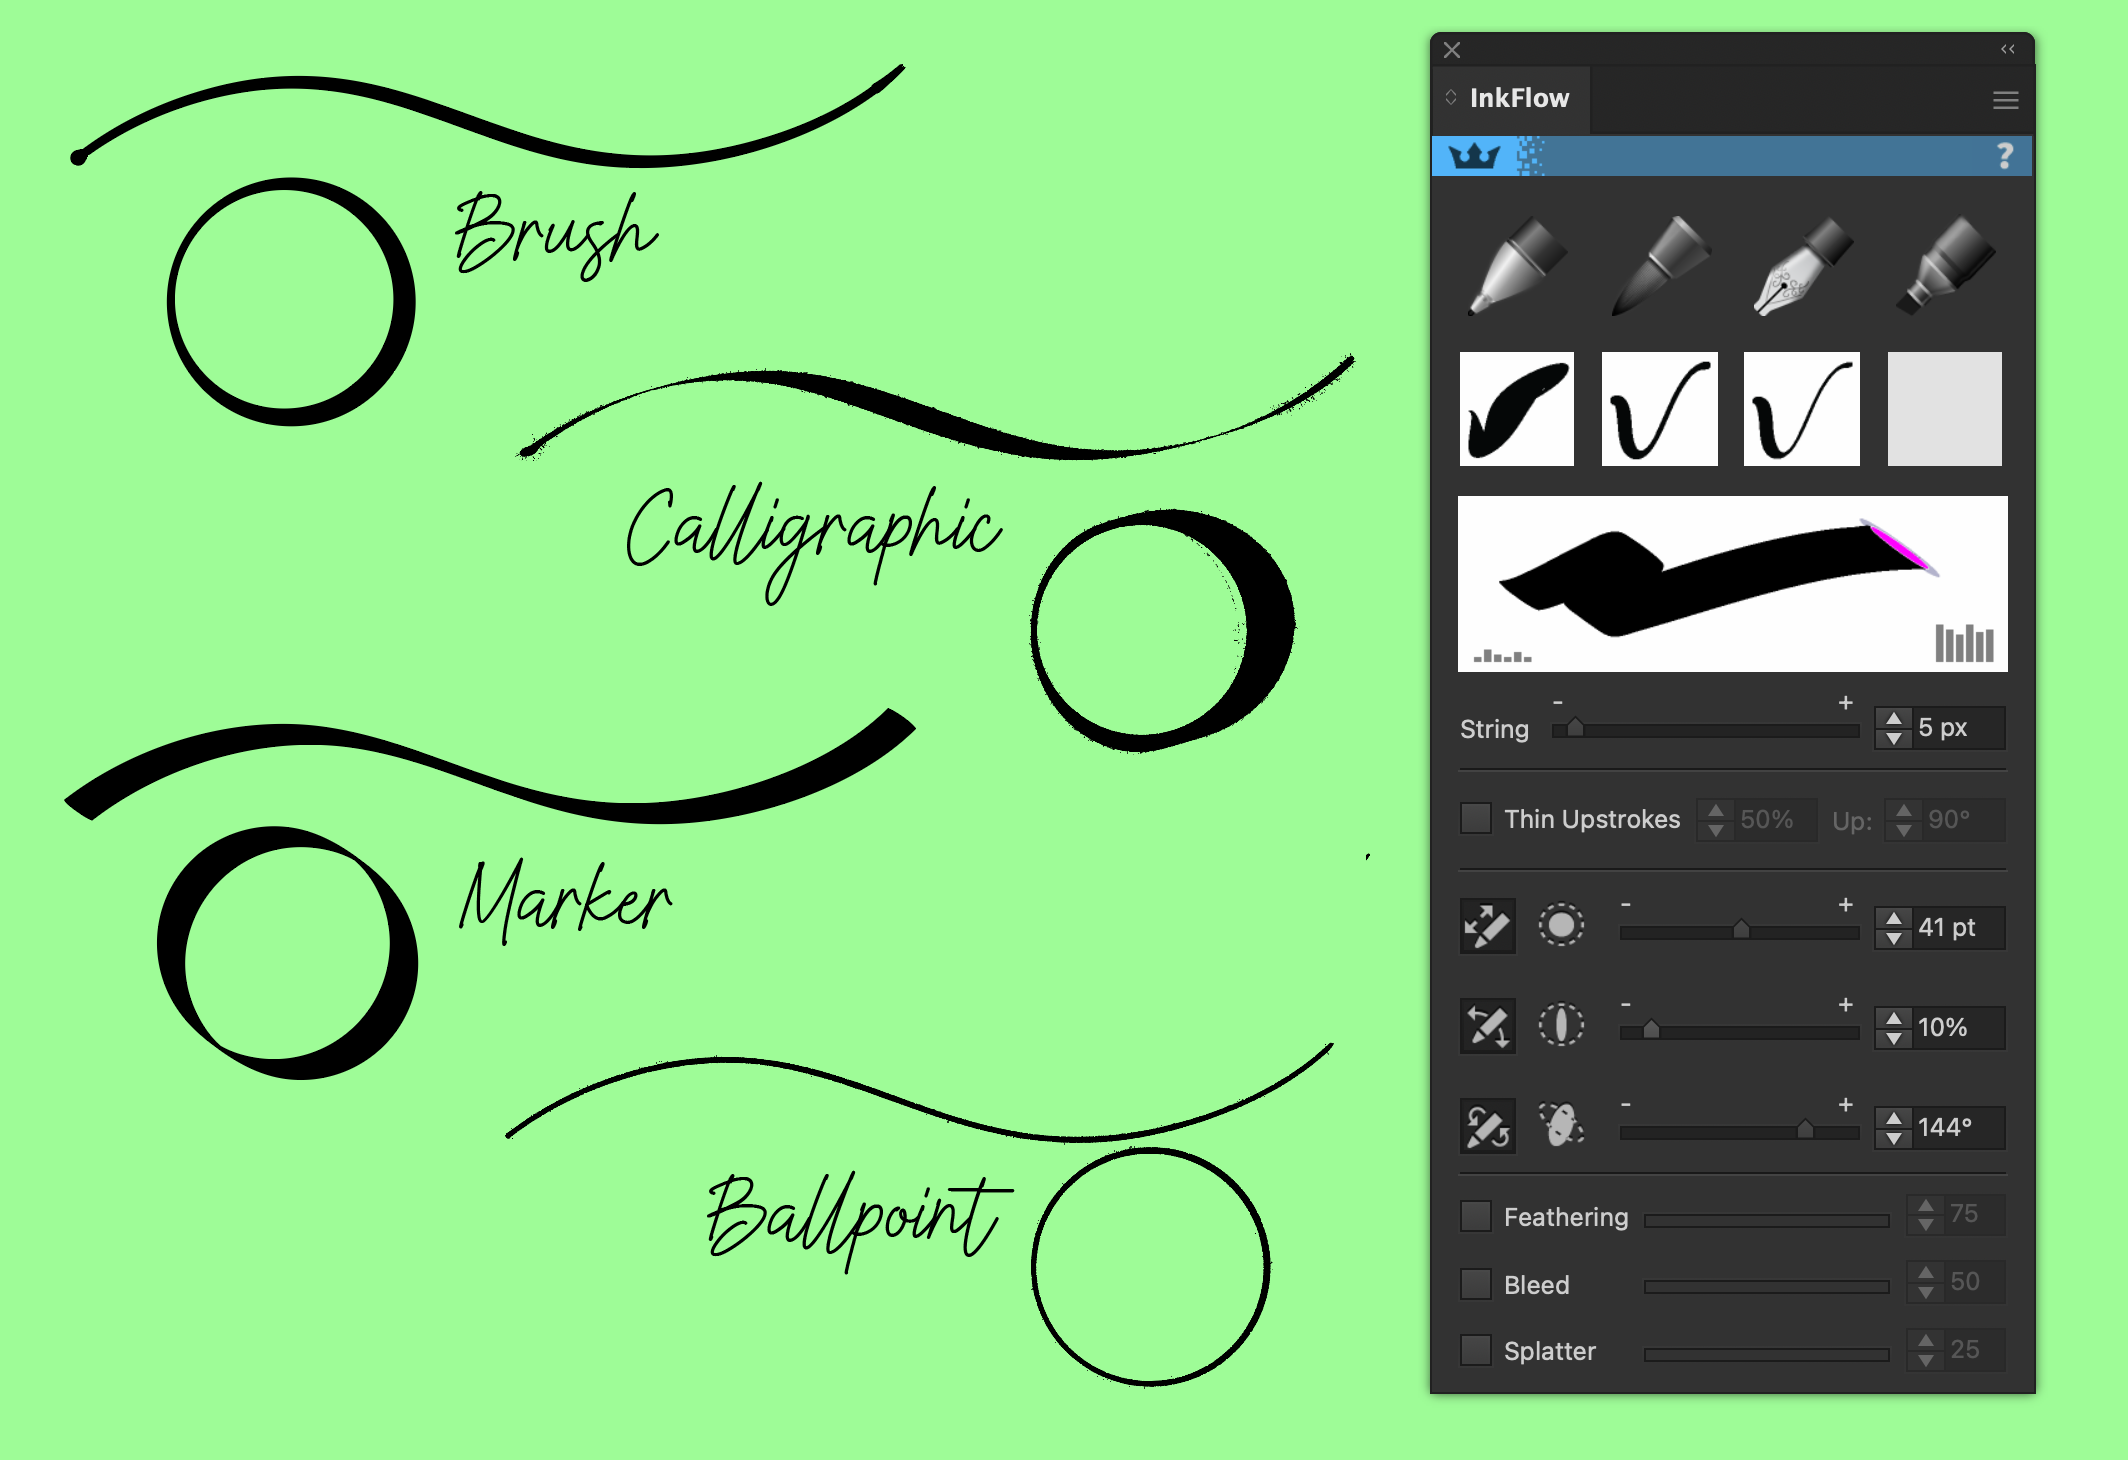
4. Skip the Manual Work with InkFlow (Optional but Powerful)
If you want to create expressive, pressure-sensitive strokes directly inside Illustrator, InkFlow is a faster and more intuitive option.
What is InkFlow?
InkFlow is an Astute Graphics plugin that lets you draw vector lines with natural variations in weight, pressure, and flow. You can mimic real marker pens, calligraphy brushes, or ink splashes with zero setup.
How to use it:
Go to Window > Astute Graphics > InkFlow.
Choose from built-in pen styles (marker, brush pen, splash, etc.).
Use the InkFlow Tool to draw your stroke.
Tweak the settings in the InkFlow panel:
Adjust stroke weight.
Change the ink texture or bearing.
Fine-tune pressure curves for sensitive stylus input.
InkFlow strokes are non-destructive, so you can adjust them after drawing. You can also save your brush style as a Graphic Style to reuse it across different paths. You can try InkFlow for free for 7 days.
Whether you're sketching in Illustrator, adding expressive splatter effects, or building a custom brush library for graffiti-style vector art, the process of creating realistic vector brushes opens up huge creative potential.
Choose your workflow:
Use Adobe Stock, clean up with VectorFirstAid, and build a reusable Art Brushes in Adobe Illustrator.
Or, draw directly with InkFlow for fast, pressure-sensitive inking.
With these tools, you can add texture, personality, and fluid movement to your digital artwork while keeping everything 100% vector.