Creating an ‘IT’ inspired poster with Stipplism
5 minute readClowns always seem to be the theme of some sort of horror movie. Some of these movies nonetheless have given us some pretty cool artwork to enjoy. Pennywise from the movie "IT" gives us a fair share of the creeps and a new sequel is coming out this year. "The Joker" is also gearing up to be a scary movie in 2019 of which you can gain some additional artistic inspiration.
Finding or Creating your Clown
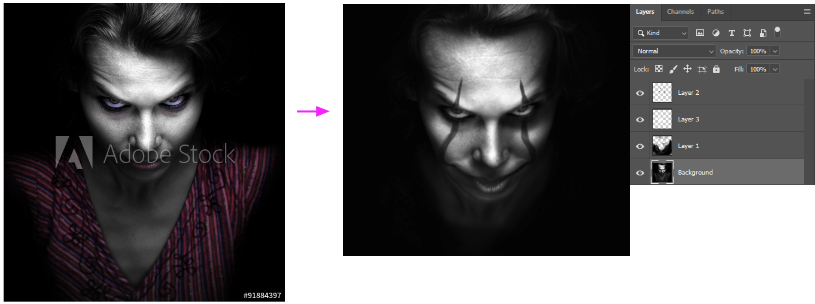
The first thing you need is a base image to use for the clown. You could either illustrate one yourself, or use an actual photo. For simplification, I will use a stock image that I found on Adobe Stock in this project. I will primarily base this project off the look of Pennywise. If you are using a photo, make sure you have some good contrasting areas that will show up better when applying Stipplism to it. Using Photoshop, I took the original image, and brought it into photoshop. Using only a black brush with different variations of opacity, I painted out some of the details I didn't need, and painted other areas of the image to increase overall contrast.
Converting your image to stipples.
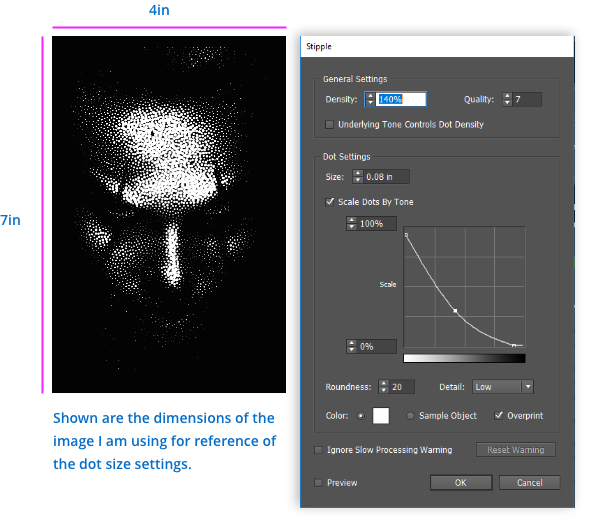
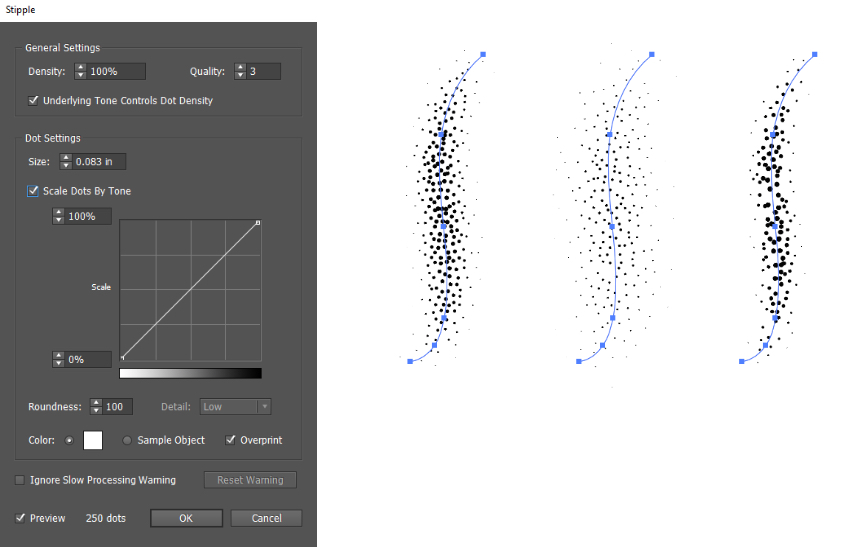
Bring your illustration or photo into Adobe Illustrator, and then you can start the stippling. There are a few ways you can access Stipplism. Either select (Effect > Stipplism > Stipple) or you can select the (FX) button in your appearance panel, and choose the Stipplism effect. Mess around with the different options for a while until you get the effect you’re looking for. You can use the image below as a reference for your own settings. If you want the more solid areas filled up, such as the nose and forehead, make sure that ’Underlying Tone Controls Dot Density’ is unchecked. With that option unchecked your density percentage will have more impact on the result.
Increasing the quality and density can affect processing time a lot. For projects that don't rely on having perfectly round stipple dots, you can set the 'Roundness', 'Detail', and 'Quality' parameters down significantly without any negative side effects. Sometimes you will still get a slow processing warning. You may want to abort, but it doesn't always take as long to process as you may think.
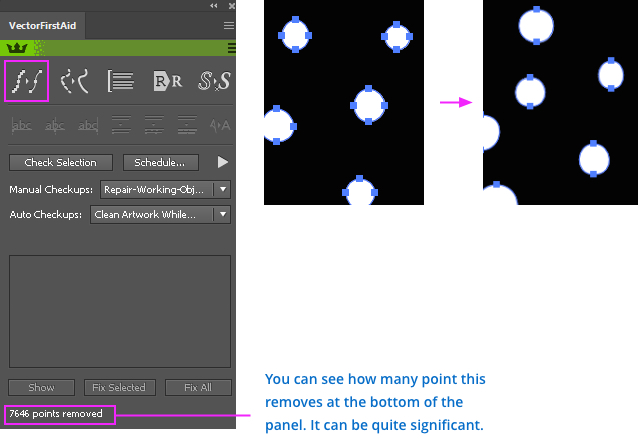
Once you have the setting dialed-in just right you can expand your effect by going to (Object > Expand Appearance). You will likely have thousands of dots to deal with. This can slow down your computer and workflow a lot. You can use the VectorFirstAid plugin to help with this. Most circles in illustrator are created with 4 anchor points. You really only need 2 anchor points to create a decent looking circle. If you (Alt + Click) the 'Smart Remove Points' option on the Vector First Aid panel, you can cut down your computers processing demand by 50% by setting the tolerance to about 20.
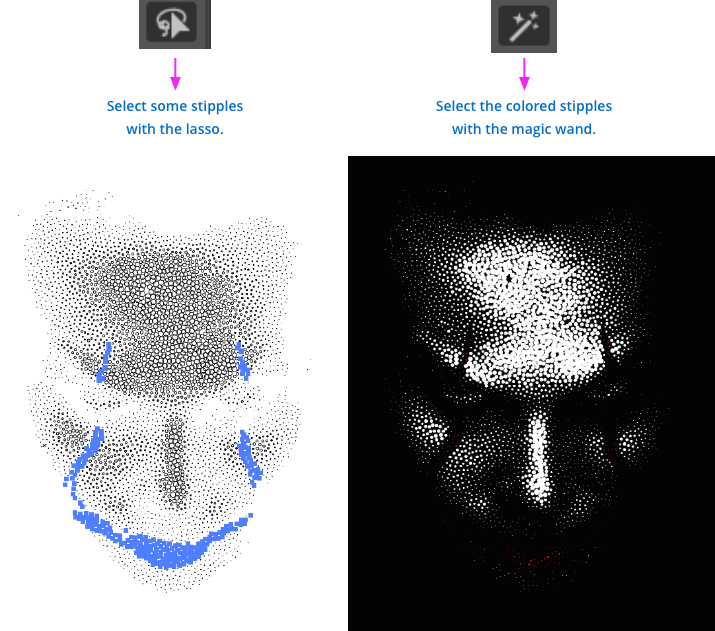
With all your stipples expanded and optimized, you can start messing with the color a bit. I want the lines on the face colored red. To do this, I use the lasso tool. I will drag it around all the objects I want selected, and then choose a nice, bright, red color in my swatches panel. In the example, most of the red stipples are too hard to see very well. To solve this problem, you can use the magic wand tool.
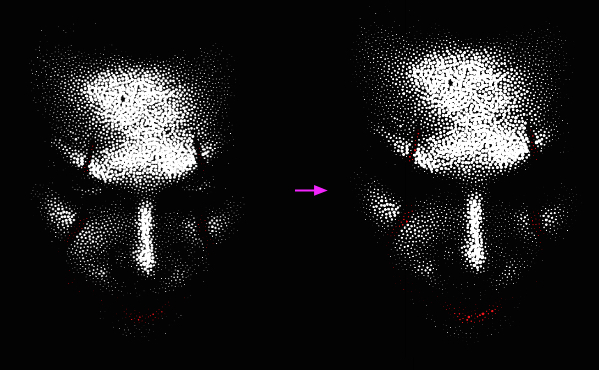
With the red stipples selected, you can go to (Object > Transform > Transform Each). I set it to scale each selected stipple to 180%. This made the red dots much more noticeable, without awkwardly scaling them. I also deleted the eyes, because I felt it looked more mysterious without them.
Create the smoke
Next, create a basic line. I prefer to draw one out by hand using either the pencil tool, or the DynamicSketch plugin. Give it a relatively large width and the tapered profile. Go to (Effect > Blur > Gaussian Blur) or simply select the blur icon if you have the Stylism Panel.
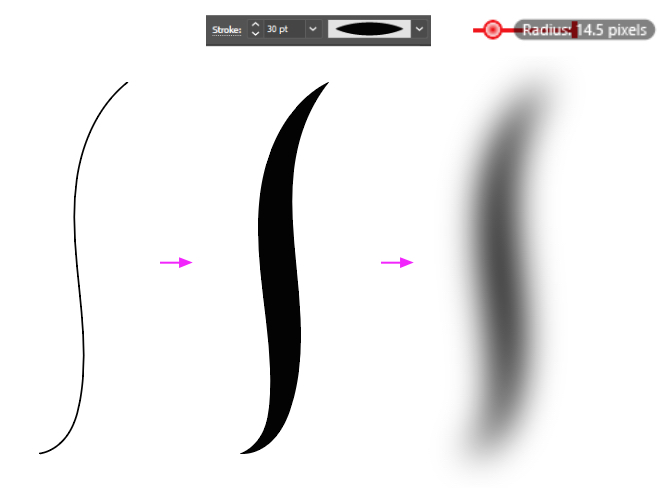
Apply the Stipplism effect to the blurry line you just created (make sure the original line is black, but have Stipplism set the color to white). You can use the lowest quality settings and a lower density because you don't need the mist and smoke to appear as detailed as the face. You can copy the lines and adjust the blur and Stipplism settings to get some variations.
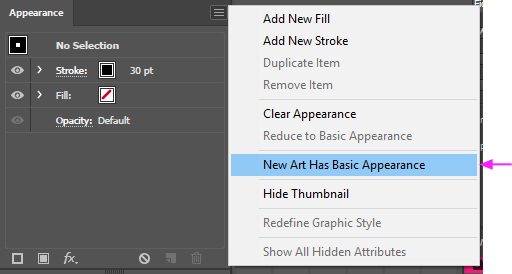
To create each line of smoke, first ensure that the 'New artwork has basic appearance' in the appearance panel is unchecked.
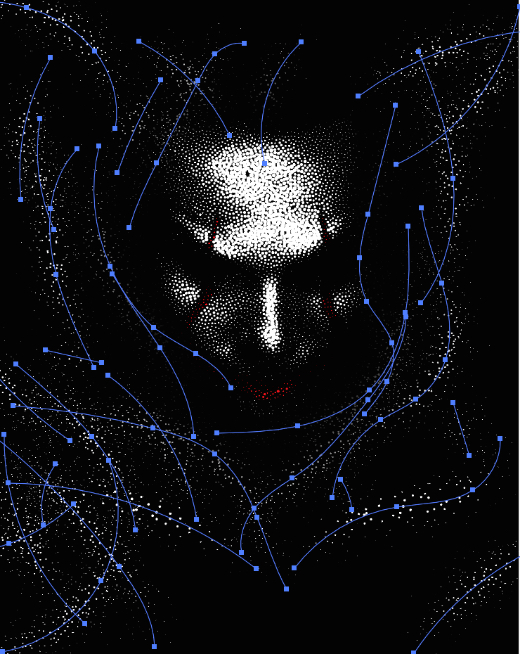
Select one of the lines with the style you want, and then using the pencil tool or DynamicSketch, draw out lines surrounding your characters face. Draw them with some randomness to give a realistic appearance of smoke or a mysterious atmosphere. Hold (Ctrl) or (CMD) and select different line styles occasionally to switch up the variation in the background.
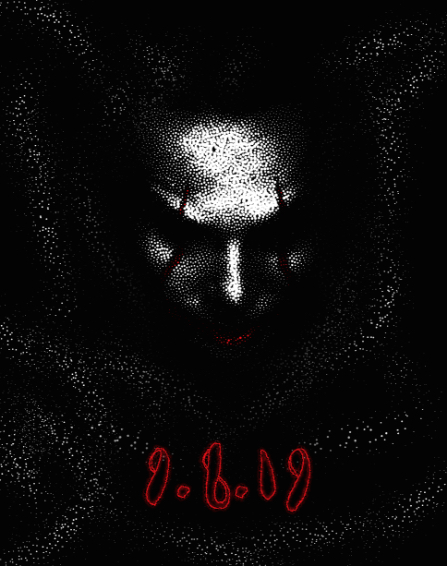
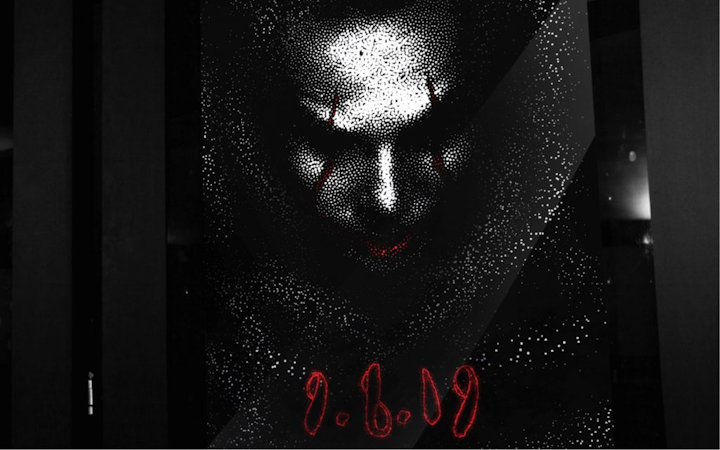
Simply add some text and additional effects of your liking to the bottom of the poster, and you will have a well stippled, creepy poster to keep you awake at night. I added the movie release date for 'IT' and applied the stipple effect to that as well as a red outer glow.