How to make multiple offsets on open paths in Illustrator
3 minute readThe AG Offset tool is here to take your design game to the next level. With just a simple click and drag, you can easily adjust the placement, shape, and direction of your open paths. And that’s not all, the AG Offset panel also allows you to fine-tune the number of paths, opacity, and even add some ease controls.
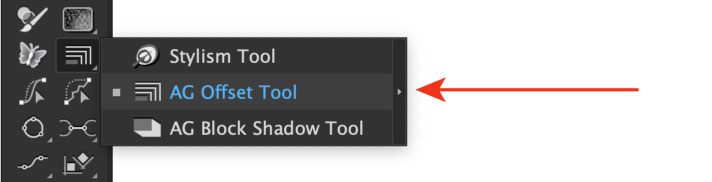
The AG Offset tool is part of the Stylism plugin and can be found stacked under the Stylism tool in the Advanced Toolbar. To activate the Advanced toolbar head up to Adobe Illustrator's main menu > Window > Toolbars > Advanced.
How to make multiple offsets on a path in Adobe Illustrator:
Select the AG Offset tool from the toolbar (stacked under the Stylism tool). The AG Offset panel will automatically pop up.
Hover over your chosen path and a preview annotation will appear. The default color is red, but you can change that on the fly by tapping the C key when the tool is active, to cycle through the other color options.
Click and drag out from your path to start the AG Offset previews.
Use the Up/Down arrow keys to increase/decrease the number of repeats.
Use the E key to toggle on/off repeat easing. Want to know more keypresses you can use? Have the Astute Buddy panel open while you work (Window > Astute Graphics > Astute Buddy).
Release the cursor to confirm the live effect.
Make further adjustments to the live effect by using the AG offset panel, or use any path editing tool to adjust your original path's shape.
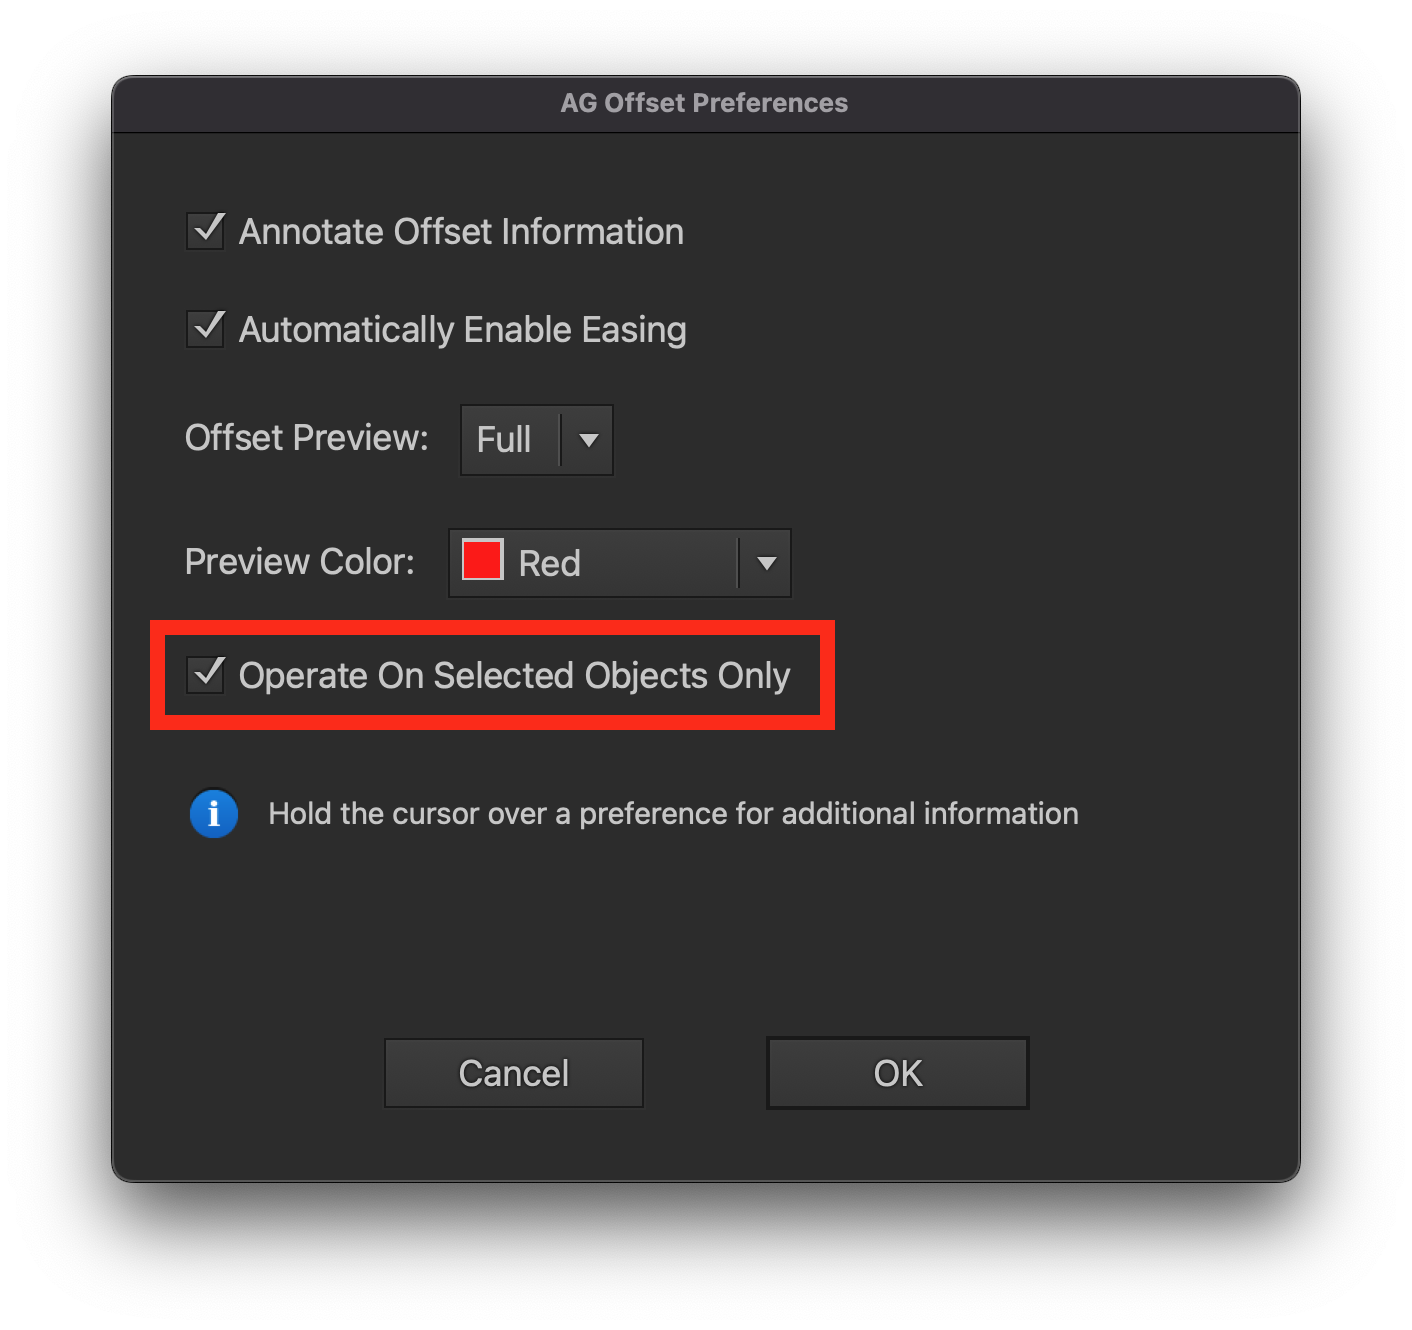
Top tip: In the AG Offset preferences the option to "Operate On Selected Objects Only" is disabled by default. This means that when you don't have any paths selected, it will try to preview the offset on any paths you hover over. You may find that enabling this option makes it easier for you to work.
Need more documentation help?
You can now benefit from the documentation site bringing you tool related training material! This allows users to fully understand by text and example images how each button, option, control and menu can benefit you.