
Making colourful offsets with gradients - AG Offset
6 minute readIn this tutorial we are going to show you how to quickly make a gradient from an existing graphic and then applying a multiple offset gradient using the gradient to add an extra brand element to the artwork.
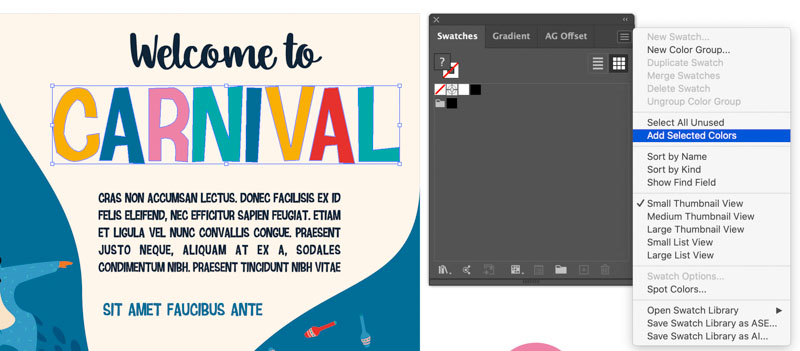
We are starting with this carnival poster from Adobe Stock and selecting five colors from it to make our gradient and stepped offset.
So let’s grab our colors first
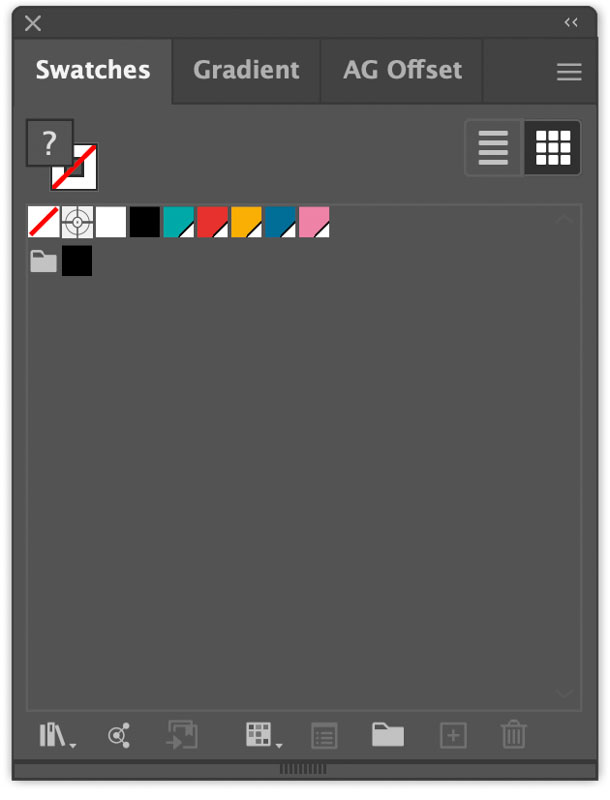
Step 1. The best way to get the colors we need is to use the word CARNIVAL in the image. Select the word and then open up your swatches panel Window > Swatches. To keep things clean, with everything unselected, click on the Swatches flyout and choose ‘Select all Unused’, this will select all the unused colors in the swatch panel and clean it out. Now select CARNIVAL which contains the fivew colors we want. Then click the flyout again and and choose ‘Add selected colors’ and this will add those five colors to the swatch panel.

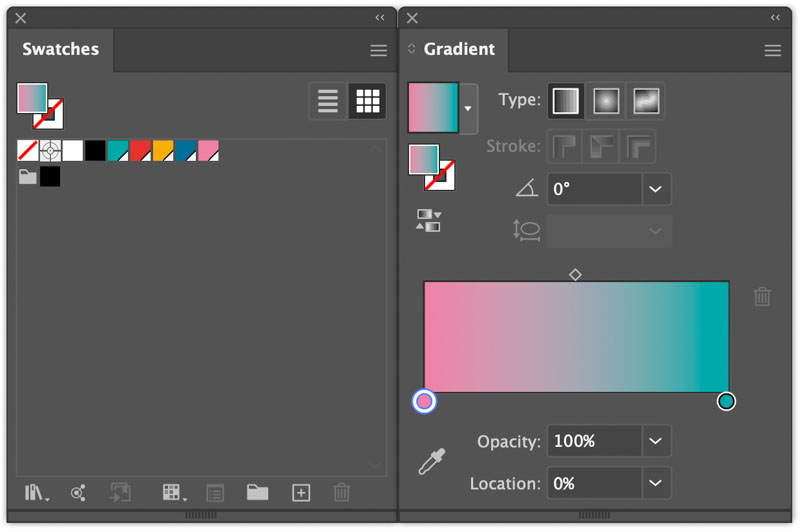
Step 2. Now we have our five colors we need to create our gradient. Open the Gradients panel Window > Gradients. You can decide in which order the colors go in your gradient, I am going to add them in the order they are in the swatch panel. Click in the gradient area to activate it. Then go to your first color and drag it onto the furthest black dot at the bottom of the gradient panel to replace the black. To ensure this worked just drag it along a little to make sure the black isn’t behind it. Now repeat with the last color and place it at the start of the gradient. This gives us our start and ending colors.

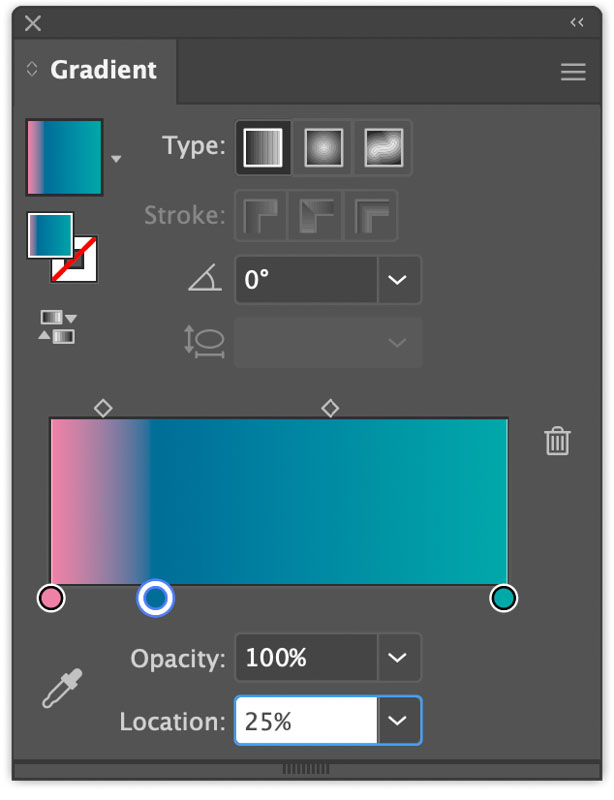
Step 3. Now to add the next three colors. Think of the gradient as a percentage, we need each color at 25% intervals. So drag the next color in at around that and in the area underneath you are able to manually adjust this percentage so type in 25 in the % ‘Location’ area. Then repeat this step for the other two colors at 50% and 75%.
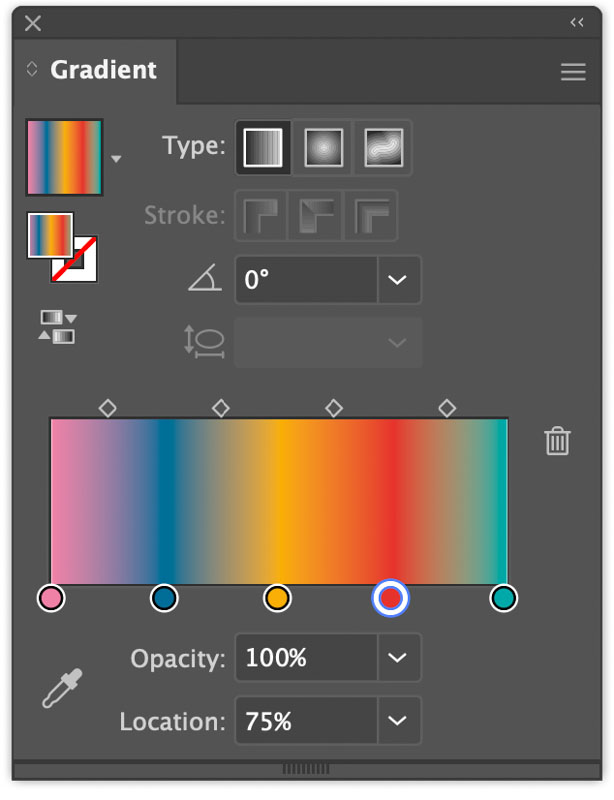
Step 4. We have created our carnival gradient, next click on the preview thumbnail of it and drag it into your Swatch panel to add to the existing colors.

Step 5. Now we have our gradient we can now look to use this in AG Offset, so open that panel next Window > Astute Graphics > AG Offset (part of Stylism)
Step 6. Change the CARNIVAL to black for now so that we can see the text, we can change the color after if we wish.
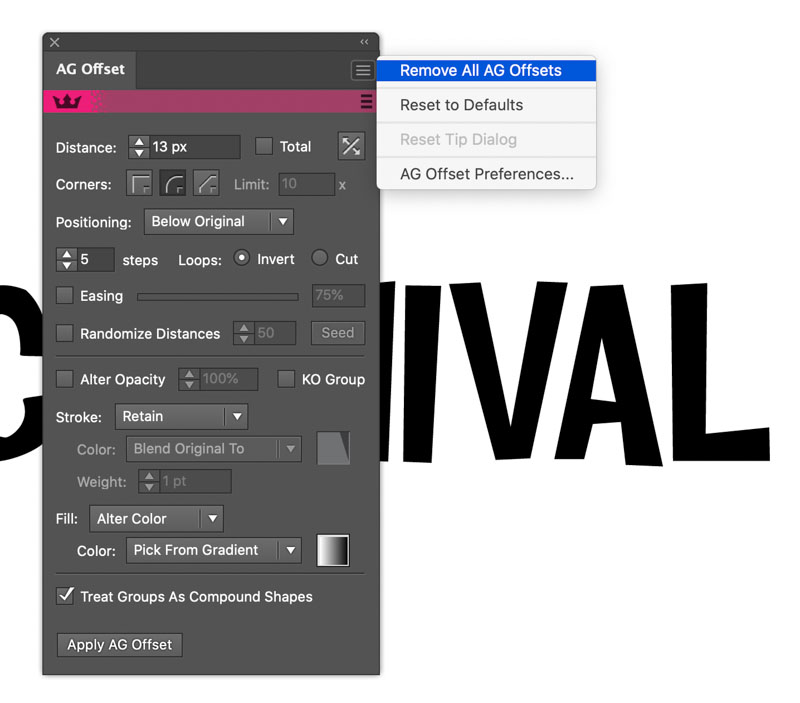
Step 7. Then we’ll apply our offset to our word. With CARNIVAL selected, go to the AG Offset panel and on the flyout (this is a good housekeeping tip – just in case you’ve previously used the panel on another project) just select ‘Remove all AG Offsets’. Then ‘Reset to Default’
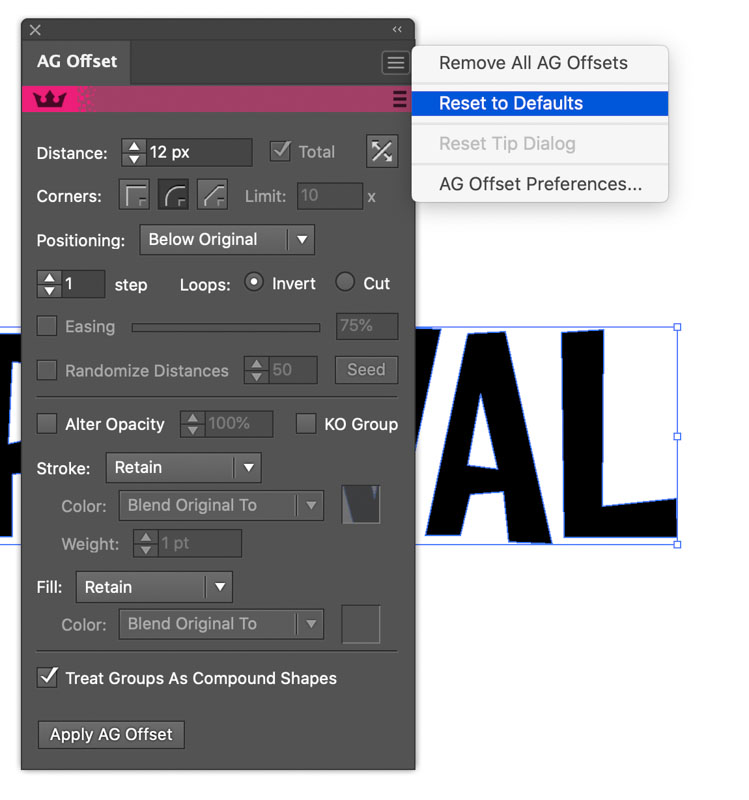
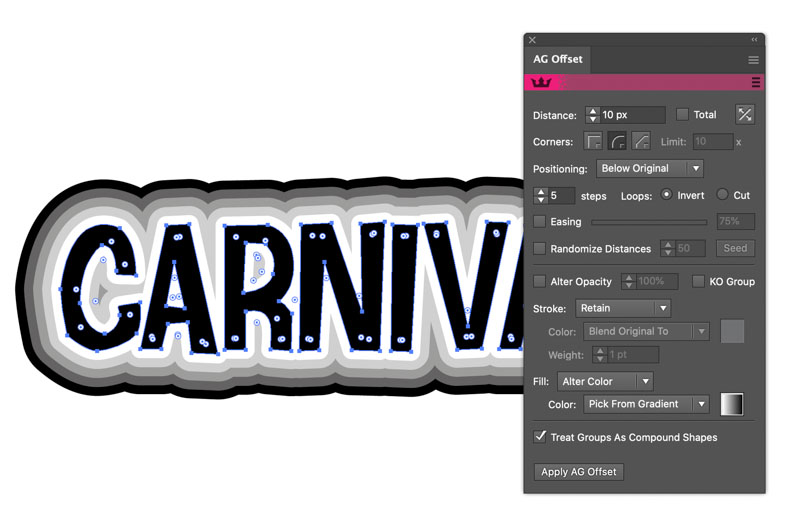
Step 8. Now click on ‘Apply AG Offset’. This will appear to add a black stroke. Go to the panel and change the following settings.
- 5 steps
- Uncheck the ‘Total’ next to distance at the top
- Change distance to 10px
- You now have a great big black stroke around your text. Now for the cool part.
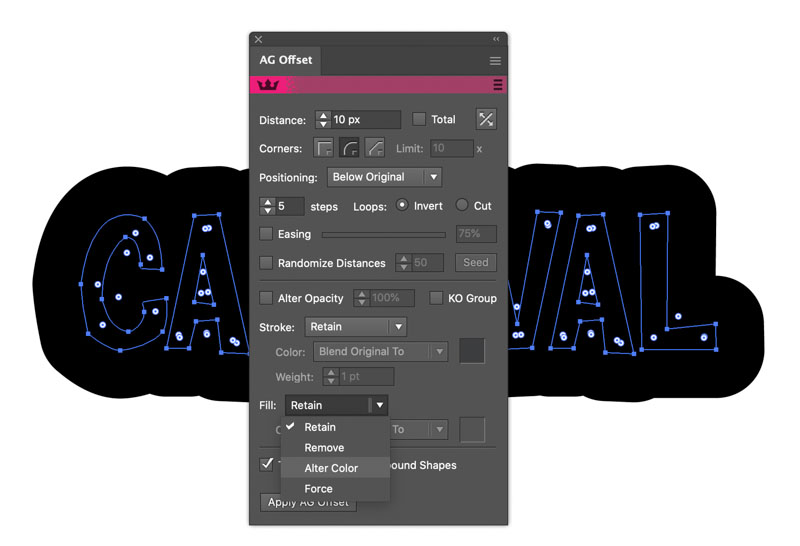
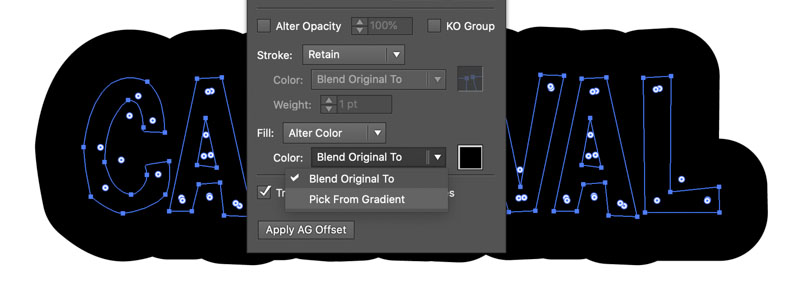
Step 9. Go to the bottom of the panel and where is says ‘Fill – Retain’ click on the Retain and from the dropdown selection choose ‘Alter color’. You will now have a swatch to the right that is now activated. And then from Color change ‘Blend original to’ to ‘Pick from Gradient’. You will now see that the offset has adopted the default black to white gradient.
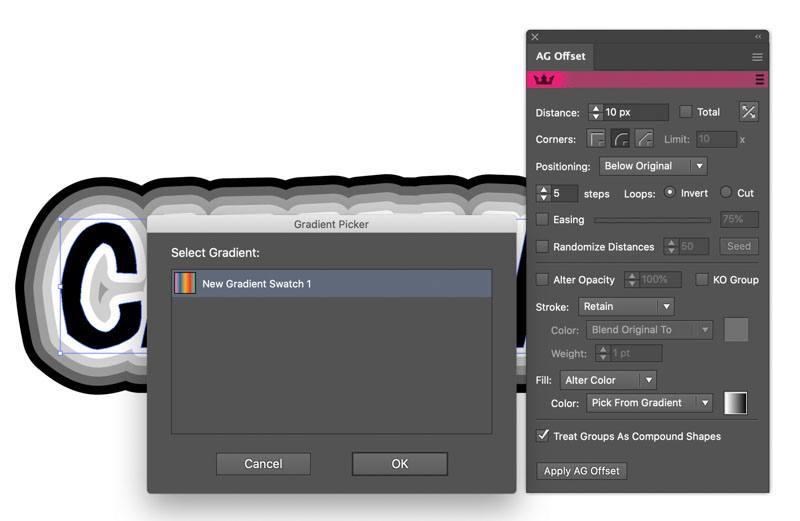
Step 10. Click on the gradient swatch and select the gradient we created. Click OK. Now we have a five stepped pffset using the five colors from the poster. You can alter the step distance, you can even increase the amount of steps and you will then have tints of each color to fill in the additional offsets. You can now also change the color of the word ‘CARNIVAL’ if you so wish. Then place your word back into the poster.

And that’s how to create a multiple offset using gradients and AG Offset, and of course you can make gradients with more steps than five, just remember, to get the solid color, make sure your step number matches the quantity of colors in your gradient for the best results.