Create a custom, stylistic Lightsaber with Stylism
9 minute readStar wars has made an incredible comeback since the Force Awakens was released. There haven't been as many lightsabers in the latest movies as there were in the first 6 movies. The best way to make up for that is to create our own. The easiest way to do that is with the Astute Graphics Stylism Plugin.
Create the handle grip
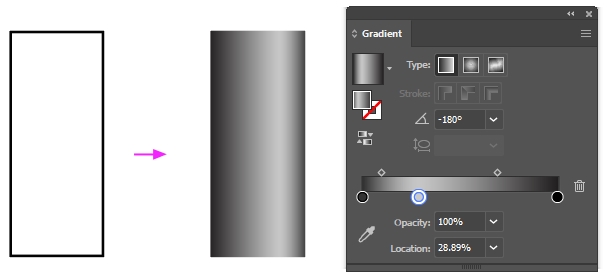
To begin, create a simple rectangle as the base of your lightsaber. This will act as the bottom grip. Use your gradient panel and give it a gradient that goes from dark to light and back to dark again. Add some variation in the dark areas and make the highlight off-center. This will give the lightsaber that added dimensional look.
Make a copy of your handle and paste it under the original rectangle. Resize it to extend above and below the first rectangle and make the width a bit smaller too. Keep the same gradient though. We will make it a bit darker so it looks like the handle is attached to the other parts that we'll create later. To make it darker, you can use the Phantasm Plugin and drag your 'Lightness' slider down a bit. Just drag it down enough to be noticeably dark, but not too black.
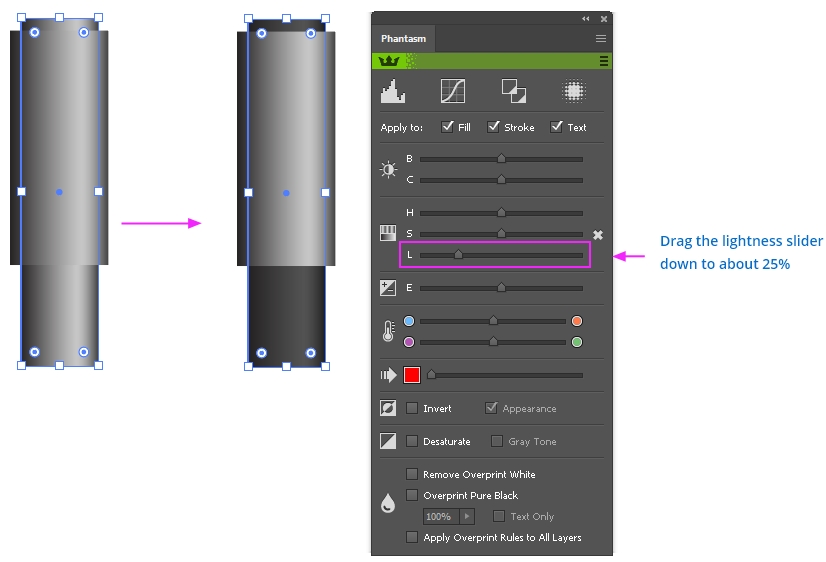
Helpful Hint: When using live effects with Phantasm, it's helpful to expand the effects when you're finished with them. This changes the actual colors of your gradient to the new colors created by the phantasm plugin. This helps so your file doesn't get lost with to many hidden layer effects.
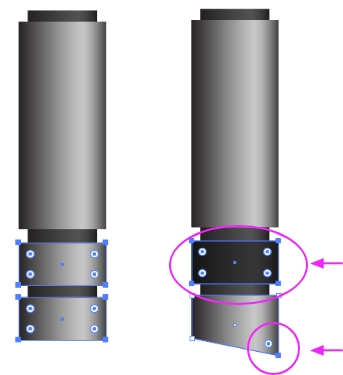
Make two more copies of the original handle again, and shrink them vertically to act as the bottom caps for the lightsaber. Color one of them dark as you did the connector layer, but make it slightly darker so there is a clear difference between the two. Leave the gradient on the back-most rectangle. To finish the cap use the direct selection tool, select one of the bottom anchor points, and drag it down to give it a sharpened look.
Create another rectangle and make it black. Place it to the top of the handle and apply the transform effect with the stylism plugin. We'll be using this effect a lot so spend some time playing with the widget and getting used to how it works. For this effect, drag the rectangle over slightly to the left and make 3 additional copies.
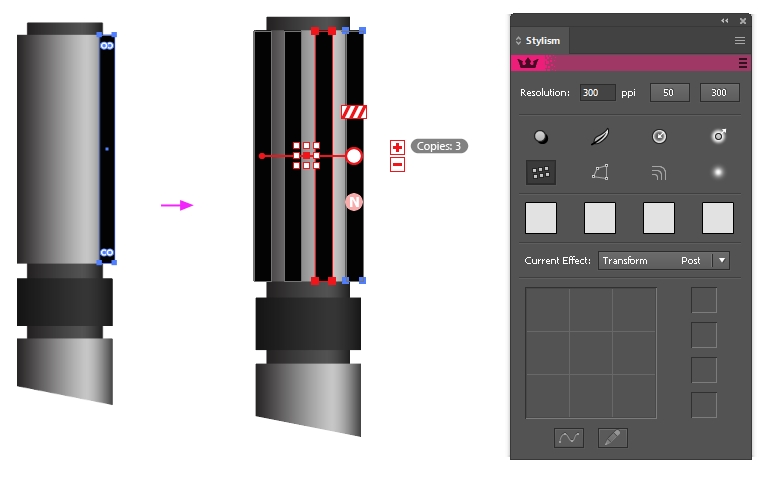
You may think it a bit unnecessary to use the transform effect for a pattern requiring only 4 shapes, but when creating complex artwork with a large number of effects, the processing power required by illustrator can get quite intense, so I find it best practice to keep as optimized a workflow as possible. You can below in outline mode how ilustrator is rendering the rectangle. It's still only calculating the first rectangle, and the others are just instances of it so they take much less work to render.
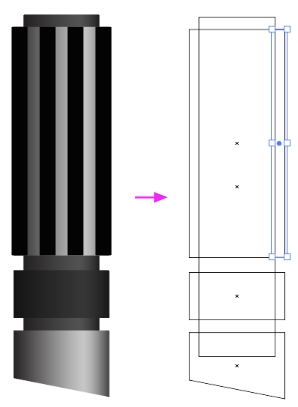
With the base of the handle almost finished, we can get started on the top where the kyber crystal is encased. Create a solid black (or very dark grey) shape the same width as the connector stemming from the top of the handle. You can use either the pen tool, or I prefer to use InkScribe to quickly draw out the contours of the top shape that will surround the crystal as shown in the example.
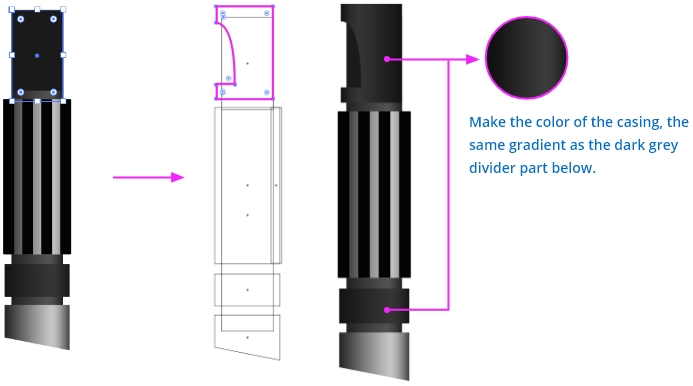
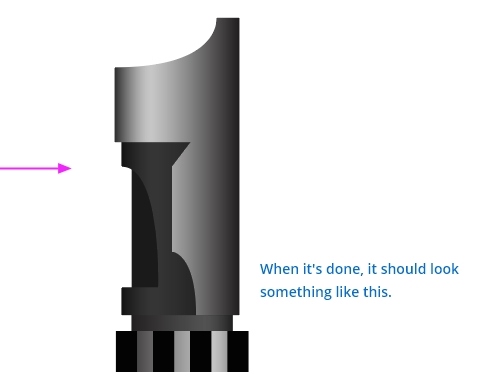
For the metal casing that surrounds the parts just created above, it will take a little more work. Use the image below as an example. Make sure to color the next part with the light metal gradient we created earlier to complete the look. The light will shoot out of the opening at the top.
In this next stage, you can add some different types of patterns to the handle to give it a more authentic appearance. Create some small thin rectangles on the bottom cap, and in between the lines on the grip. Use the Stylism tool to add a transform effect and add more copies of those rectangles to create interesting patterns like I have. Another advantage to using Stylism is that when I need to resize a batch of lines, I can just resize the initial shape, and they will all proportionally size with it. (Note: If you ever need to go back and edit your stylism effect, simply (CTRL + Click MAC) or (CMD + Click PC) the live effect button again on the stylism panel, and it will pull up your effect control widget again.)

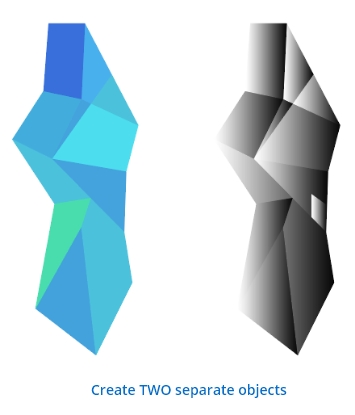
Next, let's create the kyber crystal. You can have a bit more fun with this part. Create a bunch of straight contour lines that resemble the shape of a tall crystal. Then add a variety of additional lines that cut through everything inside. You don't have to be very precise with this part. Just make it look random and interesting. With the shape and all your lines selected, use the pathfinder (Window > Pathfinder), click the DIVIDE option. (Hint: Make sure your lines cutting into your base object have no fill, otherwise this may not work well)

Once your object is split up into all the facets of the crystal, color them each a slightly different tint of the base color. You can see in my example the variation of colors you can use. You can make a copy of the shape, and simply click the default black/white gradient on the gradient panel. It should automatically apply a gradient to each object in the crystal. If it doesn’t look quite how you want, you may need to select a few facets individually, and drag the gradient a desired direction.
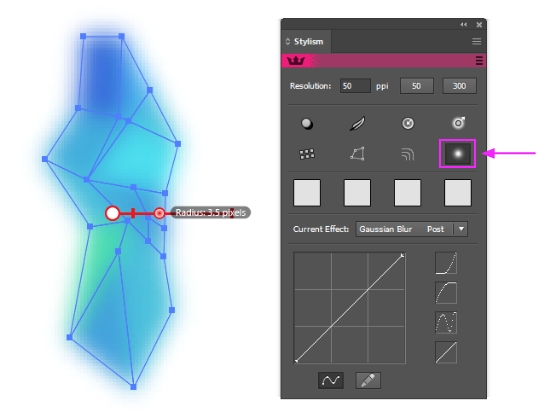
Selecting only the colored crystal facets, open the stylism panel again and click the blur button. This will allow you to quickly add a blur effect to the whole crystal.
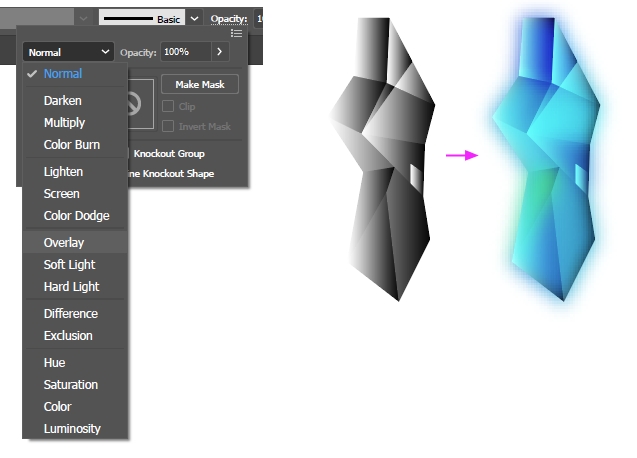
Drag the black/white crystal over the blurred crystal and set it's blend mode to overlay. It should create that ‘real’ crystal look now.
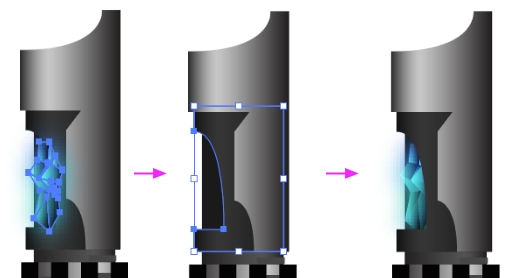
To place the kyber crystal in the light saber, select the entire crystal object. Move and scale it directly in the area where you would want it inside your lightsaber. Hit (CMD + X MAC) or (CTRL + X PC) which will cut your object. You can paste it directly inside the handle by clicking the object you want it place directly behind, and then hit (CMD + B MAC) or (CTRL + B PC) which will past your crystal directly behind that layer.
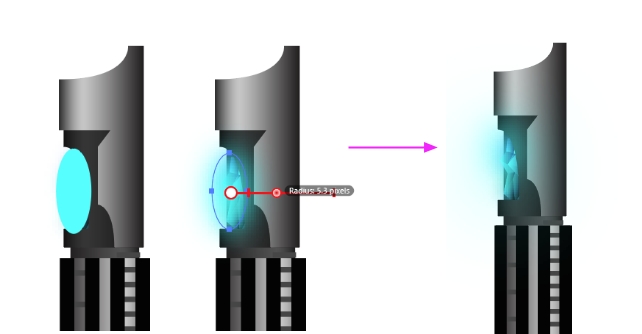
To make the crystal seem more like it's glowing in the saber, create a circle directly above it with a similar color to the crystal. Use the blur button on the Stylism panel and blur it to just the right amount that you like.
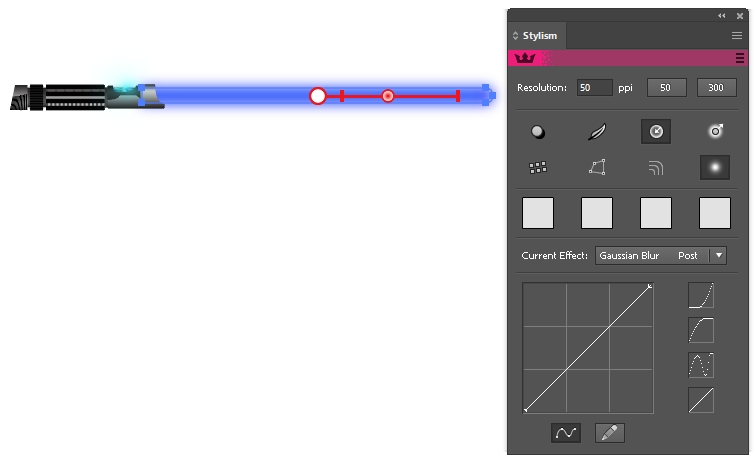
The last step should be the most simple and the most rewarding. Create a simple blue rectangle at the top of the handle and send it behind all the other layers. You can use the shortcut (Shift + CMD + [ MAC) or (Shift + CTRL + [ PC). Round the corners using the direct selection tool and the corner widgets. (Side note: When rounding corners, I prefer to use the Vector Scribe Dymanic Shapes Panel because sometimes Adobe Illustrator breaks the shape if the corners are rounded all the way.

Pull up the Stylism panel again and apply some more effects. Click the Inner Glow effect and create a lighter tone of your selected color. Also set it as centered. The right slider is the opacity, and the left slider is the blur amount. You can play with these a bit until you feel it looks about right. Use the image below as a reference.

Add the blur effect to the same layer and watch your saber come to life!
There is still one last layer to apply before you can be finished though. The lightsaber needs more of an extreme glow inside it. We'll create a white rectangle at the center and apply the blur effect again, but not as much as the first layer.

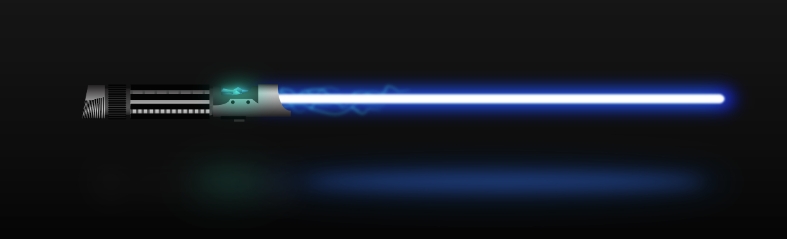
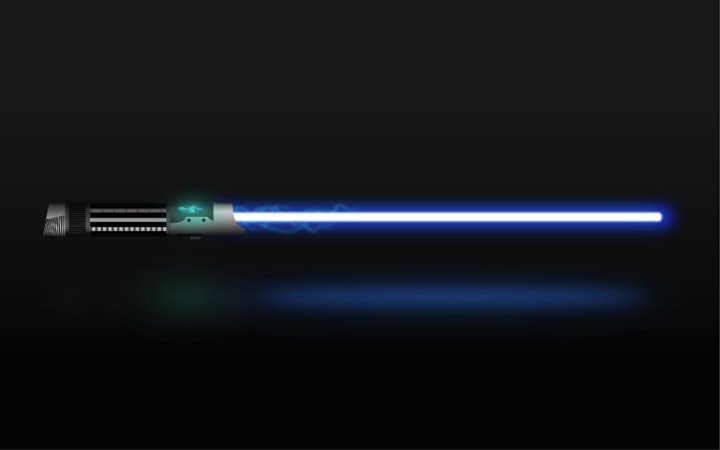
You should now have a very intense looking lightsaber with its own kyber crystal and glowing blade. Feel free to add some additional embellishments and effects to make it look extra menacing.