Featured Artist Jeffrey Karl - How to use Astute Graphics plugins to create a mobile-friendly animated SVG.
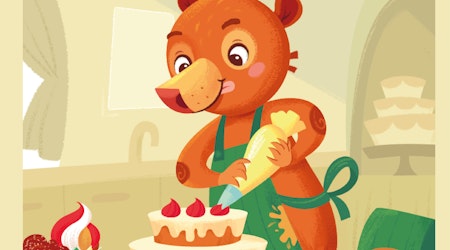
15 minute readThis is a quick tutorial on how to create mobile-friendly, vector-based animations like the one below.
“Why?”
We are currently living in the “mobile-first era” of the internet, which means whatever graphics we create need to be made with data consumption and mobile performance in mind. In order to best meet the technical needs of mobile-devices, the quality of graphics has traditionally suffered (low quality GIFs; bloated videos that don’t autoplay; stiff, manually-coded CSS animations; etc). But animation, art, and code are inching closer and closer together. The increasing overlap between these fields means we are able to create ever more dynamic and visually-appealing graphics that are still lightweight and mobile-friendly.
The Setup
Required plugins and software:
- Adobe Illustrator
- Adobe After Effects
- Overlord
- Keyshape App (currently for Mac only)
- Bonus: A codepen.io account
The Artwork
Step 1: Rough Sketch
Rough out your initial sketch however you are most comfortable. You can do this in your favorite mobile tablet sketching app, with pencil and paper, or you can do this directly in Illustrator with the Dynamic Sketch or InkFlow AG plugins. When you’re finished, set this as an embedded image on its own artboard in Illustrator.

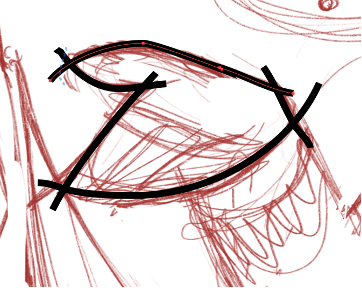
Step 2: Vector Shapes
Lay out your basic vector shapes on top of your sketch using the InkScribe tool.
For anyone who prefers a more traditional drawing experience, you can also “ink over” your sketch using the Dynamic Sketch tool and join your line work into paths with the Trim and Join function (with Dynamic Sketch selected, press and hold the Shift key). You’ll be able to adjust the stokes and fills after you are done.
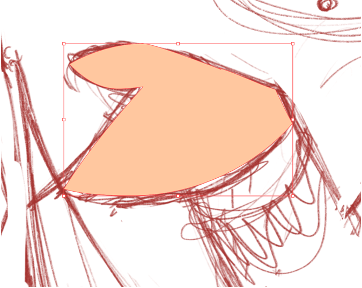

Step 3: Final Vector Art
Add remaining details, highlights, and shadows. You can also make use the Extend Path tool (VectorScribe) to make sure all minor details are properly placed and aligned.
Then group your artwork according to how you would like it to be animated. For example, all elements of the head would be grouped together, all elements of the arm grouped together, and so on. Also be sure to name your layers and groups in a way that makes them easy to identify.
Pro Tip: Using the Super Marquee Tool can be an absolute life saver when grouping your work together.
When you feel your static vector image is finished, please save the AI file and also export an SVG of the image. This SVG file will come in useful later if you’ve used any elliptical gradients in the creation of the artwork.
The Animation
Step 4: Import Vector Art to After Effects
Open a new project in After Effects. Set the width and the height of your After Effects project to match the dimensions of the Adobe Illustrator artboard, on which your flat art is placed.
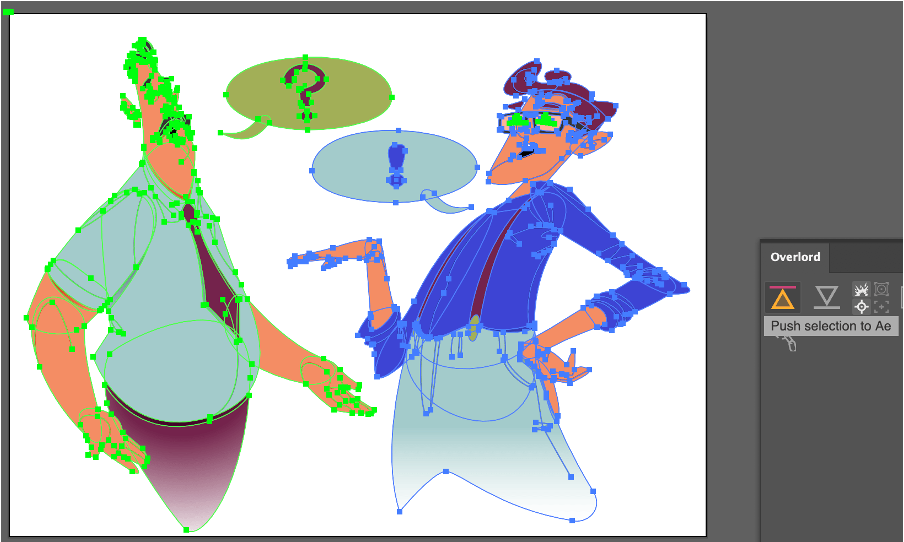
With both your flat art open in Adobe Illustrator and your new project file open in After Effects, navigate to Illustrator and select all artwork. Open your Overlord plugin under Windows > Extensions. Click the upward facing triangle icon on the Overlord plugin tool panel. This will push your artwork to After Effects and automatically populate it in your After Effects project.
From here, you can parent the layers of your composition as normal. If you’re not familiar with parenting in After Effects, you can get a brief overview from this quick tutorial here.
Step 5: Path Animation
The real power of combining the Astute Graphics and Overlord plugins occurs in manipulating path shapes.

A lot can be achieved with applying simple transforms and rotations to individual layers, but the ability to reshape the vector paths themselves creates an animation that looks and feels much more like traditional animation. And because we’re working with vector paths, we’ll be able to export these more traditional-looking animations to web and mobile-friendly SVG animations.
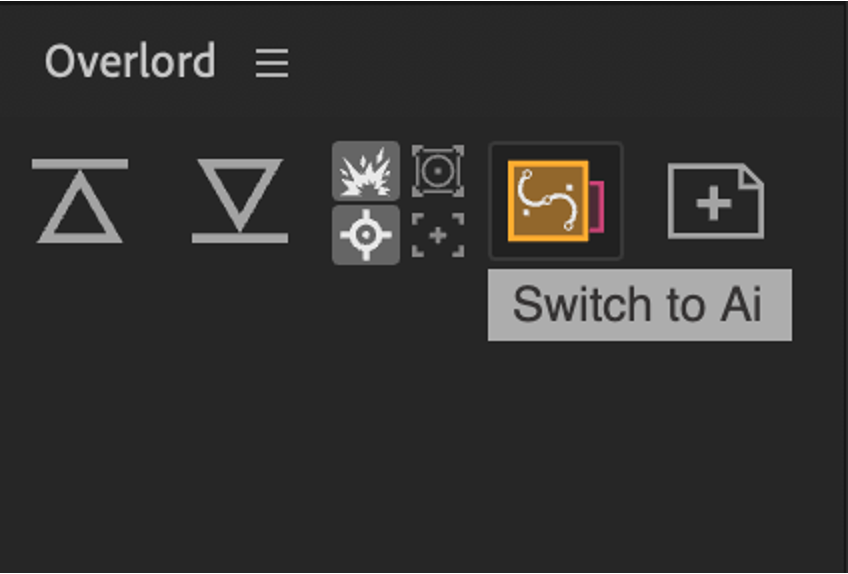
The problem with After Effects is that it isn’t very efficient for creating or editing vector paths. If you open the Overlord panel in After Effects (Window > Extensions) you will be able to easily toggle back and forth between After Effects and Illustrator, effectively turning Adobe Illustrator into an “vector editing panel” for your After Effects project. Best of all, you’ll be able to utilize the Astute Graphics suite of plugins to create and edit these vector paths, making your workflow more efficient and your animations more dynamic.
Let’s say I would like to apply a simple animation to the mouth of one of my characters. I could apply an x and y axis transformation, and maybe use a slight amount of rotation. However, it would look far more natural if I could actually alter the shape of the path itself.
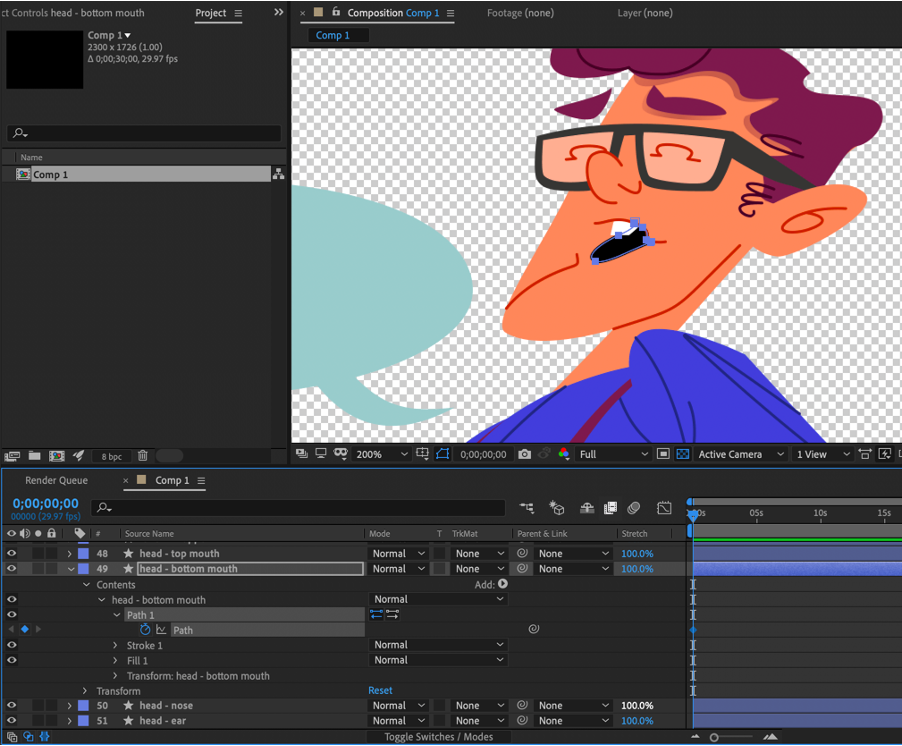
First, I move to the Timeline panel and twirl down the “mouth” layer until I reveal “Path.” Then click the little stopwatch icon to create a keyframe.
Next, I move the animation forward by one second.
Step 6: Bridging AE and AI
From within After Effects, I make sure the “Path” attribute is still selected and then click the toggle button in the Overlord panel.
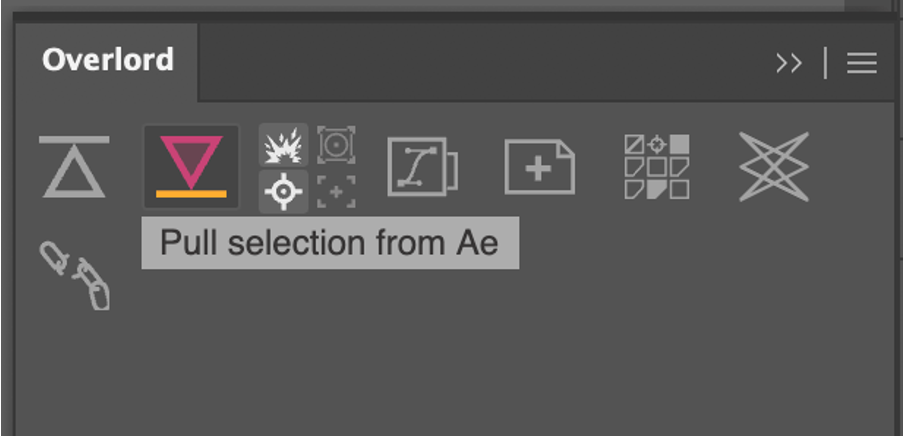
Once back in Illustrator, I find my original artboard, toggle off the visibility of all existing artwork, and create a new layer. Remaining within Adobe Illustrator, I locate my Overlord plugin and click the “pull” icon.
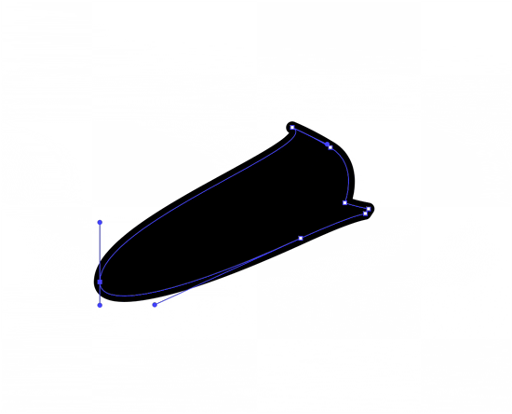
This places my mouth path on my artboard within Adobe Illustrator in the exact same position that it can be found in my project in After Effects. Now I am able to use the full suite of Astute Graphics plugins to reshape my vector path.
Step 7: Reshaping the Path
I edit the mouth shape to look like the bottom lip is receding and the top lip is coming forward, while the entire mouth closes and shifts upward slightly. Once I am satisfied with the shape, I navigate back to After Effects by once again clicking the Toggle button in the Overlord plugin. Once in After Effects, and with the Path attribute still selected in my Timeline, I click the Pull button from the Overlord panel. I then see a new keyframe created in you timeline with the newly shaped path.
I hit F9 to add some Easy Ease, just for good measure.
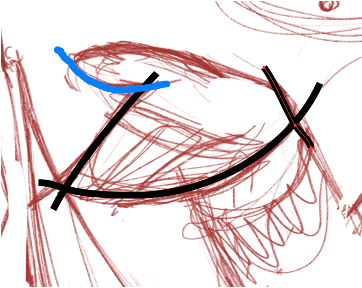
One particularly useful tool in this AE to AI workflow is the Reposition Point Tool. Sometimes creating an animation by keyframing between two shape paths can create an odd-looking result, despite the vector shapes at either keyframe looking correct. Very often this is the result of a point along the path being forced to move too far between keyframes. In the example below, you’ll see a single animation occurring between two keyframes. The starting position and ending position of the individual points (highlighted in green) on the path creates an odd ripple effect at the bottom of the mouth shape.


Changing the First Vertex can help — but sometimes this just doesn’t fix the problem. I’ve changed the first vertex in the example below. This corrects the ripple effect at the bottom of the mouth, but creates another ripple effect above the mouth.


In certain cases, one needs to place the point in a different location along the path. This usually means redrawing the entire path. However, the Reposition Tool from Astute Graphics enables you to slide a point along the edge of an existing path, preserving its shape.
Continuing with the example from above, I’ve used Overlord to bring the mouth shape back into Adobe Illustrator. I then shift two of the points on my existing vector path, and then push that shape back into After Effects (again, using the Overlord plugin). This corrects the ripple effect in the animation. No tedious redrawing of vector paths necessary.

The Implementation
Step 8: Exporting the Final Animation
Once the animation is finished in After Effects, it’s time to export the animation to a web-friendly format. For this I use the Bodymovin plugin. To download Bodymovin and to get a quick overview of how to properly install and use the plugin, please navigate to AE Scripts.
The Bodymovin plugin exports what is known as a “Lottie animation” — which is actually just a .json file that contains a particular kind of animation. This file could be used as a finished animation, but properly implementing the animation requires a little knowledge of code. If you would like to simply use the Lottie file, but have limited knowledge of code, you may find the website LottieFiles.com to be quite useful. Here you can upload your Lottie animations and will find a simple user interface that makes implementing your Lottie animations far easier.
However, I’ve chosen to convert my Lottie animation to an animated SVG file. To do this, I open my Keyshape App and import my .json file directly into the program (File > Open > Select JSON file).
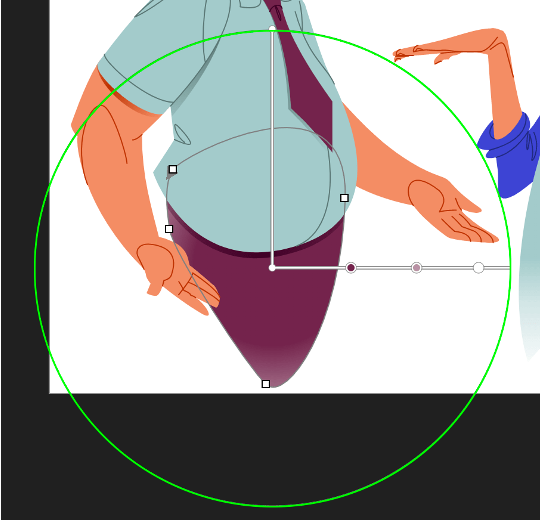
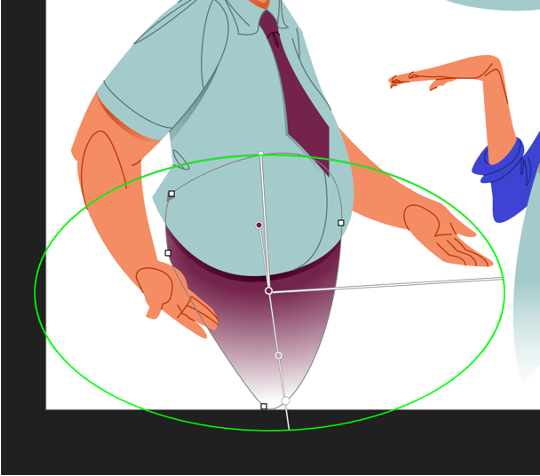
Once I’ve opened my JSON file, I locate the static SVG file I exported from Illustrator (Step 3) and open it in Keyshape, as well. The reason for doing this: transferring vector art from Illustrator to After Effects will remove any elliptical gradients you have in your artwork, converting these to purely radial gradients.This can drastically alter the look of the finished image. However, these elliptical gradients are preserved in my exported SVG file.
Once I open my static SVG file in Keyshape, I locate the path that contains the elliptical gradient. I then copy this path to my clipboard; navigate back into the open JSON file within the Keyshape app; select the corresponding layer with my direct selection tool; and paste my copied path directly on top of the radial path. I then use the Align tool to properly place the pasted path. I then delete the original path containing the radial gradient, leaving only the elliptical gradient.
The animation will now play just as it did in After Effects, except it will now do so with the correct artwork, which contains the elliptical gradient path.
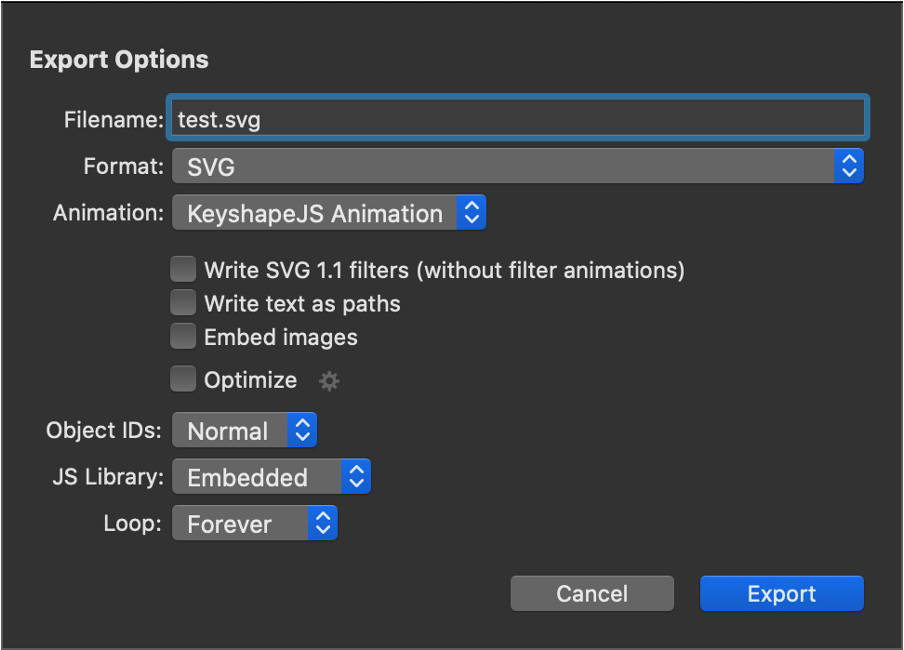
Last, I export the animated SVG as a KeyshapeJS animation. I now have a lightweight, mobile-friendly, high-resolution animation.
Just for the sake of comparison, when this animation is reduced to a width of 760 pixels and exported as a GIF, the file is 5.2 MB. The animated SVG version is 2300 pixels in width (which means it would display just fine on a desktop computer) and is 329 KB in total file size (which means it’s a lot friendlier to viewers on a mobile phone).
In short, the SVG preserves the quality of the image better than the GIF and is —visually— about 300% larger than the GIF, despite the total file size of the SVG being 94% smaller than the GIF.
Step 9: One Final Note
Depending on your content management system, you may have to enable SVGs for your website. In Wordpress, this can be achieved with a plugin.
It also may be the case that you cannot add your SVG animation directly to your website as an image. With Wordpress, for example, you will have to upload the SVG to your media library, copy the file location, and then paste the URL within an <object> tag (normally images are placed within an <img> tag.
If you’re unsure of how to place your SVG within an <object> tag, please refer to the CodePen link below.
See the Pen Astute Graphics Animation (SVG) by Jeffrey Karl (@jeffreylkarl) on CodePen.