FindReplace - Place randomized icicles on winter houses
7 minute readYou may often find yourself repeating tasks to place copies of a few objects in a scene. The FindReplace plugin can make tasks like this significantly easier and less time consuming. I’ll be explaining how you can use the FindReplace plugin to place a group of icicles randomly throughout a winter scene. You will be able to add variation to the size, style, and placement of each icicle for a random, natural look. I’ll be using the scene below as the example.

Prep the rooftops for icicle placement
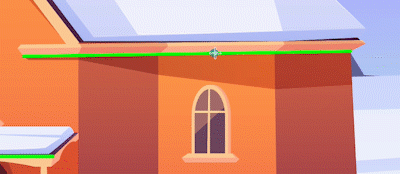
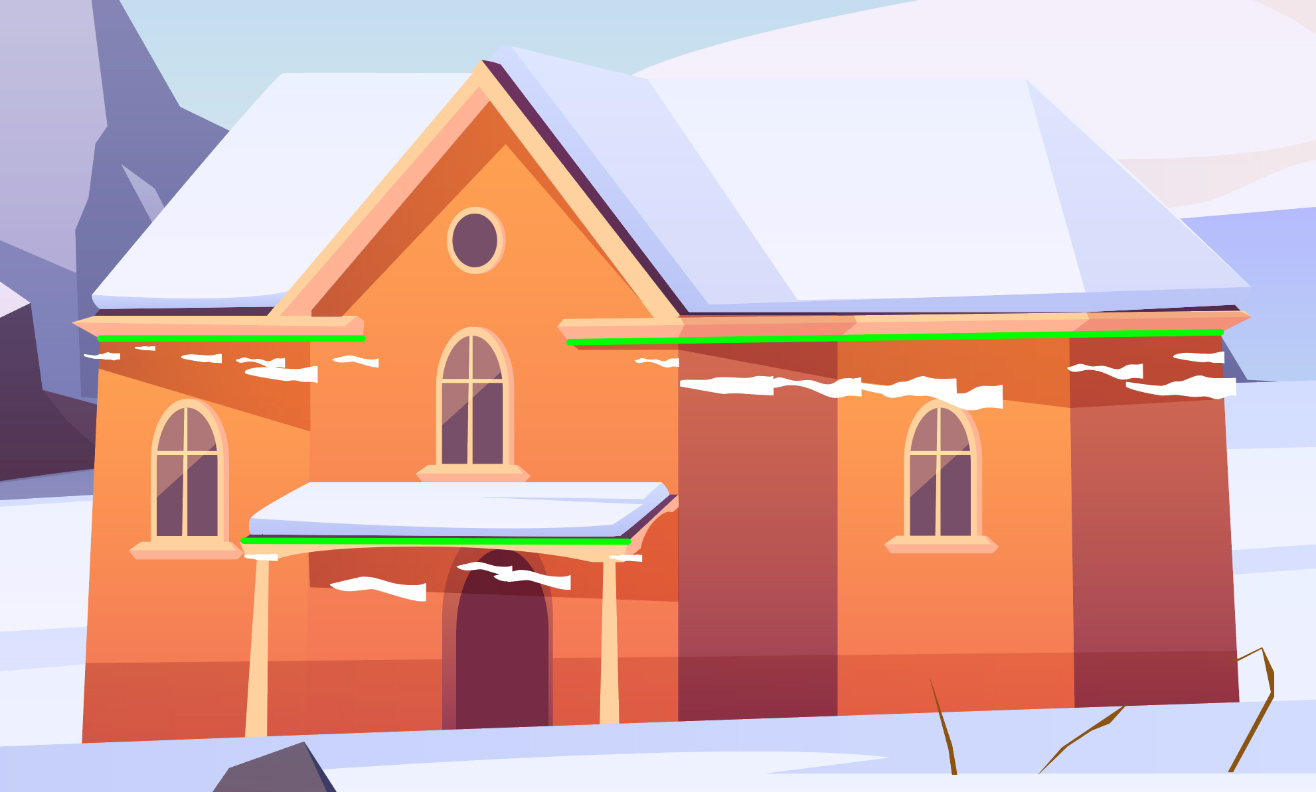
Before I get into the icicles, the rooftops need to be prepared with lines to place the icicles along. Create a new layer and lock the layers below that contains your scene. You can use any number of tools for creating the lines, but I prefer the Line Segment Tool because we don’t have to worry about accidentally connecting paths that I don’t want connected. To make the lines easier to see, you can use a color with good contrast from your scene. I'll be using bright green which will be changed later to match the scene.
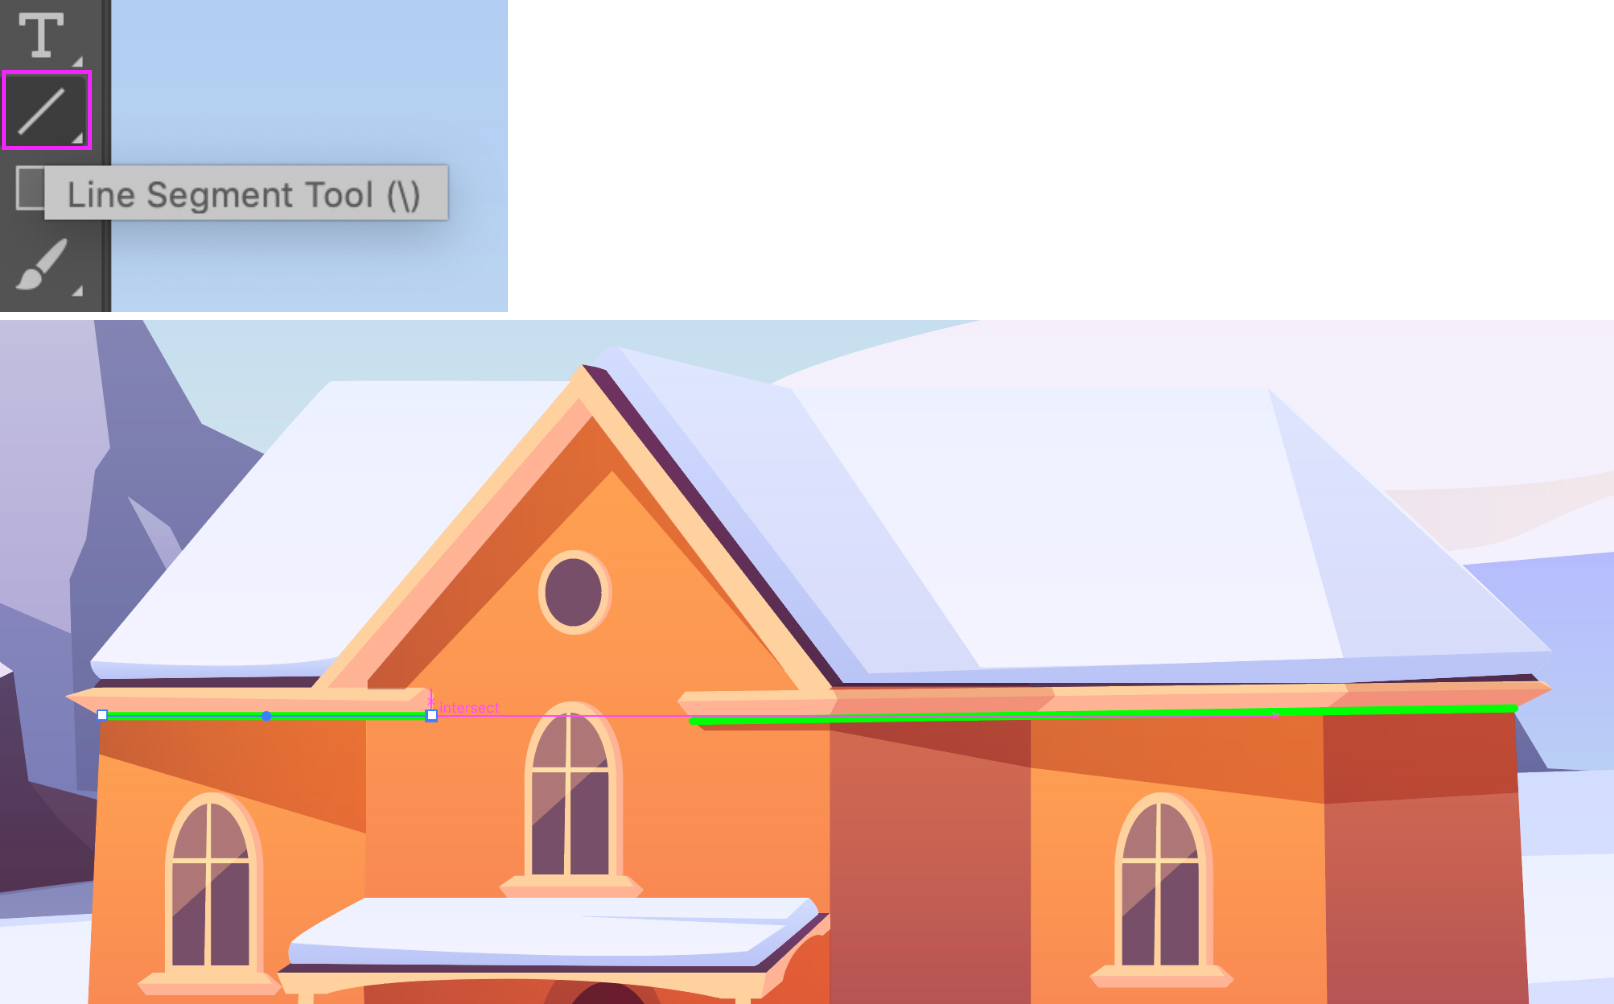
Add lines along all the rooftops that you want icicles to extend from. Use the Perpendicular Line Tool from the SubScribe plugin to create the lines that act as icicles. These will be replaced later with actual icicles.
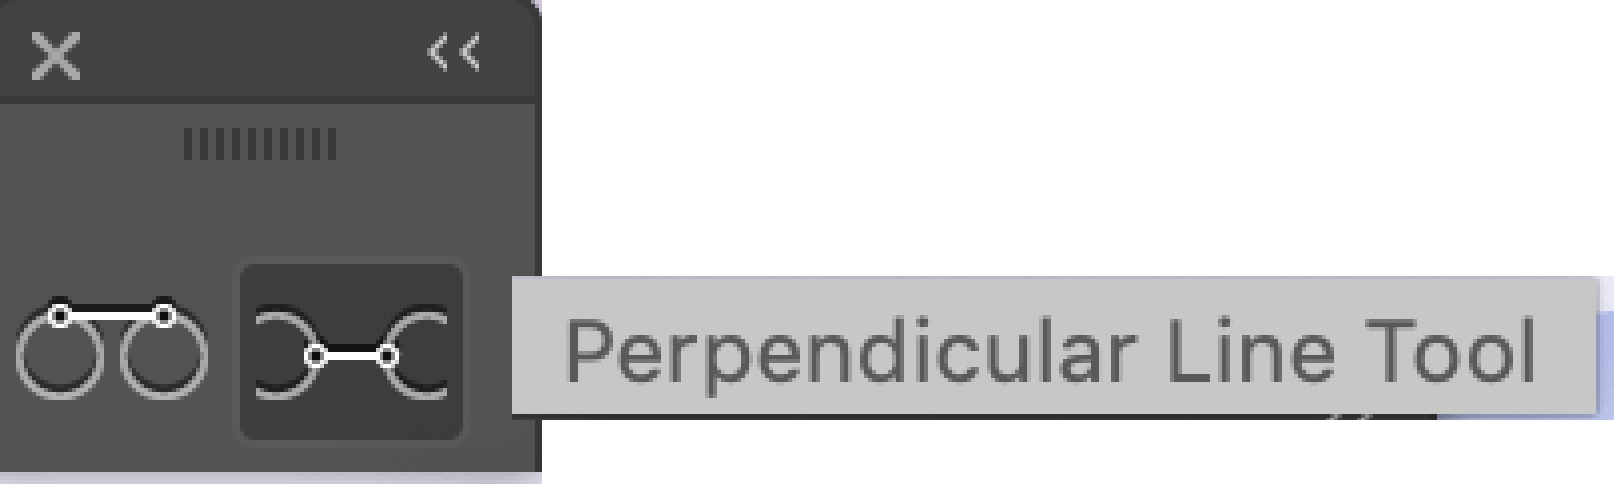
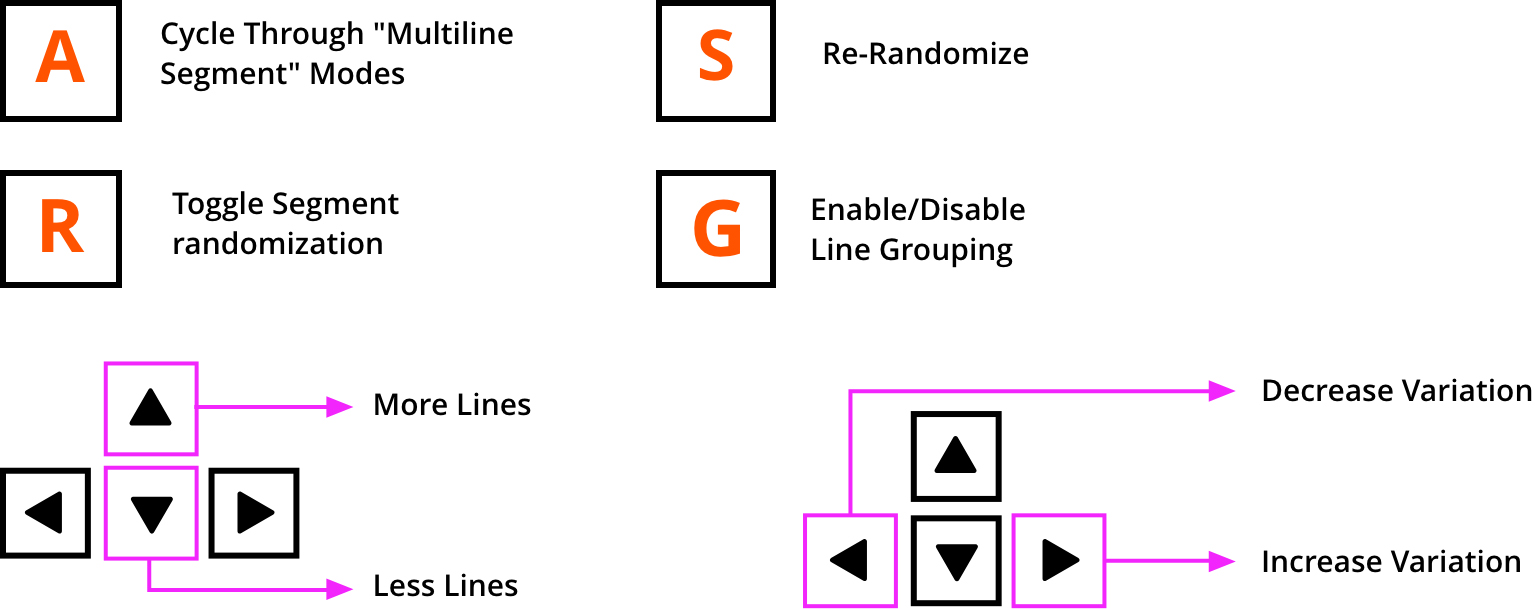
Set the current working stroke to a different color than the rooftop lines, but also a color that contrasts the scene. Activate the Perpendicular Line Tool. Drag a line down from one of your rooftop lines and hit A on the keyboard a few times to toggle different drawing modes. Do this until the lines are extending along the whole path. You can see the Perpendicular Line Tool shortcut reference below. Draw random lines along the rooftops you created using the R keypress.
Remove short lines
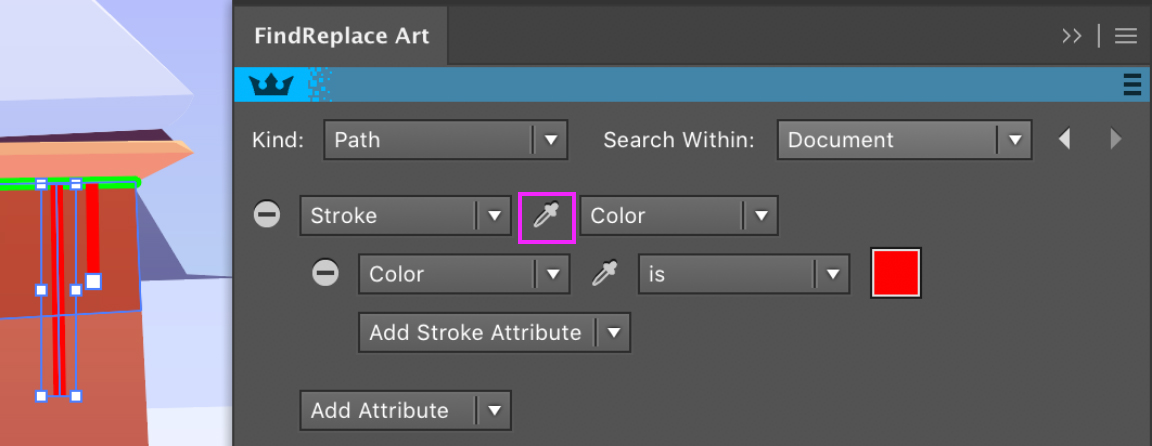
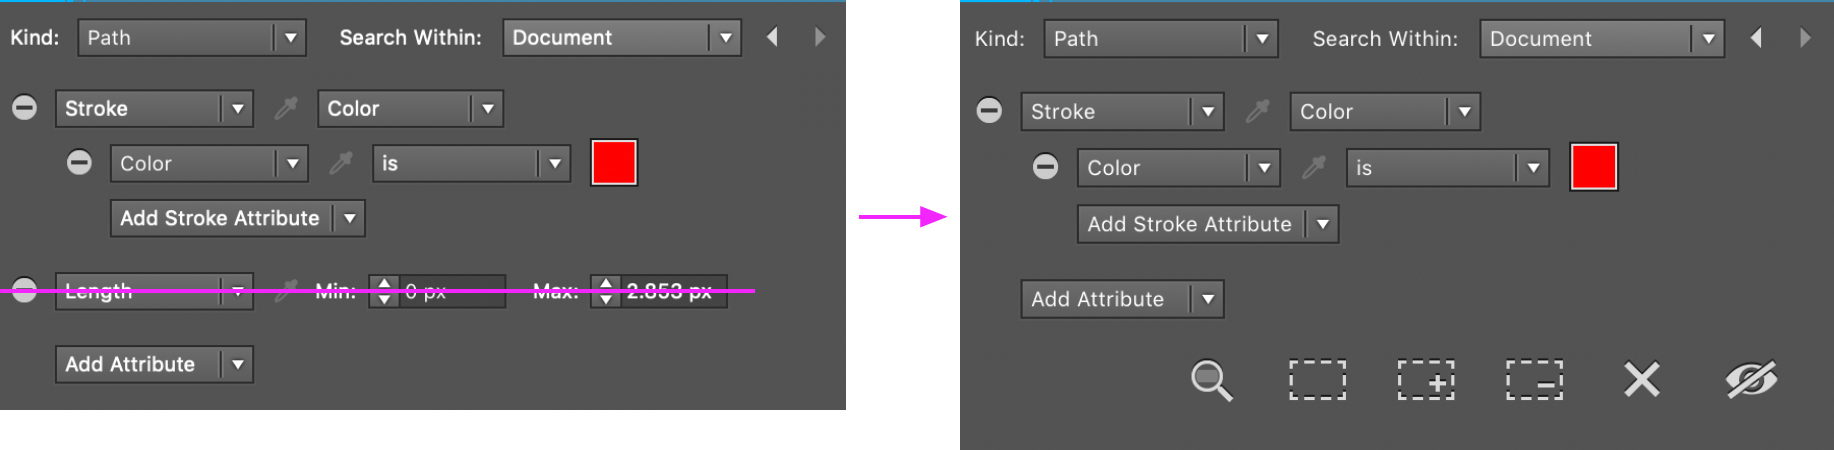
You may want to remove all the short lines to prevent icicles from appearing distorted or too small. You can quickly do this using the FindReplace panel. First we want to search within the entire document, so set Search Within to Document. To remove all the icicles that are too short, set Kind to Path, and use the Stroke and Color attributes.

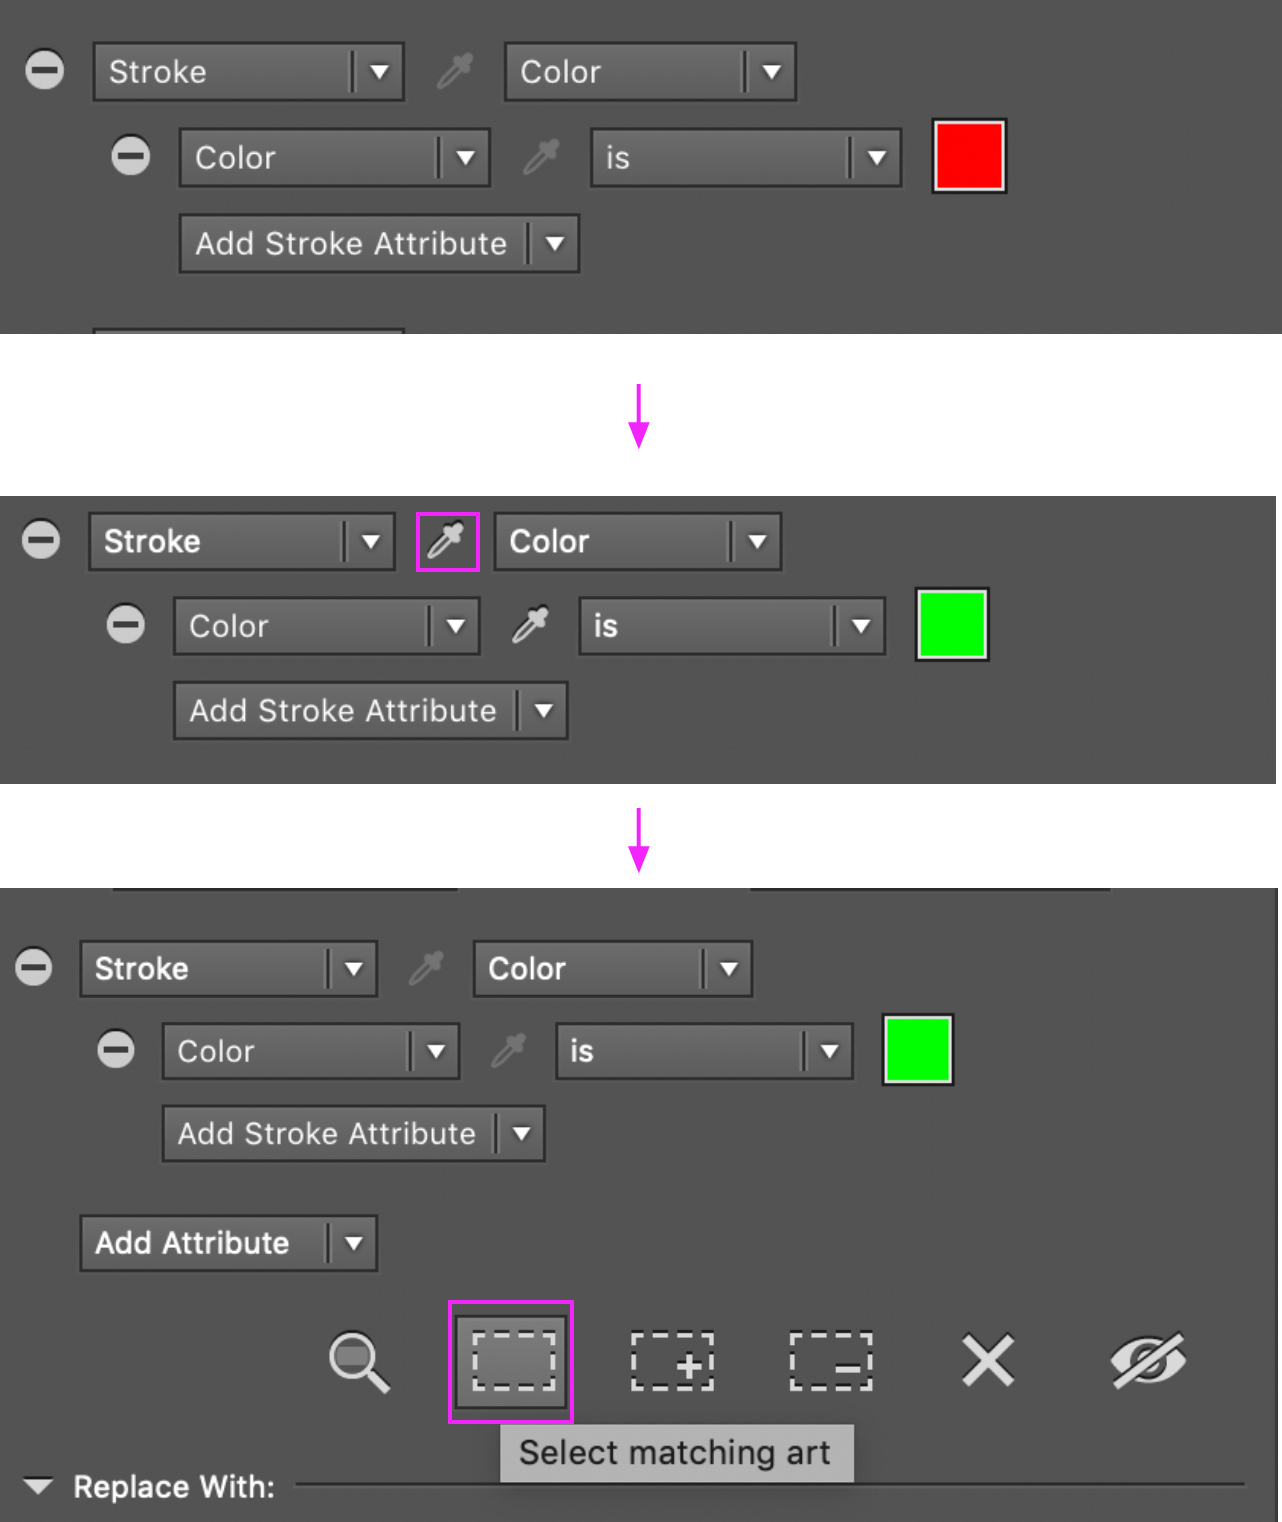
Select the unique color of the icicles you created (it's RED in this example) by holding Shift and clicking the Eyedropper icon as shown below. This will automatically pull in the stroke color to the FindReplace panel.
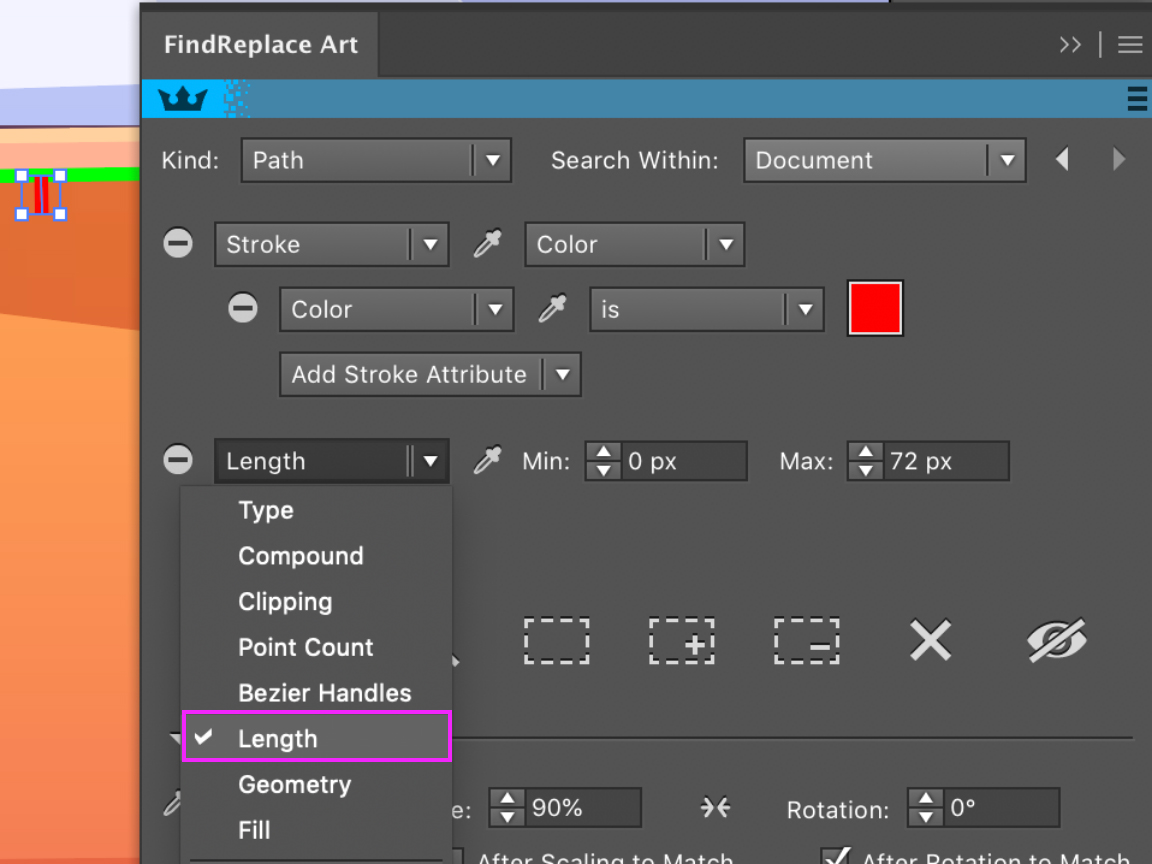
Add another attribute for length. Select the longest unacceptable line and eyedrop it into the FindReplace panel. It will automatically add the same number under Min and Max.
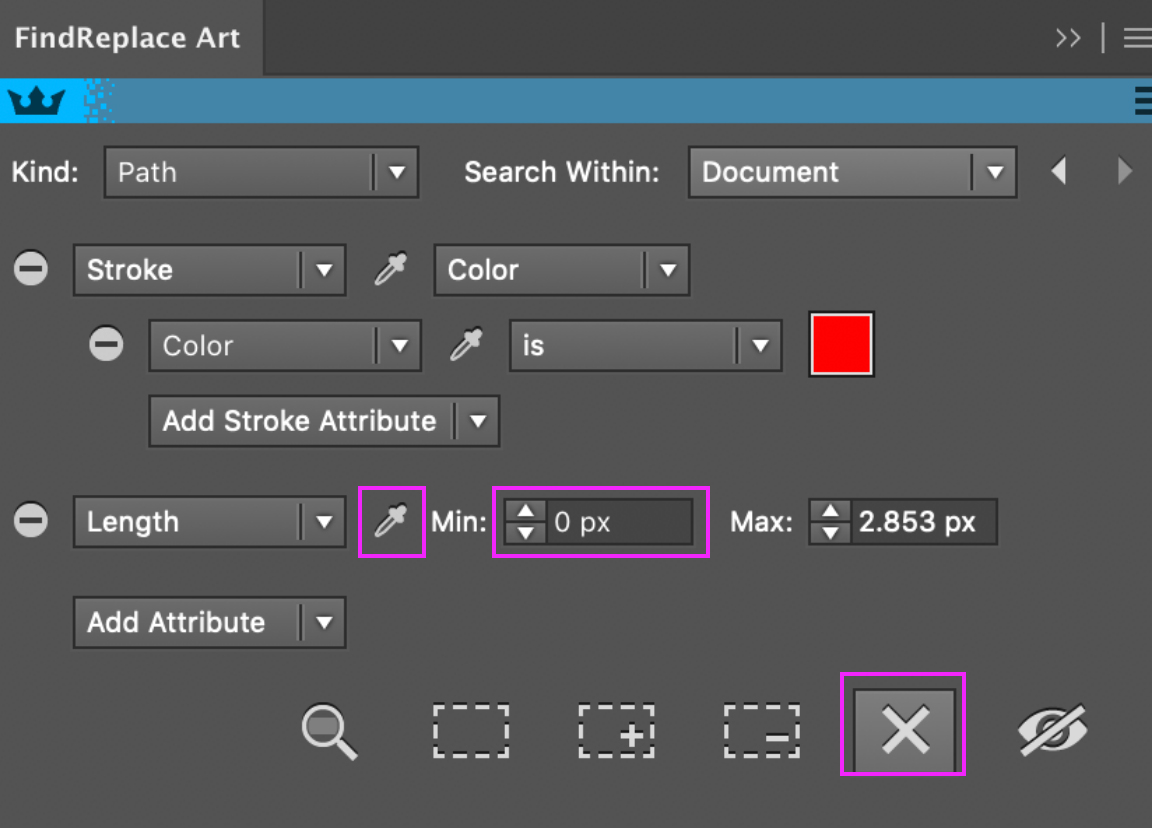
Change the Min to 0 since you want all shorter lines removed too. Hit the Remove Artwork icon and all your lines that are too short will disappear.
Add icicles
Select your group of icicles and drop them into the Replace With box using the eyedropper. Make sure the icicles are grouped together. Your icicles will most likely be white and appear invisible, but don't worry. If you hover your mouse over the Replace With thumbnail box, it will tell you what has been selected. You can see that I have 5 paths selected in the example below, which matches the group of icicles I'm using as the replacement object.

Set your Scaling and Rotation to Match. The scale can be set to 100% because the Positioning and Scale to Match will control the scale of the icicles. Make sure the Positioning is set to Bounding Box Center so the icicles are placed and scaled correctly. Set Pick from Group to Random. This will allow only individual icicles from your group to be placed in your scene instead of the entire group. The Random option will give it a natural variation.

You should already have the icicle color set up from the previous replace action, so remove the length attribute and you should be set to go.
Hit the Replace All button and watch the FindReplace panel do it's magic.
All the icicles were replaced in the right places, but they are rotated 90 degrees. Since Rotation to Match is enabled, the icicles are automatically rotated based on how Illustrator sees the object. This is an easy fix though. Simply undo your replacement, and set Rotation to 90 degrees, keeping Rotation to Match enabled.

The icicles will be placed correctly now. Select all the green horizontal lines along the rooftop and change them to white. This can easily be done by selecting one of the green lines and using the FindReplace panel, (Shift + Click) the eyedropper within the Stroke attribute. Since you were previously searching for the icicle stroke color, this step should be pretty quick. Hit the Select Artwork button and all your lines will be selected that match the same style.
Set the color to white and they will match your scene. As a result of using the FindReplace panel, you should have quickly been able to add a nice set icicles to your winter houses, with much less effort than creating and copying them one by one.