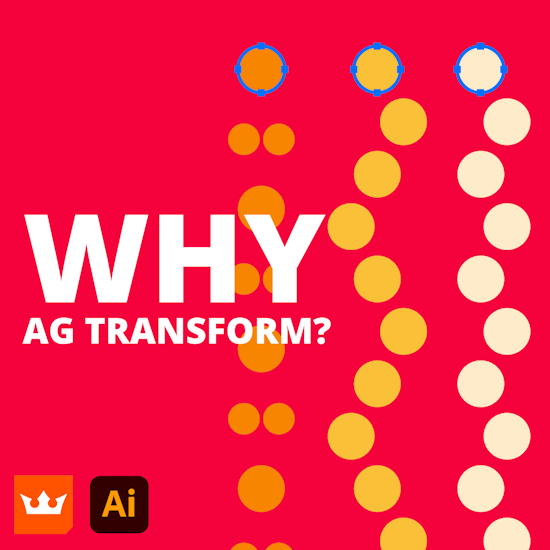
Why AG Transform?
7 minute readIf you’re used to using the native Transform live effect, you may wonder why you need AG Transform, one of the AG Utilities live effects from Astute Graphics.
The answer is that just as AG Offset adds many new features and options to the native Offset effect, so too AG Transform expands upon the native Transform effect, giving you unprecedented power to transform your artwork and create eyecatching designs that are easy to change and experiment with.
Following are five reasons why AG Transform goes well beyond the old Transform.
1. Grouping Levels
The native Transform effect always operates on the artwork to which it is applied as one single unit, even if that artwork is a group of objects (or a virtual group created by previous live effects in an appearance stack). This severely limits the usefulness of the effect when using randomization.
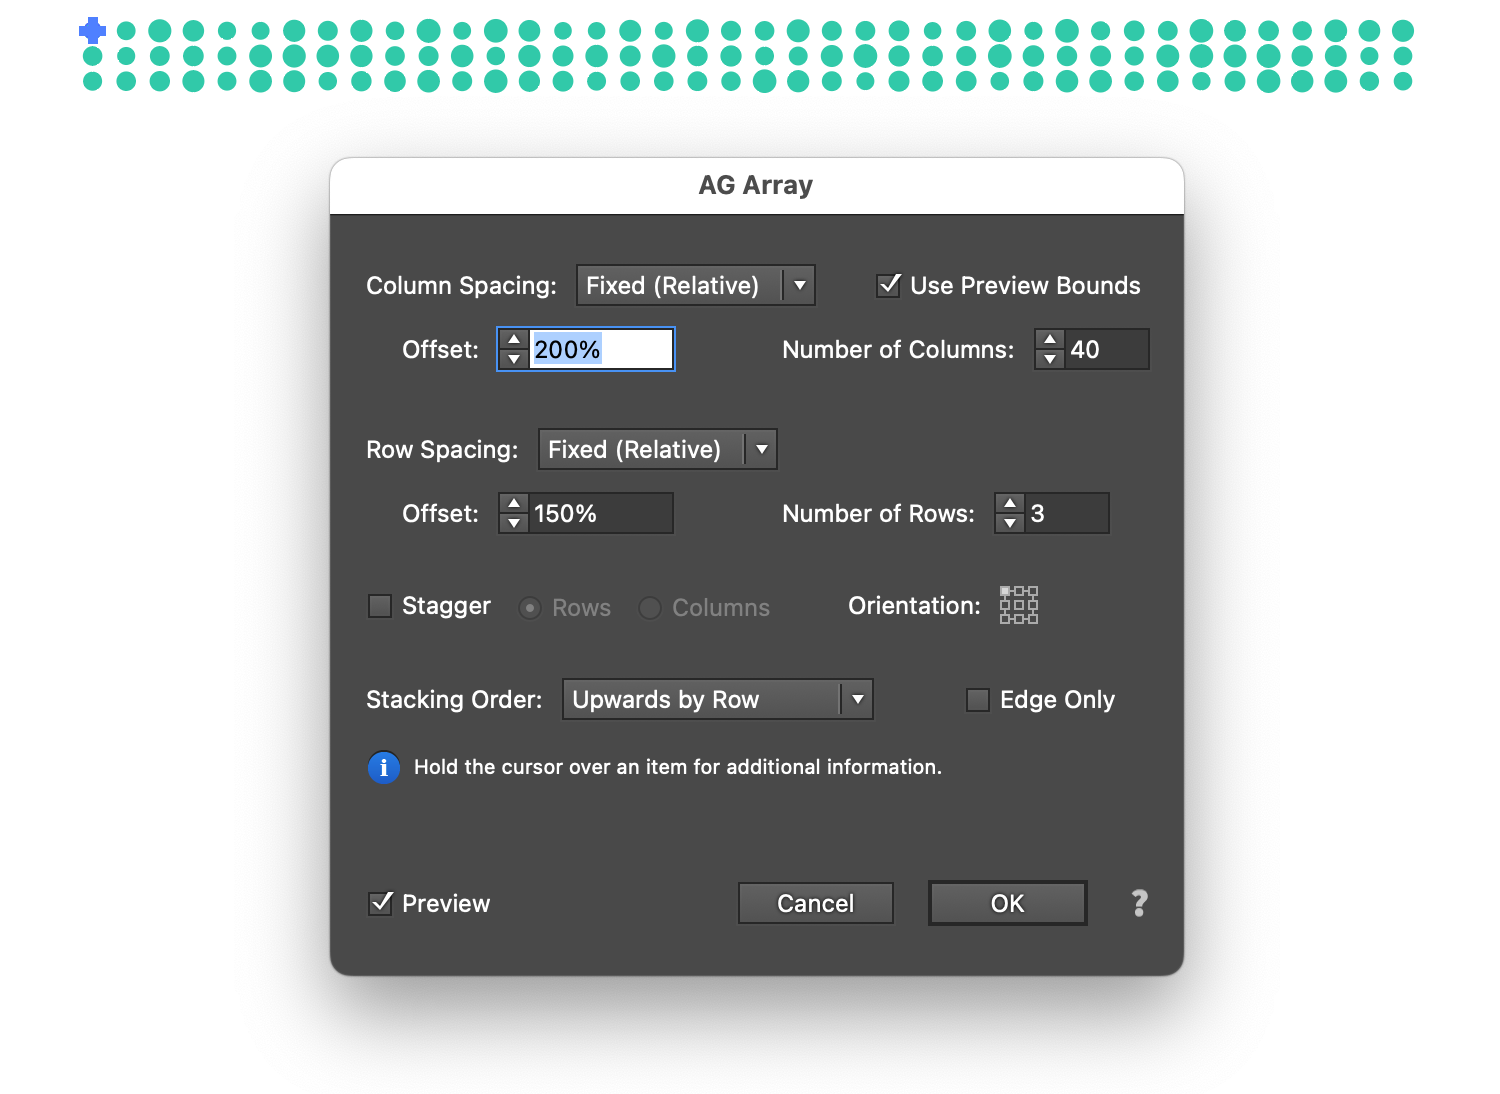
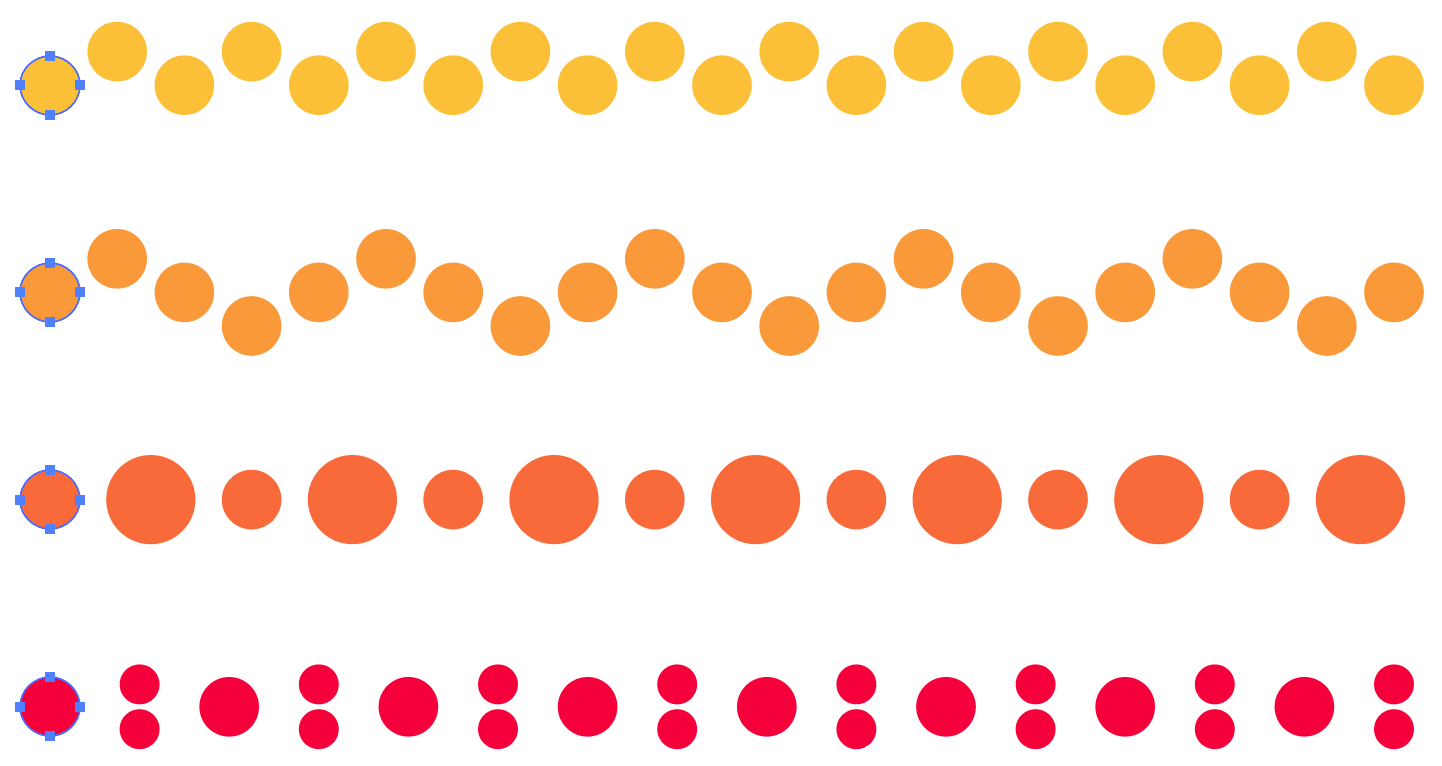
For example, suppose we wished to create a decorative divider consisting of a grid of circles, each a slightly different size. We could start by drawing a circle and manually step-and-repeating it both horizontally and then vertically. But, if later we wanted to change the circles’ base size or spacing, doing so would involve extra work. For flexibility, it is much better to use a single circle with an AG Array effect applied:
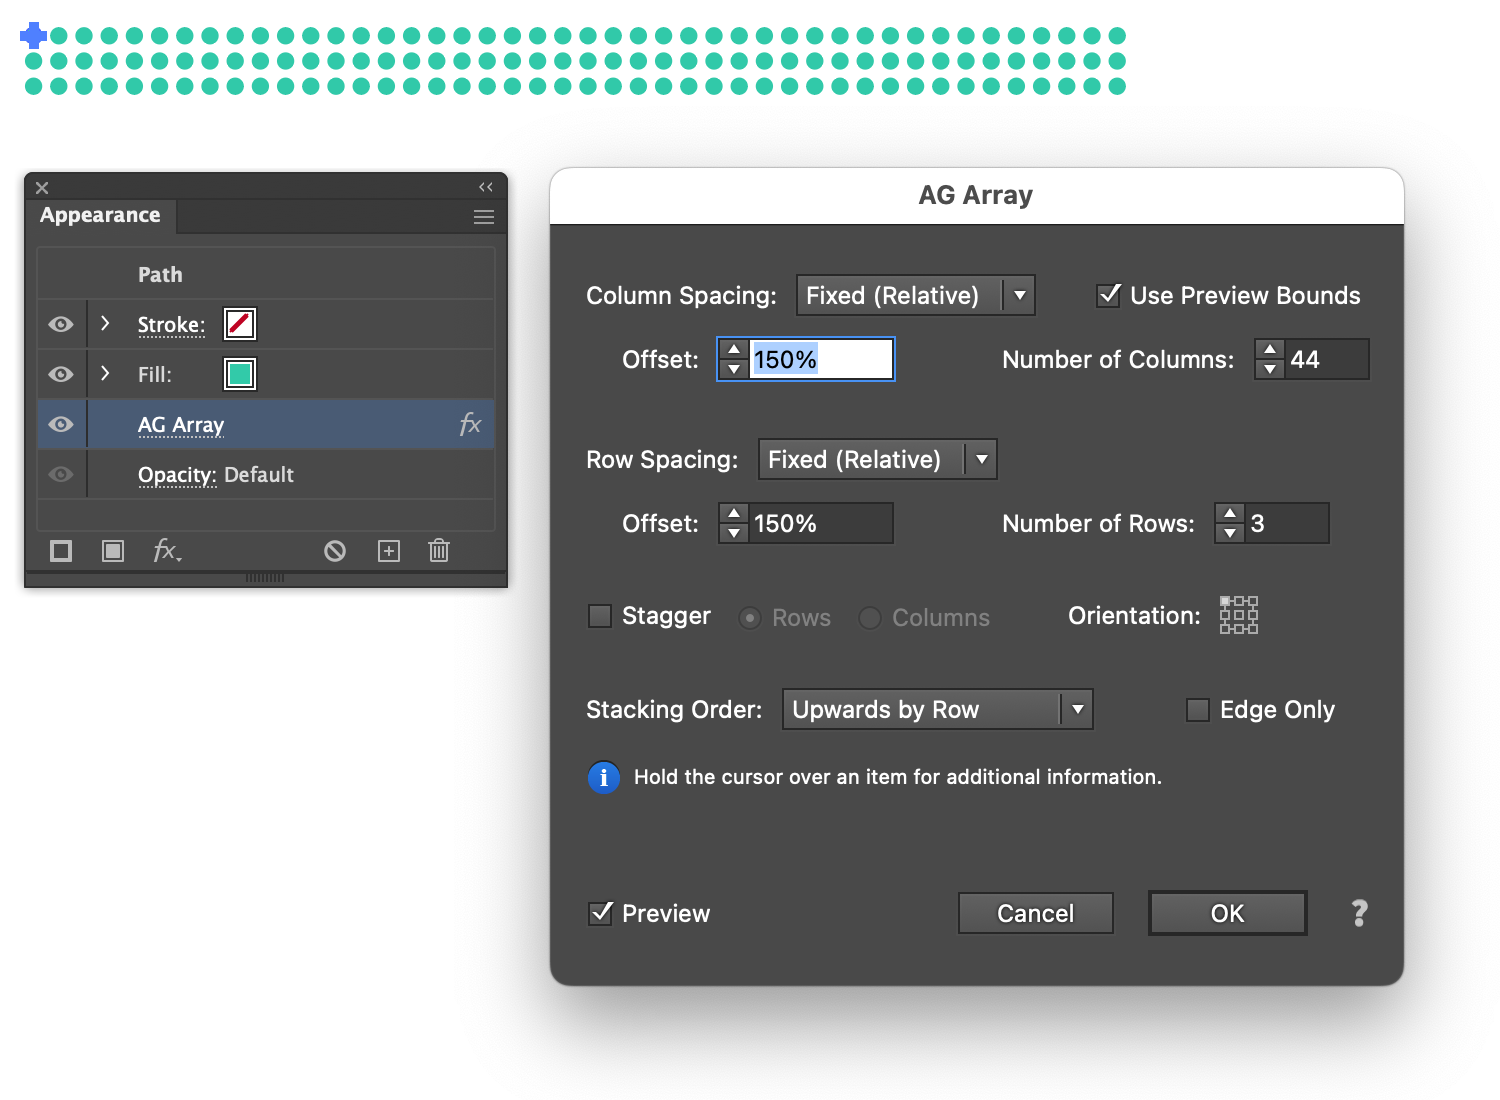
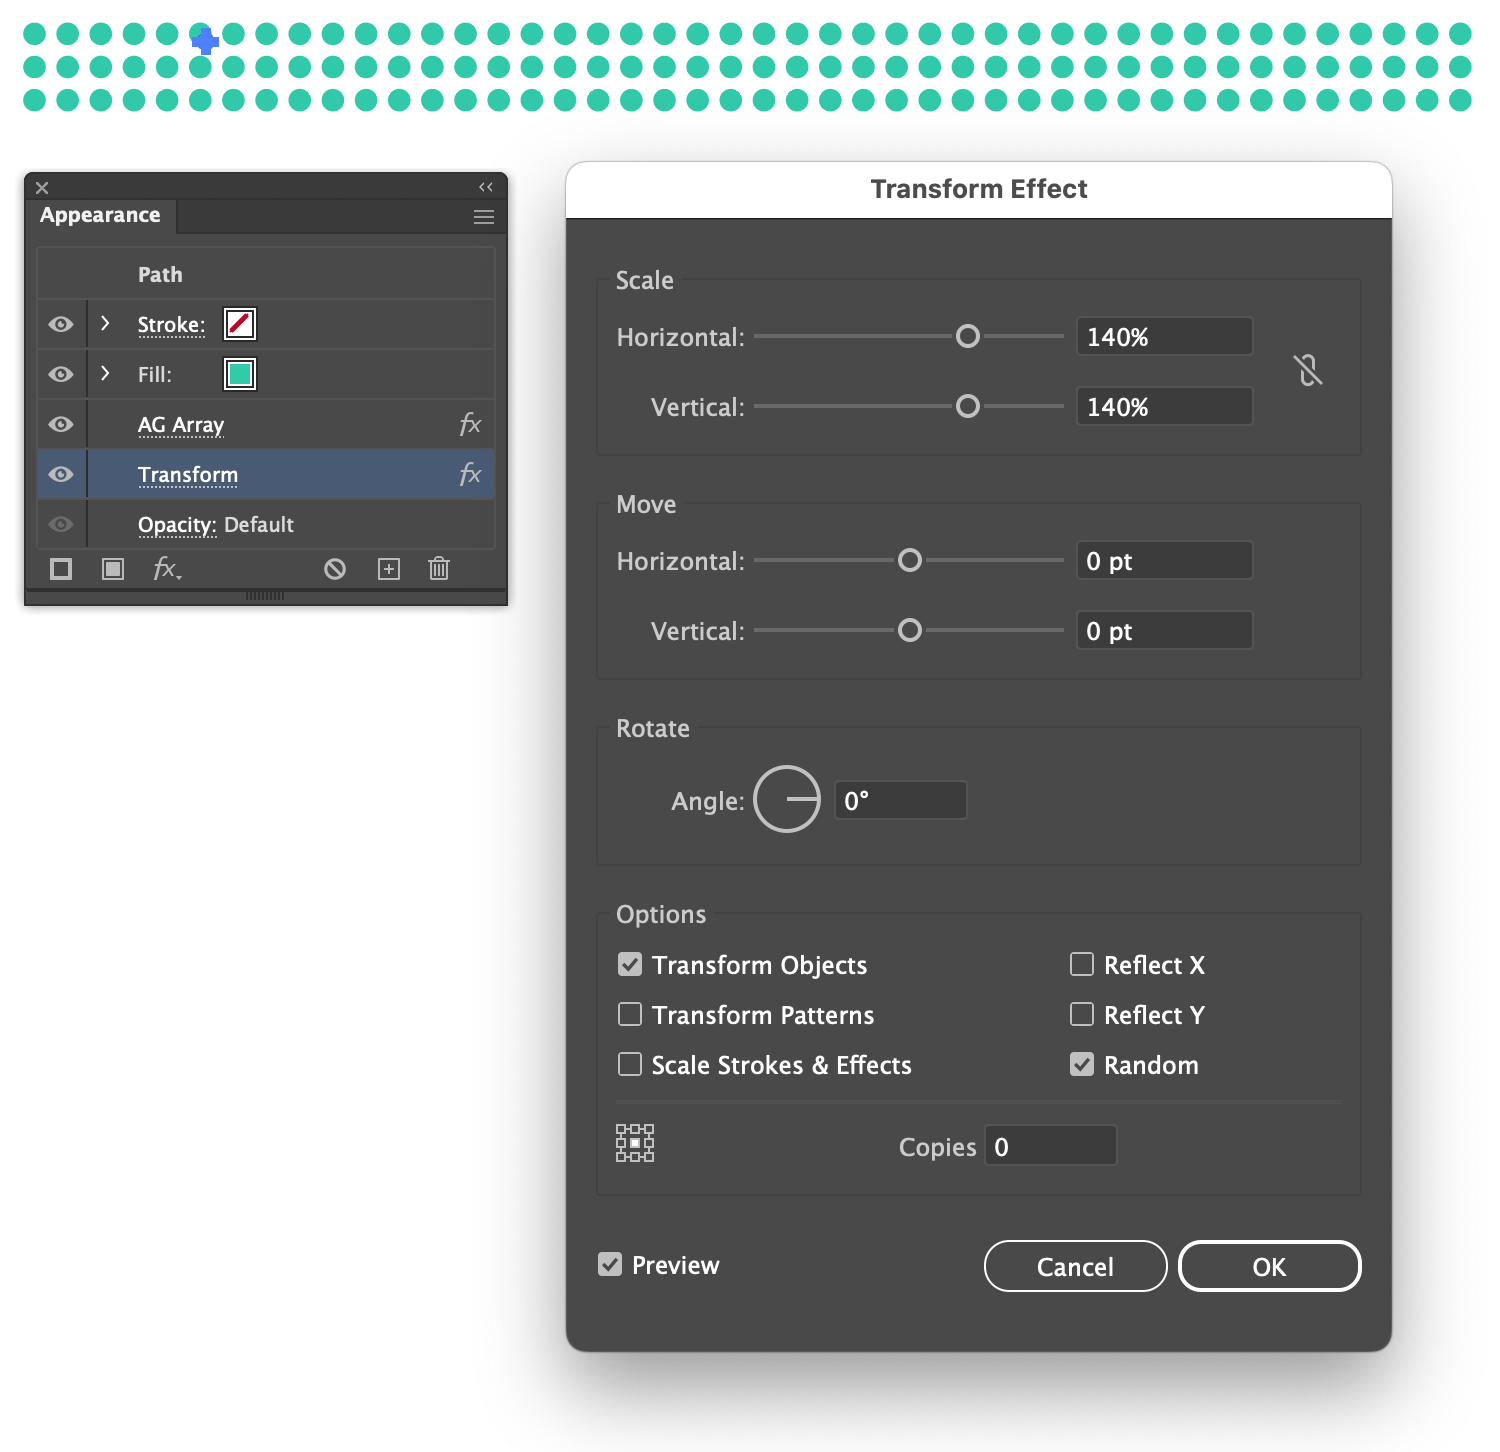
The problem comes when we then try and change the circle’s sizes (up to 140%, say) by adding the native Transform effect. Even with “Random” turned on, all the circles are scaled by the same amount. The Transform effect is being passed a large group in the effect stack, and it just transforms it as a single unit.
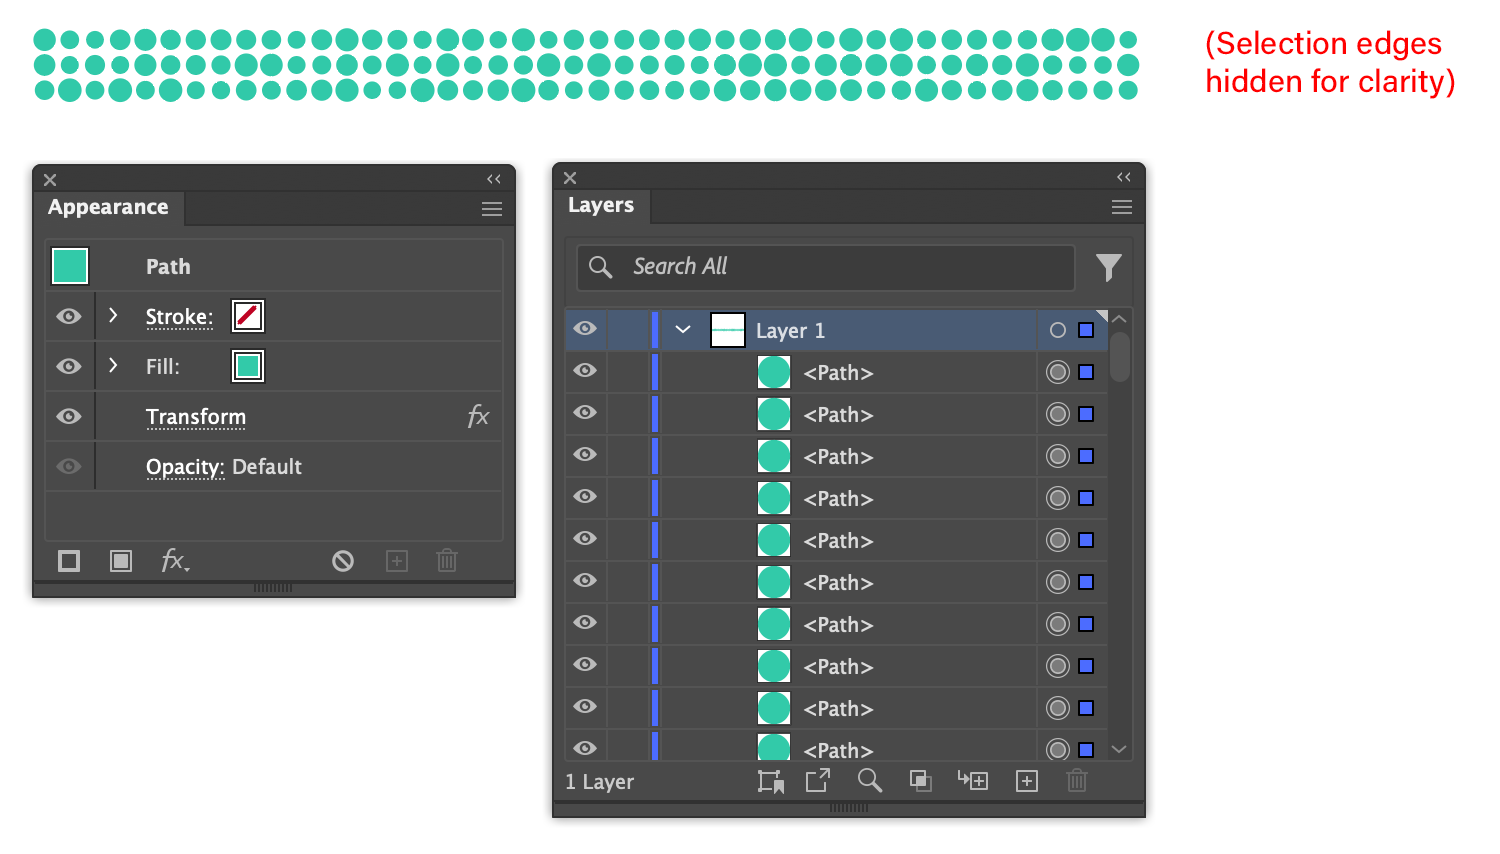
To achieve the look we want, we would have to use Expand Appearance on the original grid of circles and then completely ungroup them (or at least put them in Isolation Mode) before applying the Transform effect individually to each circle:
If the specific random values happened to produce an undesirable look (for example, with too many large circles directly adjacent to one another), the Transform effect would have to be removed and then reapplied to get a new set of random numbers. And if the spacing of the circles needed to be changed afterwards, then either tediously selecting, moving, and using the Align panel would be needed, or the entire sequence of operations would need to be repeated.
AG Transform, on the other hand, can independently affect each member of a group by setting the effect’s Apply at Grouping Level parameter to an appropriate value. By increasing the Grouping Level from its default of zero, the effect “digs deeper” into the grouping structure, and transforms each lower level group or object individually. In this example, using a Grouping Level of 1 allows each circle in the array to be transformed with its own random value:
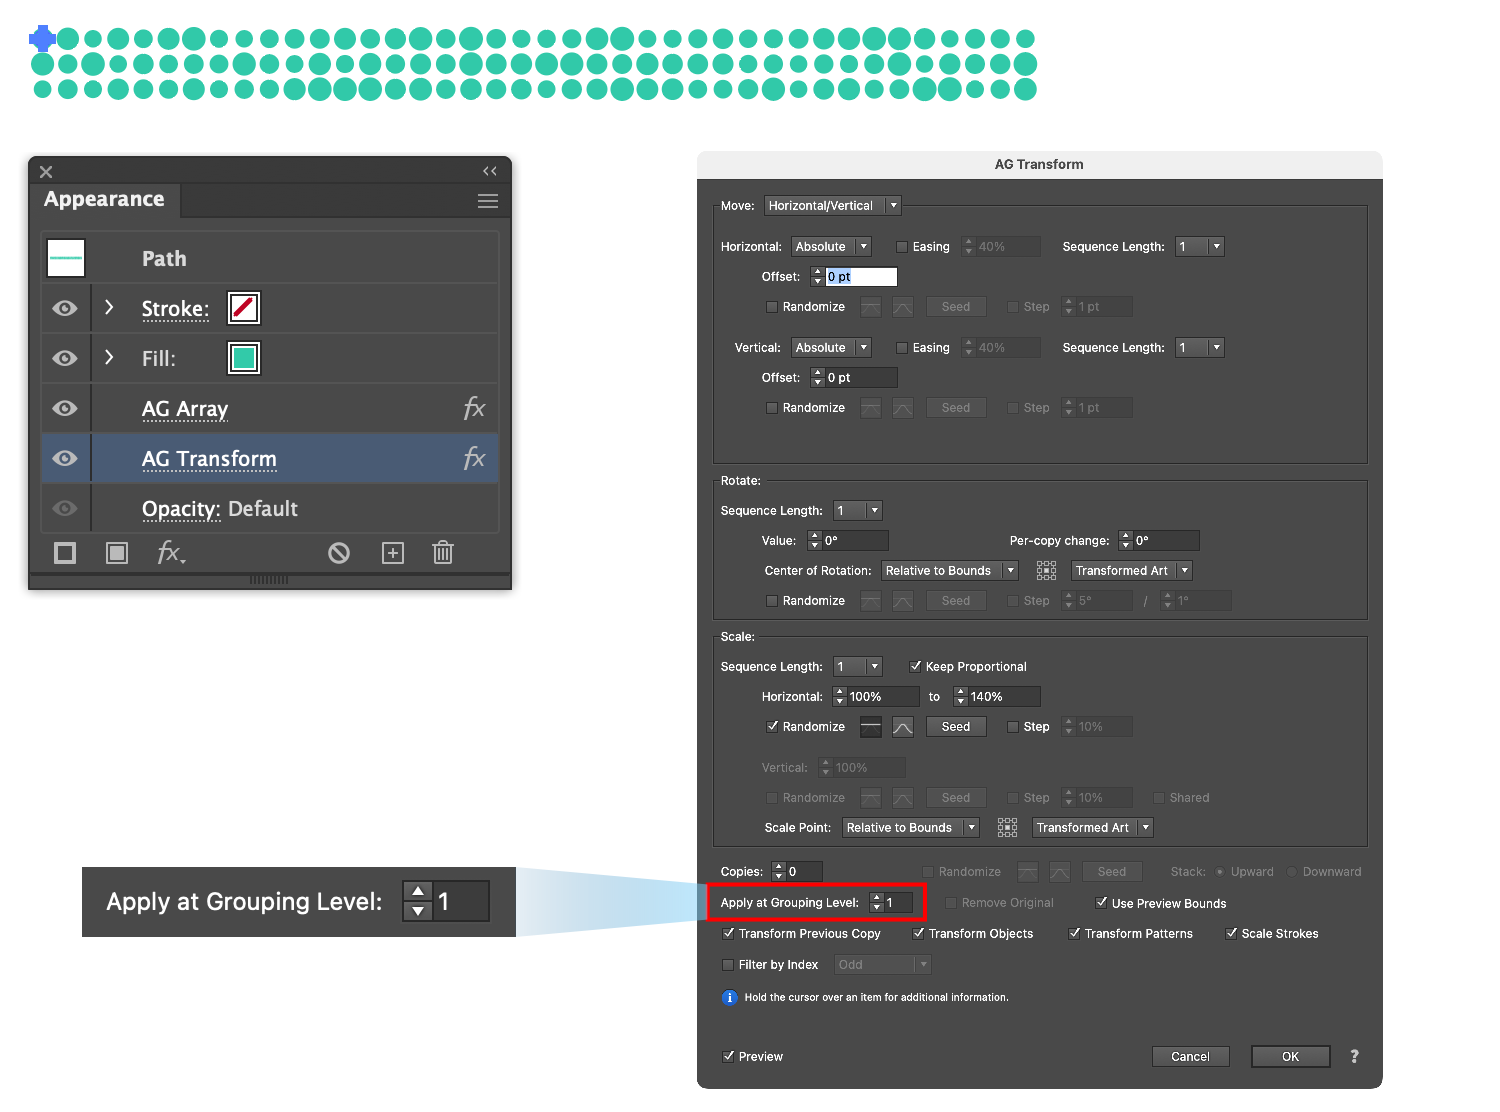
If we don’t like the random arrangement that was produced, we need only press the Seed button in the Scale section to produce as many different looks as we want.

Best, everything in completely live, so if we decided to alter the horizontal spacing between the circles, we could simply adjust the corresponding AG Array parameter:
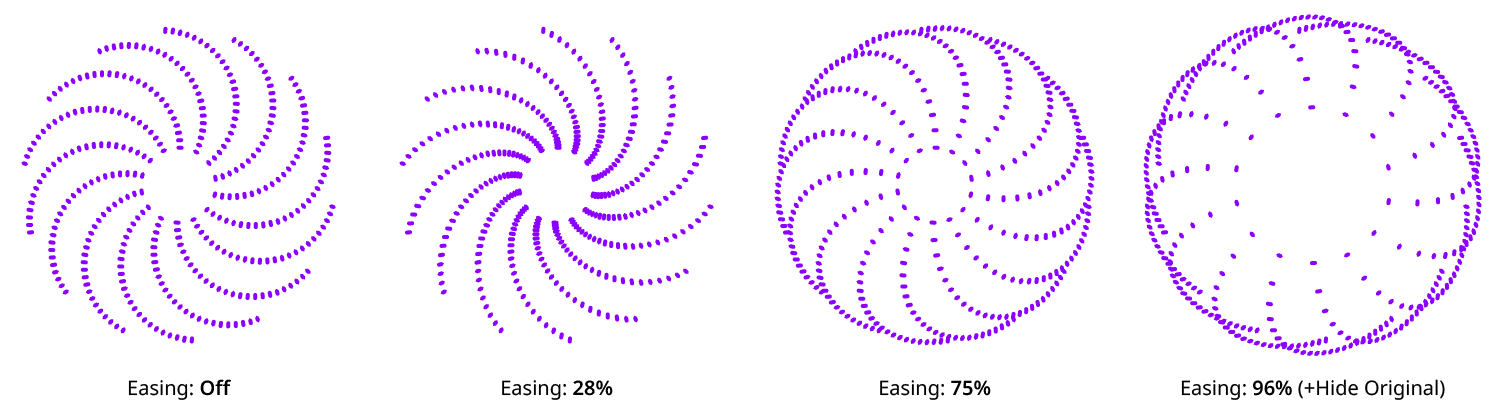
2. Easing
Want an appearance like this?

Forget about using the native Transform effect — it can only offset each copy by the same amount. But AG Transform offers Easing, whereby the copies can gradually become closer or further apart:
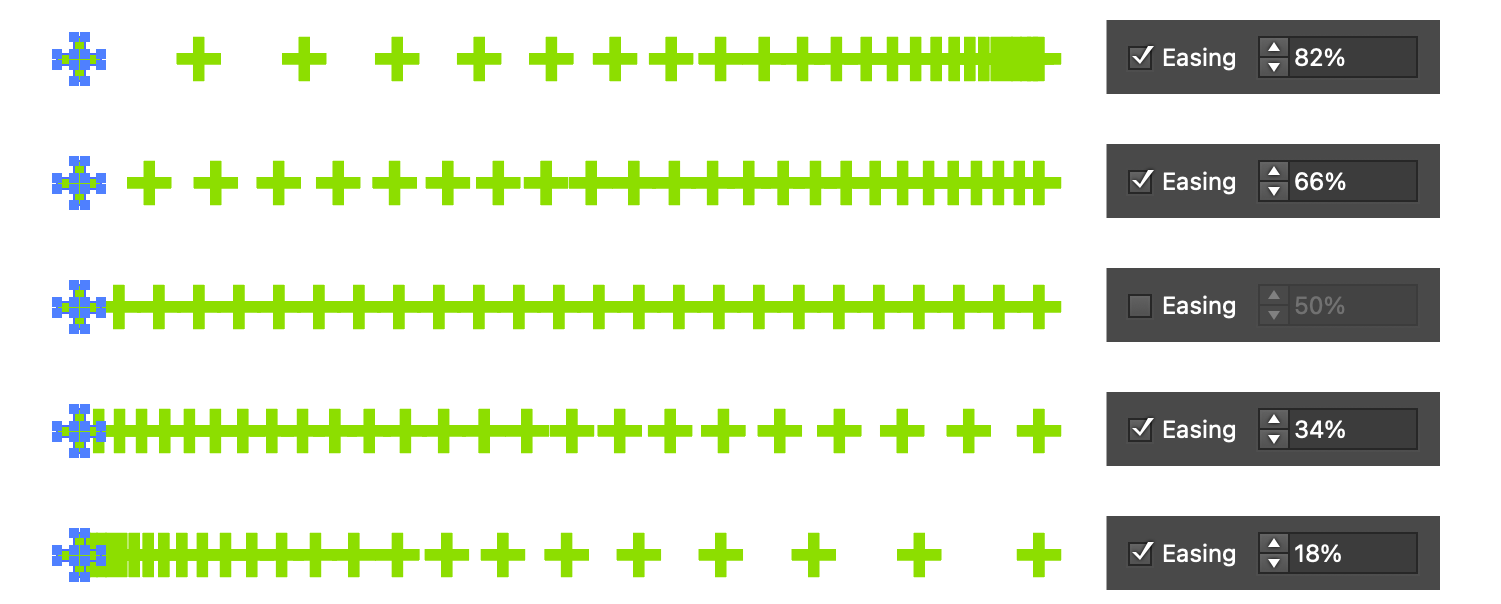
When combined with AG Transform’s other advanced features, like offsetting by Distance and Angle, easing can open up many new possibilities:
3. Sequences
Sequences are a feature in AG Transform that allow the parameters of succeeding copies to be different from each other. For example, the first copy might be transformed by a move of 24 pt to the left, while the second copy could move 36 pt. A sequence of up to eight different parameter sets may be applied to the copy chain. This allows zig-zagging movements and other special effects using just a single object and effect:
4. Center of Rotation/Scaling
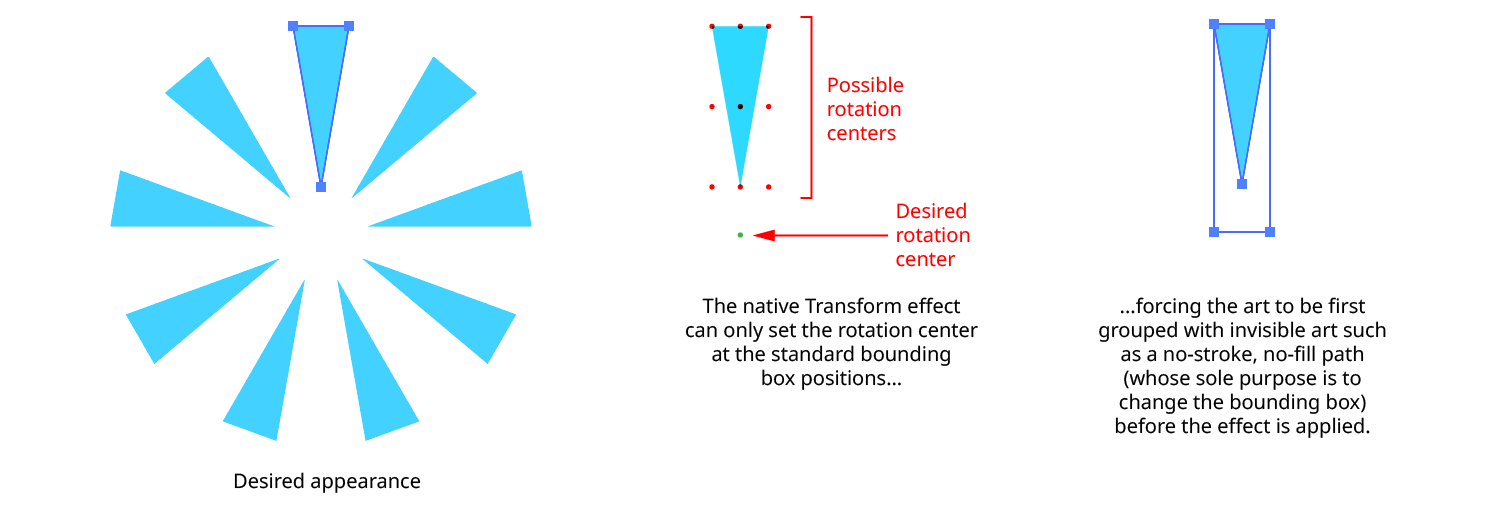
The native Transform effect’s options for specifying the transformation center (the point about which rotation and scaling take place) are very limited: it can only be positioned at one of the nine standard positions in relation to the bounding box of the original art, and it stays fixed for all copies. If the desired transformation center does not fall at one of these spots, workarounds are needed, such as grouping the art with an appropriately-sized no-stroke, no-fill path that changes its bounding box.
AG Transform offers much more flexibility in the positioning of the center of rotation or scaling — starting with the fact that they may be set independently of each other. Each point can be located using one of six different methods, including at a given anchor point of a path, any position along the path, or along an imaginary line constructed through points of reference on the path:
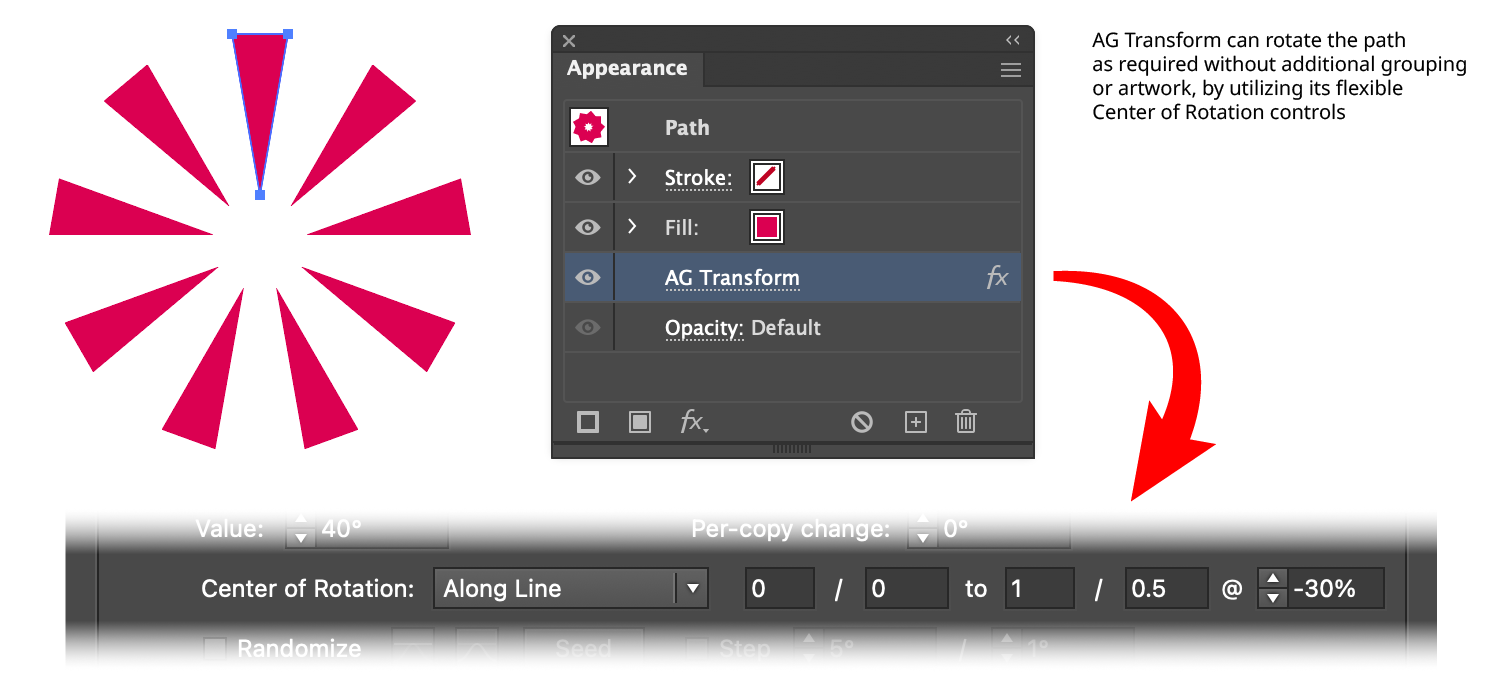
In some of the methods, the center of rotation is transformed along with the art, facilitating the creation of appearances which cannot be accomplished with a single native Transform. Here, the rotation center is being shifted to the right along with the object:
5. Filtering
Sometimes it is desirable to transform only a subset of the members of a group. While this might be done manually, by selecting only those members and then applying the effect to them, this would not be possible when the effect is part of an effect stack without expanding the existing effects and losing the ability to easily edit them afterwards. But AG Transform implements filtering by art index, which, for instance, enables it to scale down every other circle in an array created by an AG Array effect:

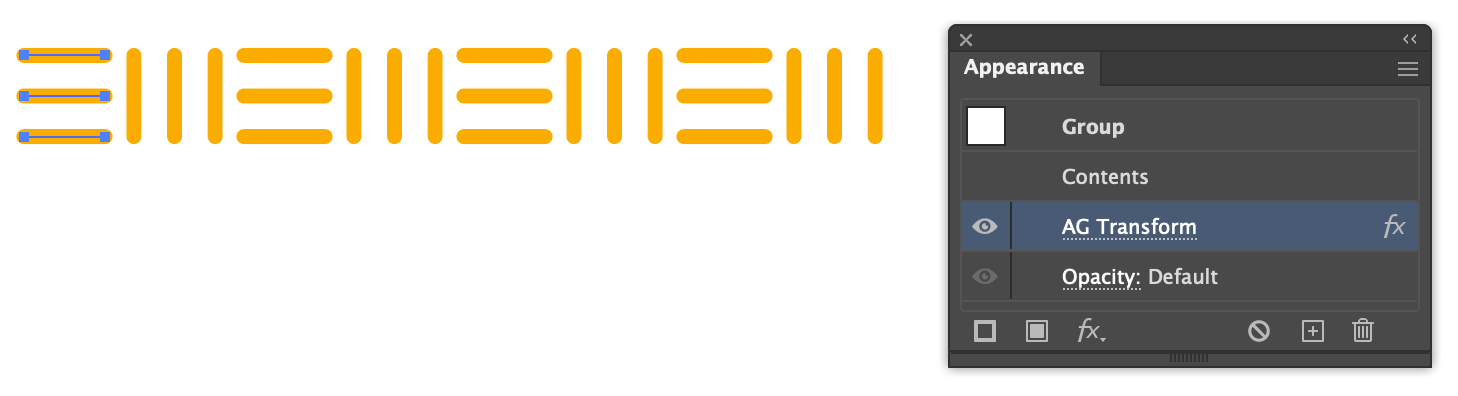
As another example, consider the construction of a millimeter ruler, where every 5 and 10 millimeters are marked with longer tick marks:

Manually creating this through step-and-repeating would not be too difficult — at least, when the ruler is straight. But what if we wanted an accurate ruler along a gentle curve?

Here, a path with a Make Shape effect (which can create lines along the curve a fixed distance apart) is given two AG Transforms. The first lengthens every tenth line, starting with the first, while the second does a slightly smaller scale every tenth line, starting with the sixth. In each case the Scale Point is at the starting anchor point of each line, so lengthening only occurs in one direction, and “Scale Strokes” has been turned off so the lines’ weight stays constant.
Try Astute Graphics for FREE
If you haven’t tried the hundreds of features available from Astute Graphics for Adobe Illustrator, you can use it free for 7 days. No payment details are required.
