Create a Halftone Effect in Adobe Illustrator
9 minute readIf you're looking to add a unique texture and depth to your designs, creating halftones in Illustrator is not only fun but incredibly easy. Halftone effects, with their iconic dot patterns, are a great way to give your artwork that extra dimension. They are also great at making use of lower resolution or less detailed underlying images. Whether you're working on a vibrant pop art piece or a comic book illustration, halftones can bring a playful, retro feel that instantly grabs attention. The best part? Illustrator makes it simple to create various halftone styles—from circular and linear patterns to fading dots that gradually disappear, offering endless possibilities.
Halftones are widely used in screen and offset printing, where the dot pattern mimics the way colors are built up in CMYK printing. They’re perfect for creating bold stencil designs, adding texture to digital art, or even producing those transparent effects often seen in modern design. Whether you're aiming for sharp contrast or subtle gradients, halftone patterns allow for a versatile way to experiment with textures and effects that can elevate any design. From posters to T-shirts to digital illustrations, halftones work across a variety of art styles and is a must-know technique for any creative.
Native Color Halftone Effect
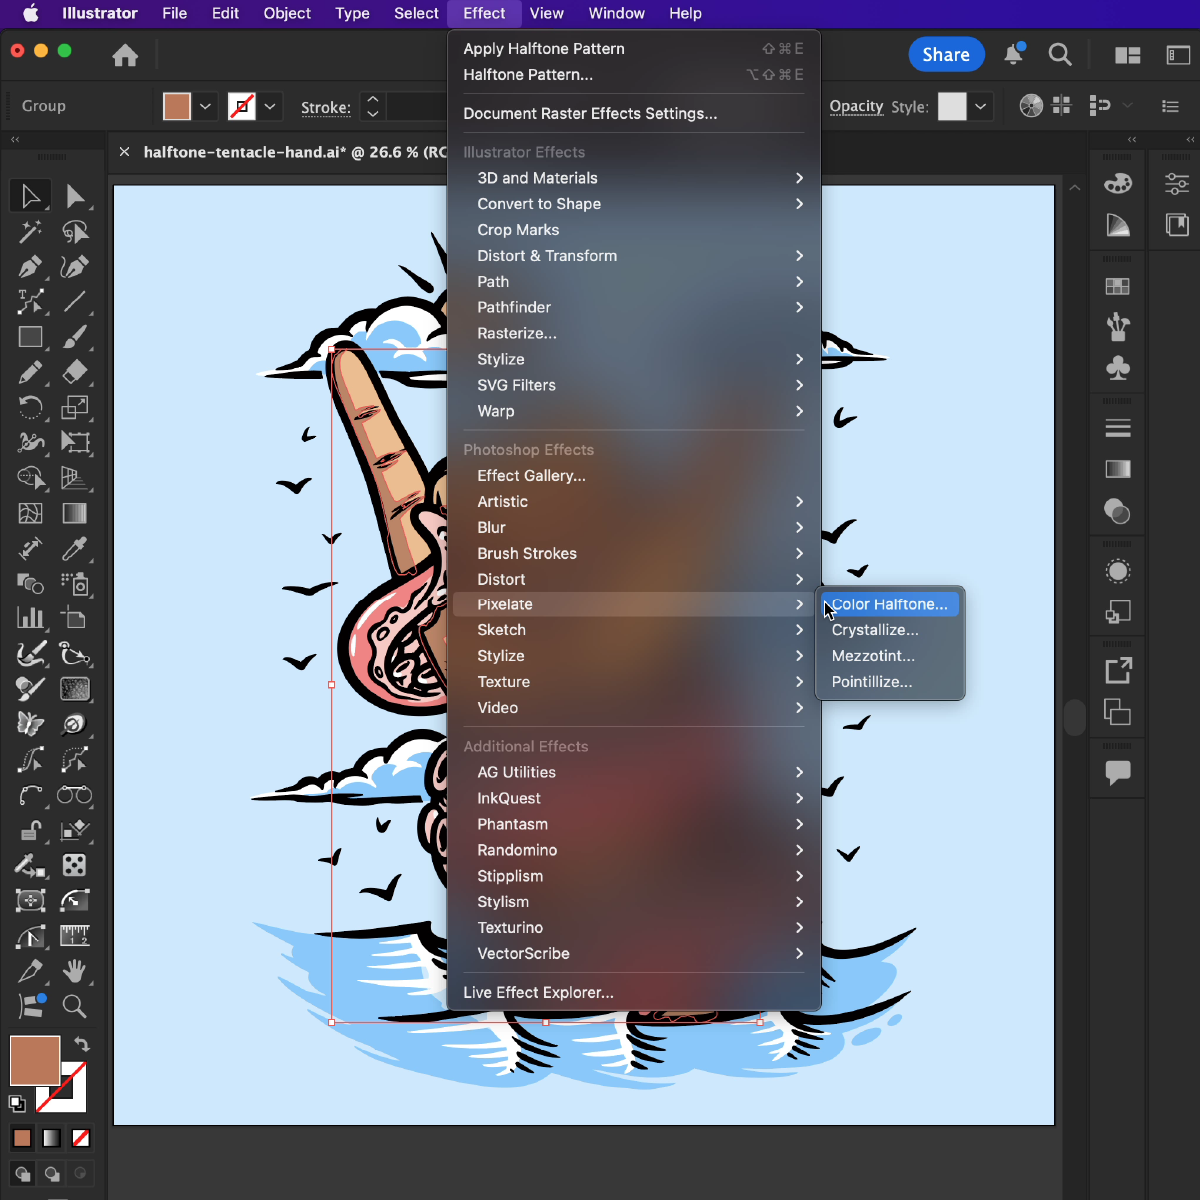
Create or select the object or artwork that you want to apply the halftone effect to. This could be a shape, image, or even text. Go to the top menu and click Effect > Pixelate > Color Halftone.
The Color Halftone dialog box will pop up, giving you the option to adjust the settings:
Max. Radius: This controls the size of the halftone dots. Larger values create bigger dots, while smaller values make finer dots.
Screen Angles: These are the angles at which the halftone screens (dots) will be applied. You can set different angles for each of the four color channels: Cyan, Magenta, Yellow, and Black (CMYK). For a single channel halftone (eg. only Black) the screen angle choice is arbitrary—you can use what you like for best visual effect.
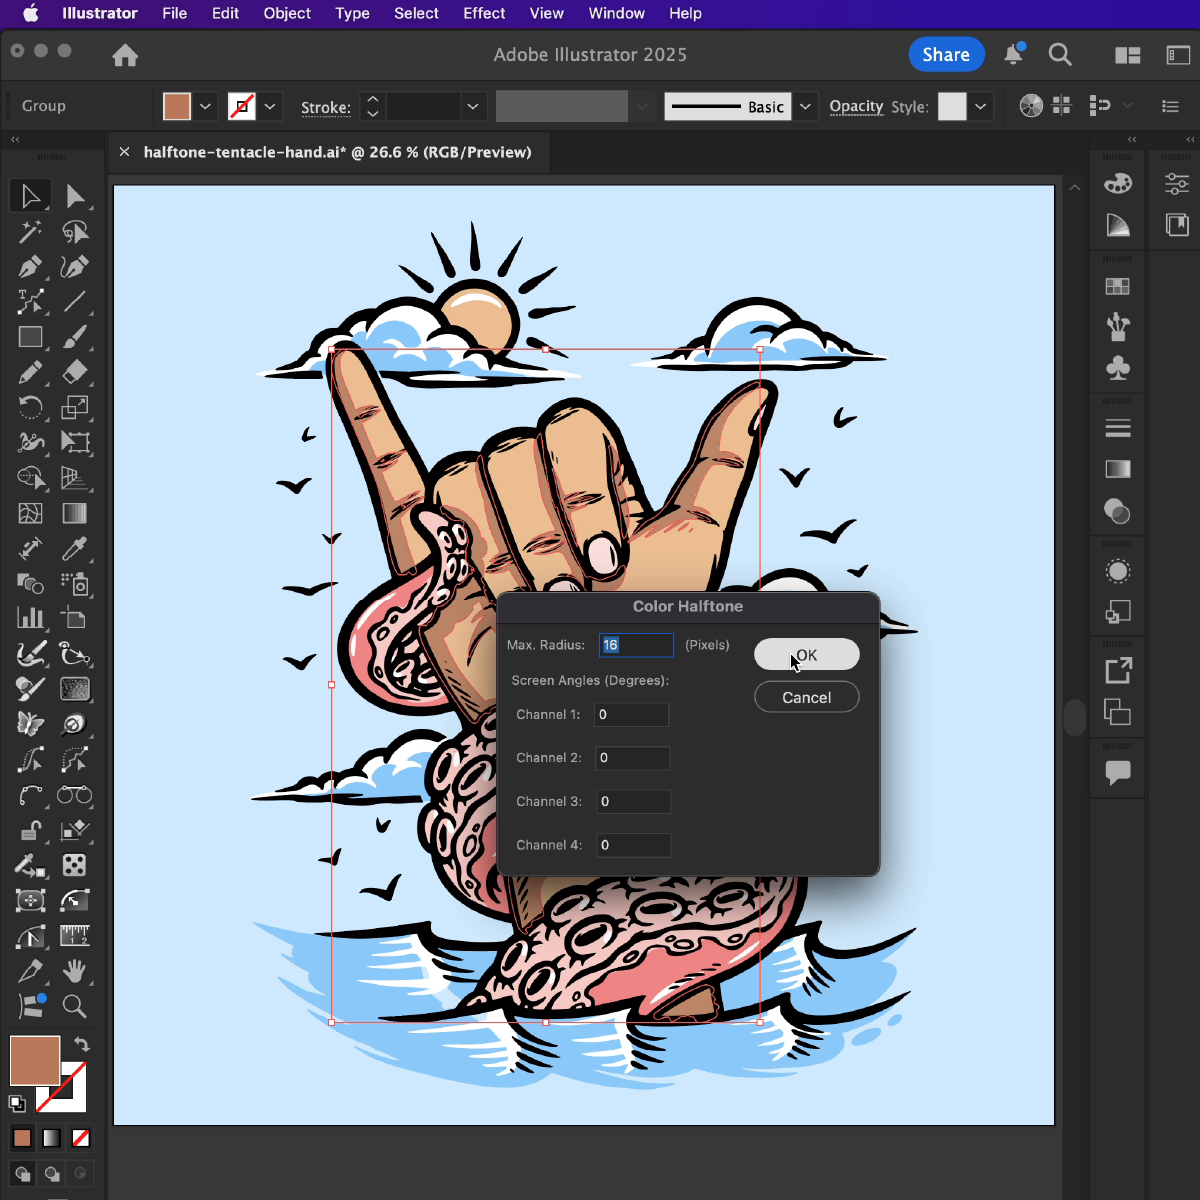
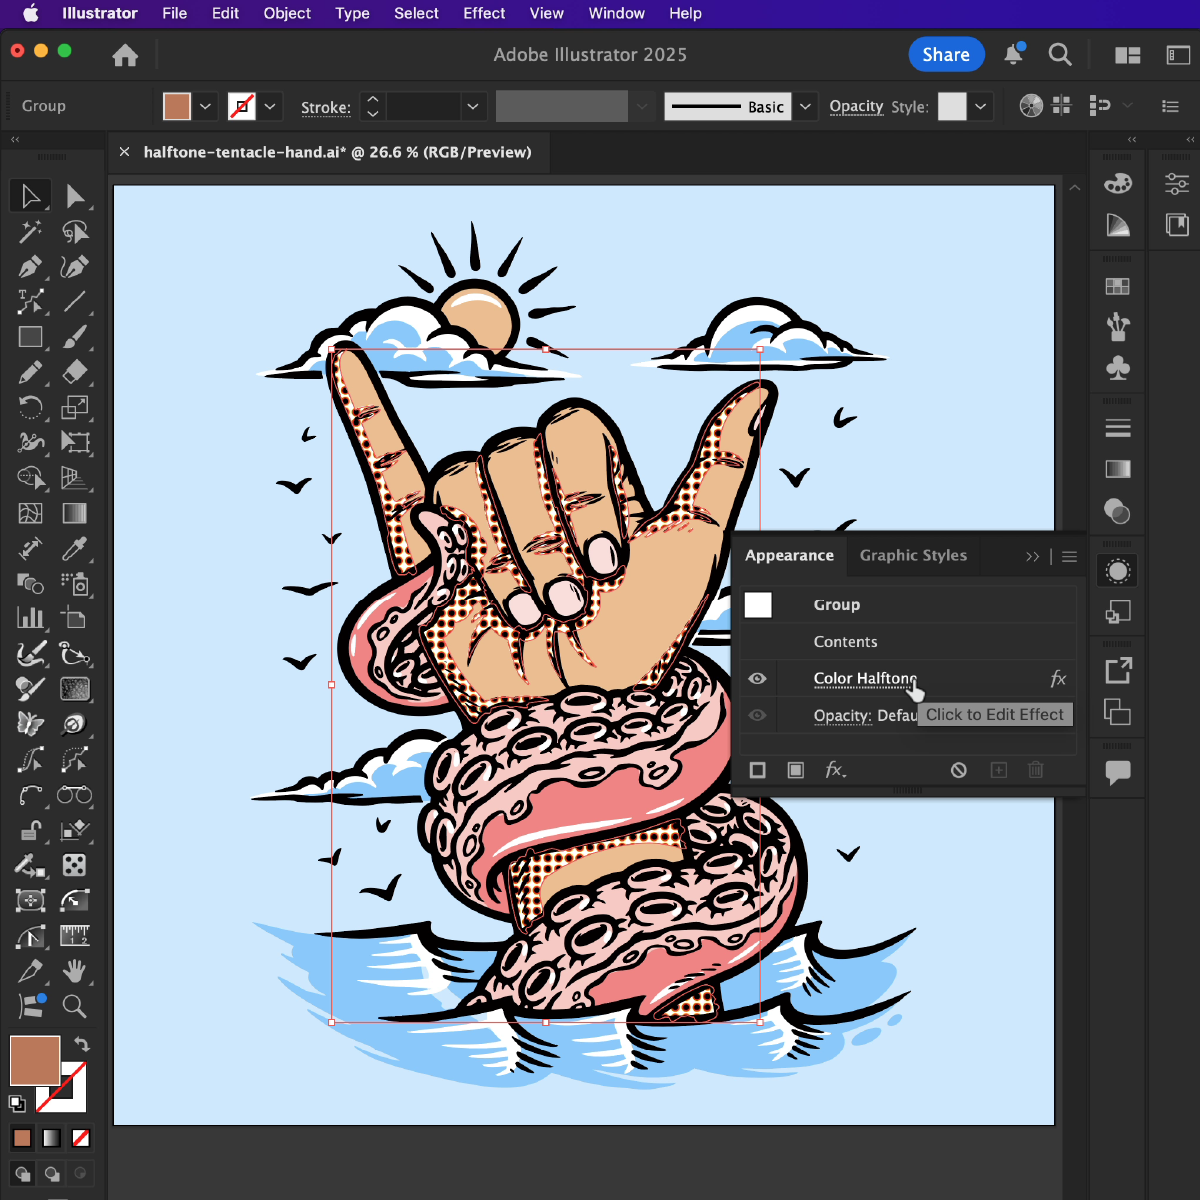
Color Halftone won’t preview the changes, so you need to click OK to confirm. If you want to make further edits, open the Appearance panel (Window > Appearance), with your object still selected. You will then see Color Halftone listed. Click that to reopen the dialog to make changes.
Tips: To get a more dynamic halftone effect, you can experiment with applying a black and white gradient to your object first. With this way, the dots will scale according to the tone of the object. You can then edit the Gradient to further adjust the dot placement.
Rasterize the Halftone Effect
As with all raster-based live Effects, the resultant resolutions are determined by the Document Raster Effect Settings dialog (Effect > Document Raster Effect Settings...). The default resolution of raster Effects are determined by the template document types where screen-based templates are set to 72ppi (less detail, more pixelated, quicker to render) and print-based templates set to a more detailed but slower 300ppi.
If you wish to rasterize a single object with the native halftone effect applied, ensure it's still selected and then choose Object > Expand Appearance.
If the artwork you want to rasterize is a grouped selection of various elements, including the native halftone effect, you need to take another approach. But before continuing, you still need to ensure that the Document Raster Effect Settings are already set to the desired resolution (dpi). Next, select the artwork that contains the halftone effect and choose Object > Rasterize.

In the Rasterize dialog box, set the following options:
Resolution: Choose a resolution (ppi) that preferably matches the resolution set in Document Raster Effect Settings dialog. 300ppi is good or print work. 72 or 144ppi is good for on-screen work, where 144ppi is Retina (double) resolution commonly found on mobile and modern screens.
Color Model: Choose Grayscale color model to output the dots as black.
Background: Set the background option to Transparent.
Click OK to rasterize the object.
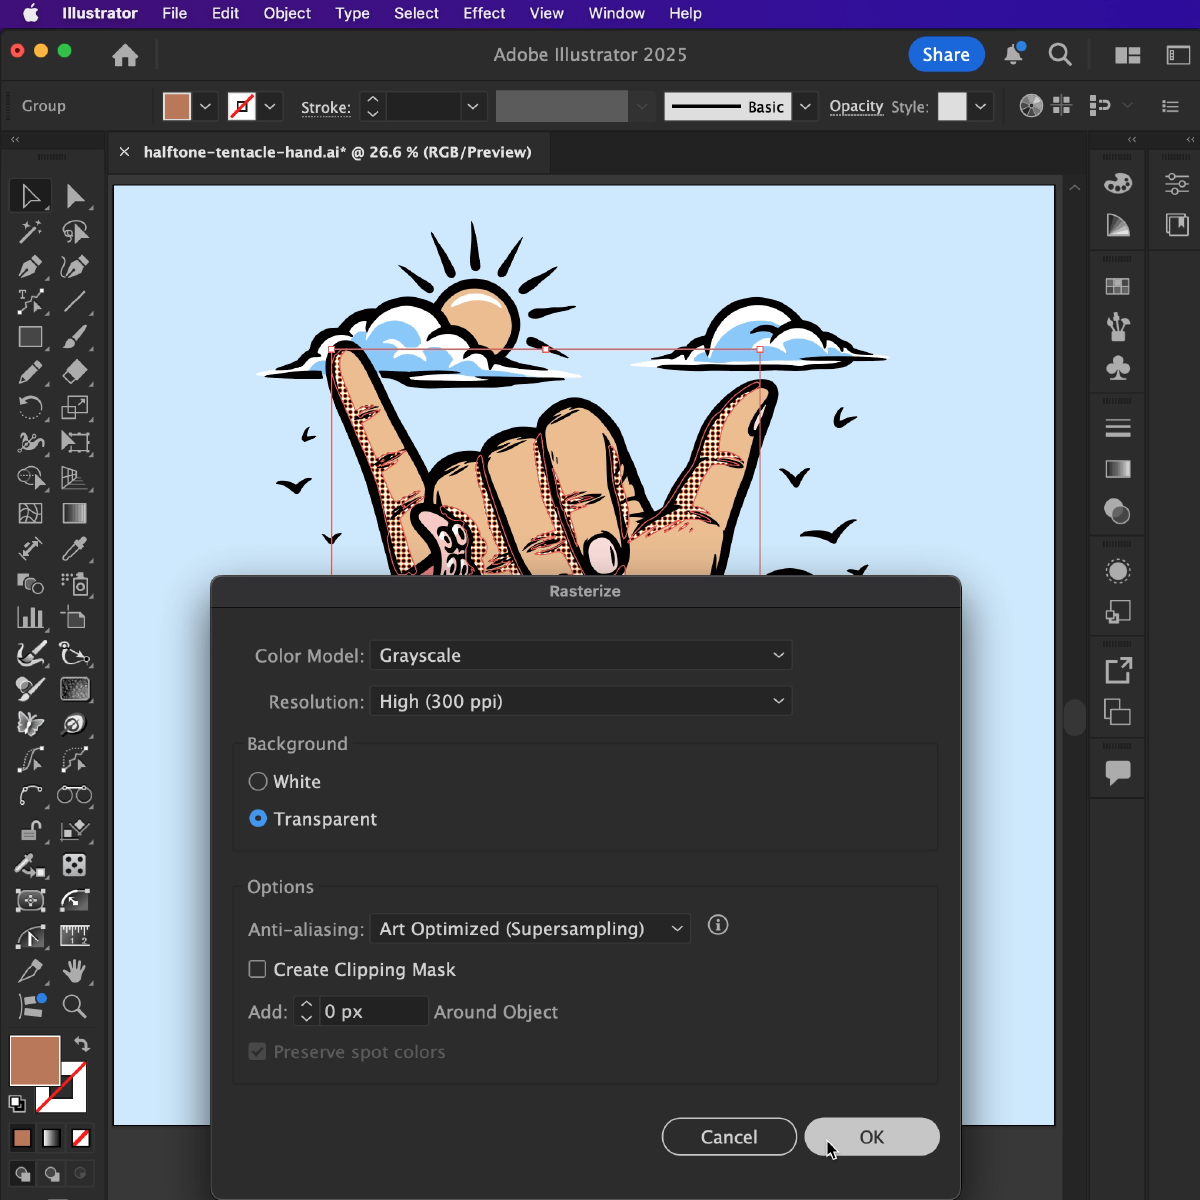
Image tracing the halftones
Open the Image Trace Panel by going to Window > Image Trace.
In the Image Trace panel, set the mode to Black and White (if not already). Next, click on the Advanced options arrow to reveal more settings.
Under the Advanced settings, check the Ignore White box. This will make Illustrator ignore any white spaces and focus on tracing the black halftone dots.
Adjust the Corners to allow for smoother shapes and try out the Shape option to ensure the final shape result contains geometric shapes where possible.
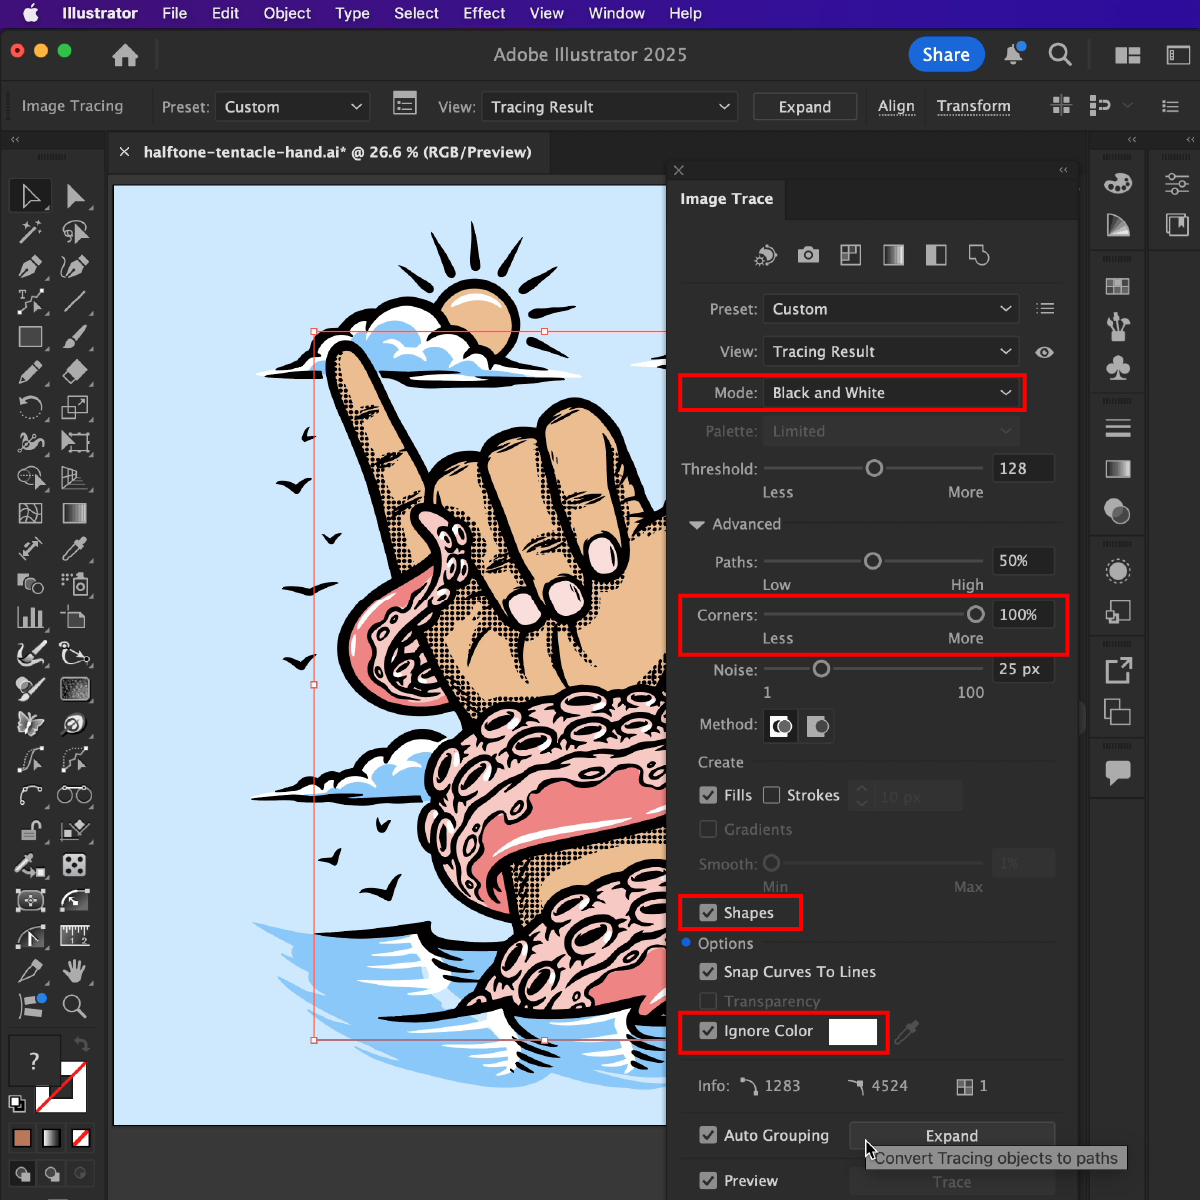
Check the Preview box to see how the trace looks in real-time. If you’re satisfied with the results, click Expand in the toolbar to convert the trace into vector shapes.
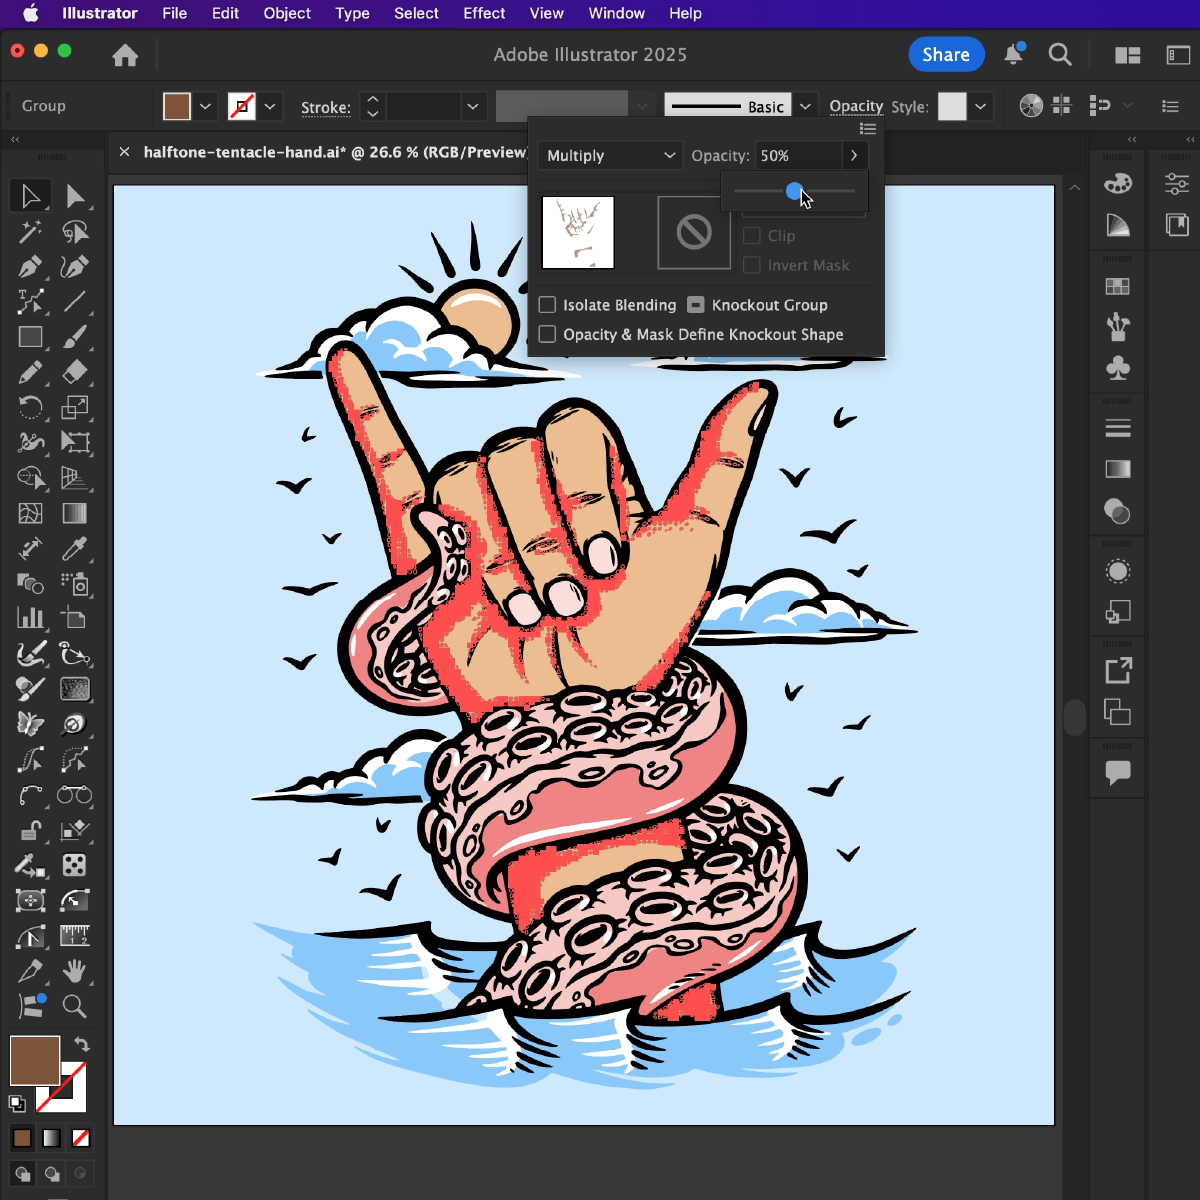
Once you’re happy with the result, change the fill and blending mode of your vector halftones for a comic book type finish.
Creating vector halftones quickly using Phantasm
If you want to add halftone shading to your vector artwork, here’s a quick guide on how to use the Phantasm Halftone live effect that can be expanded into pure scalable vector halftones.
Make sure you have the Astute Graphics Phantasm plugin installed in your version of Adobe Illustrator.
Try it for free for 7 days
Phantasm Halftones is part of the Phantasm plugin which you can try free for 7 days with just your email address. Find out more here…
Make sure the image or vector object you want to apply the halftone to is selected. Open the Phantasm panel (Window > Astute Graphics > Phantasm).

Click on the Phantasm Halftone Live Effect button in the panel to open the Phantasm Halftone dialog window.
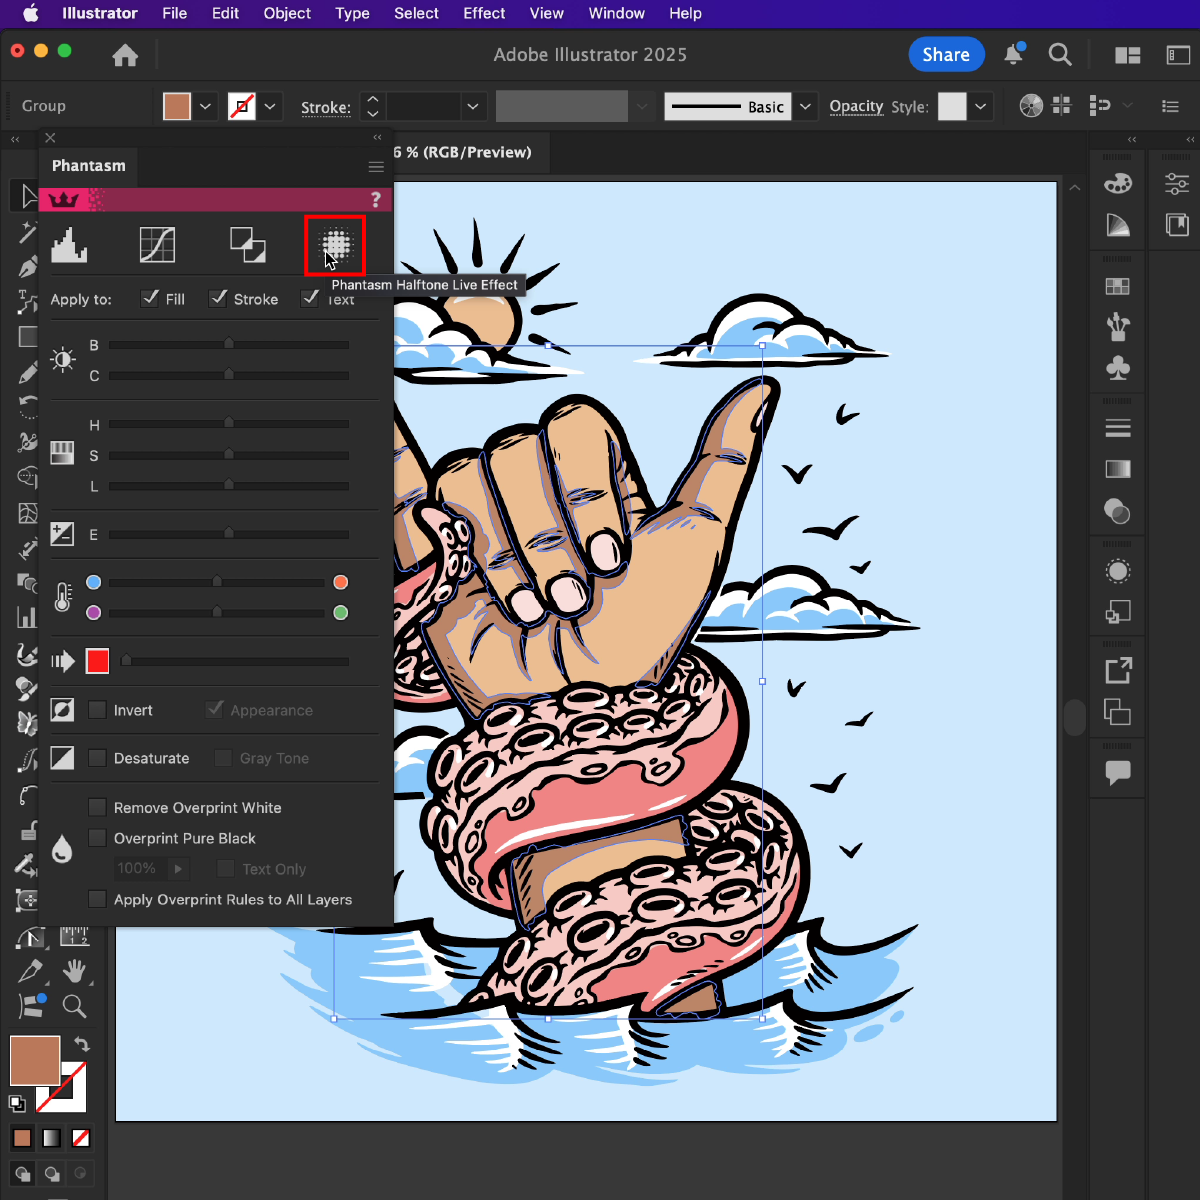
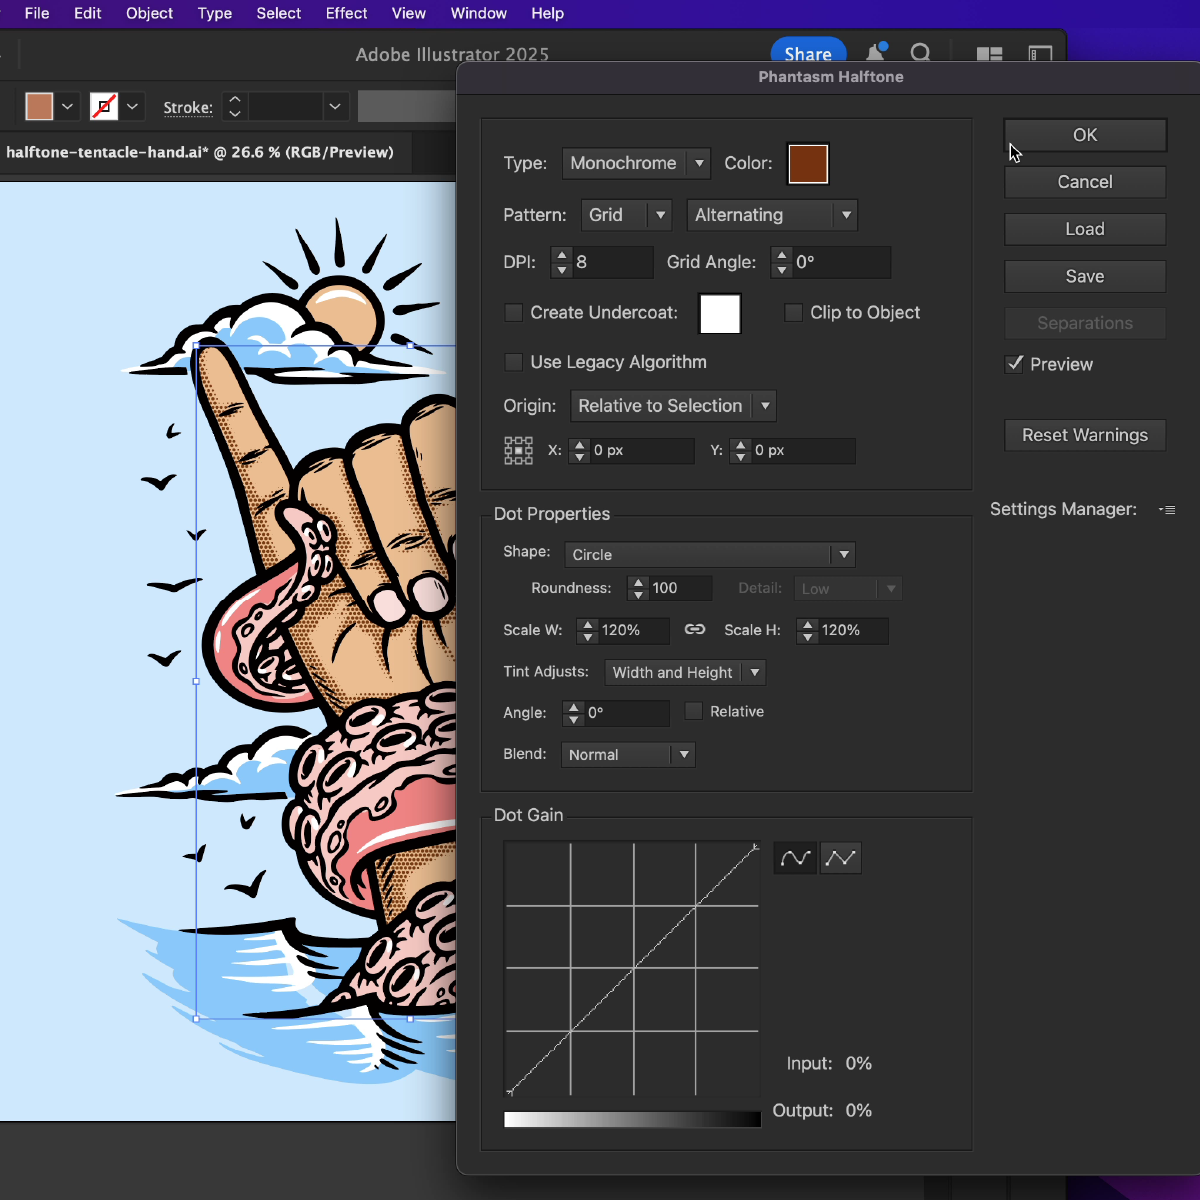
Once the Phantasm Halftone dialog is open, you will have several settings to adjust for your halftone effect:
Type: Choose between a single Monochrome color, RGB/CMYK color mode (depending on your document type), or the Sampled color from the original object.
Pattern: Choose between a Regular or Alternating grid, FM or Radial pattern.
DPI: This controls how dense or spread out the halftone dots are. A higher frequency will result in smaller dots and a more detailed effect, while a lower frequency will produce larger dots with more visible space between them.
Angle: Adjust the angle of the halftone pattern to suit your design. Common angles are 45° or 30°, but you can customize it depending on the effect you want.
Clip to Object: Enabling Clip to Object will crop your halftone to the original path's geometry. Leaving it disabled will ensure the halftone pattern finishes with a complete shape, regardless of whether it extends the original object's boundary.
Dot Properties: The Dot Properties section allows you to adjust the scale and shape of your halftone. The tint adjustments allow you to further tweak the scale. You can even use Characters or Symbols as your halftone shapes, not just circles.
Preview Mode: Enable preview mode to view the real-time effect of the halftone pattern.
Once you're happy with your halftone settings, click OK. The halftone pattern will now be applied to your selected artwork.
If you want to tweak the effect after applying it, you can always return to the Phantasm Halftone dialog and adjust the settings. You can find the live effect applied in the Appearance panel (Window > Appearance).

To turn the halftone pattern into individual vector shapes go to Object > Expand Appearance to convert the live halftone effect into a group of vector paths that you can manipulate.
Try Phantasm for free for 7 days with just your email address...
Already a subscriber?
Ensure you have the Phantasm plugin installed through your Astute Manager, then you can find the Phantasm panel in the Window > Astute Graphics > Phantasm.
Need more help on this feature? Here's the full halftone documentation…