Create a mind blowing rollercoaster with WidthScribe
6 minute readSummer is approaching and it is the season for going out into the sun and taking a trip to the various amusement parks that surround the globe. In this tutorial, I will be teaching you how to use the WidthScribe Tool to make the creation of the most colossal roller coaster you can imagine, a breeze.
Create Your Base Concept
When creating a coaster there are two ways of approaching the process. One is with a sketched out concept. The other option is just flying by the seat of your pants and letting it take you where your concept wants to go. I will start my project with a couple of lines that will act as the base of my concept. When using this method, I prefer to use the Pencil Tool in Illustrator.
You can also use the DynamicSketch plugin, which gives you a lot more control, and you can visualize the strokes as you’re making them. Dynamic sketch does take a bit more set-up with preferences, so we’ll focus on the pencil tool for this project.
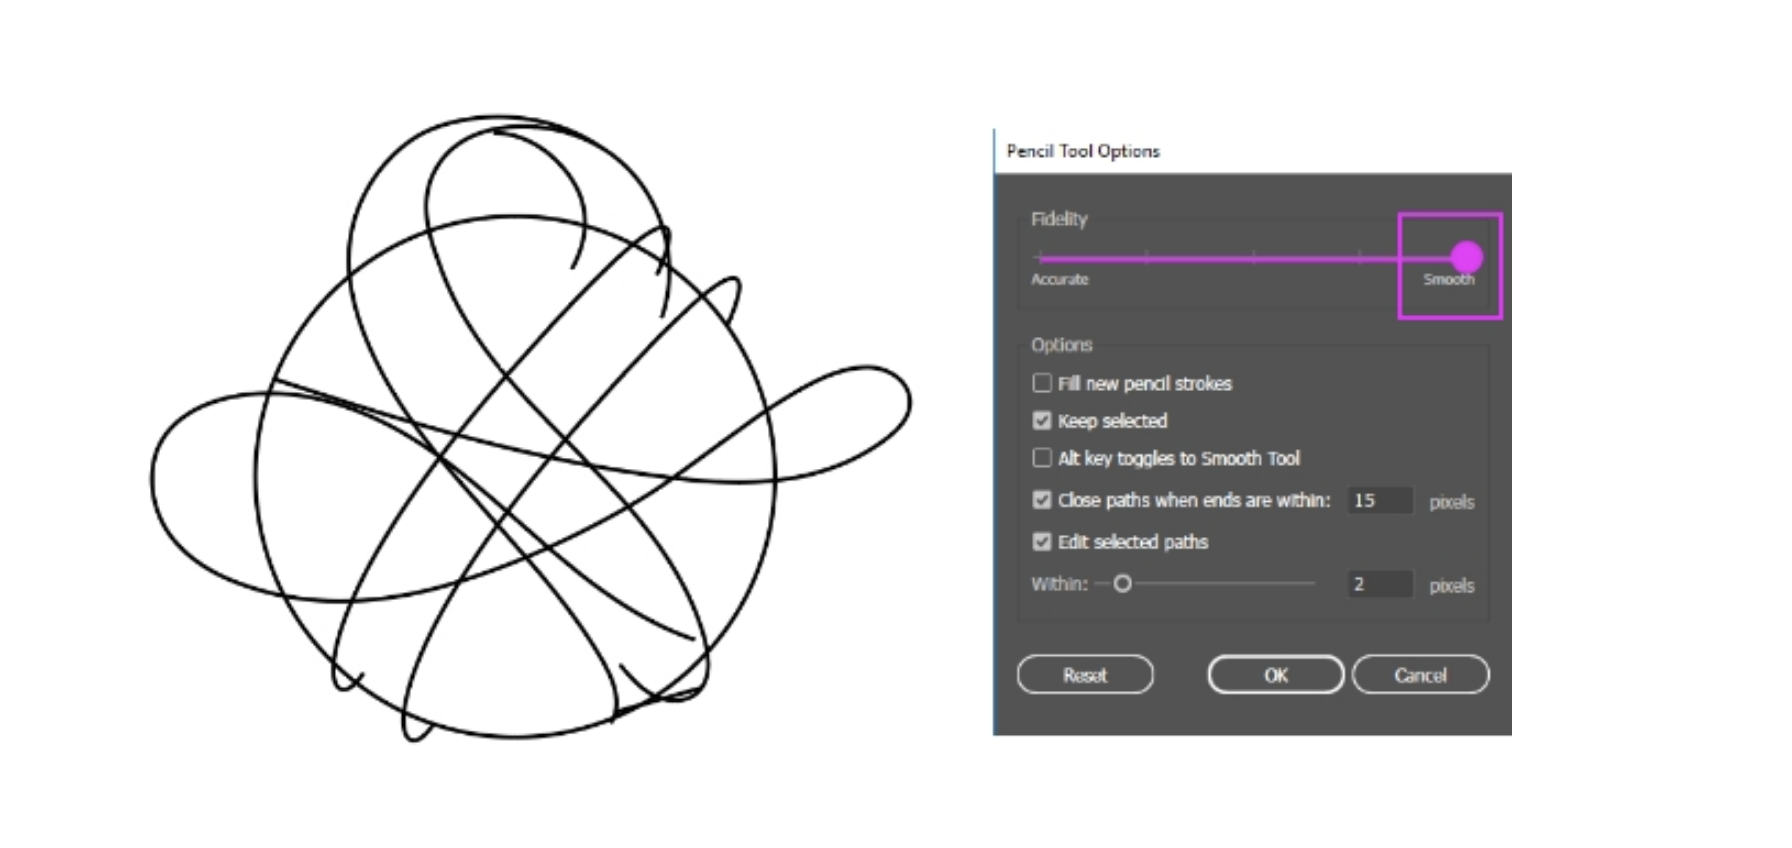
With the pencil tool active, draw out a few lines that you want the coaster to follow. If you want to create a badge, start with a circle as your base object that you can draw your lines around. If you hit Enter on the keyboard, the pencil tool preferences will open up. You can use the settings I have shown below to give you an idea of the settings I prefer to start with. I like the smoothness cranked all the way up to make sure my coaster lines will be very flowy and smooth.
Once you have a few ideas put down on paper or the screen, you can start cleaning up the lines and connecting everything. Make sure all the rails have a adjacent parallel rails. In the example I've created, you can see that all the rails are surrounding a circle. One thing to keep in mind when adding the parallel rails is to remember how perspective works. Any rails that are banking, should have the adjoining rail appear behind it as in the example below.
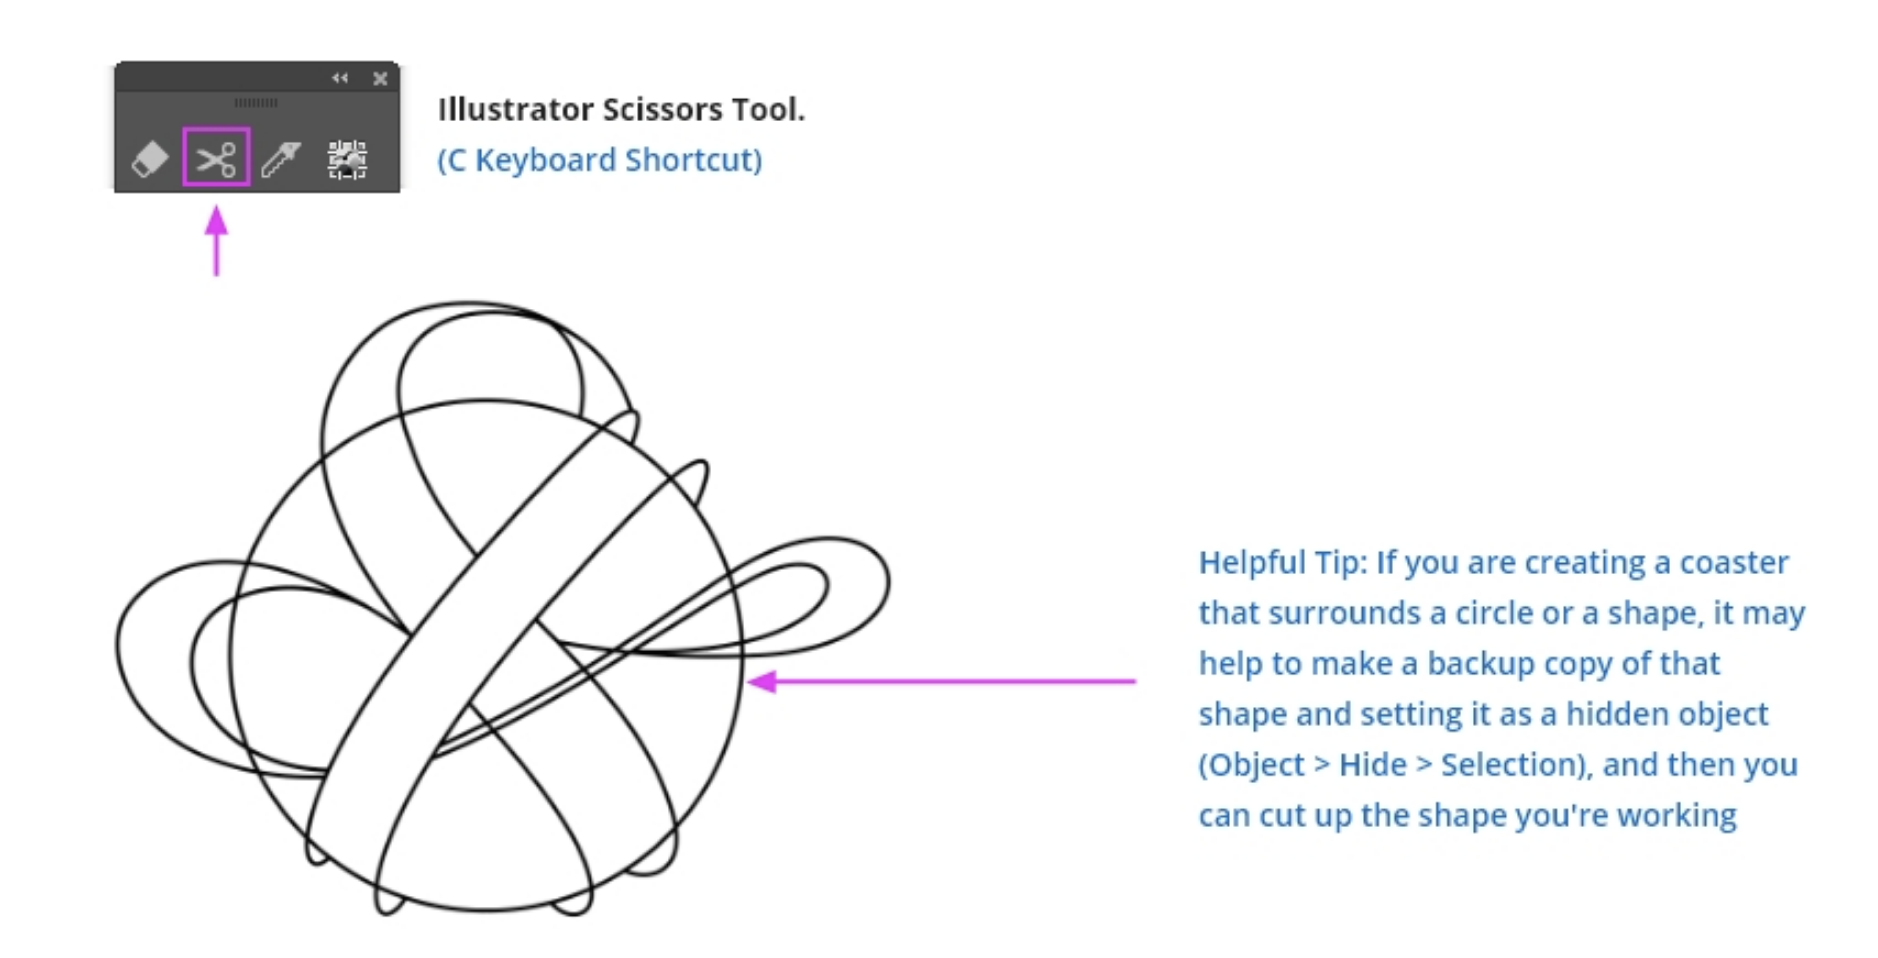
Helpful Tip: When cleaning up your lines, use the scissors to cut lines where you want to remove the line segments. I prefer not to have tracks visible when they are behind other tracks. This is of course, not how it would appear in real life, but it tends to make the composition appear cleaner.
Line cleanup & rail connectors
Once you have all your lines cut and cleaned up, you can start adding the rail connectors. You can use either the pen tool, pencil, or whatever method works best for you to create the connections between the rails. When connecting lines that curve around, you can use the SubScribe V2 tangent line tool, and quickly connect those lines.

Use WidthScribe to beautify your tracks
Now you can start the fun part. Select the Width Gradient Tool and click each rail set and start applying width gradients along the paths like in the video example below. I use the thickest part of the rail to appear closer and more dramatic, but play around and make something fun and interesting.
Final cleanup and coloring
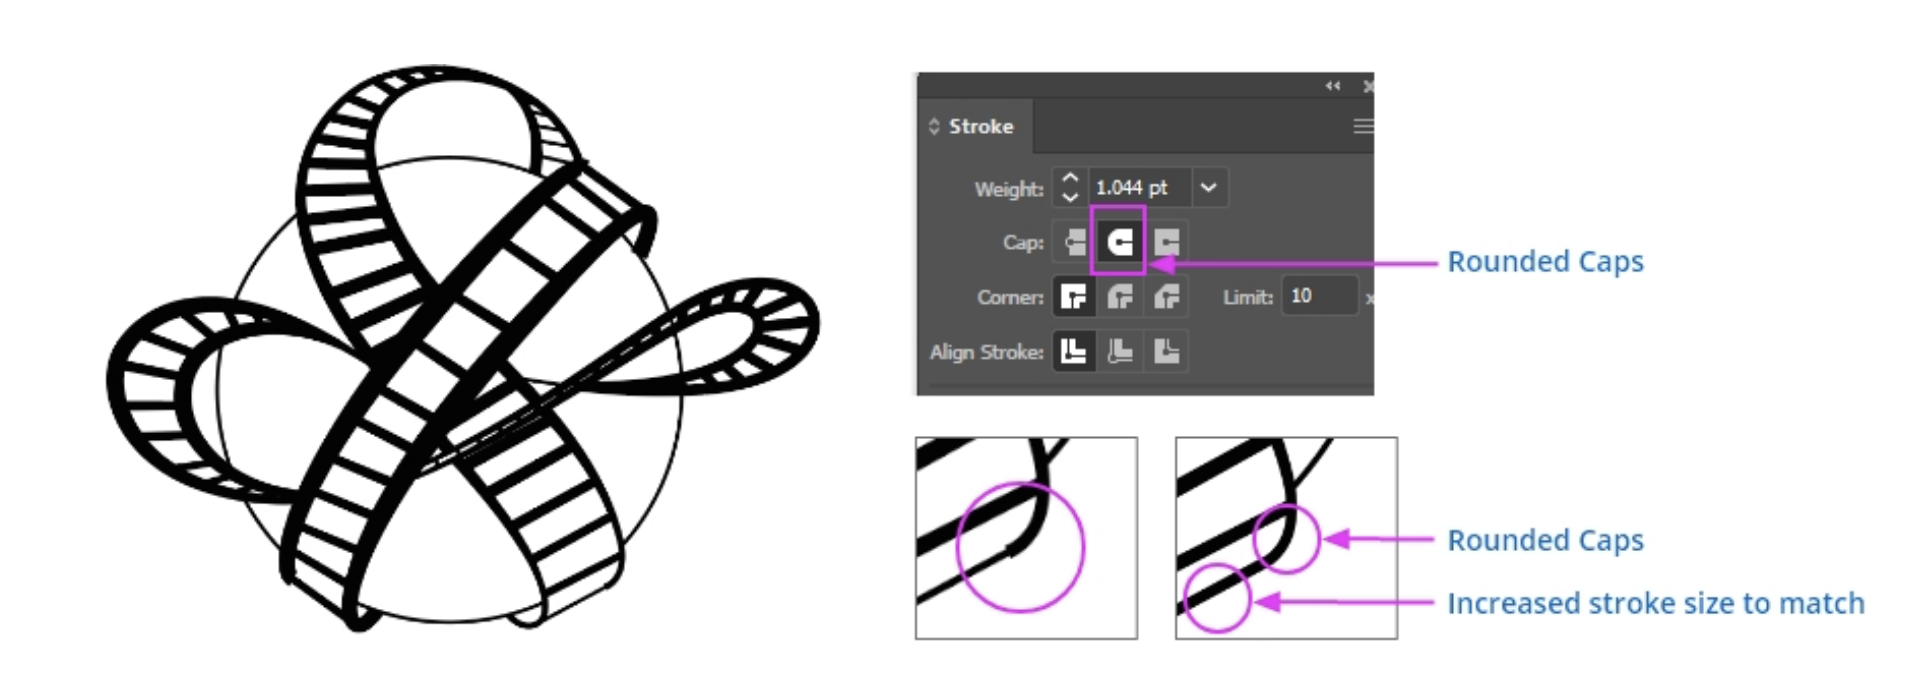
You should now have some nice looking roller coaster tracks. Next, you will want to go through and clean up all your lines. You can see that in the image below, some of the corners and edges of the tracks are jagged, and don't cleanly taper. You may have to expand some lines at this point and set the caps of some lines as rounded caps.
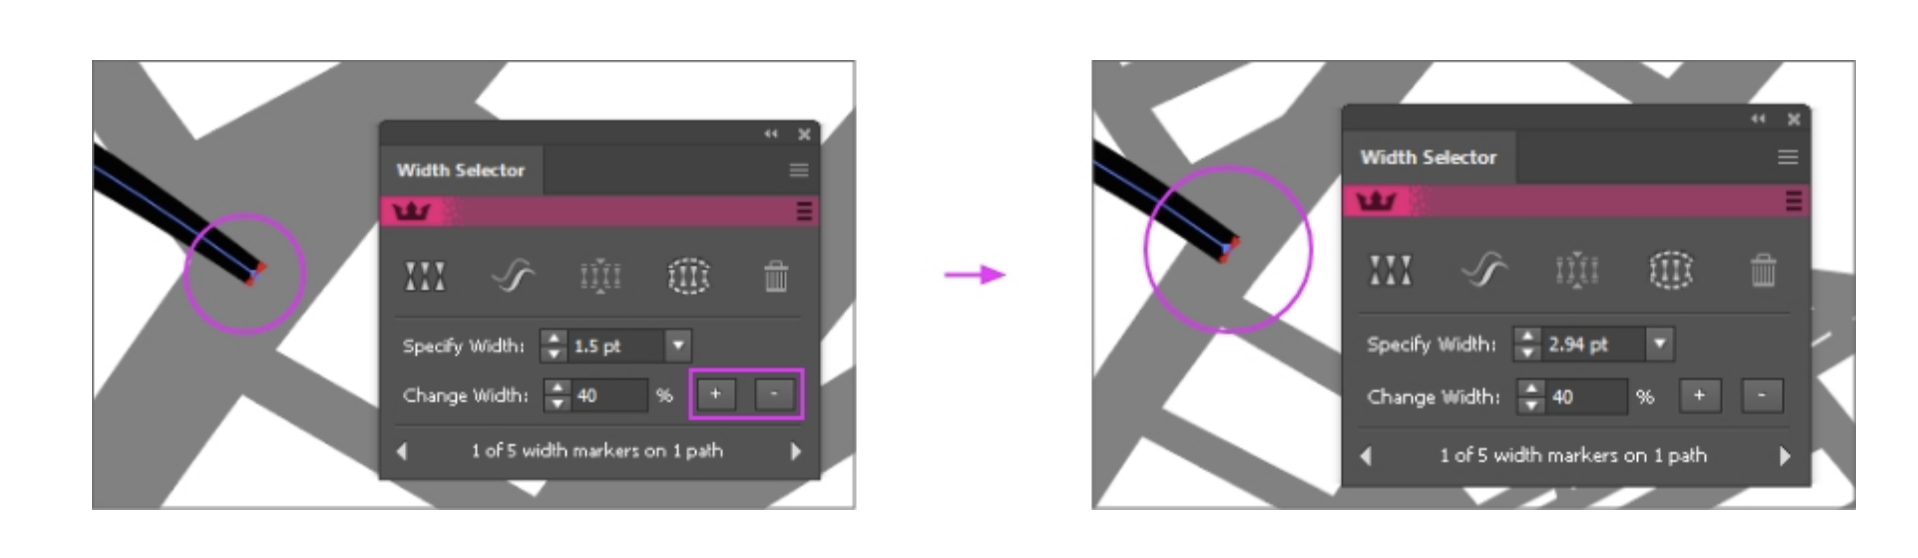
You may also find that some lines may not be the exact thickness you want. You can easily go in and fine tune the widths by using the Width Selector tool. Select the tool, and click any width marker you want. You can specify a specific width for that width marker, or use the plus (+) and minus (-) buttons to increase or decrease the width as needed.
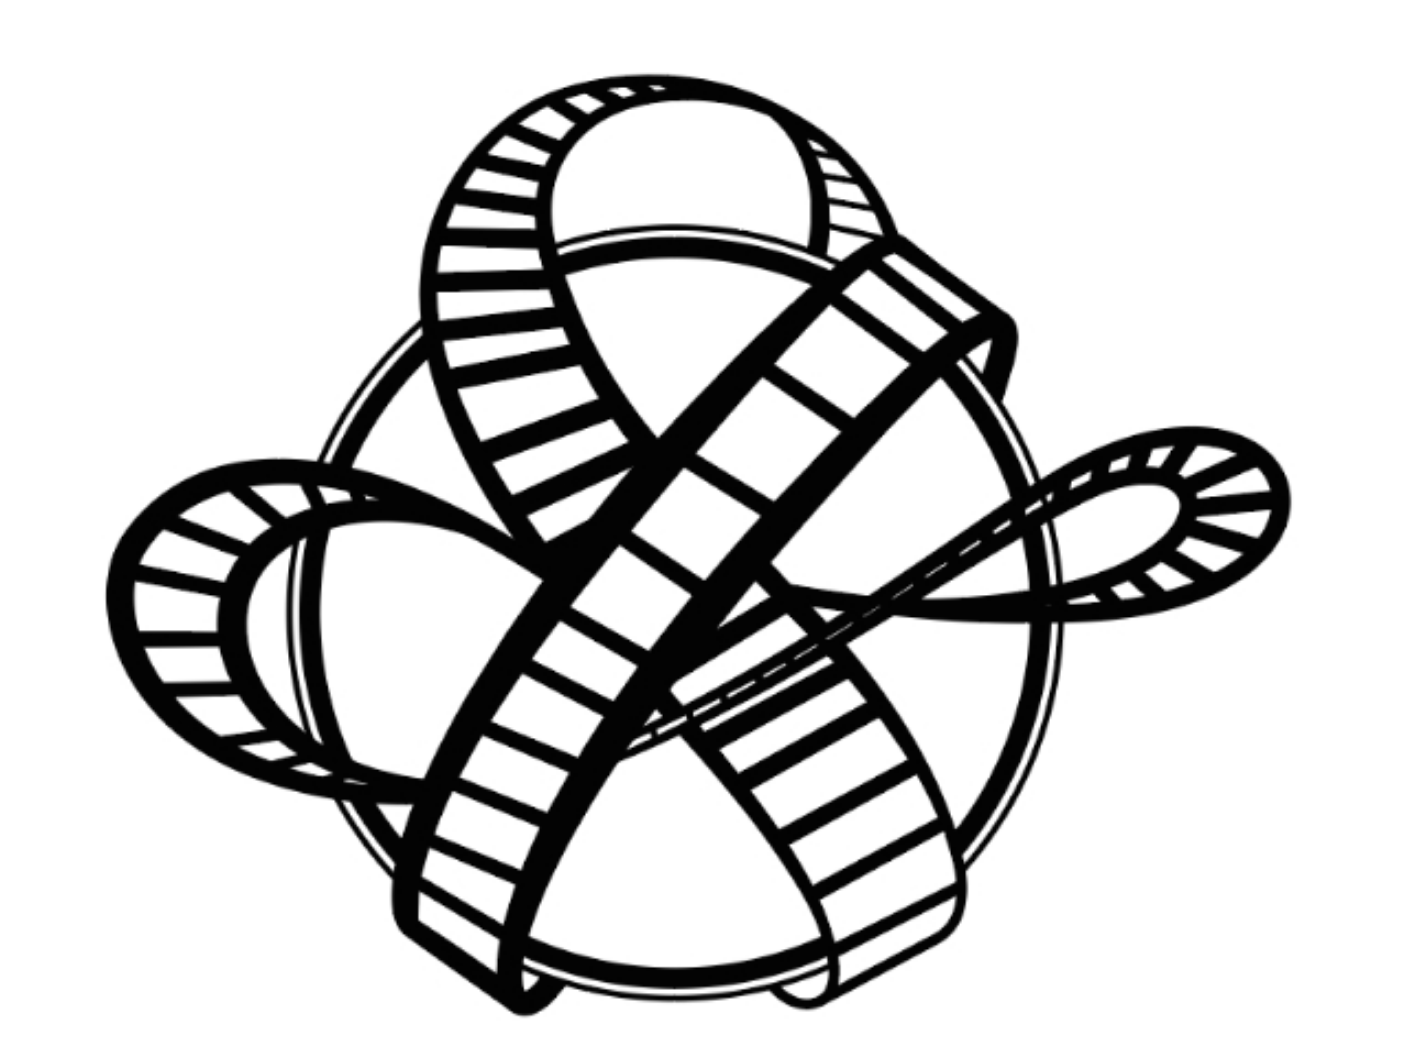
You can also unhide your backup circle layer and make an inset border that adds some depth to the illustration. With all the track edges cleaned up and the tracks put in place, you should have something that looks similar to the example below.
Make it unique
You should now have some nice looking tracks that have a good variety of thick and thin tapered lines. To spice up your project, you can add different colors, add in additional tracks that weave in and out of your existing tracks, create track supports, or place some fun extra illustrations that add to the scene. You can see what I did with this illustration and use it as inspiration to create something better.