Create a "Swarm" effect with AG Transform
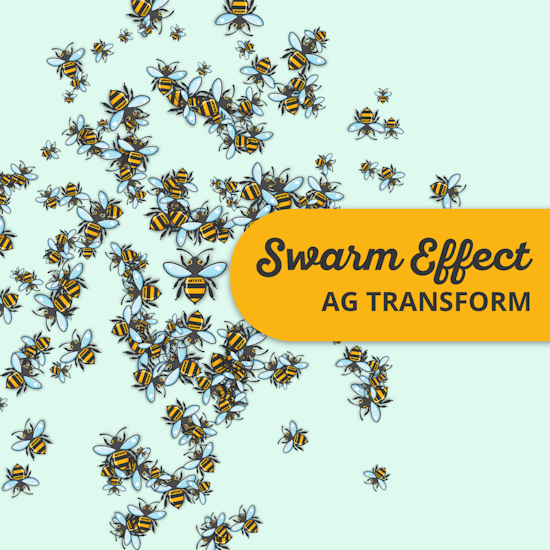
3 minute readThis tutorial describes how to use AG Transform to create a "swarm" or "cloud" effect with objects. This effect is suitable for generating background textures or adding a complex, artistic element to designs. This method automates a process that would otherwise be time-consuming to perform manually.
Object selection
First, select an object to be multiplied. This can be any element, such as a character, a custom icon, or another shape. The objective is to generate hundreds of copies of this object, each with unique properties, including size, angle, and position.
The "Swarm" technique
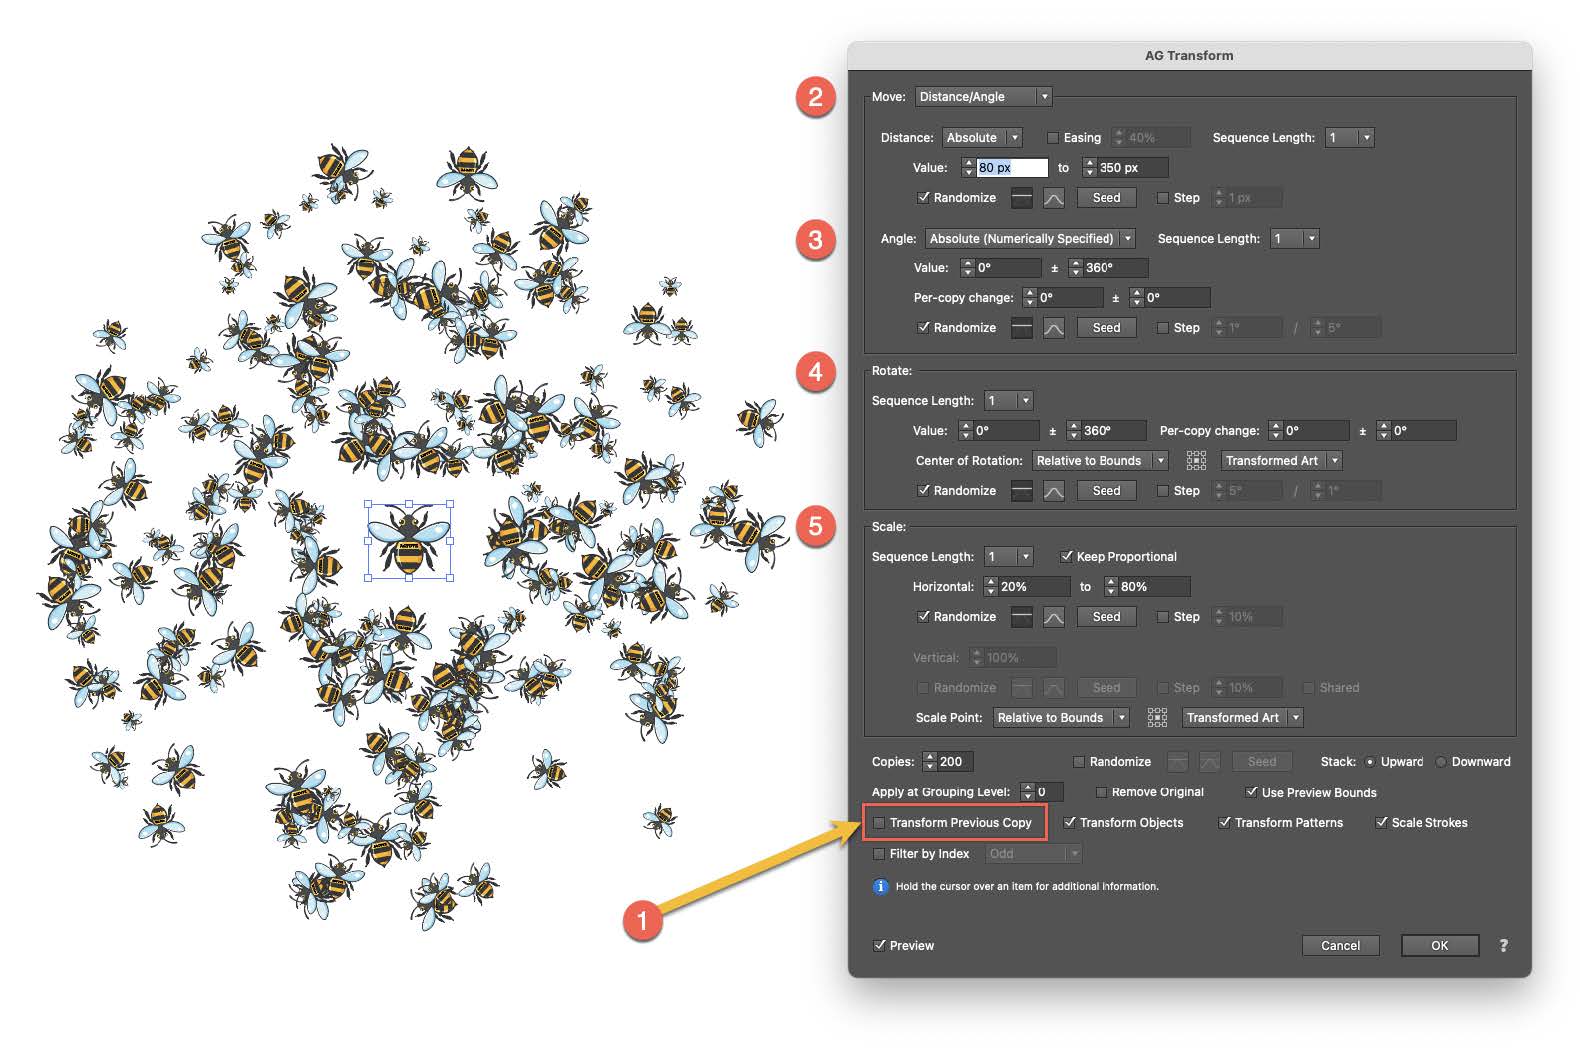
The core of this technique is found in the AG Transform panel (Effect > Additional Effects > AG Utilities > AG Transform). Locate and disable the "Transform Previous Copy" option (1). This setting ensures that all copies are generated based on the original object, rather than sequentially from the previous copy. This is the key to having the objects group around a central point instead of forming a line.
Applying randomization
To introduce random variations, activate the "Randomize" checkbox for each of the following parameters:
Move: Utilize the Distance/Angle mode. For the distance (1), set a range to control how near or far the copies appear (e.g., between 80 and 150 px). For the angle (2), set it to 0° with a variation of ±360° to distribute the copies in all directions.
Rotate (3): Apply a range of 0° ±360° so that each copy has a distinct orientation.
Scale (4): Define a size range, such as between 20% and 80%, to create variety.
Copies (5): Increase the number of copies significantly (e.g., 200 or more) to achieve a dense and impactful effect.

Achieving a professional look: Linear vs. Gaussian Distribution
The swarm effect can be refined to appear more natural by adjusting the distribution setting, which is represented by a straight line or a curve icon.
Linear Distribution: In a linear distribution, all values within a set range have an equal probability of being chosen. In the context of this effect, it means a copy has the same likelihood of appearing at the minimum distance (e.g., 80 px) as it does at the maximum distance (e.g., 350 px). This results in a highly uniform, static-like chaos.
Gaussian Distribution: This distribution method follows a "bell curve" model. Values near the center of the specified range are more likely to be selected. By changing the distance distribution to Gaussian, the majority of copies will cluster closer to the center, with fewer copies appearing at the extreme ends of the range. This creates a more organic and less artificial grouping.
This entire process is a "live" effect. To generate a new variation, one can simply adjust the ranges or click the "Seed" button for any of the randomized parameters to get a new result instantly.
Try Astute Graphics for FREE
If you haven’t tried the hundreds of features available from Astute Graphics for Adobe Illustrator, you can use it free for 7 days. No payment details are required.

