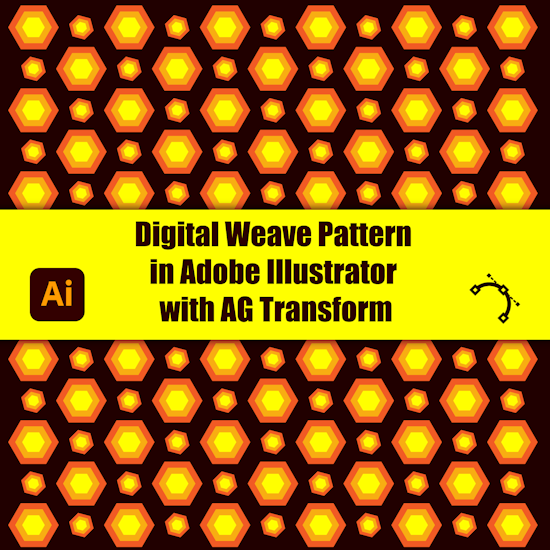
Digital weave effect with AG Transform
3 minute readThis tutorial outlines a procedure for creating a "Digital Weave" effect. The fundamental concept involves applying modifications to a selection of objects within a grid rhythmically and repetitively, simulating a digital pattern.
Objects for Use:
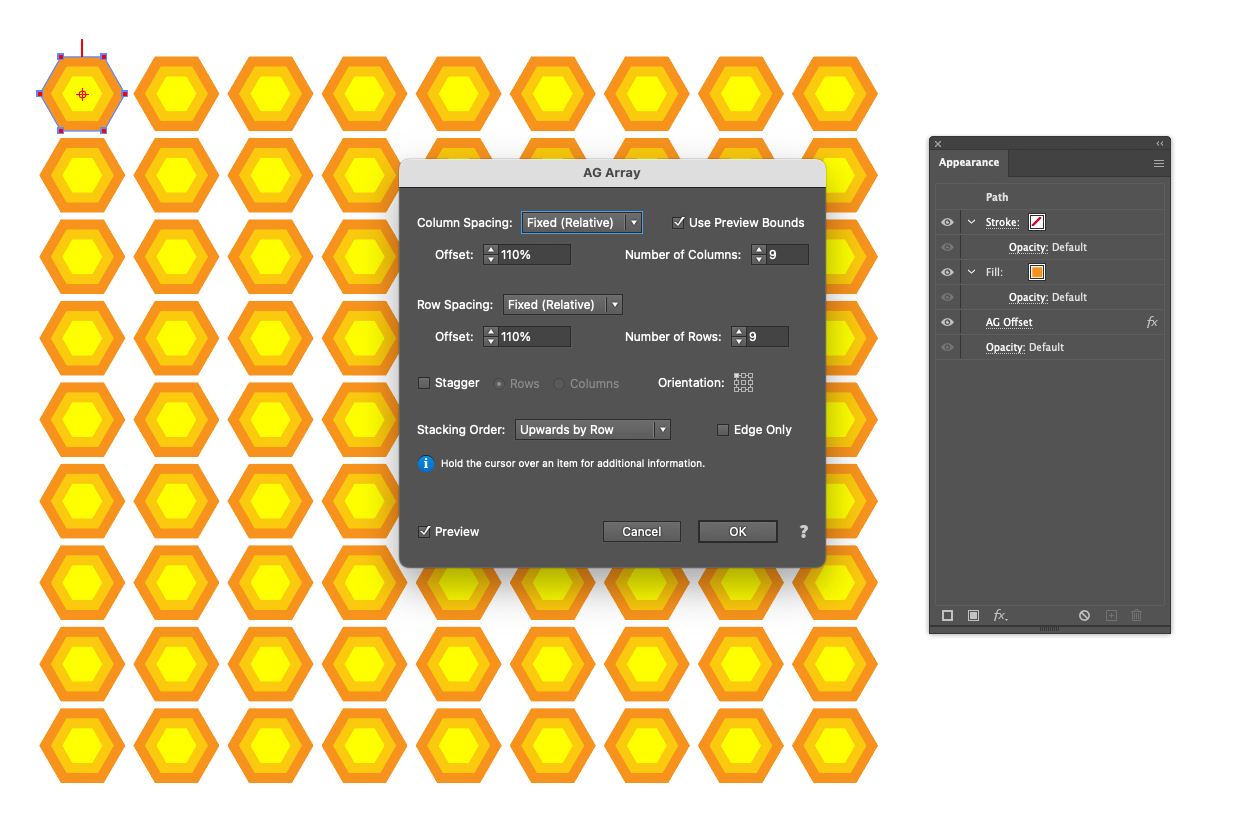
The Base Grid: A grid composed of identical objects is required. This can be generated using the AG Array tool.
First, select the object and apply the AG Array effect by navigating to Effect > Additional Effects > AG Utilities > AG Array.
Configure a 9x9 grid. The offset can be set to the user's preference.
Detailed Steps in AG Transform:
Global configuration and transformation:
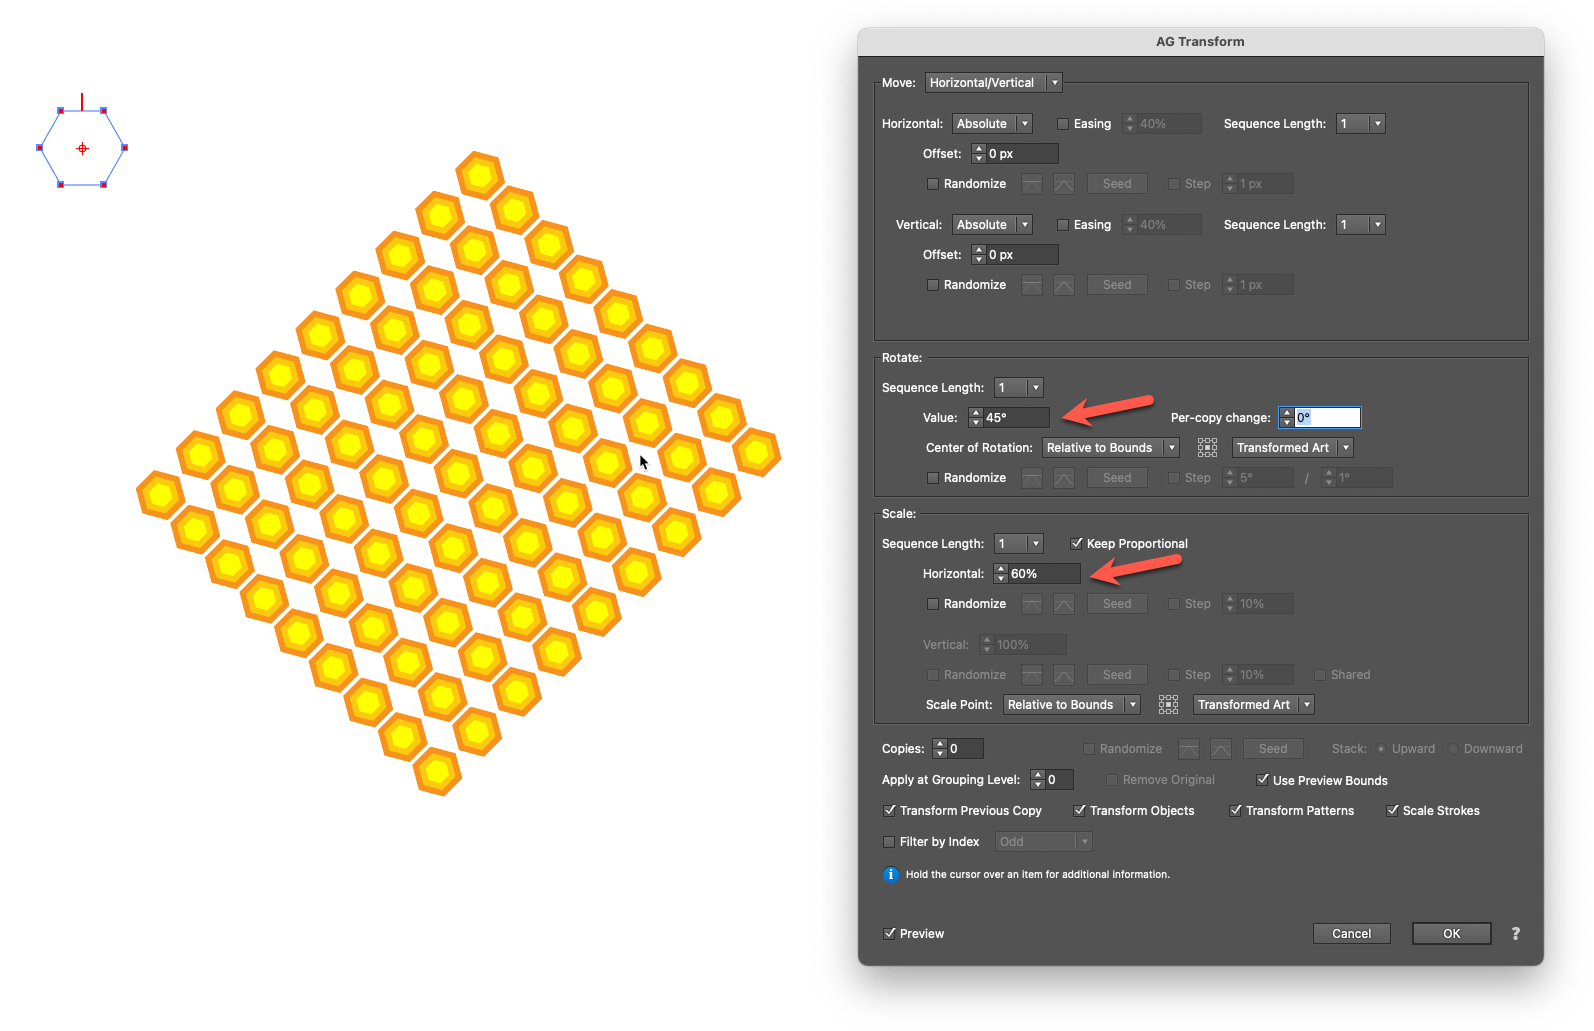
Select the object (or group) and apply the AG Transform effect, located at Effect > Additional Effects > AG Utilities > AG Transform.
In the Scale section, reduce the scale to 60% and ensure that the "Keep Proportional" option is enabled.
In the Rotate section, apply a 45° rotation. At this point, all objects in the grid will be uniformly scaled and rotated.
Introducing filtering ("Checkerboard pattern"):
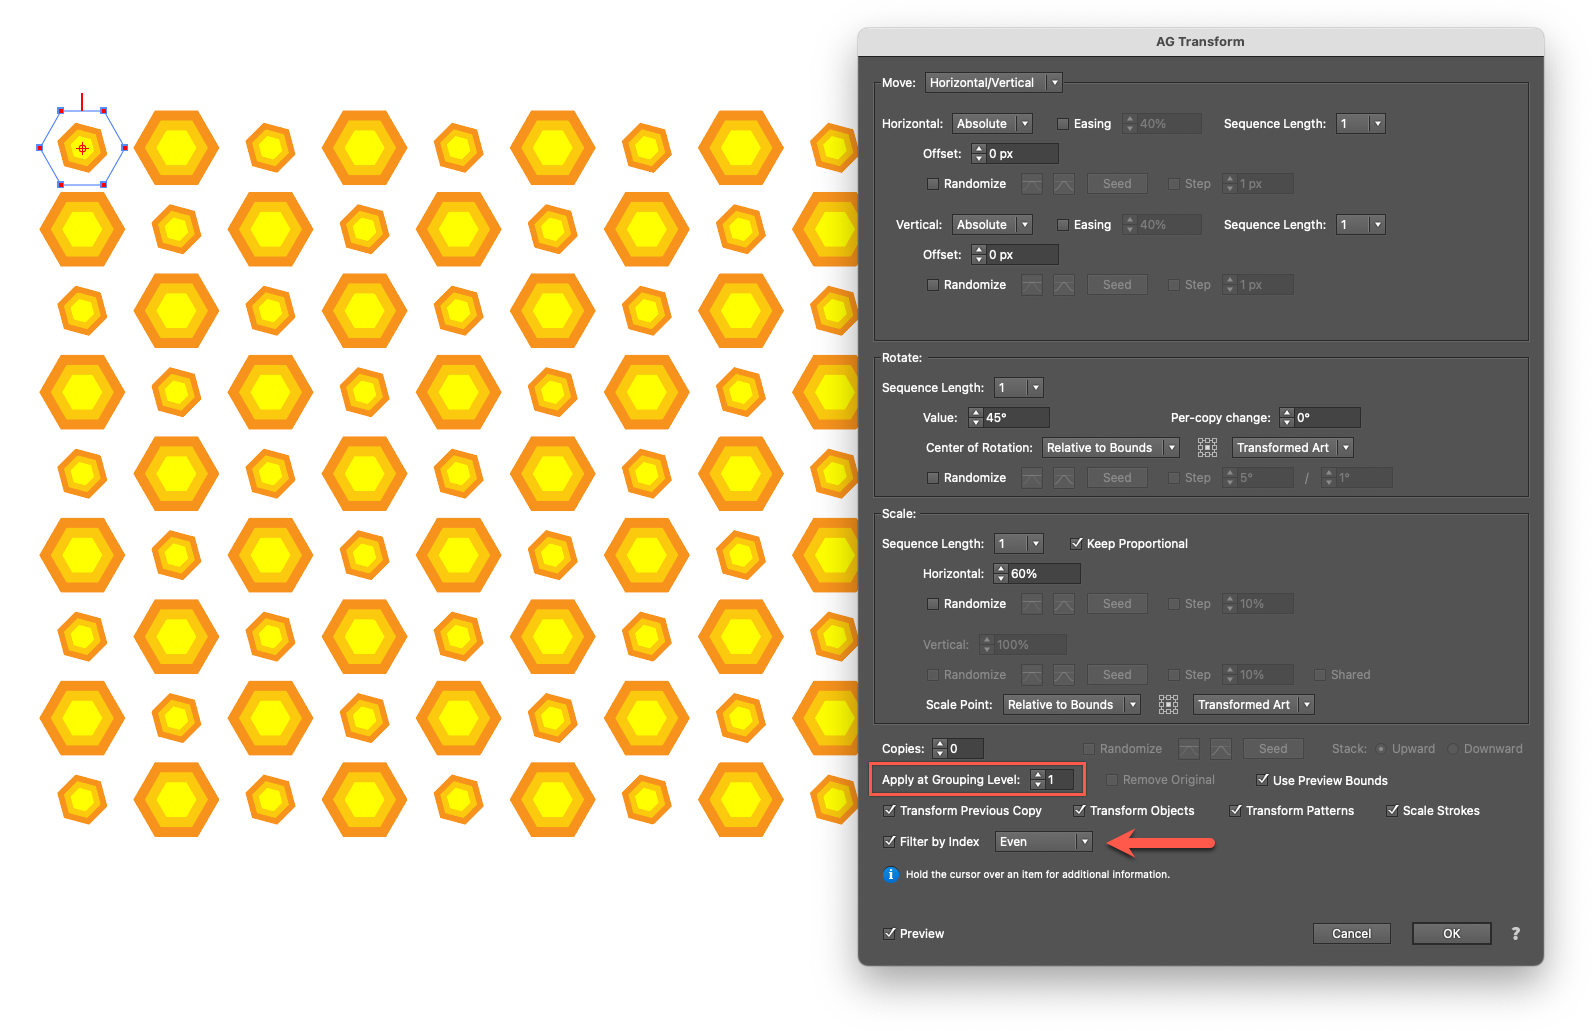
Proceed to the lower section of the panel and activate the "Filter by Index" checkbox. This functions as the “selection” tool.
Increase the Grouping Level to 1.
From the dropdown menu, select the "Even" method.
The transformation (scaling and rotation) will now exclusively apply to objects with even indices (e.g., object 0, 2, 4, 6). This generates a checkerboard pattern where transformed objects alternate with the original ones.
Creating a rhythmic "Stitch" (Pattern mode):
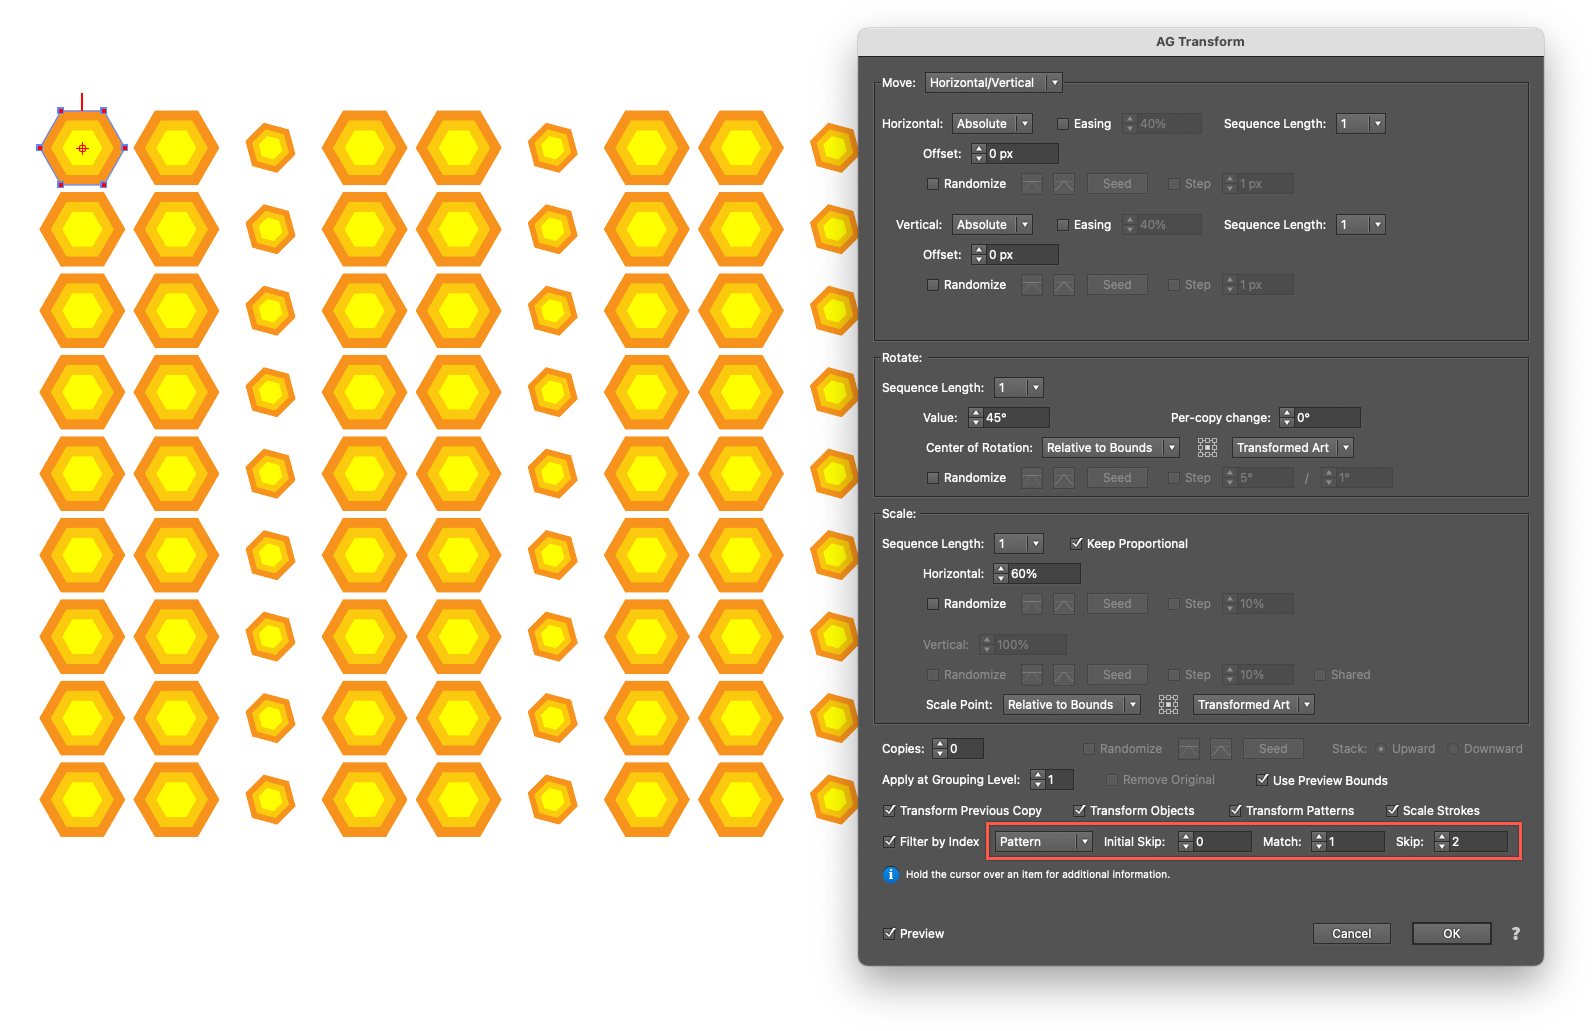
Change the filtering method to "Pattern" to achieve more detailed control. This mode utilizes three values to define a selection cycle.
Configure the following values:
Initial Skip: 0 (This will not skip any objects at the beginning).
Match: 1 (This selects and affects one object).
Skip: 2 (This will skip the subsequent two objects).
The effect is now applied to one object, skips the next two, and repeats this cycle throughout the entire object sequence, creating a rhythmic pattern.
Generating organic "Noise" (Randomly mode):
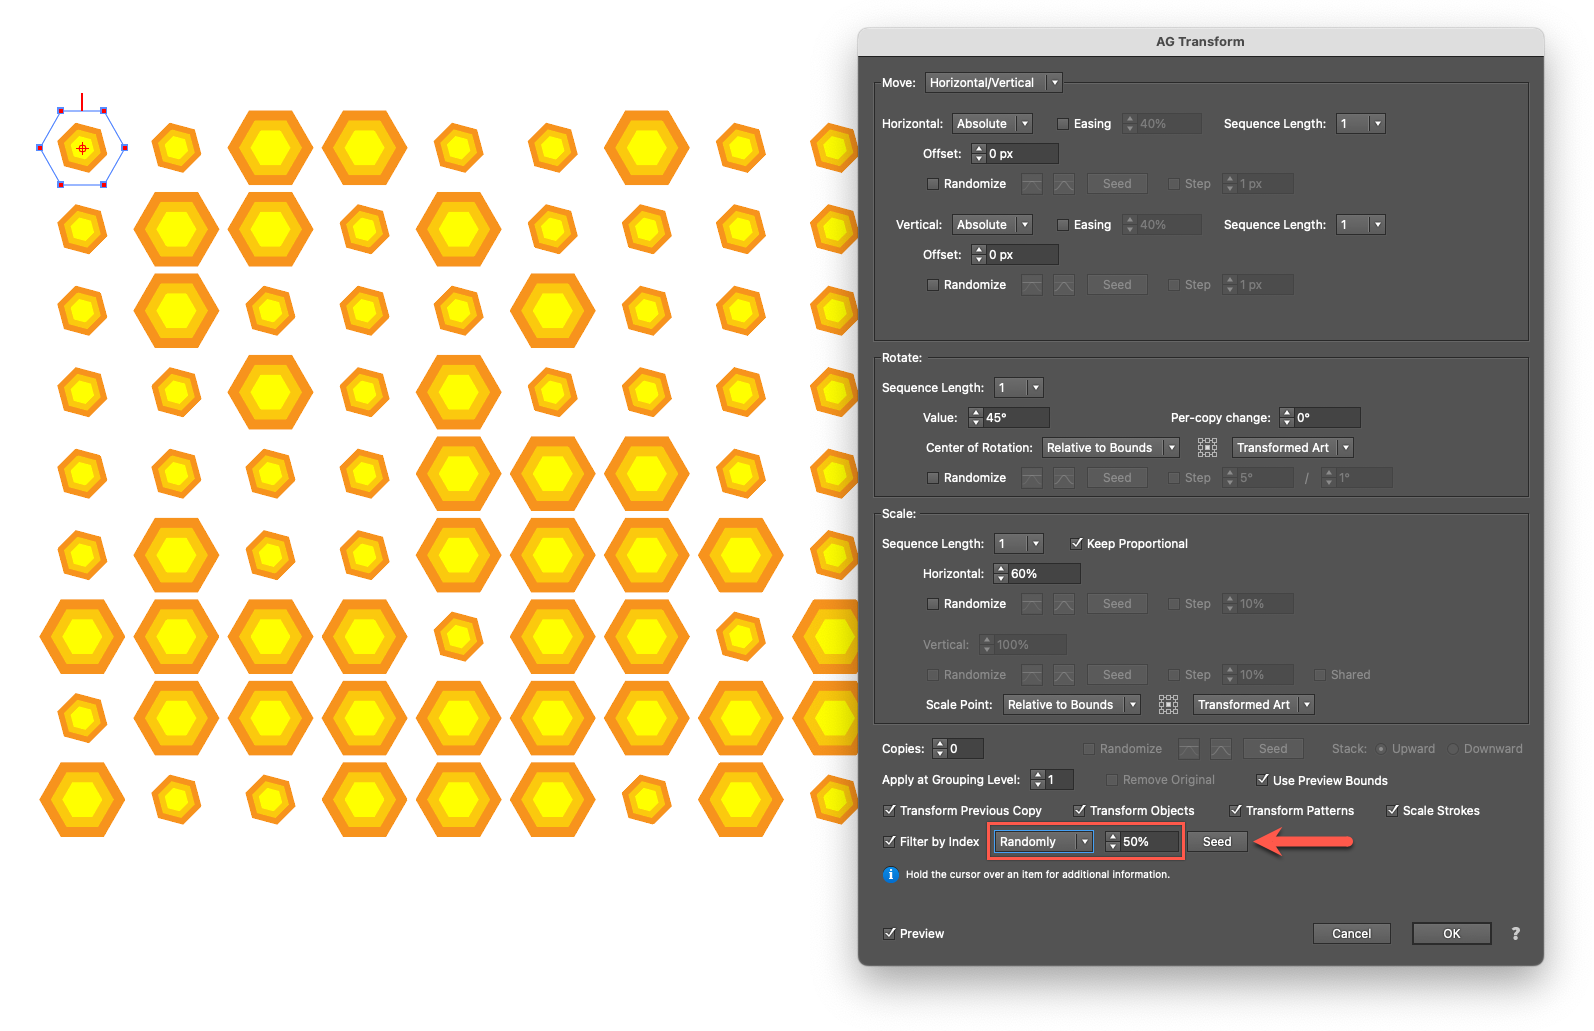
Explore the "Randomly" filtering method for a more organic result.
Set the value to 50%.
Each object in the grid will now have a 50% chance of being transformed. This produces a texture that appears structured yet contains organic imperfections and variation.
The "Seed" button can be used to generate different random outcomes until a desired result is achieved.
By using index filtering, it is possible to select specific objects for transformation. This technique is fundamental for creating complex textures, fabric-like patterns, or detailed technical backgrounds, offering a level of creative control not available in standard Illustrator tools.
