Drop shadow, long shadow and block shadow in Adobe Illustrator
10 minute readHow to add a basic drop shadow
Create a drop shadow effect in native Adobe Illustrator using the following steps:
Select object(s)
Effect > Stylize > Drop Shadow...
Click OK
This will add a basic drop shadow using the options and numeric values entered in the Drop Shadow dialog:
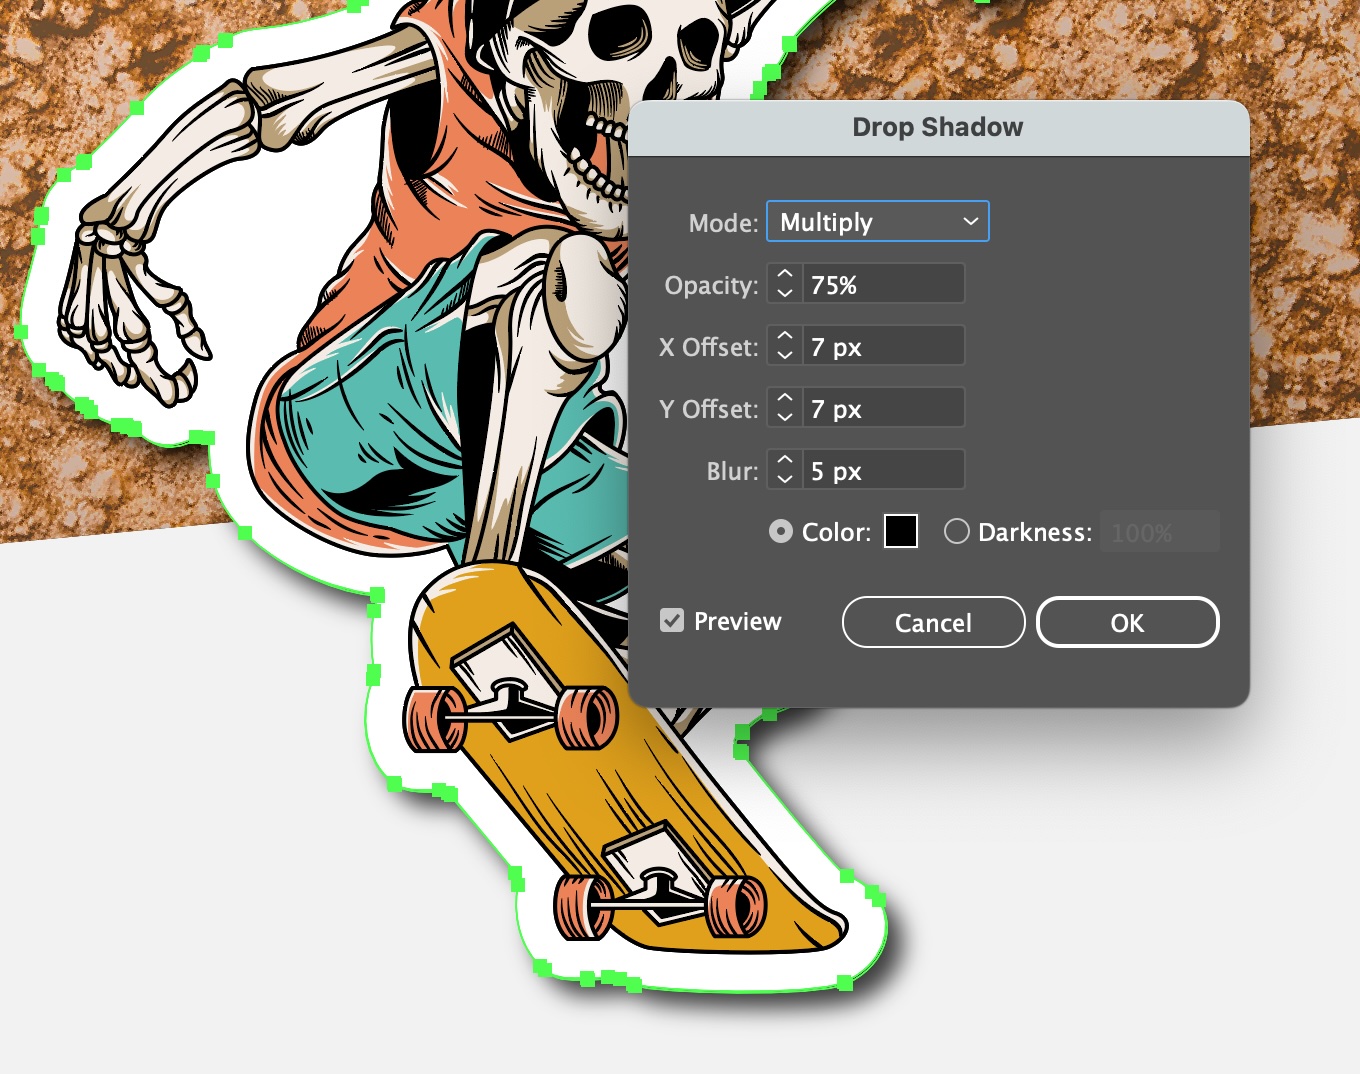
Control includes:
Mode and Opacity - set opacity using one of the standard opacity/transparency types (default of Multiply which works on all basic drop shadows which make a dark shadow).
X and Y Offset - the distance the block shadow moves away from the selected object(s) giving the appearance of differing height above the background.
Blur - how diffused the blur edges are.
Color or Darkness - set the shadow color or, if Darkness is selected, the percentage of Black to be added (ideal for CMYK documents)
The resulting drop shadows are raster image live effects, and therefore editable via the Appearance panel (Window > Appearance).
Note that the resolution of the drop shadows is uniform throughout the document with all raster image effects — ie. all editable drop shadows and other raster effects will have the same resolution and cannot be controlled individually. You can adjust the resolution used for raster effects throughout the document via Effect > Document Raster Effect Settings...
Add drop shadows interactively and intuitively
Using Astute Graphics plugin, Stylism, it's possible to replace the unintuitive numerical controls for applying drop shadows with a modern user interface.
If you don't already have the plugins, it takes less than 5 minutes to create a 7 day free trial account. No credit card details are required, only your email address. Visit https://astutegraphics.com/freetrial to sign up and install these Adobe Illustrator Plugins on a 7 day free trial.
Importantly, basic drop shadows added using the Stylism user interface remain 100% native and compatible with all users.
Apply a drop shadow interactively using the following steps (following installation of the Astute Graphics plugins):
Open the Stylism panel (Window > Astute Graphics > Stylism)
Select Object(s)
Click on the Drop Shadow Live Effect Button in the Stylism panel (left button, top row) to add the shadow

Once added, the Stylism Tool will be automatically enabled, displaying the drop shadow controls.
The three-armed annotation controls provides handles or sliders to control the:
X and Y Offset
Opacity percentage
Blur size
Additional annotation user interface elements include a drop-down menu to set the opacity mode (default: Multiply) and color (default: black).
Everything is within instant reach for the designer to experiment quicker.
For full details of this functionality, please refer to our AG Docs on the topic: https://docs.astutegraphics.com/stylism/stylism-overview#drop-shadow-controls
Synchronise drop shadow characteristics
Stylism offers a quick way to synchronise the characteristics (offset, opacity, blur and color) of two or more drop shadows. This can ensure that it appears each art object (shape, image, letter, font, etc.) is the same distance above the background, and shadows are all cast in the same direction.
Steps to synchronise drop shadows:
Select two or more objects with an editable live effect drop shadow applied
Switch to the Stylism tool (clicking on the magenta color bar at the top of the Stylism panel is a top tip shortcut!)
Click and drag Stylism's drop shadow annotation center marker from the shadow characteristics you want to replicate over the center marker(s) of the other drop shadows(s)
For full details on the common Stylism annotation controls, please refer to our AG Docs on the topic: https://docs.astutegraphics.com/stylism/stylism-overview#common-annotated-controls
Professional-look drop shadows
Notice that native drop shadows are artificial in appearance? Jealous of the contour controls for shadows in Photoshop? Let's use Stylism to make more convincing shadows in Illustrator.
To follow this section, you need to have both the Stylism and Phantasm plugin installed. Both are included as standard as part of the suite of 100's of Adobe Illustrator enhancements in the single Astute Graphics' plugin subscription: https://astutegraphics.com/plugins/
With Phantasm installed, by default, the Stylism panel displays a contour control on the lower half. With a drop shadow applied to selected artwork and the Stylism tool active, click and drag curve controls in the graph area to adjust the shadow contour:
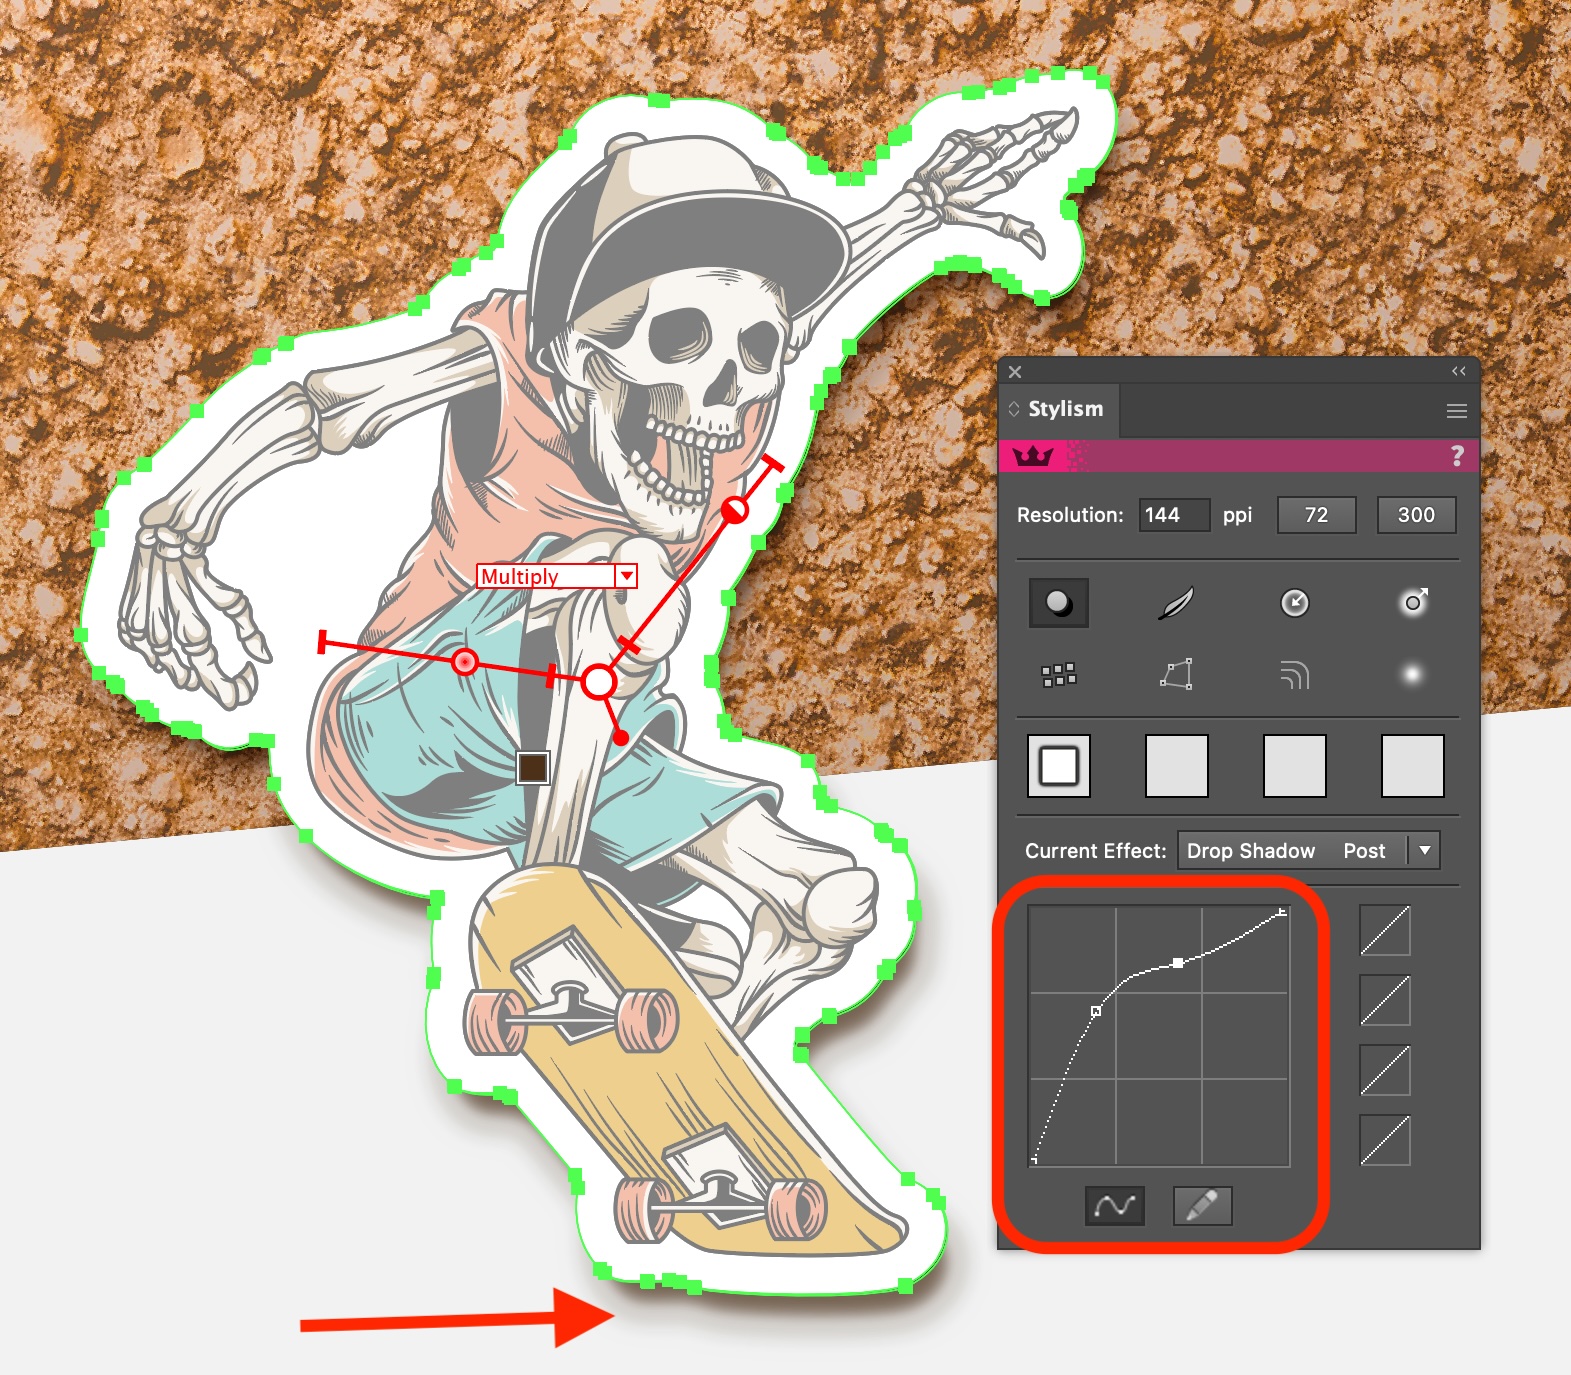
For full details, please refer to the AG Docs on this topic:
https://docs.astutegraphics.com/stylism/stylism-overview#stylism-panel
The difference between drop shadows and long shadows or block shadows
Firstly, long shadows are also known as block shadows. They are the same thing. But long (or block) shadows are very different from drop shadows:

Drop shadows are blurred or diffused and made using a raster image. It's not vector, even though it can be applied to vector artwork.
Long, or block shadows, are typically parallel solid fill vector shadows and used in a stylistic way rather than trying to indicate the artwork being any height above a background, like with drop shadows.
Creating long shadows (the hard way)
There is no long, or block shadow tool natively in Adobe Illustrator. However, it's possible to approximate this shadow type using a number of steps. It's more time consuming and the results aren't optimal (jagged edges when zoomed-in, not easily changed, take longer to render and result in a large file size). But don't worry — there is an easier way, detailed in the next section using a very popular plugin tool.
How to create a block shadow using native Illustrator tools:
Select the object(s)
Copy to clipboard
Paste in Front
[If a raster image, even a raster-based effect is present in the selection...] Replace any raster images with filled rectangles covering the same area, no stroke
[If the artwork has a stroke applied, is a selection, group of editable text...] Expand Appearance and the Expand, ensuring all strokes are also expanded (outlined)
Pathfinder > Add
Copy to clipboard
Paste
Move the duplicate object down and to the right (typically, for a long shadow that heads south-east in direction)
Select this and the previous object, then use Object > Blend > Make
Use the Blend tool settings to increase the number of steps if the result appears jagged (typically, ensuring Specified Steps is opted for, and around 200 steps)
Move the resultant long shadow blend to behind the original objects
If the edges of the artwork are rounded, the blend steps are not as obvious:
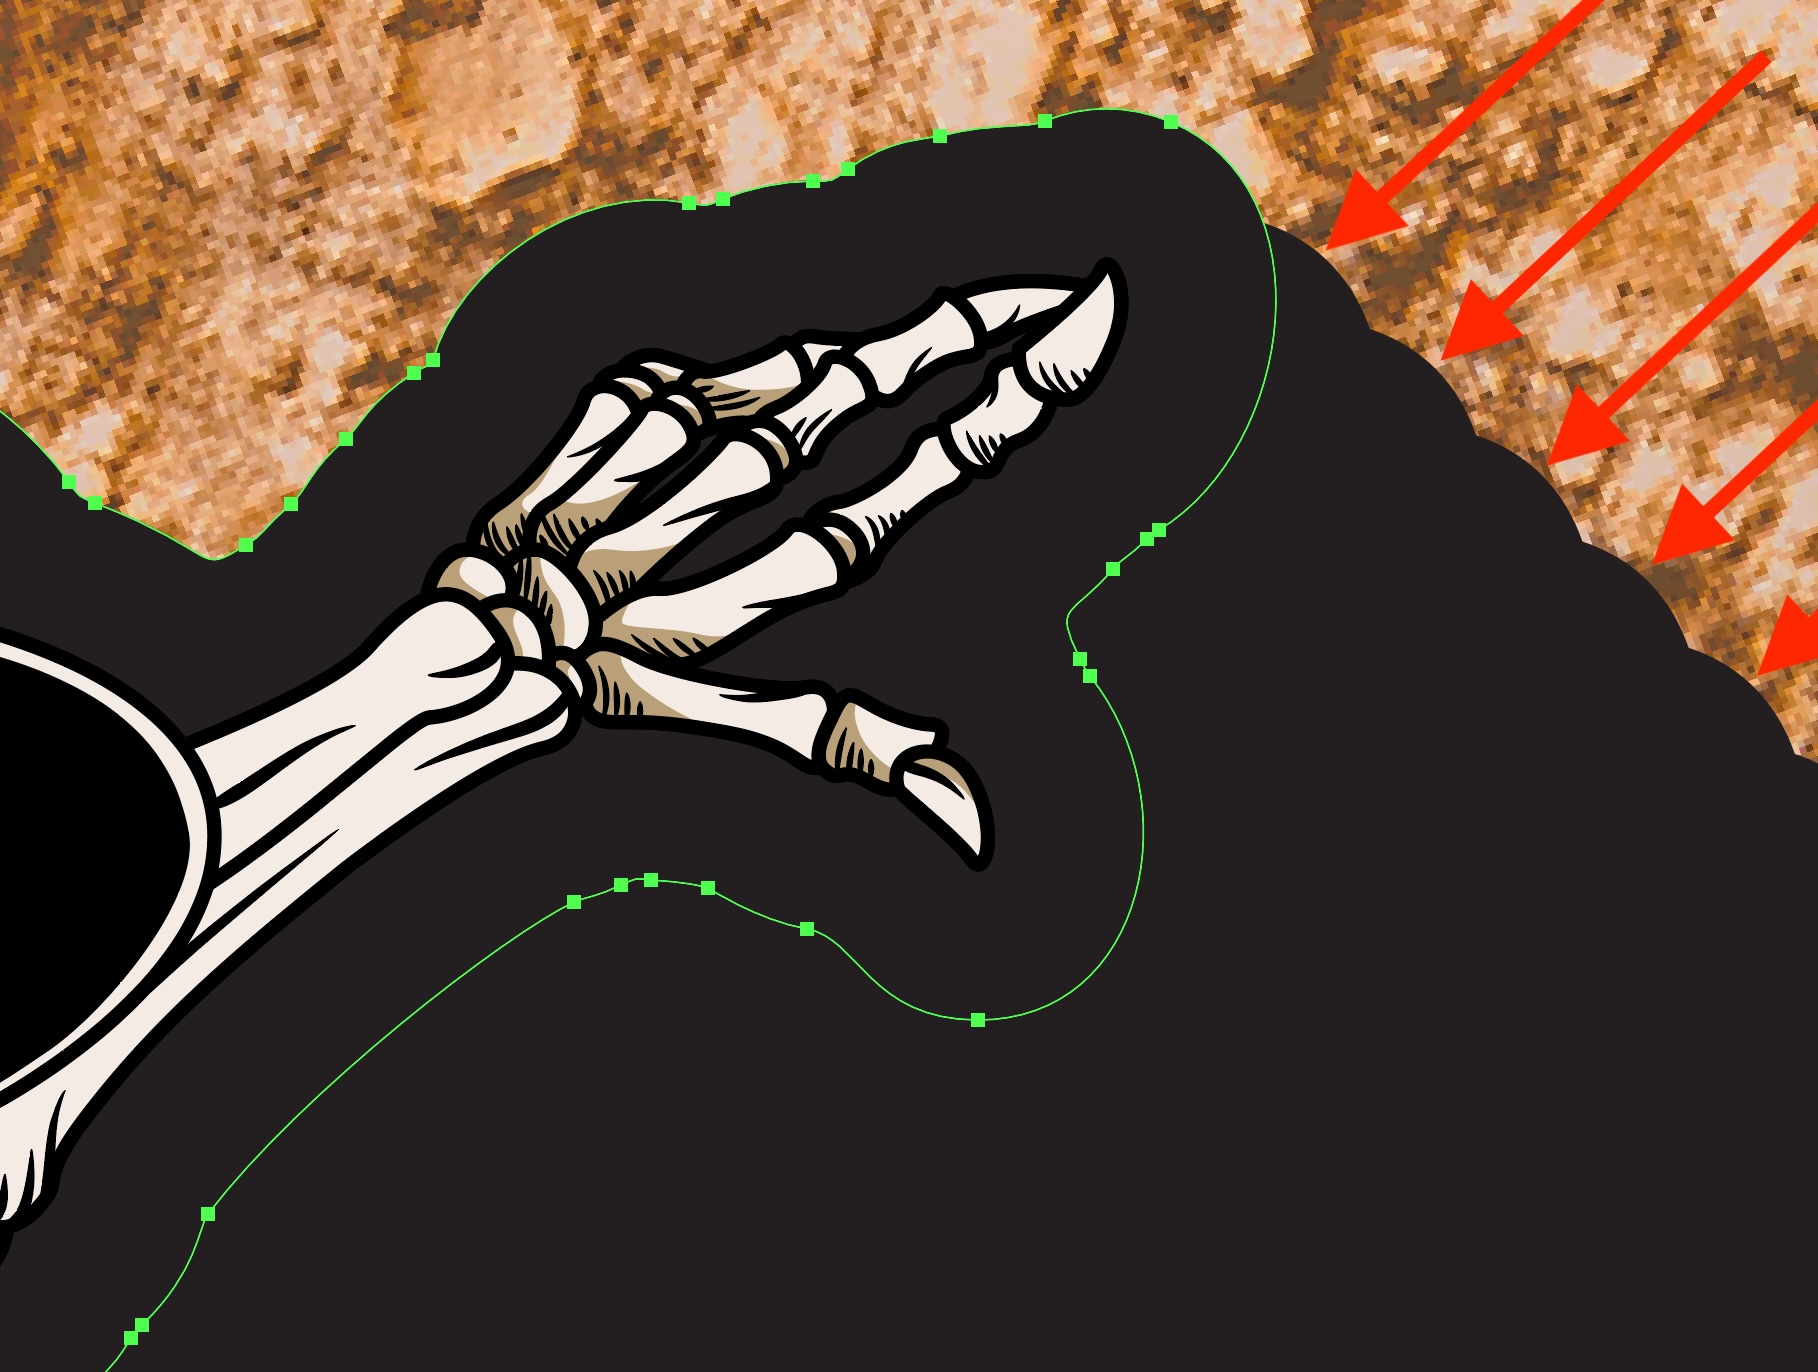
However, if the edges are sharp, as is typical with letters in words, the steps can be very noticeable. This can be alleviated by adding more blend steps, but at the cost of rendering speed and file size.
Creating long shadows (the easy way)
With the Stylism plugin installed, creating a fully editable long, or block shadow is possible with a click-and-drag only:
Open the AG Block Shadow panel (Window > Astute Graphics > AG Block Shadow)
Switch to the AG Block Shadow tool (clicking on the magenta color bar at the top of the AG Block Shadow panel is a quick way)
Click on the object you want to apply a long shadow to and drag in the direction and distance (a preview will illustrate what will result)
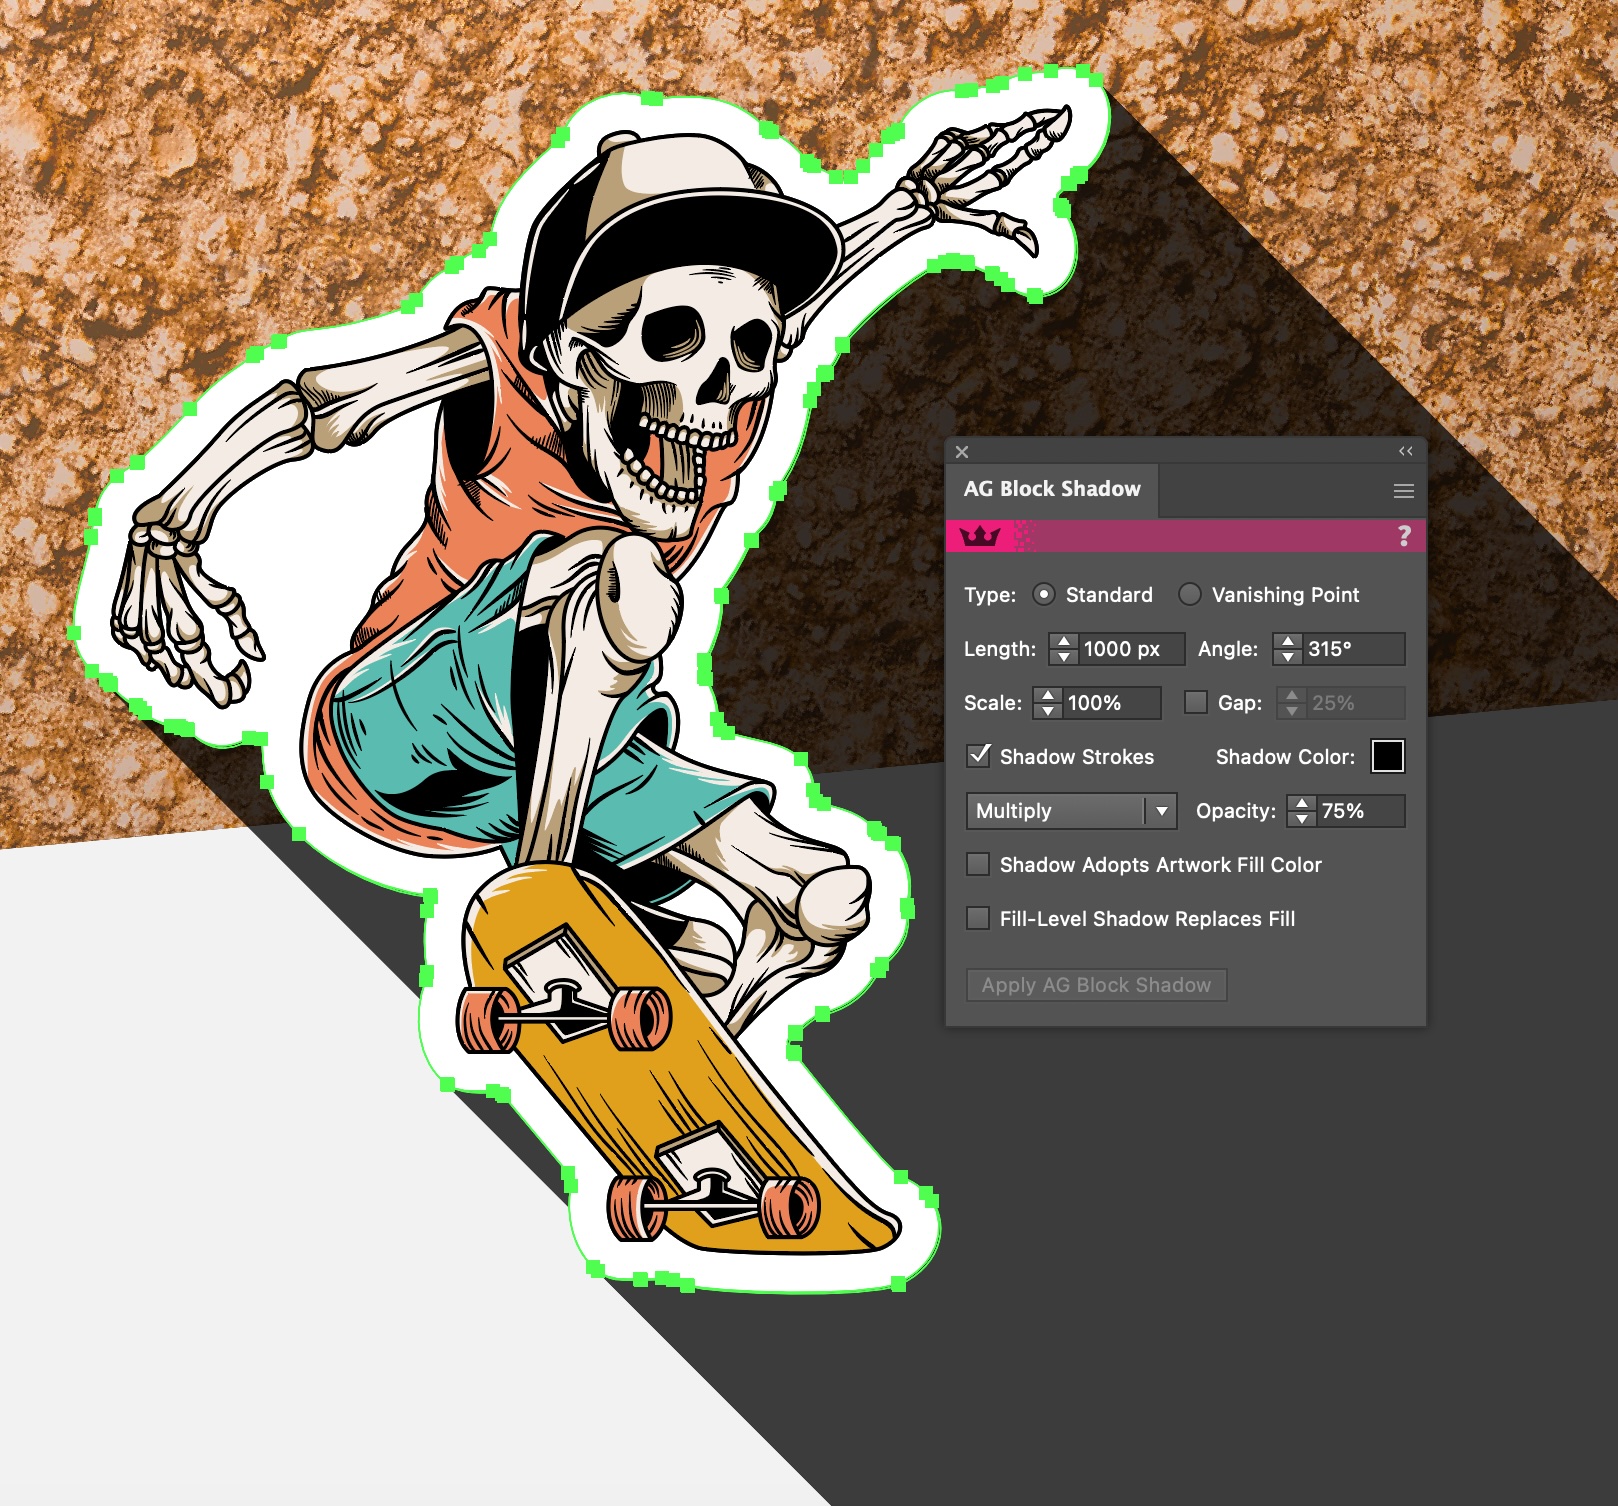
That's it! The result is a live effect long, or block shadow effect that can be easily tweaked and is possible to apply to any artwork type, including groups, editable text and images.
For full details how to use the AG Block Shadow, please refer to the AG Docs on this topic: https://docs.astutegraphics.com/stylism/ag-block-shadow-overview
If you don't already have the plugins, it takes less than 5 minutes to create a 7 day free trial account. No credit card details are required, only your email address. Visit https://astutegraphics.com/freetrial to sign up and install these Adobe Illustrator Plugins on a 7 day free trial.