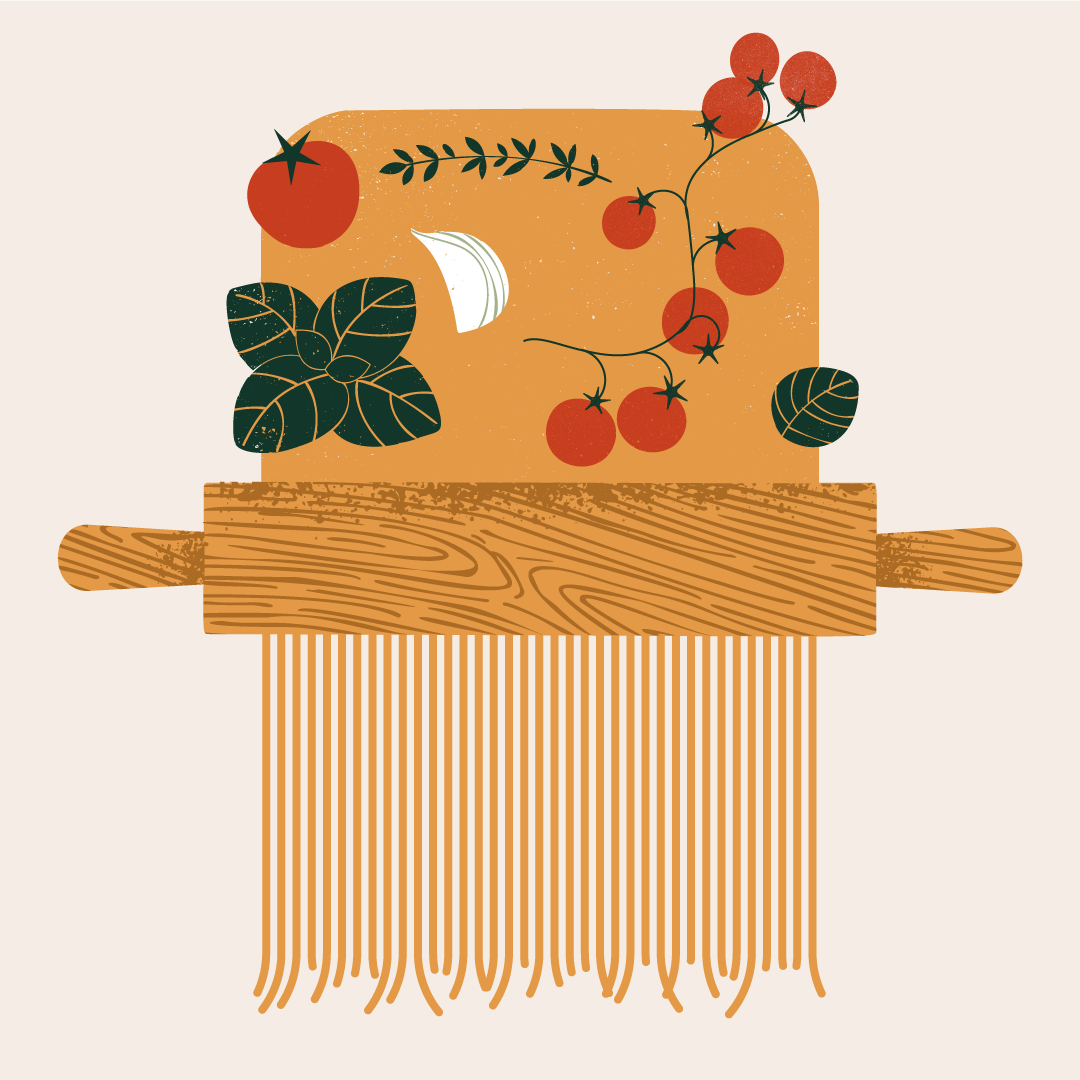
How to stack live effects in Illustrator
6 minute readIn this tutorial we’ll be extending these straight paths to give them curled extensions with the Extend Path Live Effect from Astute Graphics. The Extend Path Live Effect can extend single and multiple open paths in Illustrator quickly and easily. It also has a randomize option, meaning your group of lines can all be slightly different lengths, with different curls going in different directions.
To start off this tutorial we are going to select multiple open paths and group them together. As with most live effects, Extend Path appears in the main menu, under Effect > AG Utilities. It can also be applied directly from the Appearance panel using the “Add New Effect” button at the bottom of the panel, then AG Utilities > Extend Path…
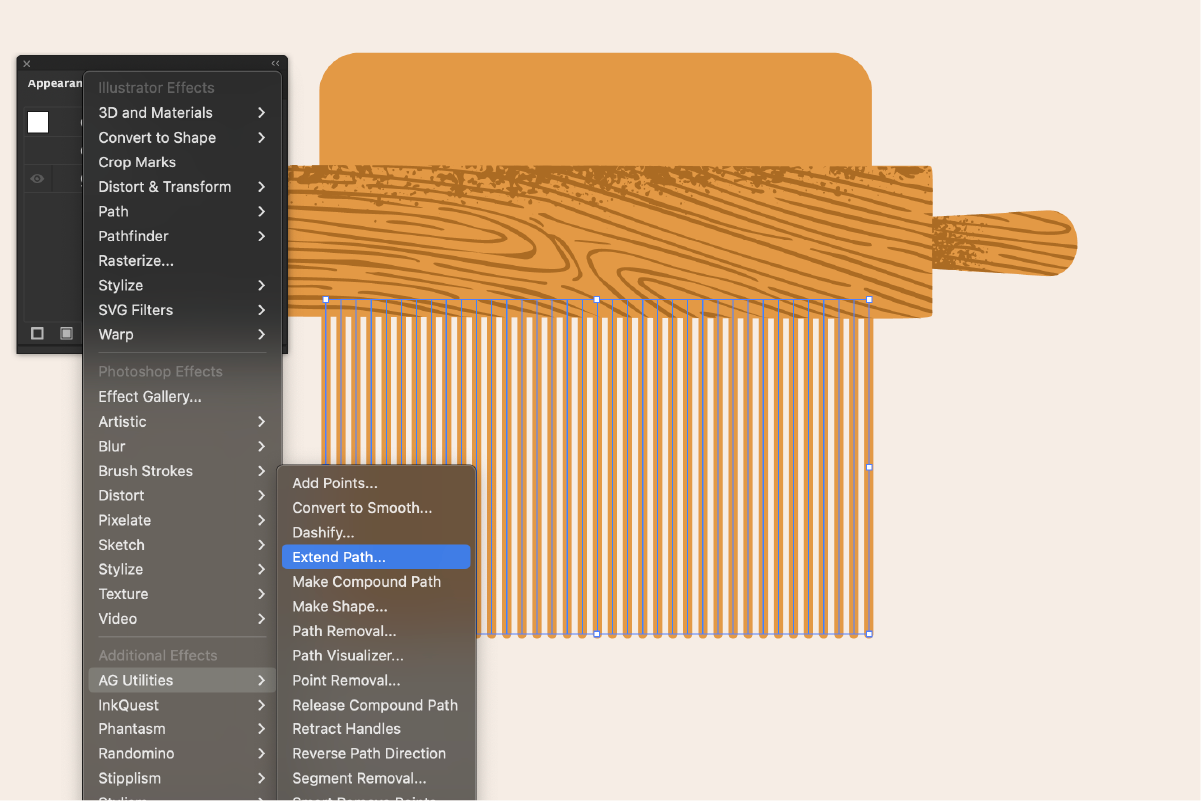
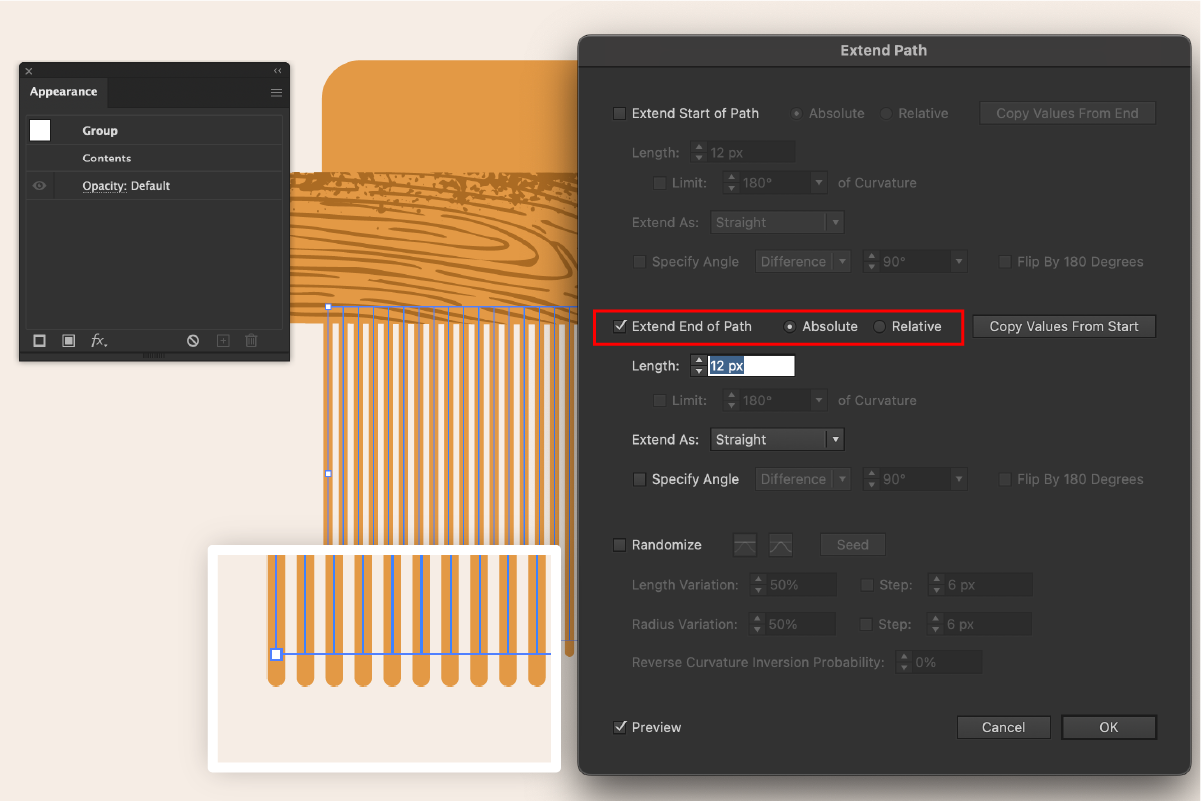
After selecting the effect, a parameters dialog will appear where you can choose options like extending the start or end of the path using different methods. The default options applied are to extend the end of the path with an absolute value.
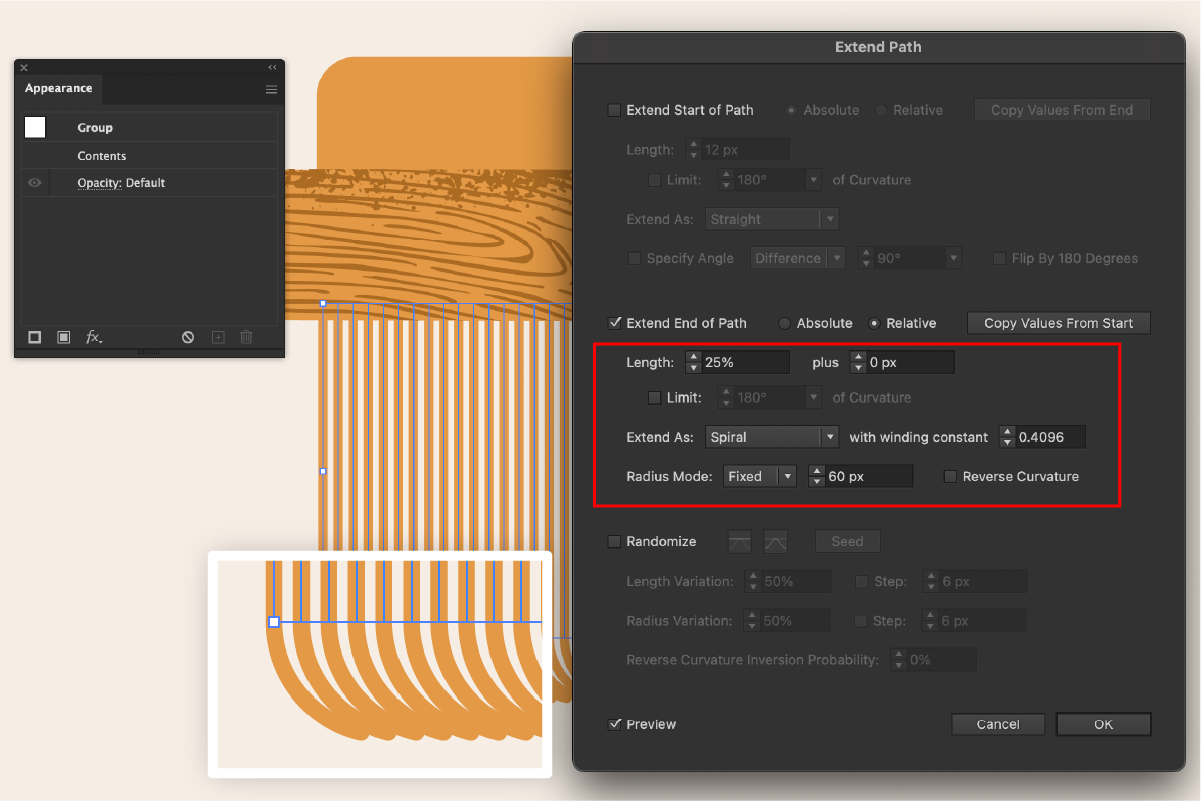
You can use the parameters dialog to adjust the extension length to a relative percentage of the original path. There are also options to change the type between a bezier, constant radius, straight, or spiral extension. With the spiral extension, it’s necessary to ensure the radius mode is “Fixed”. That way the straight paths can be turned into curly ones. Use the Radius Value box to enter and adjust your spiral curve.
The bottom section of the dialog is the Randomize option. Enable the randomize checkbox to start previewing. The Length Variation specifies the random variation in the length of the extension. For example, if the length is set to 20 pt, then a variation value of 25% would produce lengths that vary by as much as 20 pt × 25% = 5 pt, that is, between 15 pt and 20 pt; a variation value of 90% would produce lengths between 2 pt and 20 pt. The Radius Variation works in the same way, but only for the radius value.
The Reverse Curvature Inversion Probability value only works for Constant Radius and Spiral extensions. Specifying a value in this field will adjust the probability that the curve will be reversed.
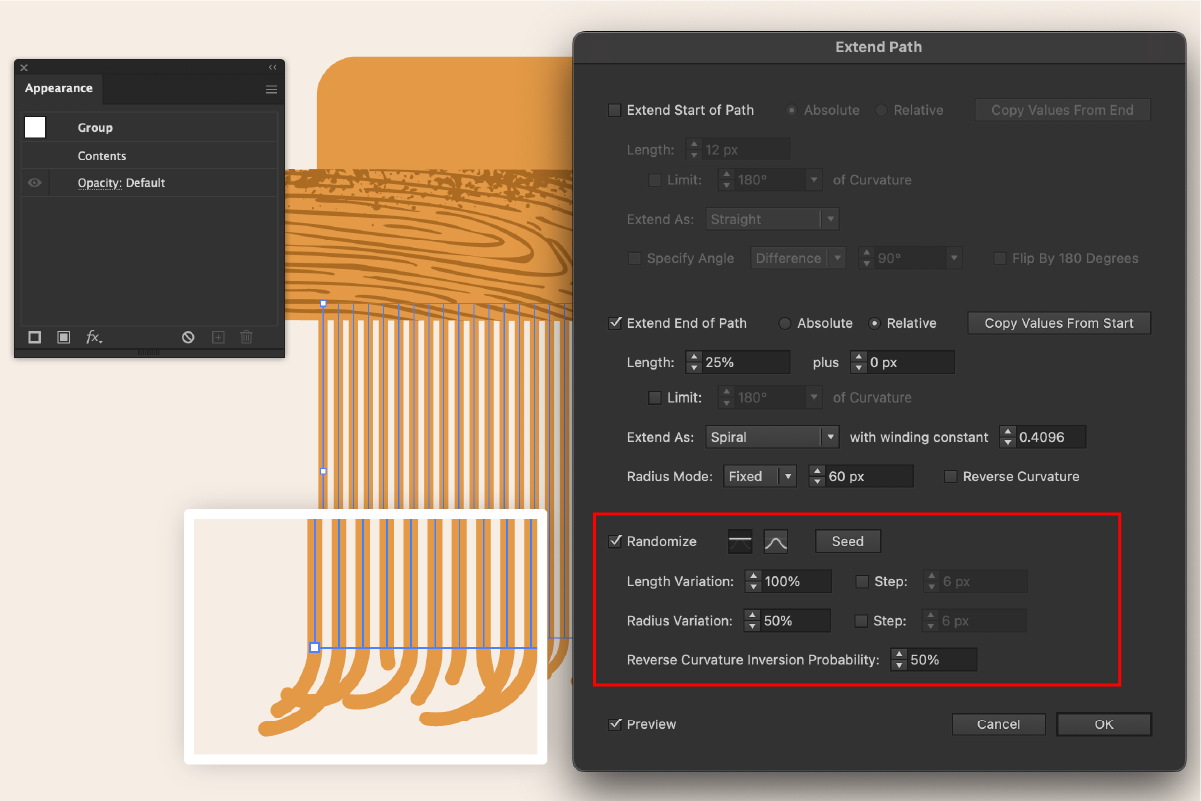
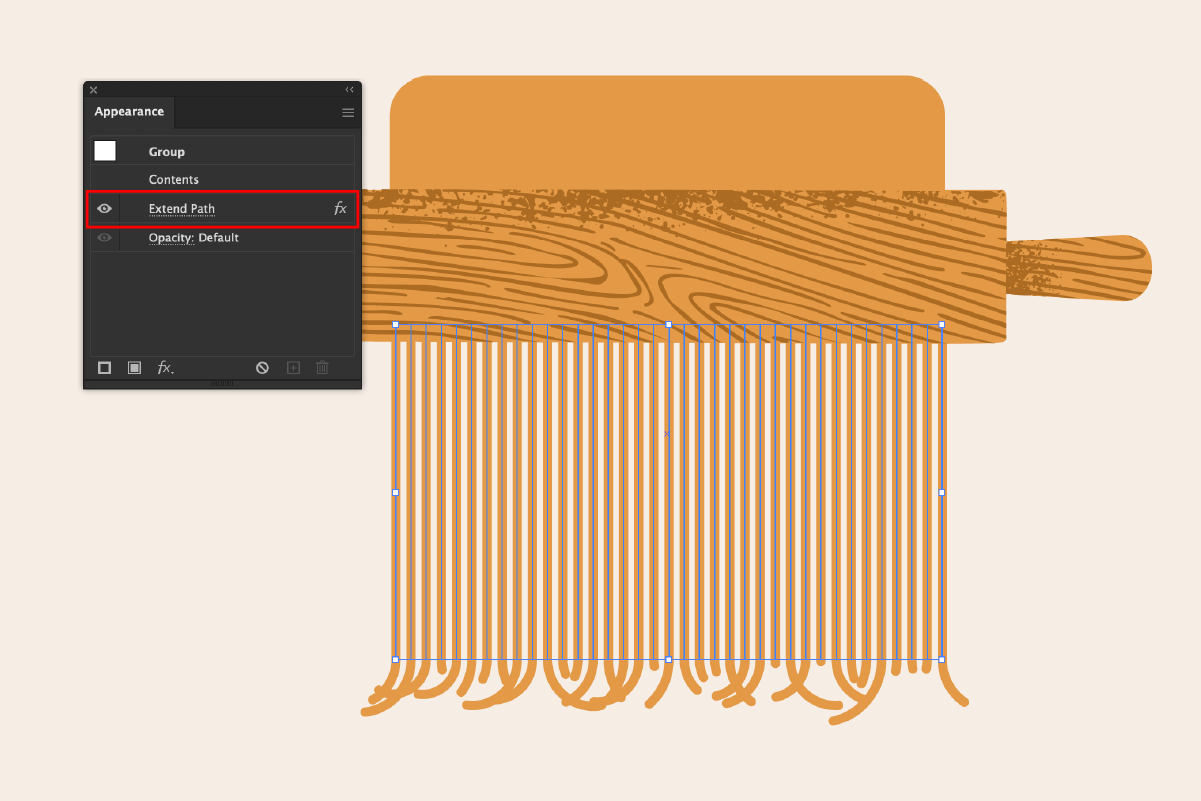
Clicking the OK button will apply this Live Effect to your group. You can see this reflected in the Appearance Panel, where you can also toggle viewing on/off or remove from the group entirely.
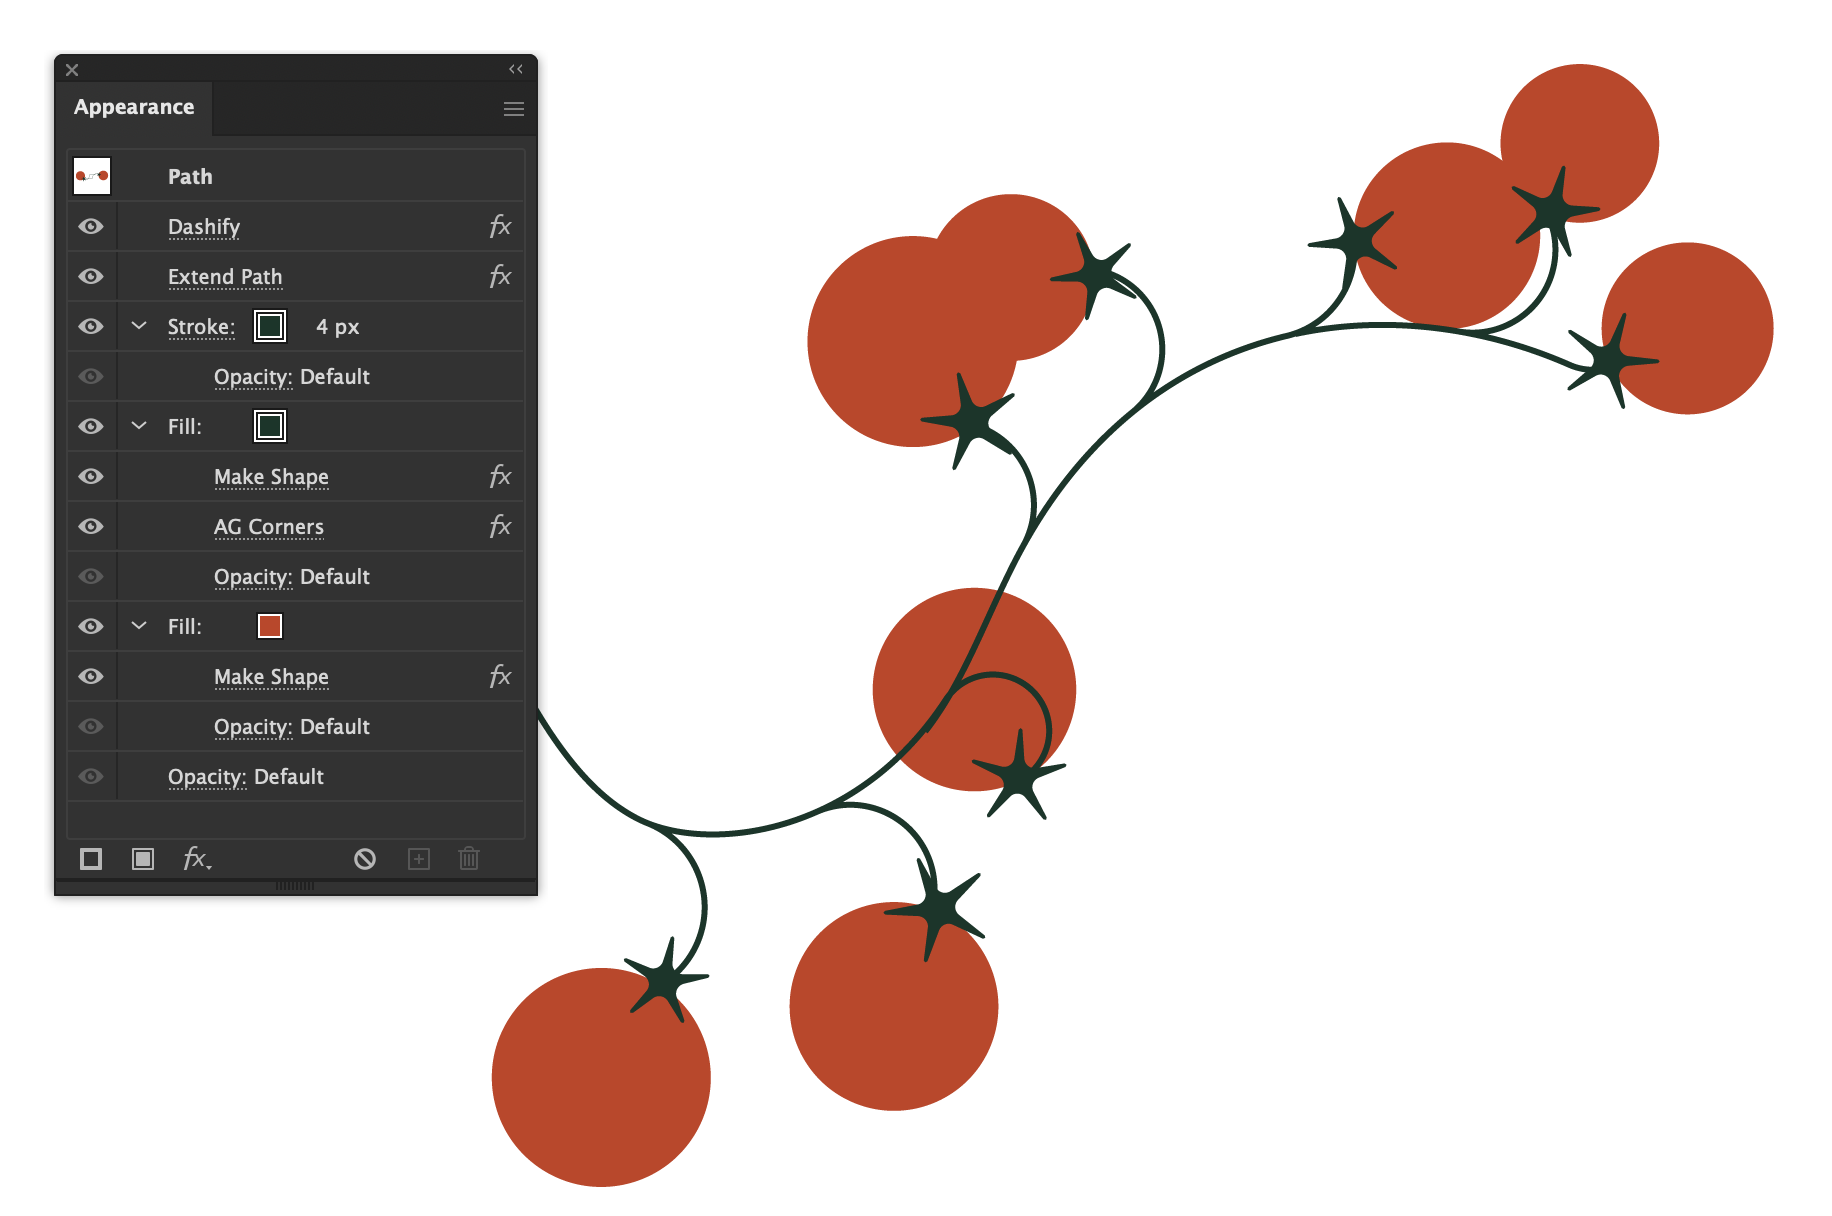
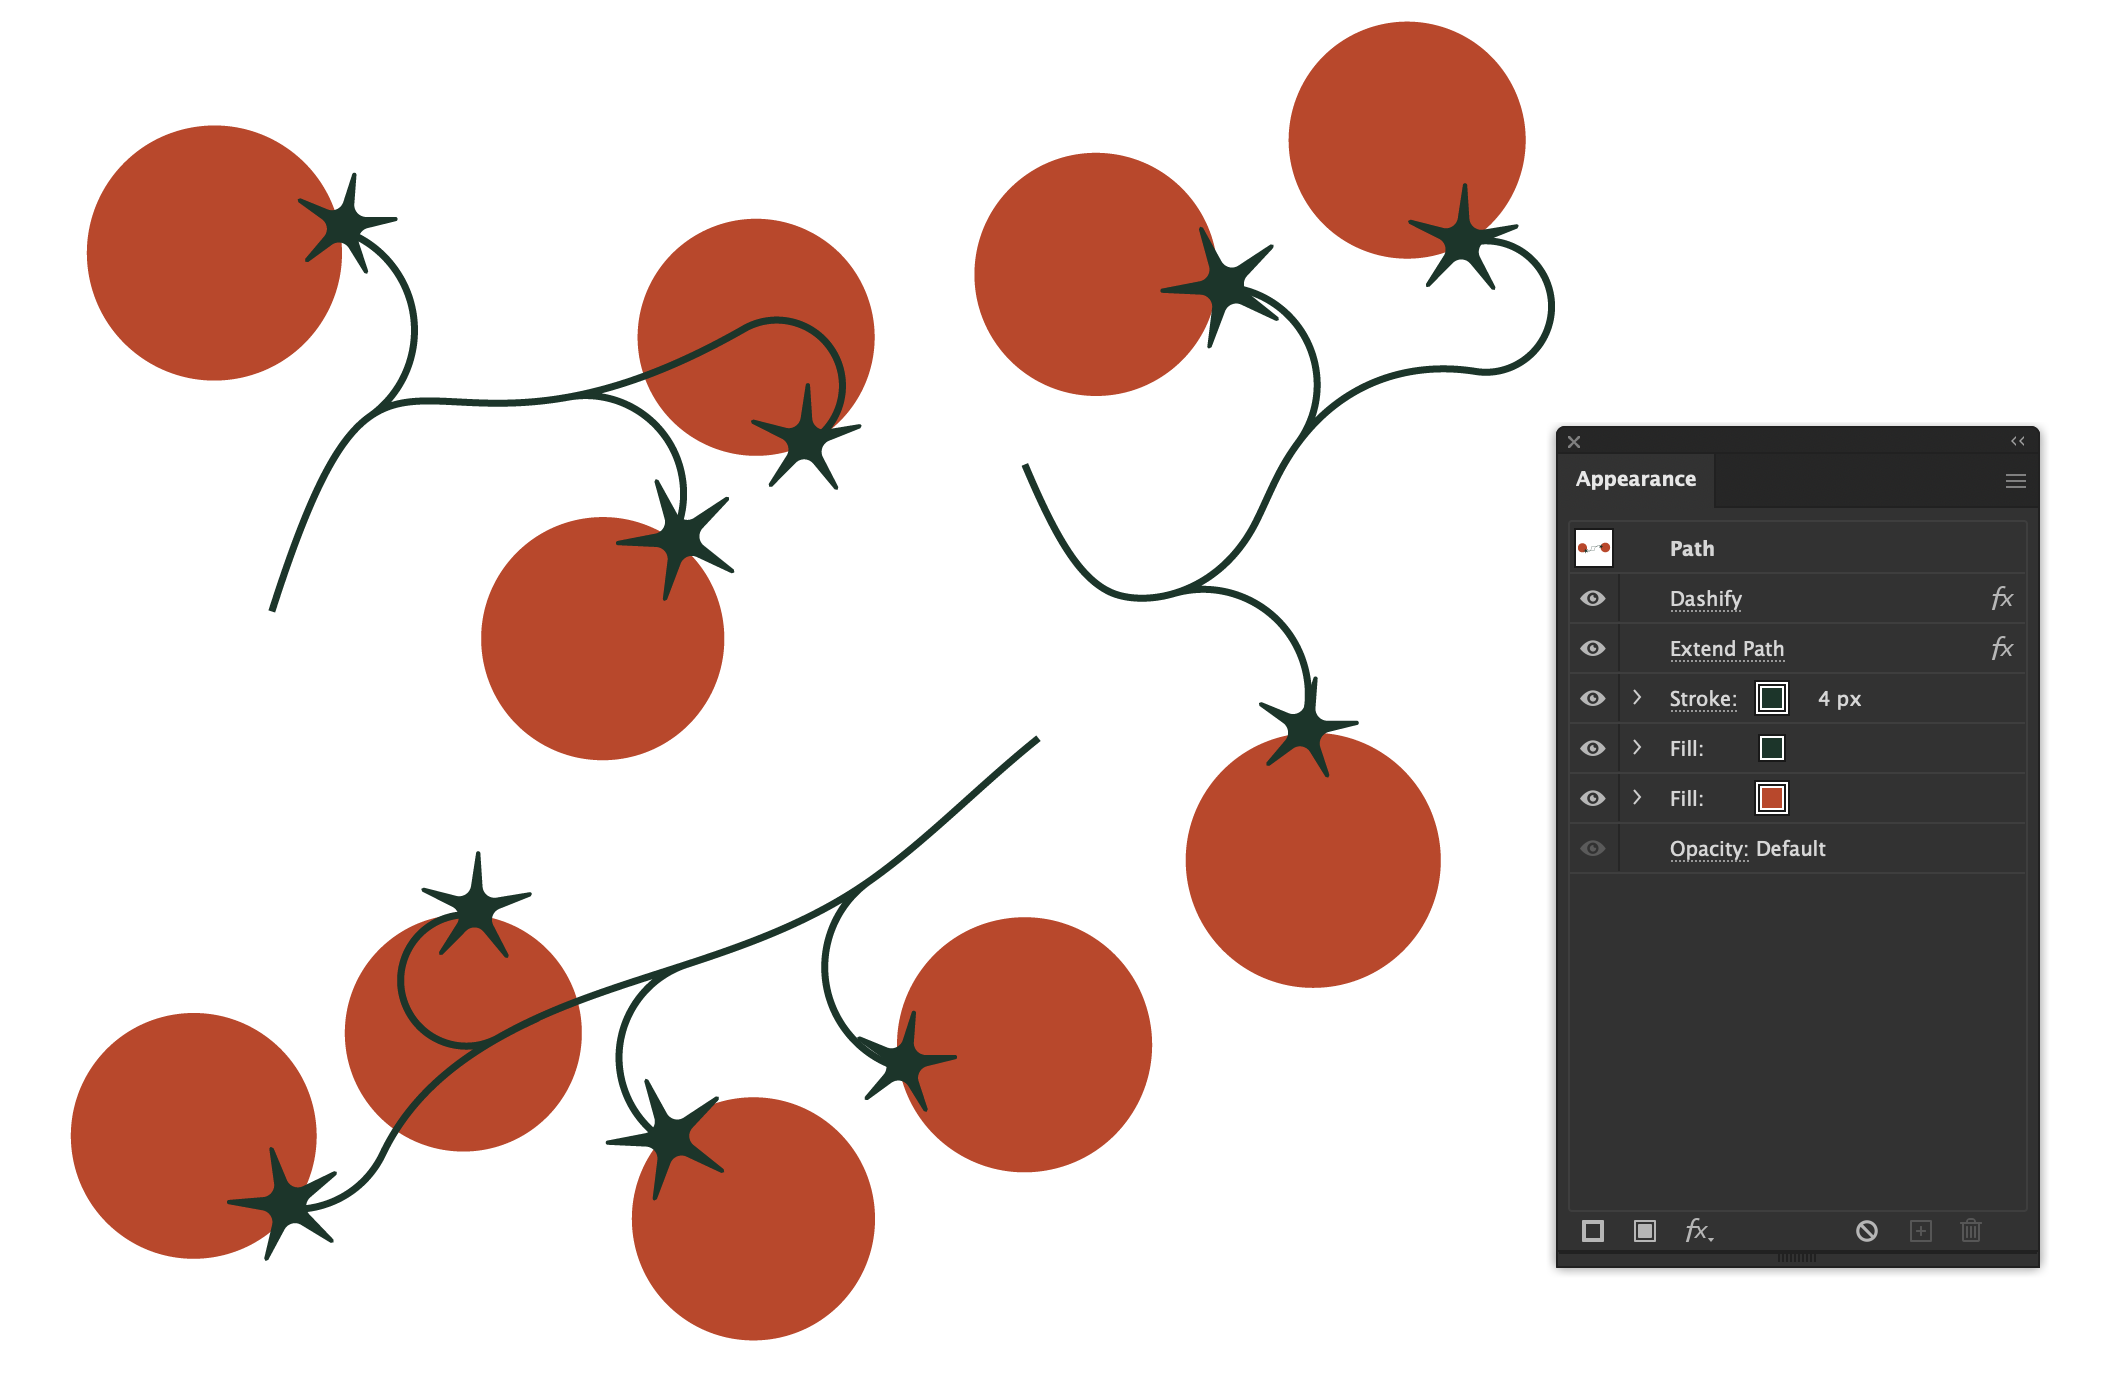
Now you’ve got the hang of seeing one of the Live Effect Building Blocks in action, let’s deconstruct this tomato vine graphic style (made with 4 different Live Effects Building Blocks) to see how it was made.
You can follow along by downloading the Adobe Illustrator file here: https://bit.ly/tomato-vine-graphics-style
It starts with a simple open path, with one green stroke applied.
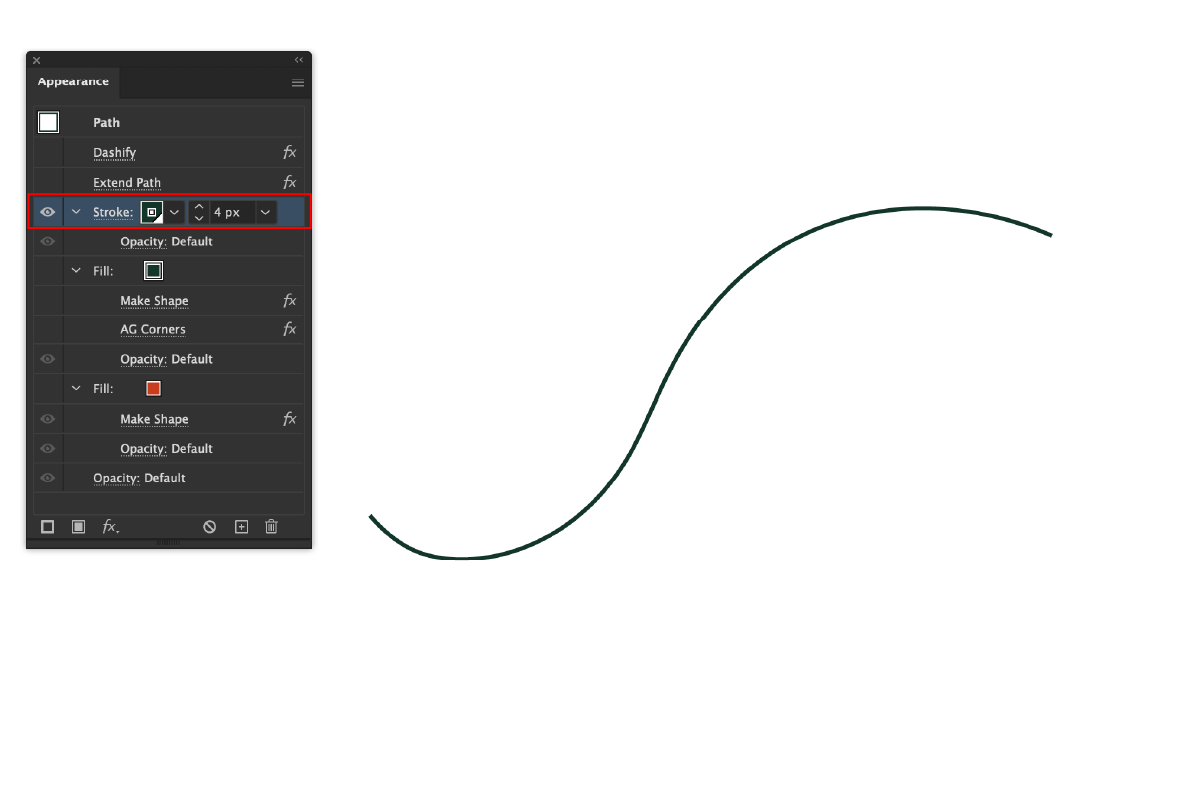
Then a Dashify Effect has been added to the top of the Appearance panel as a pre-effect so that it affects the whole path.
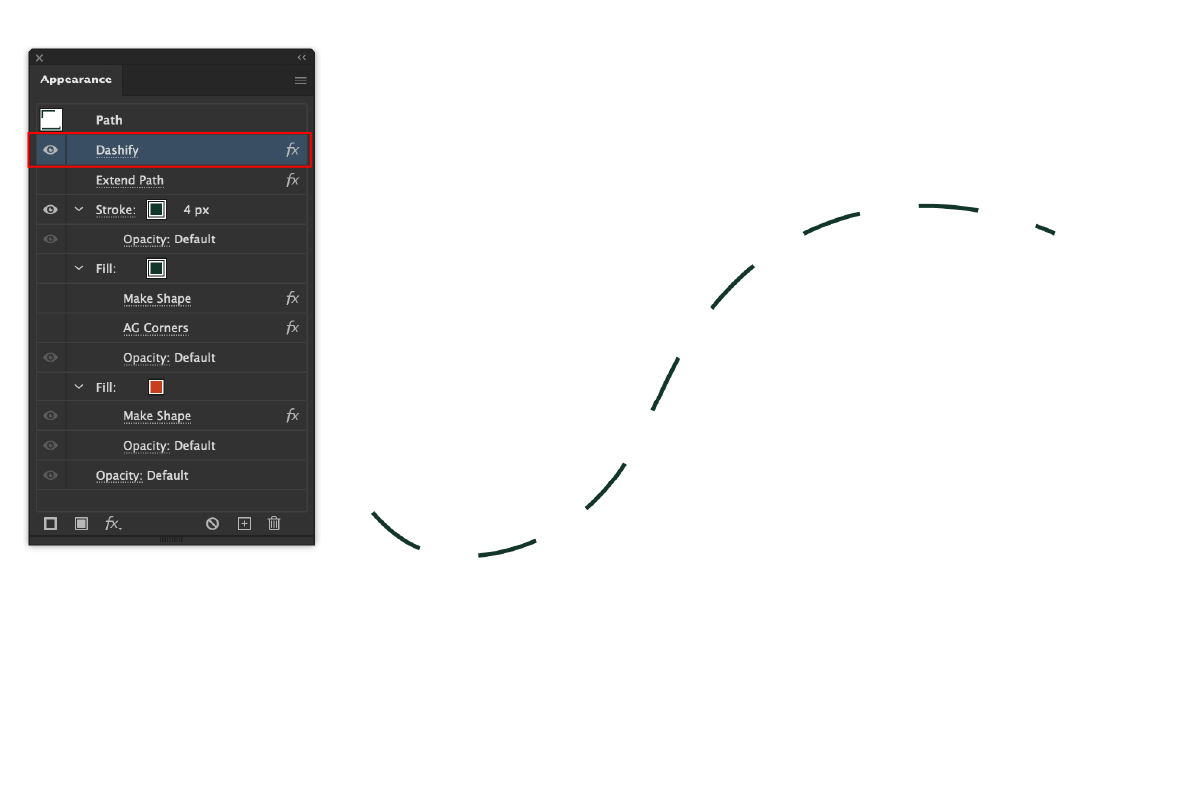
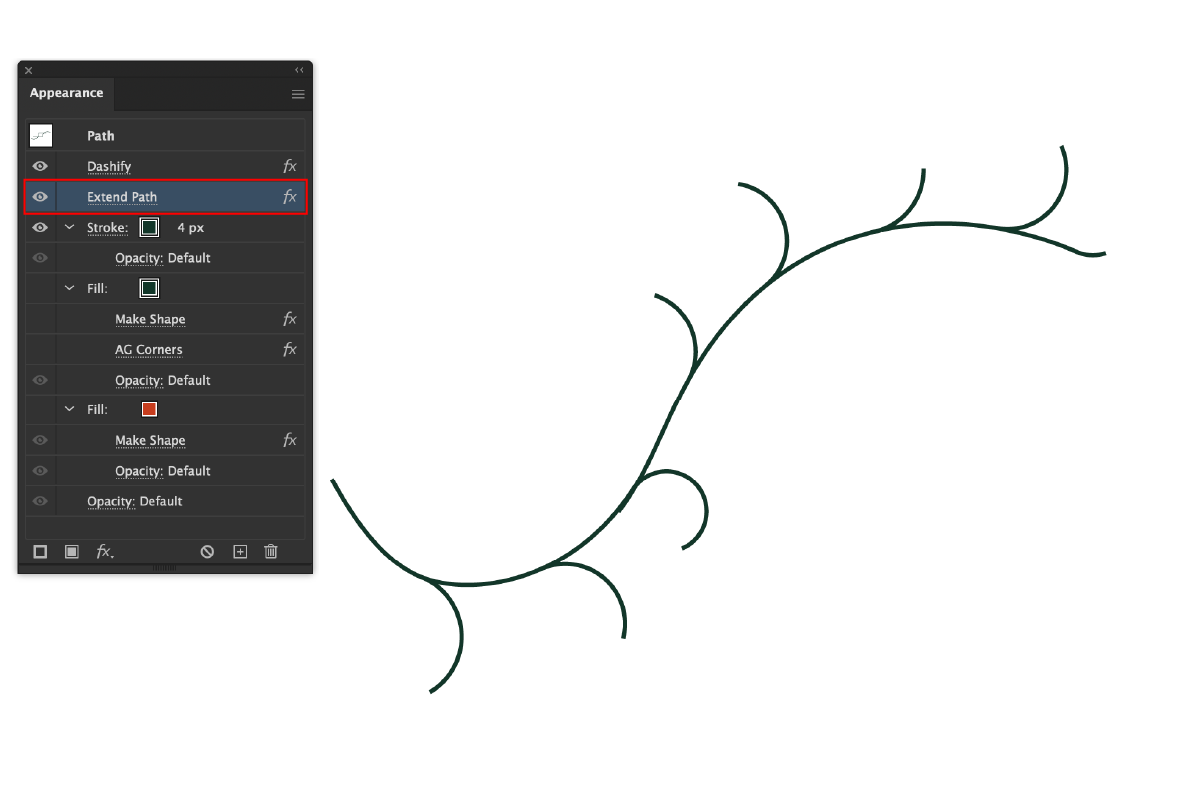
As the path now has the Dashify effect applied at the top, what the Appearance panel sees from now on is a series of multiple open paths. Applying the Extend Path Live Effect and setting it to extend as a spiral at one end and Bezier curve on the other, creates the vine and its stalks.
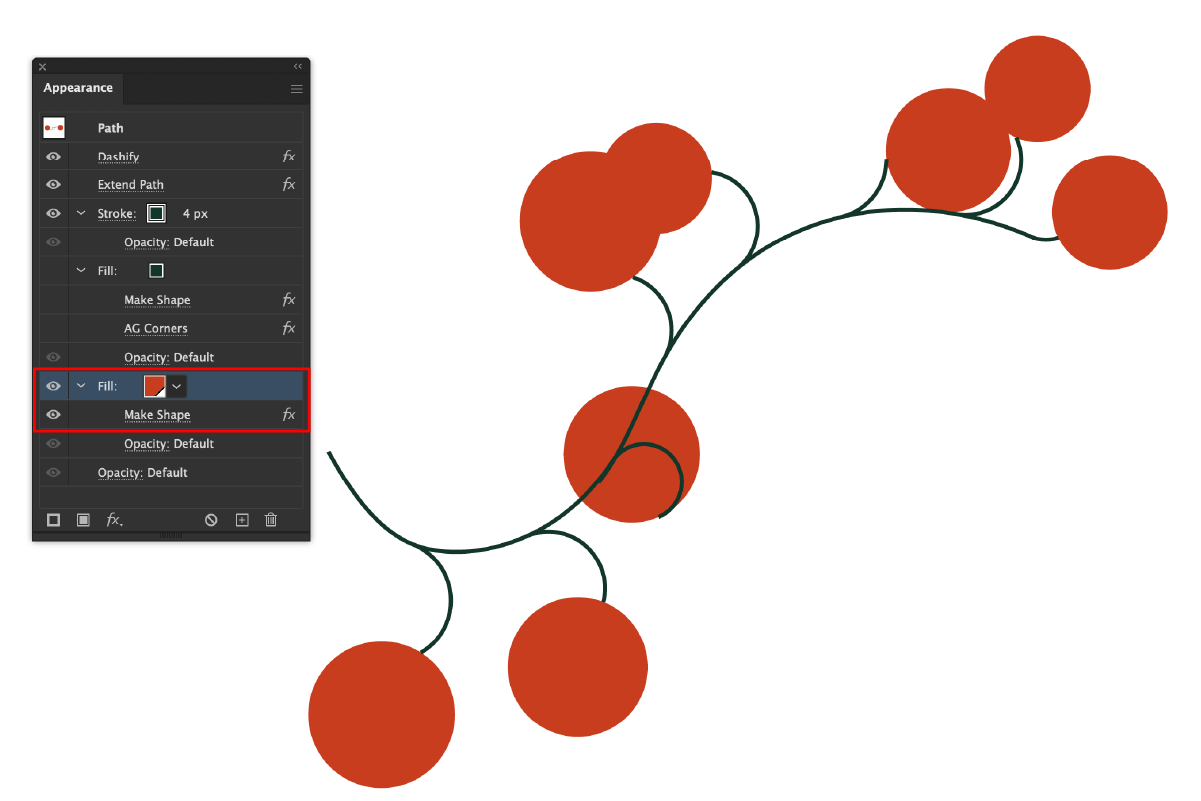
The next thing added was a Red Fill to make the tomato. The red fill was turned into a circle with the Make Shape Live Effect, and positioned once along the path at the end. Remember the Dashify effect is what gives the illusion that there are now multiple paths. The randomize option was also enabled to vary the tomato sizes.
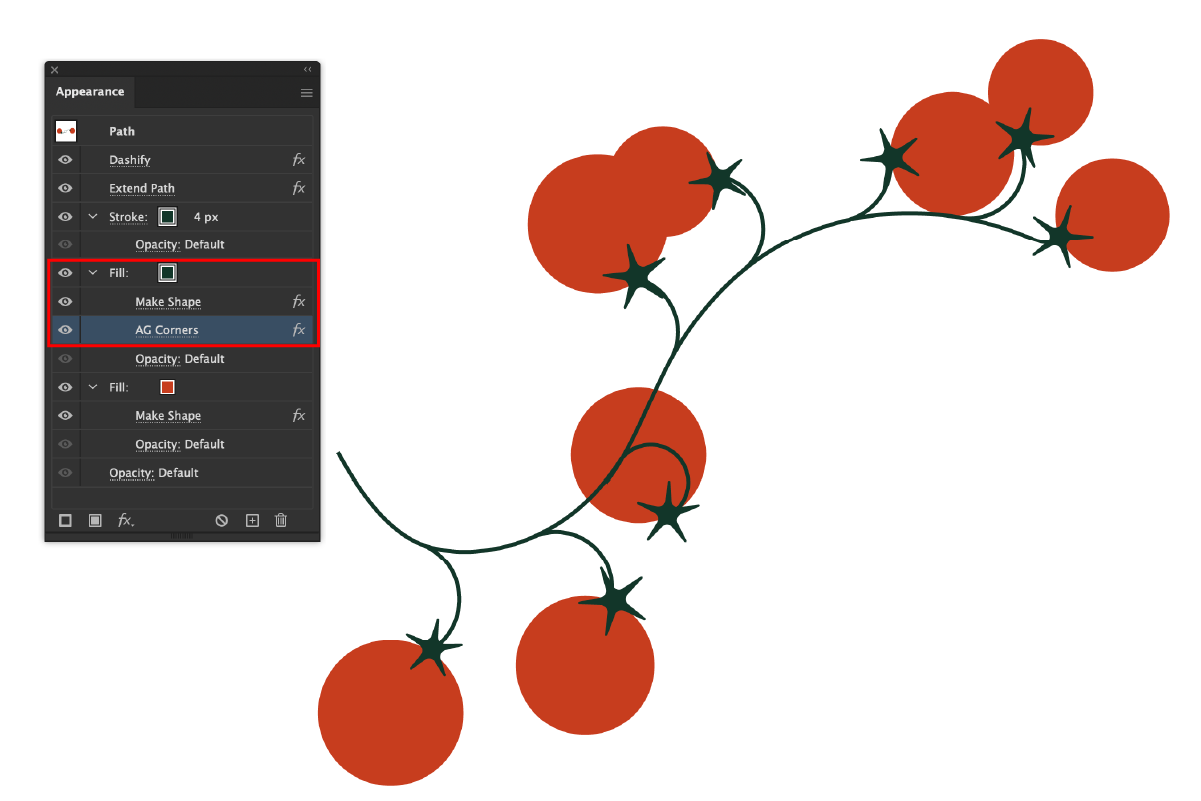
The last thing added to finish off the tomato vine was a Green Fill for the sepal. This needed to be placed above the tomato, so the green fill was stacked above the red fill in the Appearance panel. The green fill also has a Make Shape Live Effect applied to turn it into an irregular star. The AG Corners Live Effect (found under the VectorScribe section of the Live Effects) has the flexibility to apply rounded corners without distorting them; you can implement different corner types and methods to both the inside and outside of a shape.
It's easy to create new tomato vines in seconds...
The Live Effect Building Blocks can be used with any of the native Adobe Illustrator or other Astute Graphics effects. To read more about these features visit our blog Live Effect Building Blocks - Start Learning Now, or to start learning check out the written documentation.
