Tangent and Perpendicular Snapping in Adobe Illustrator 2026
8 minute readThe 2026 release of Adobe Illustrator adds long-awaited tangent and perpendicular snapping, helping you align lines cleanly to curves and paths. However, while these new native tools are a welcome improvement, they still have some frustrating limitations. If you need full tangent and perpendicular control, the Astute Graphics Tangent Line and Perpendicular Line Tools are still the gold standard.
In this guide, we’ll walk through how Illustrator’s new snapping features work, and how the Astute Graphics Tangent and Perpendicular Line Tools offer true geometric control, flexible snapping, and smart shortcuts powered by AstuteBuddy.
👇 Skip ahead:
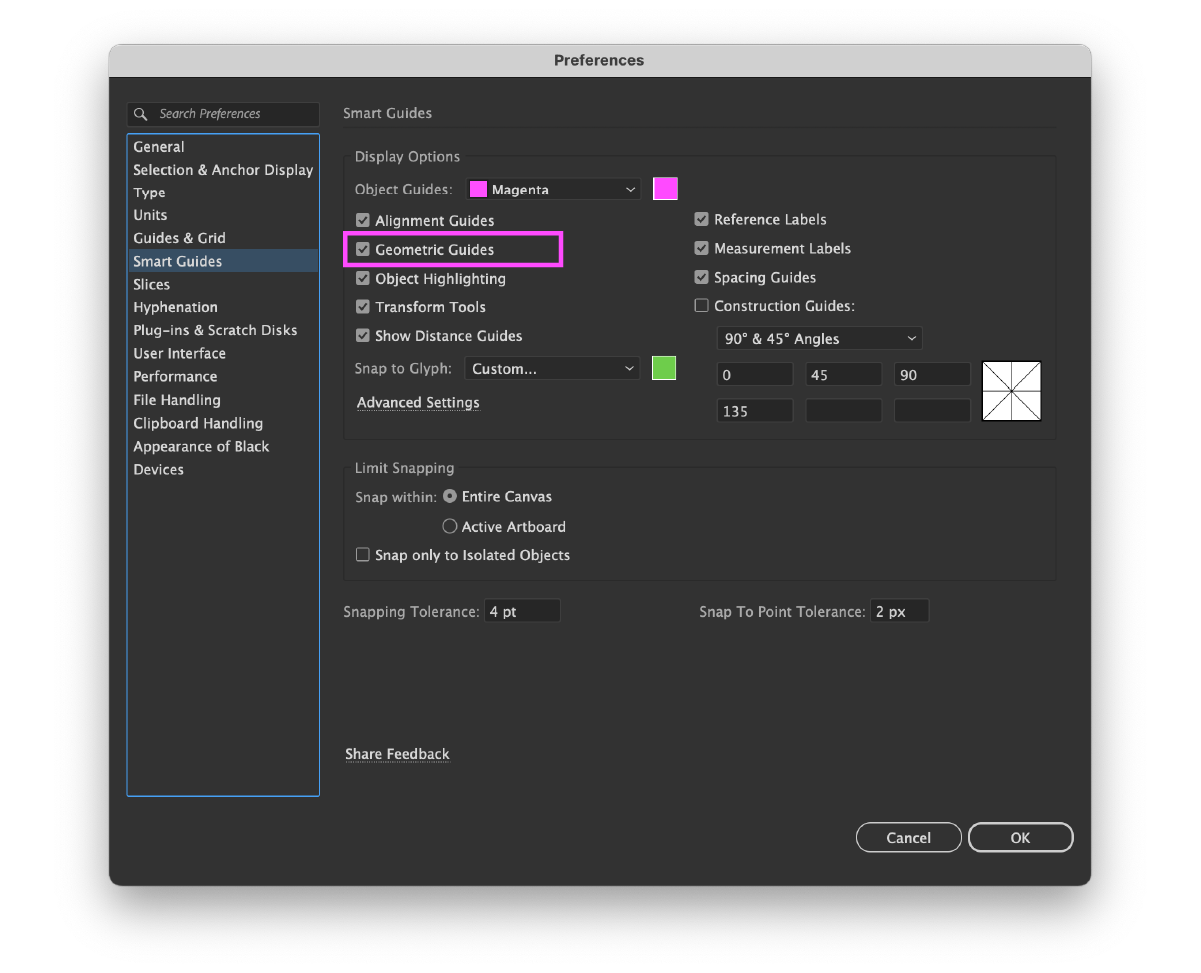
To use Illustrator 2026’s new tangent and perpendicular smart guide tooltips, you need to ensure you have Geometric Guides enabled in the Illustrator Preferences. For new installs, this should be on by default, but you can check and change this setting in Preferences > Smart Guides.
Tangent Snapping in Illustrator 2026
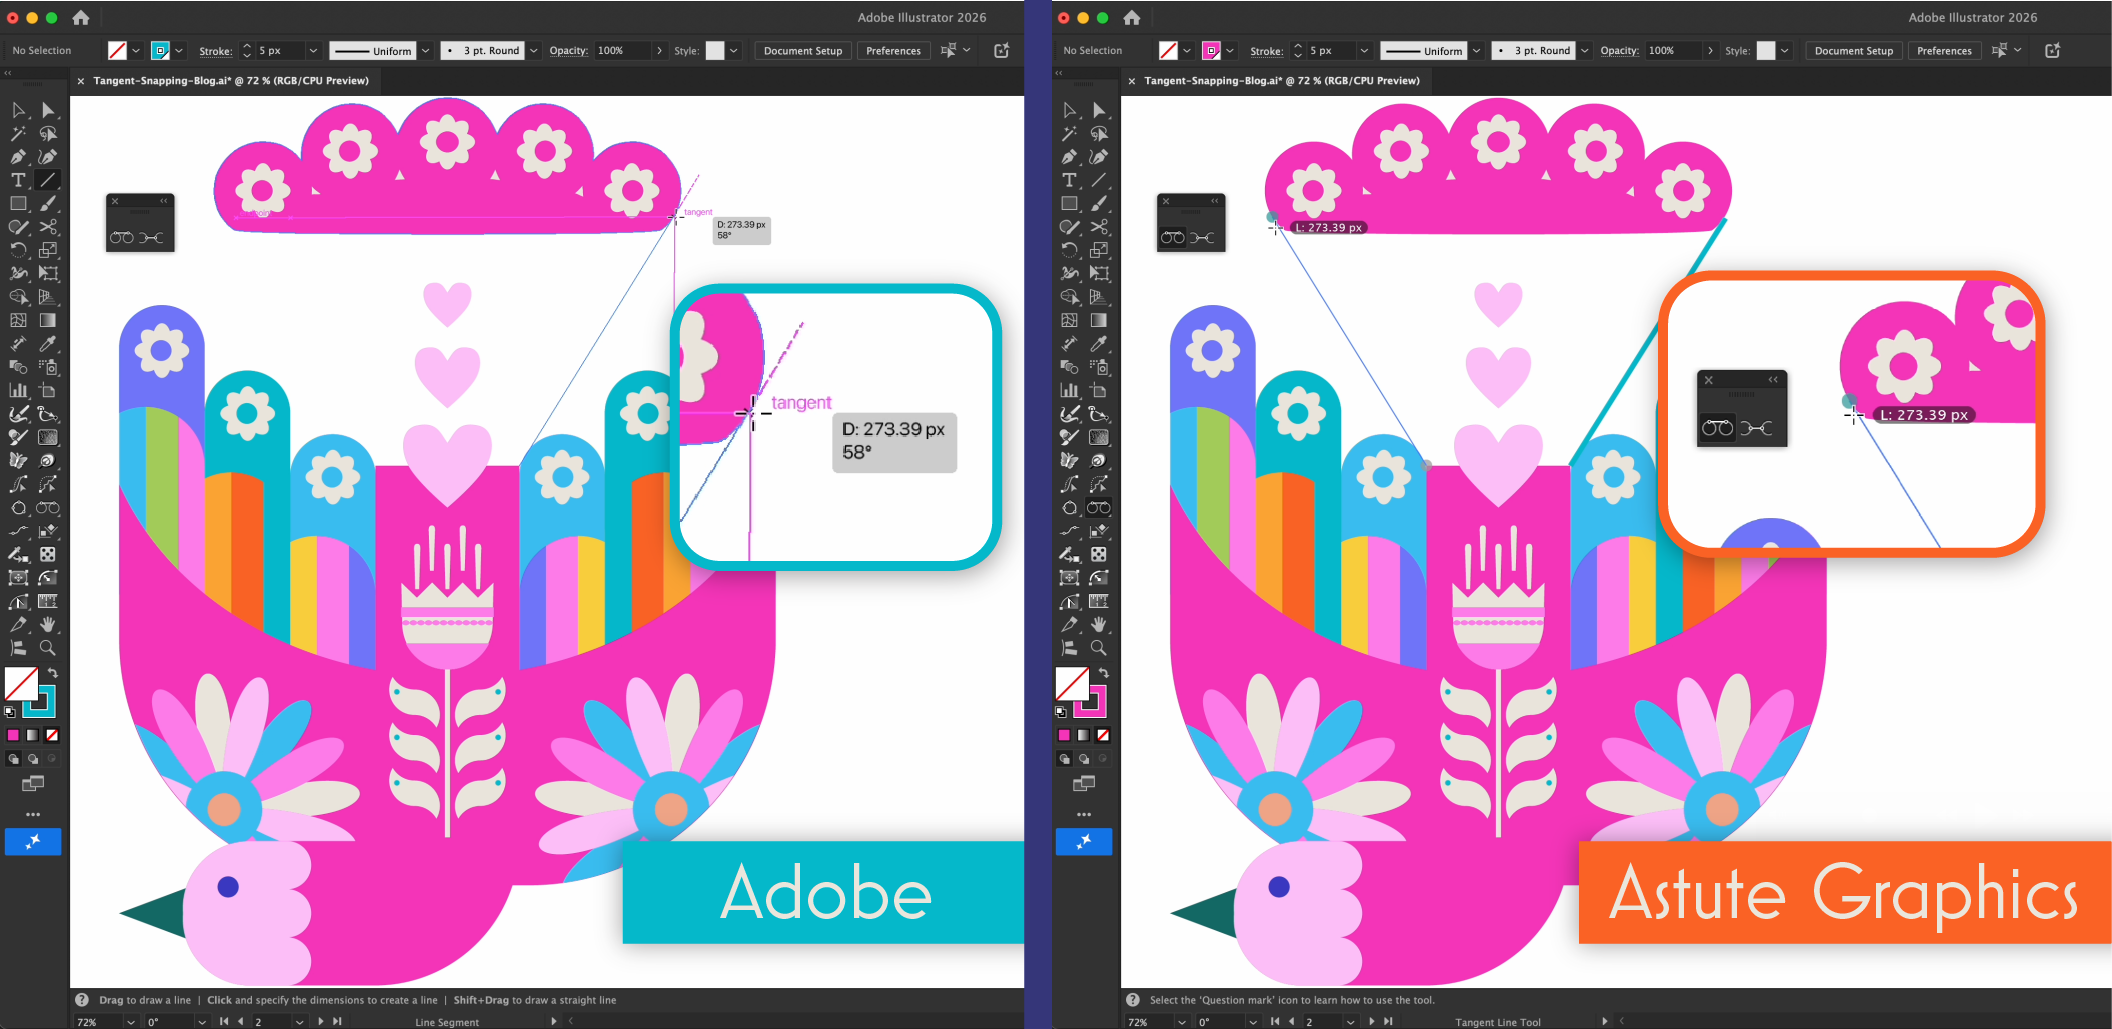
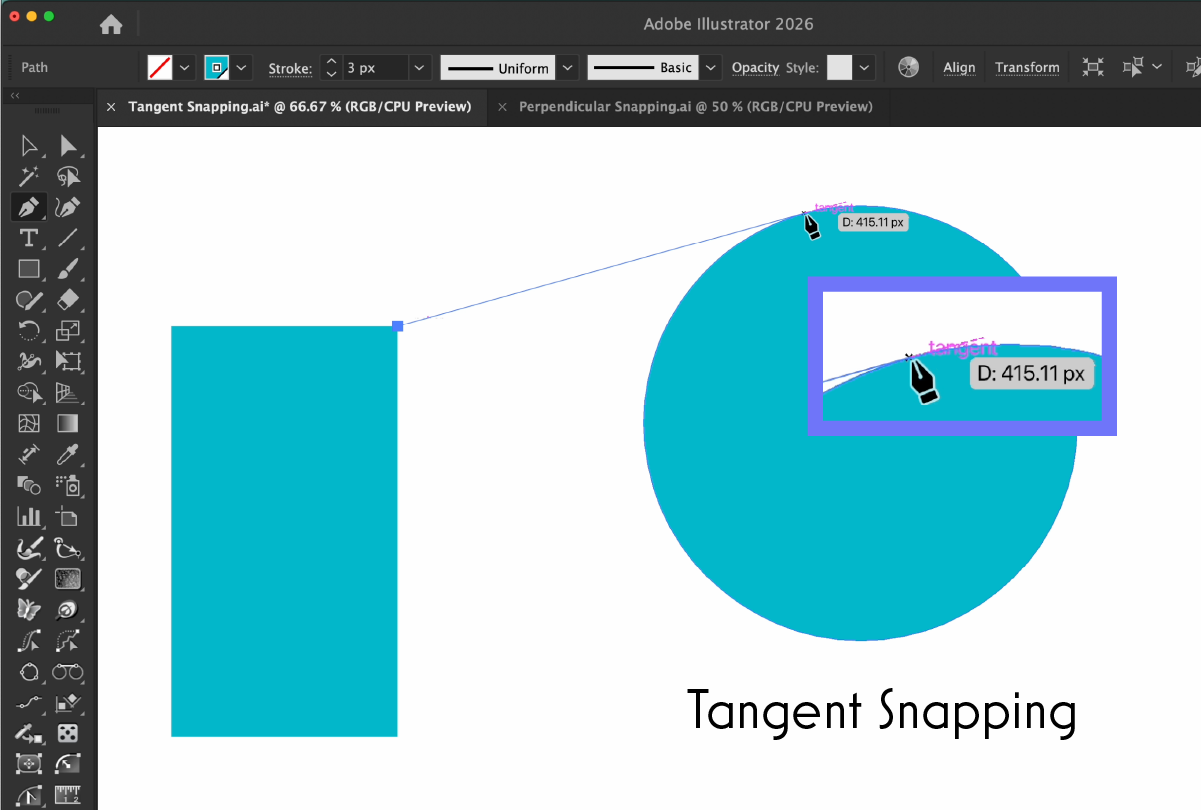
Before Illustrator 2026, aligning a line to the tangent of a curve often meant guesswork. The new Snap to Tangent feature finally allows you to align endpoints tangentially to circles or arcs.
How to use Snap to Tangent
Select or draw a line: Either select a line on the artboard or with the Line Tool (\) or Pen Tool (P) draw out a new path.
Drag toward a curve: With the Direct Select Tool (A) move the endpoint near a curved path. When the Tangent tooltip and magenta guide appear, you’re aligned.
Release to Snap: Release the mouse or pen to snap the endpoint tangentially.
The limitations
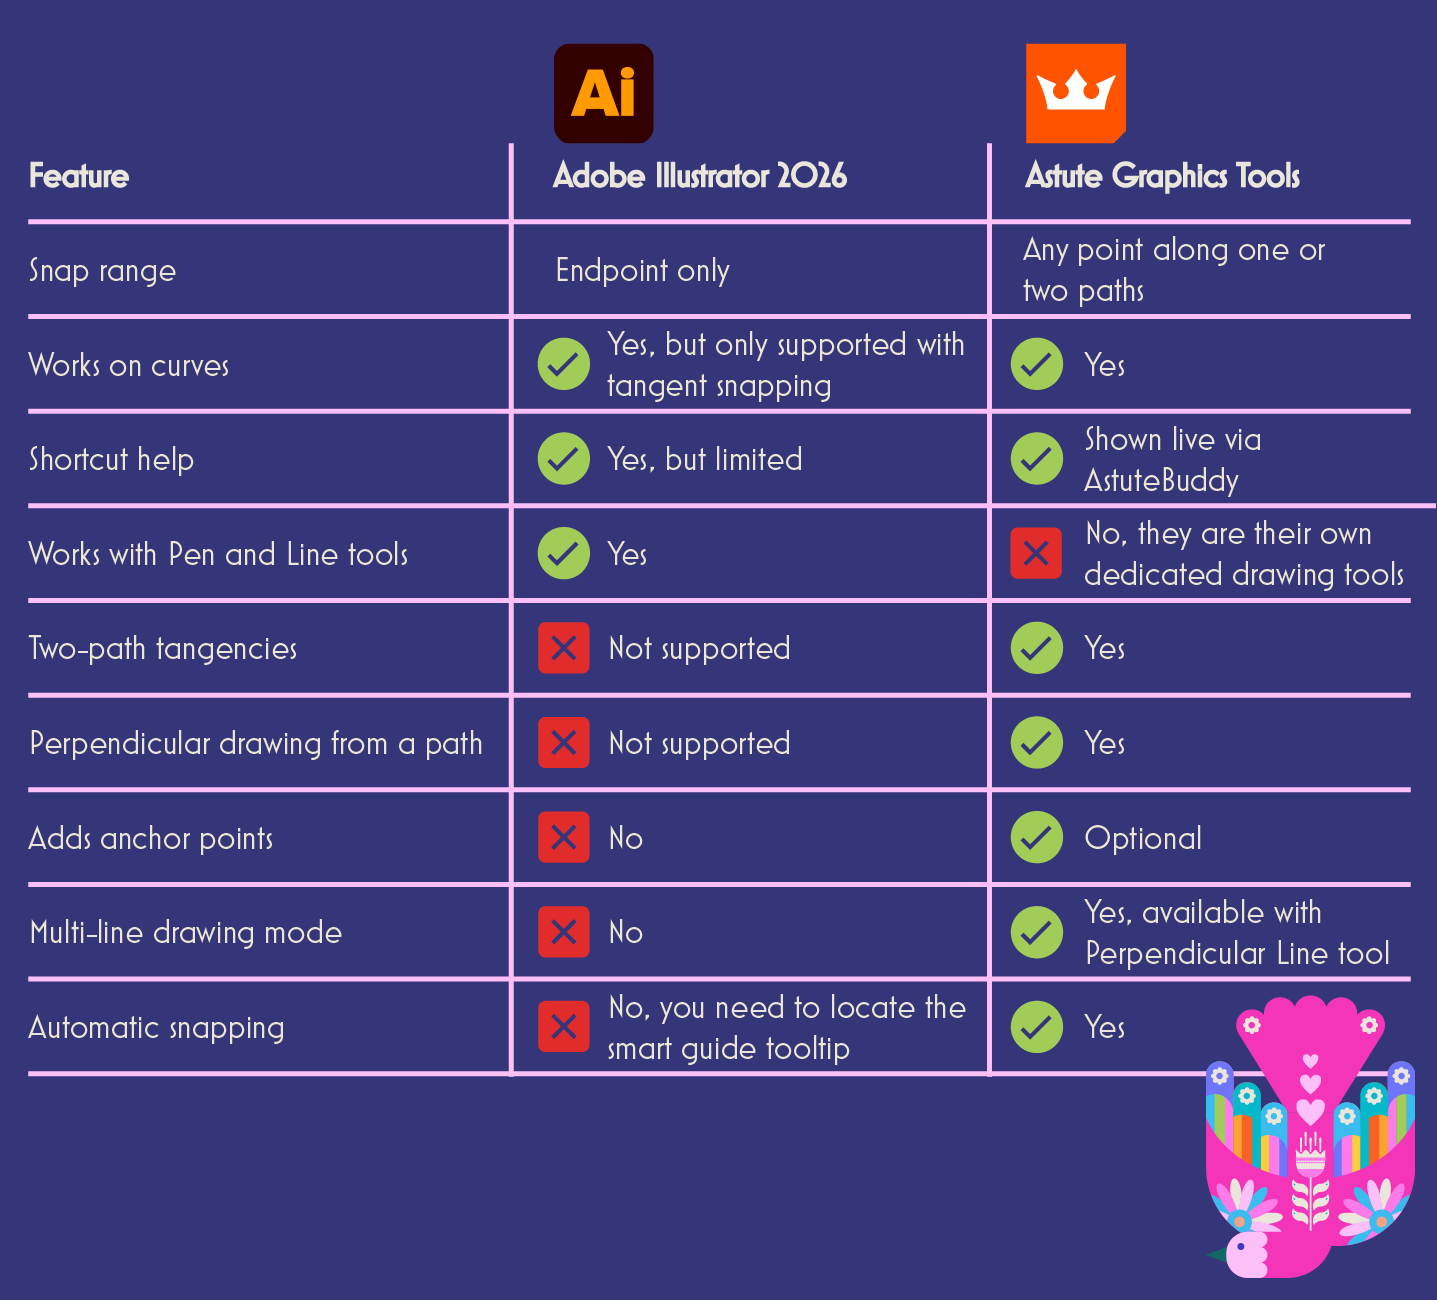
Illustrator’s native tangent snapping only works on line endpoints. Mid-line tangents or multi-point tangential alignment aren’t supported.
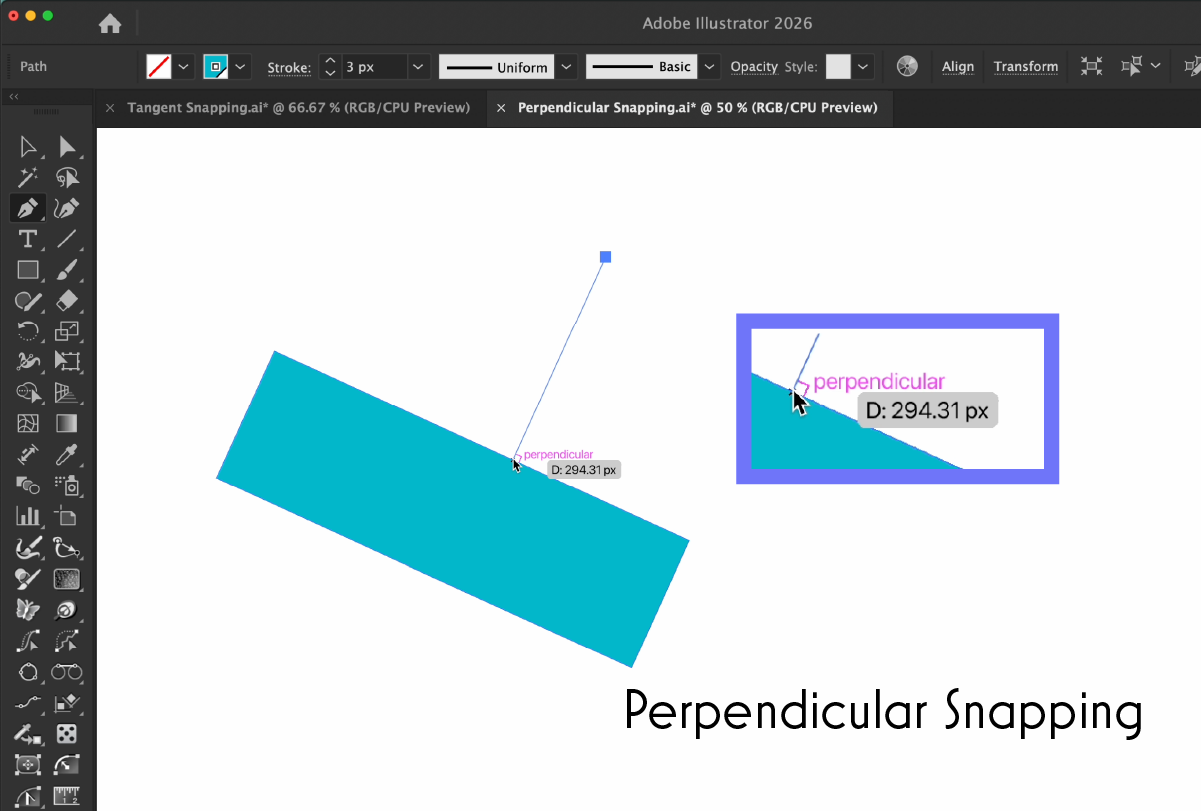
Perpendicular Snapping in Illustrator 2026
The new Snap to Perpendicular feature in Illustrator 2026 lets you align lines at perfect 90° angles, ideal for clean intersections and technical illustrations.
How to use Snap to Perpendicular
Select or draw a line: Either select a line on the artboard or with the Line Tool (\) or Pen Tool (P) draw out a new path.
Drag toward a straight path: When the Perpendicular tooltip appears, the alignment is exact.
Release to Snap: The line snaps to a right angle with precision.
The limitations
Illustrator’s native perpendicular snapping only works on straight paths, it can’t snap to curved paths. Mid-line or multi-point perpendicular snaps are not supported.
Tangent and Perpendicular Line Tools from Astute Graphics
The Astute Graphics Tangent Line Tool, part of the SubScribe plugin, remains far more powerful and versatile. This tool lets you create straight paths that are tangent to one or two existing paths with precision and control that Adobe’s native snapping can’t yet match.
Where to find the Tangent and Perpendicular Line Tools
The Tangent Line Tool and Perpendicular Line Tool appear in Illustrator’s Advanced Toolbar (Window > Toolbars > Advanced). They are stacked together so you can easily toggle between the two tools by using the Left Bracket ([) keypress*. The cursors both appear as a crosshair. To indicate snapping to an existing path, a semi-transparent green circle highlight will appear for the Tangent Line tool, and a semi-transparent green square for the Perpendicular Line tool.
How to use the Tangent Line Tool
The Tangent Line Tool supports two main workflows: Creating a tangent line from one existing path, or creating a line that’s tangent to two separate paths.
Creating a line tangent to one path
Select the Tangent Line Tool: Available in the Advanced Toolbar (Window > Toolbars > Advanced).
Set your starting point: Start by hovering over a path and the green highlight will indicate you’ve snapped to an existing path, or click anywhere in your document to set your first point.
Set your end point: Draw away from the path, or toward an existing path to create the tangent line. A preview of the new tangent path will follow your cursor.
Snapping: A small “P” shows when snapping to an anchor point, and “M” when snapping to a midpoint.
Tip: Hold Shift while dragging to constrain the line’s length to rounded values (based on zoom and units). You can also press Command/Ctrl to temporarily override snapping to a second path if needed.
Creating a line tangent to two separate paths
Select the Tangent Line Tool: Available in the Advanced Toolbar (Window > Toolbars > Advanced).
Connect two paths: Start along one path then move your cursor near another.
Snapping: When a line can be drawn tangent to both, it automatically snaps into position. If multiple valid tangent points exist, the one closest to your cursor is chosen.
Tip: You can use the Right Bracket (]) keypress* to ignore the first path’s tangency. This is particularly useful when you want to start from a specific point but only snap tangentially to the second path.
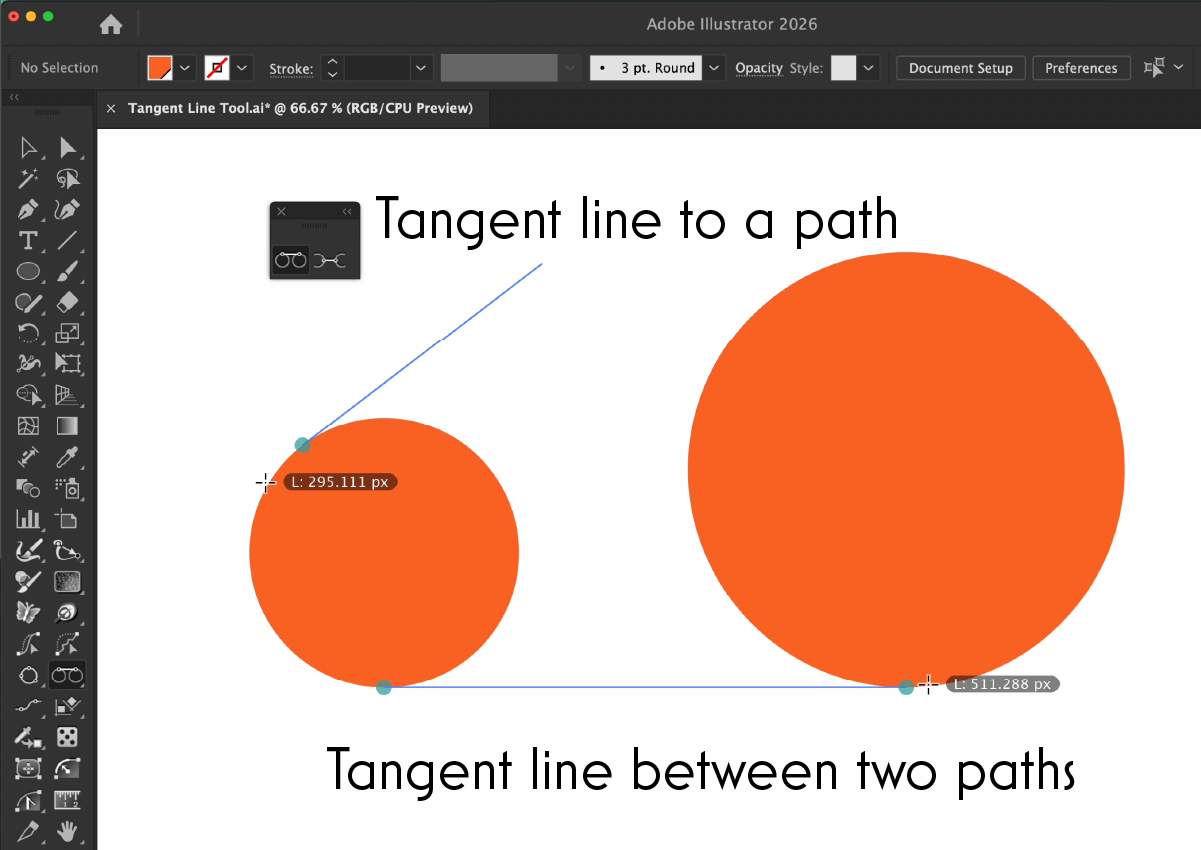
This is an incredibly fast way to build construction lines between circles or curves, something Illustrator’s native snapping cannot do.
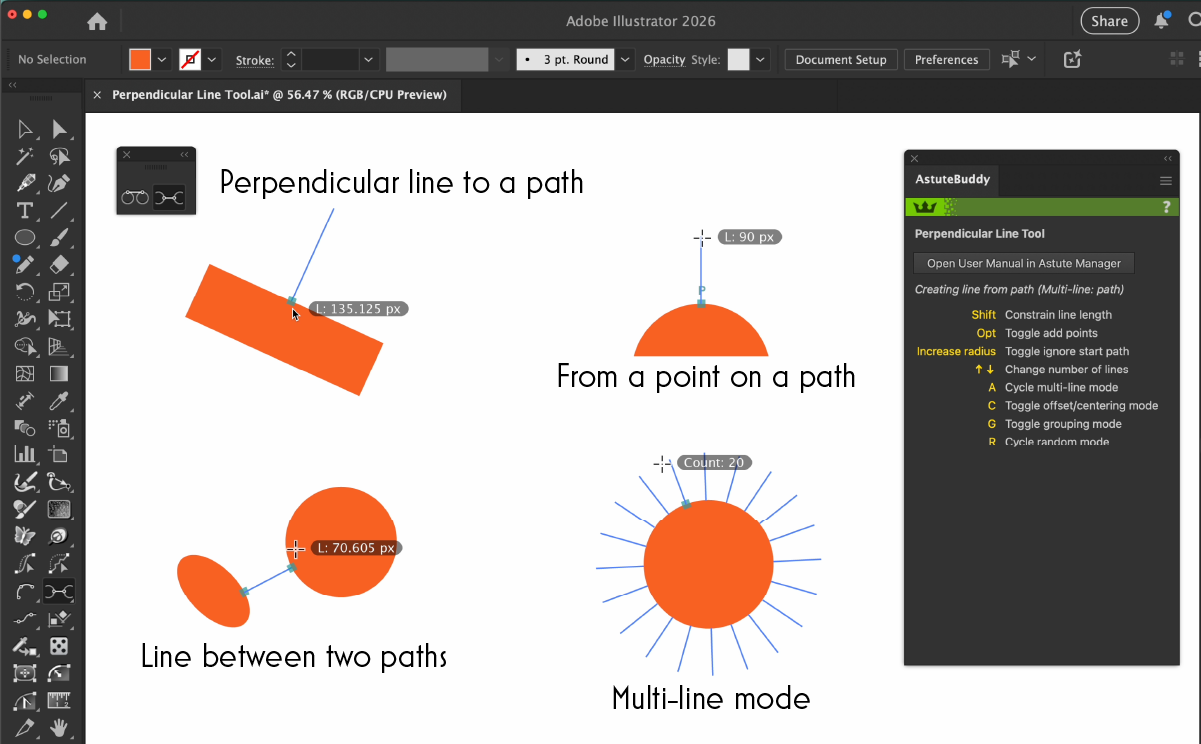
How to use the Perpendicular Line Tool
The Perpendicular Line Tool draws straight paths that are perpendicular to one or two existing paths with no need to select them first.
Select the Perpendicular Line Tool: It’s stacked under the Tangent Line Tool in the Advanced toolbar.
Hover near a path: The path will highlight with a green square annotation.
Click or drag to create the line: Click once to set the first point, then click again (or drag) to set the second.
Use Quick Keypresses (Shown via AstuteBuddy):
A: Cycle multi-line mode for multiple perpendiculars.
Up/Down Arrows: Adjust number of repeats.
R: Randomize length or position.
C: Toggle centering mode.
You can find the full online documentation for the Perpendicular Line and Tangent Line tools over on our docs website. For other Astute Graphics tools that support perpendicular snapping, check out ColliderScribe's Snap to Collision and Rotate at Collision tools.
Why Choose Astute Graphics Plugins
The Tangent Line and Perpendicular Line tools are just a few of the hundreds of features included with an Astute Graphics subscription. When paired with AstuteBuddy, you gain instant on-screen help for every modifier key and shortcut, making even complex geometry effortless.
You can explore all Astute Graphics plugins with a free 7-day trial — no card required.
*When referring to the Left and Right Bracket key presses ([ ]), on an English-language keyboard this performs the keyboard shortcut assigned to "Decrease Diameter". This may differ on other language keyboards and can also be customized by the user.

