Type Effects with Stylism's NEW Block Shadow
6 minute readAG Block Shadow: How to Create a Graphic Style for 36 Days of Type By Carlos Garro.
By Carlos Garro.
Inspired by the 36 Days of Type movement (http://www.36daysoftype.com/), I decided to create a graphic style that I can reuse in Adobe Illustrator.
With the new AG Block Shadow from Astute Graphics, I can simplify my production process and explore different designs in a non-destructive way.
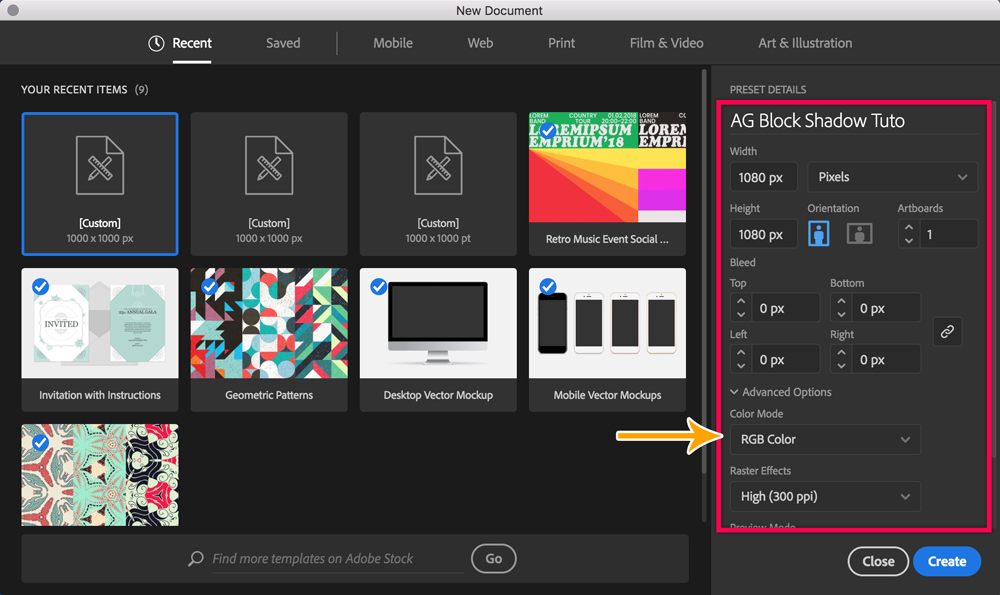
We start by creating a 1080 x 1080 pixel RGB document with Align Pixel to Grid OFF.
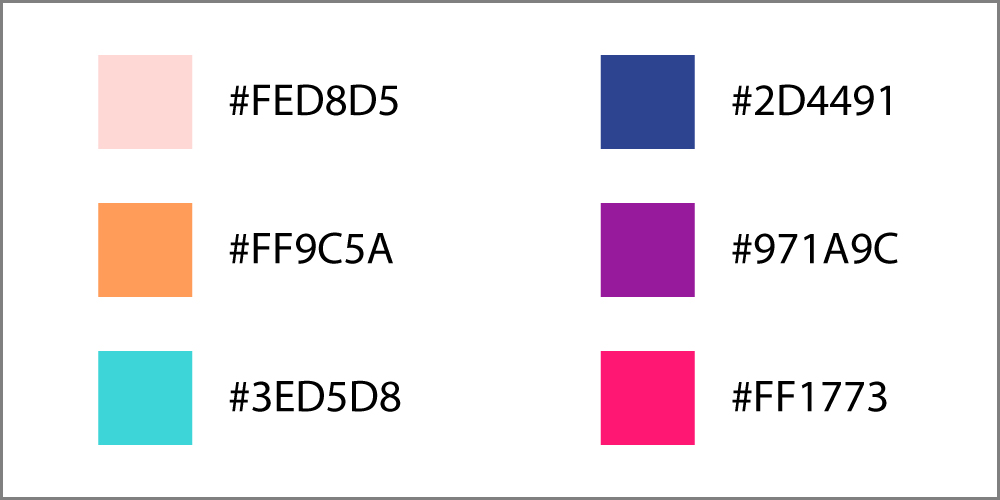
We will use the following color palette.
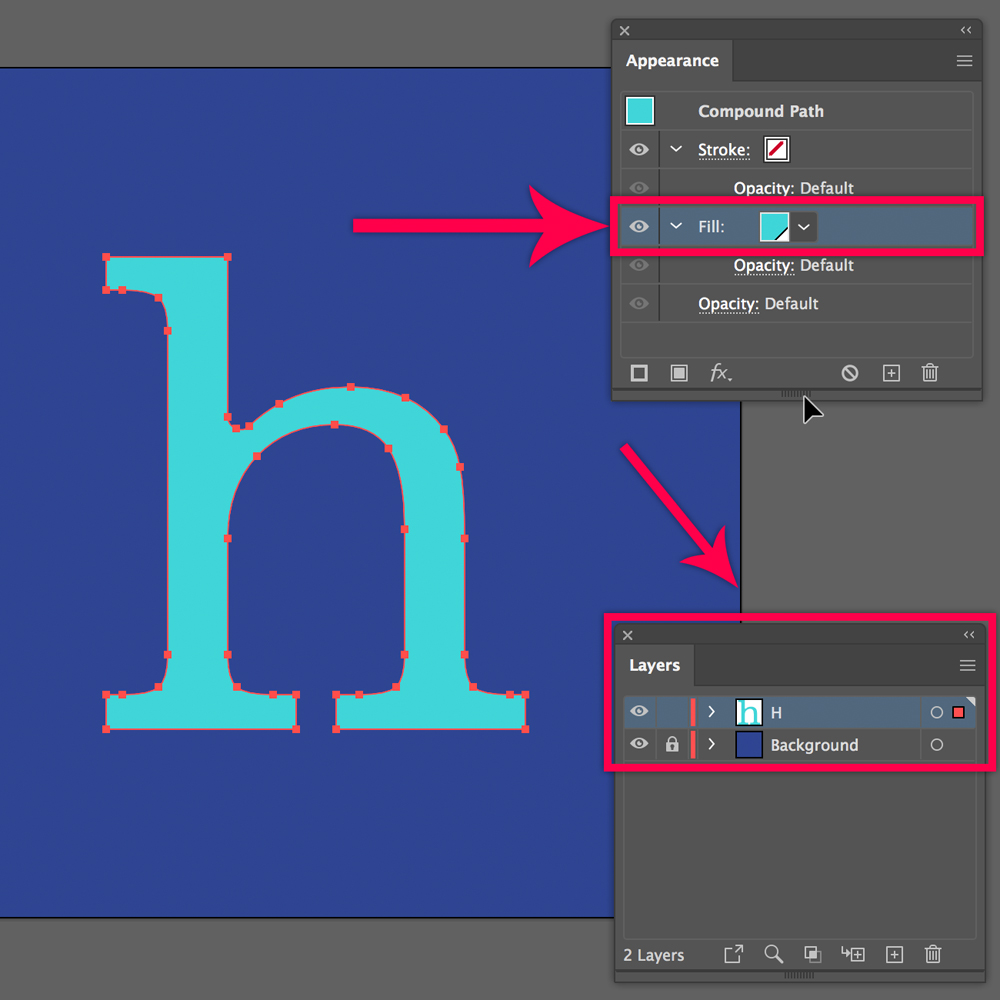
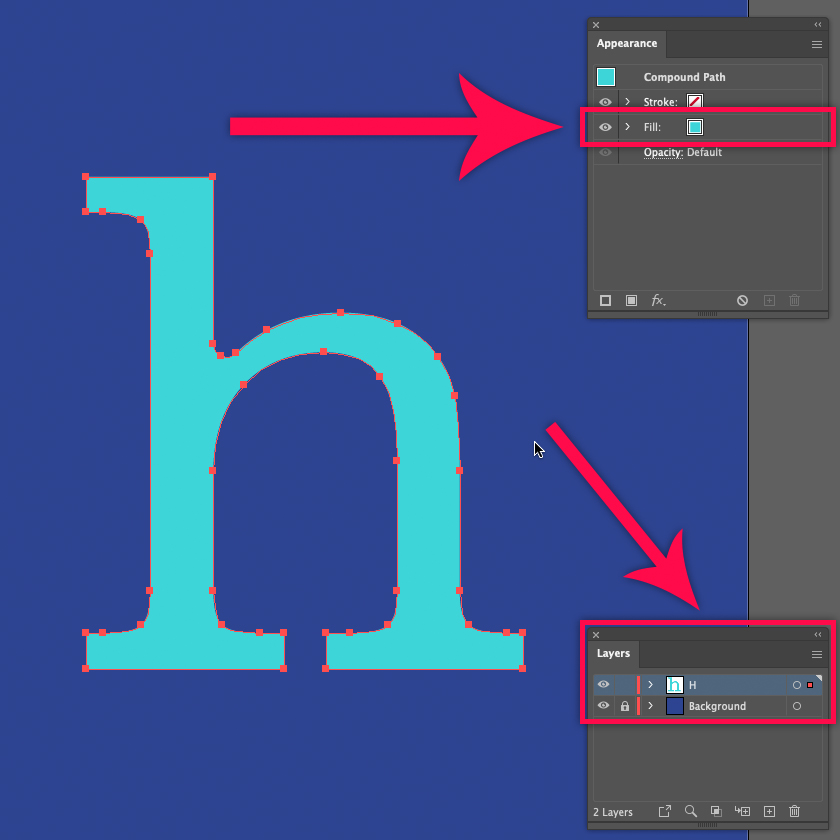
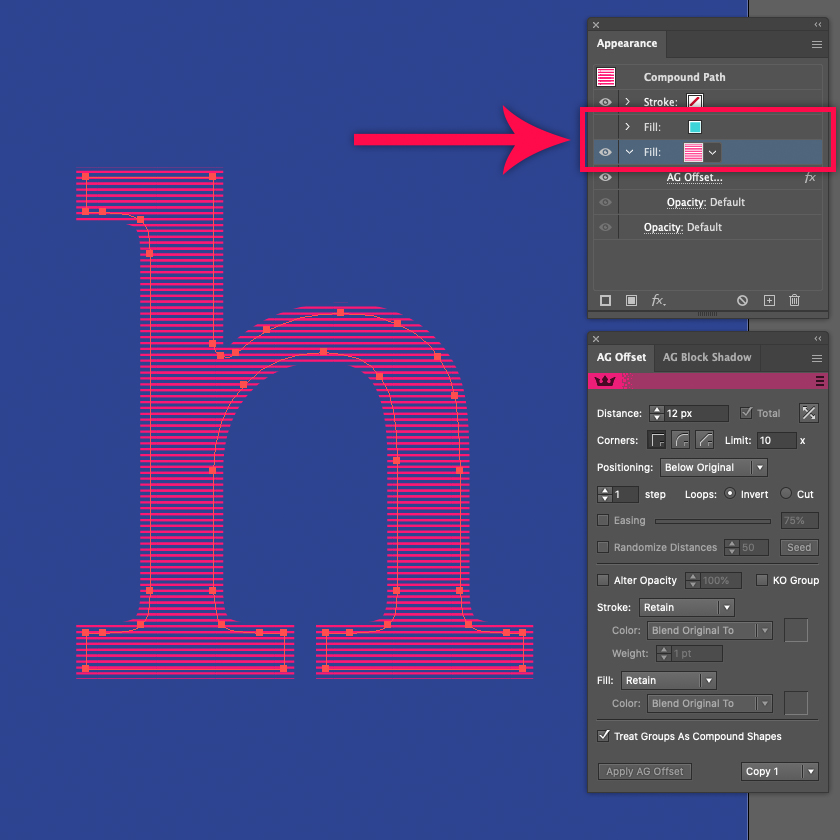
We create a background layer and another where we will place our letter. For this example, I will use a lowercase "H" letter from the Clarendon family, 600 pixels height, Compound Path, #3ED5D8 as a fill color. Have your Appearance panel handy as it is vital during the demo.
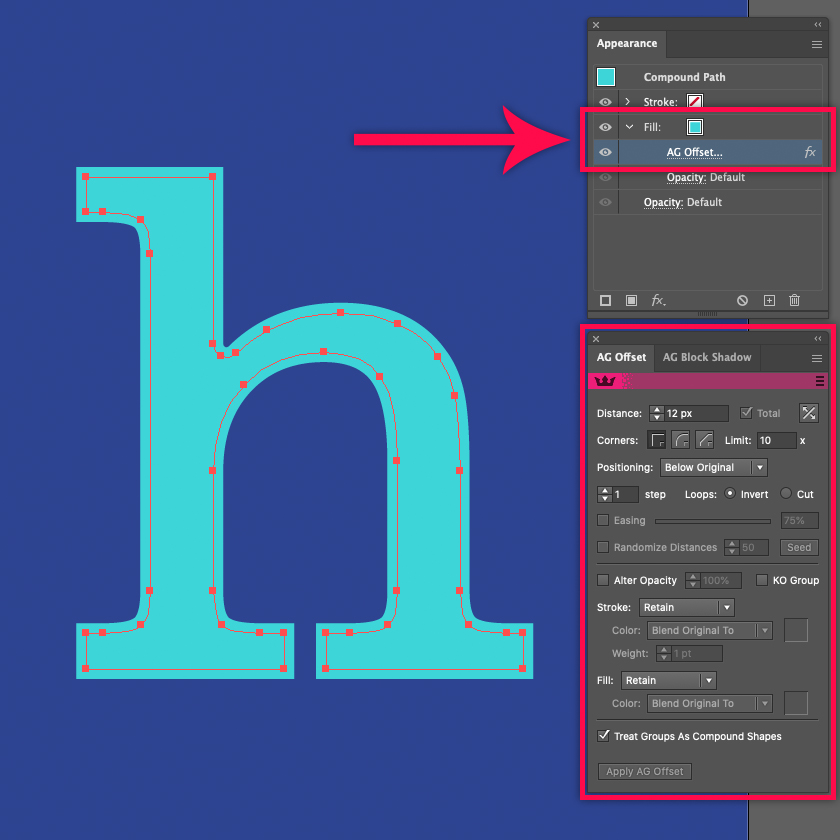
With AG Offset Path, we create a 12 px Offset Path, apply the options described in the image. Then move the AG Offset Path within the fill.
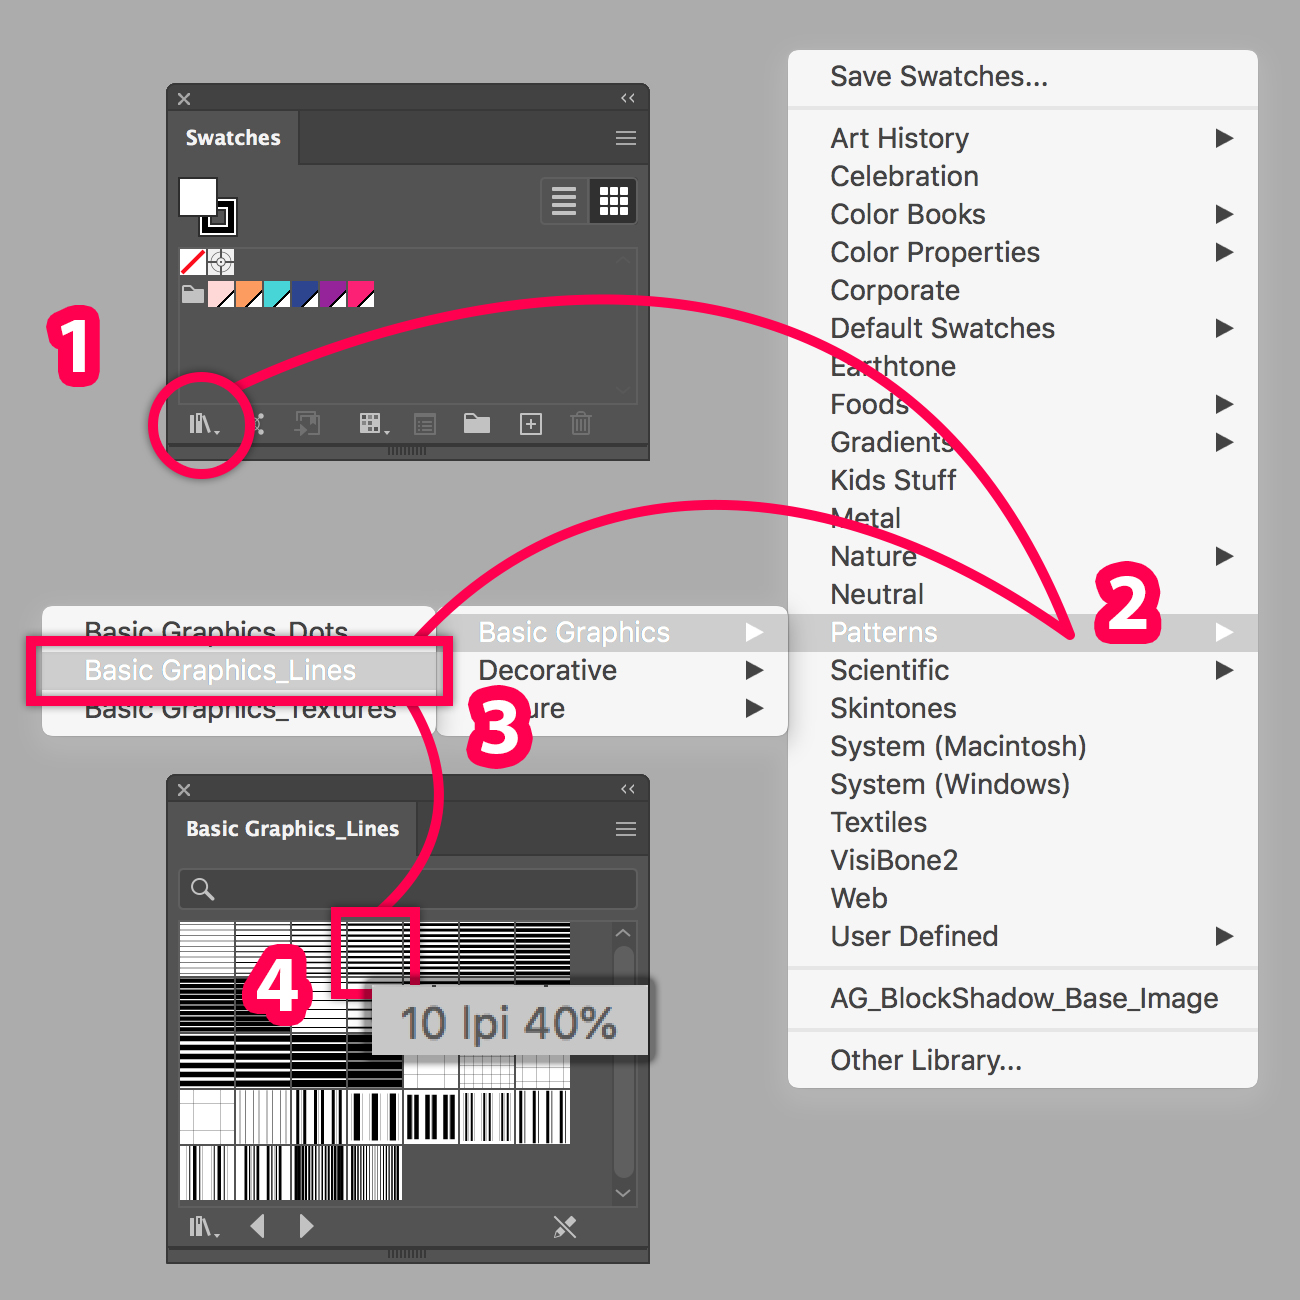
We want to create a block shadow with hatched Pattern, for this, we are going to take advantage of the library that Illustrator has.
In the Swatches panel, we click on the library icon in the lower-left corner (1), we look for: Patterns(2) > Basic Graphics > Basic Graphics_Lines (3) and select “10 lpi 40%” (4). This action adds the Pattern to the Swatches panel.
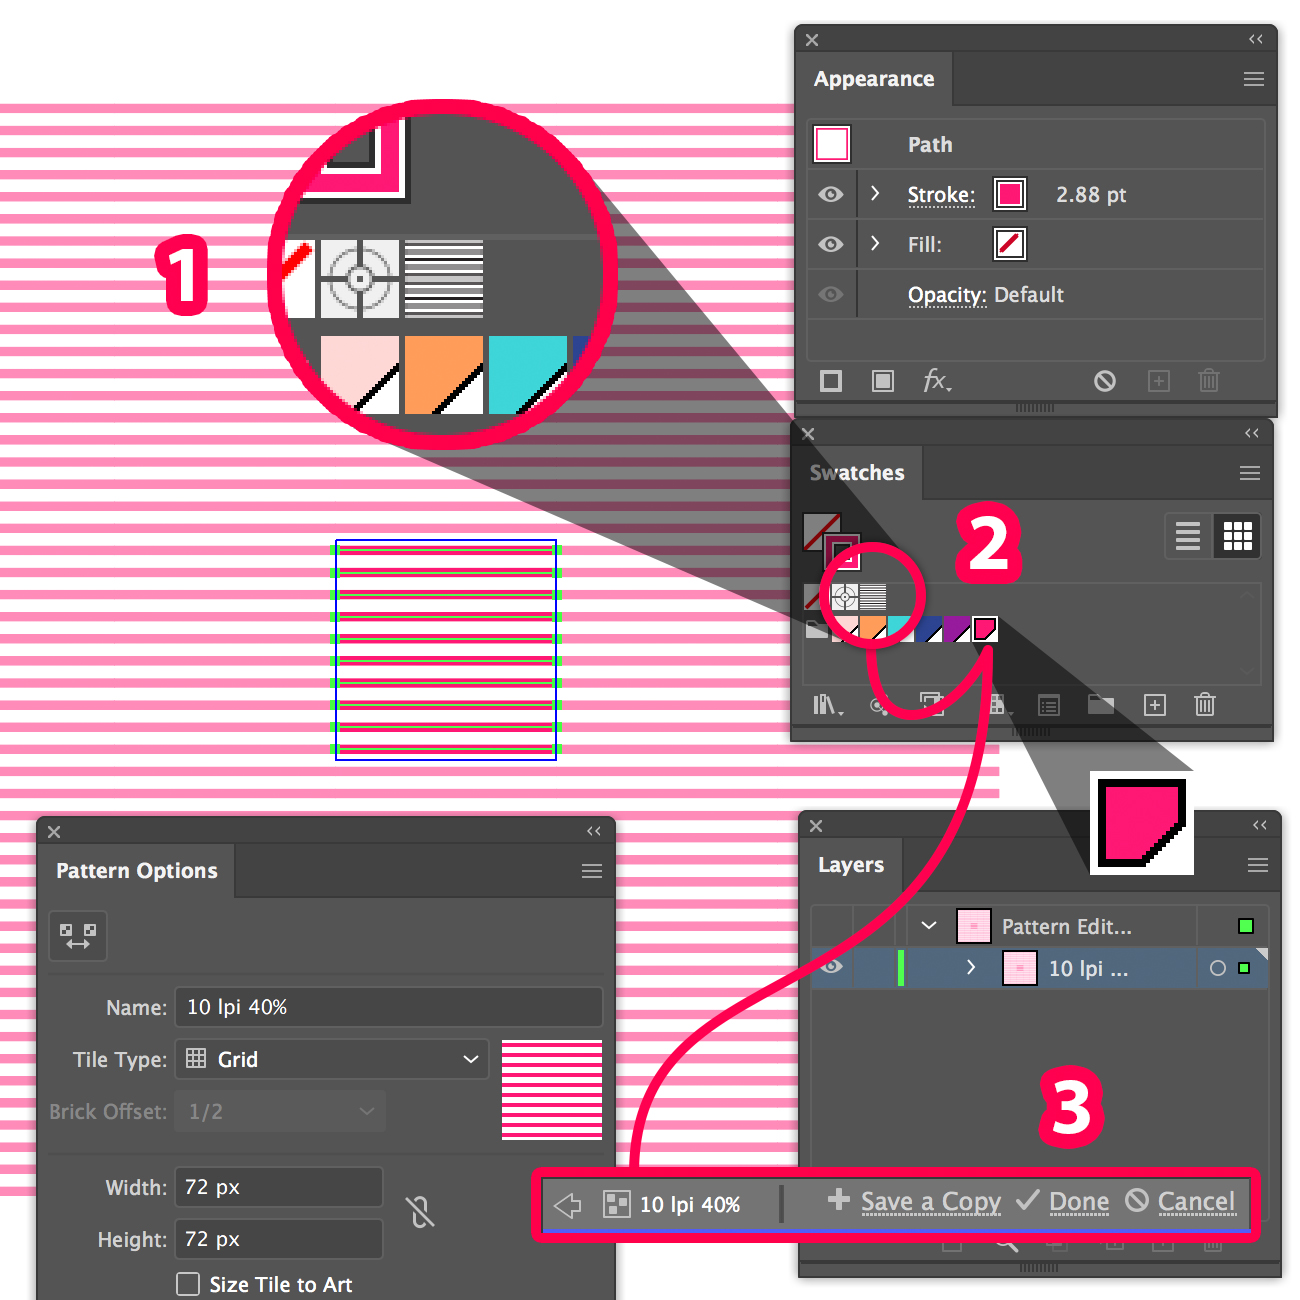
Before applying the Pattern we are going to edit it. With nothing selected, double click on the Pattern in the Swatches panel and change the color of the lines from Black to # FF1773. Then press the "Done" button in edit mode (or Save a Copy).
Duplicate the previous fill (the light blue one). Hide it in the appearance panel before the next step).
Apply the Pink Pattern to the copy below
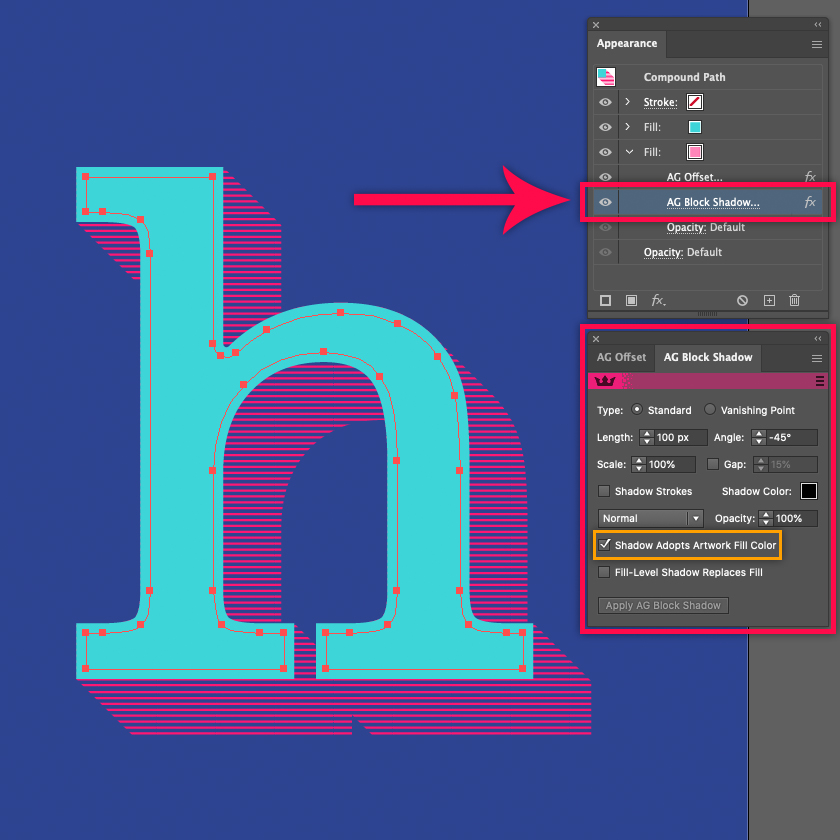
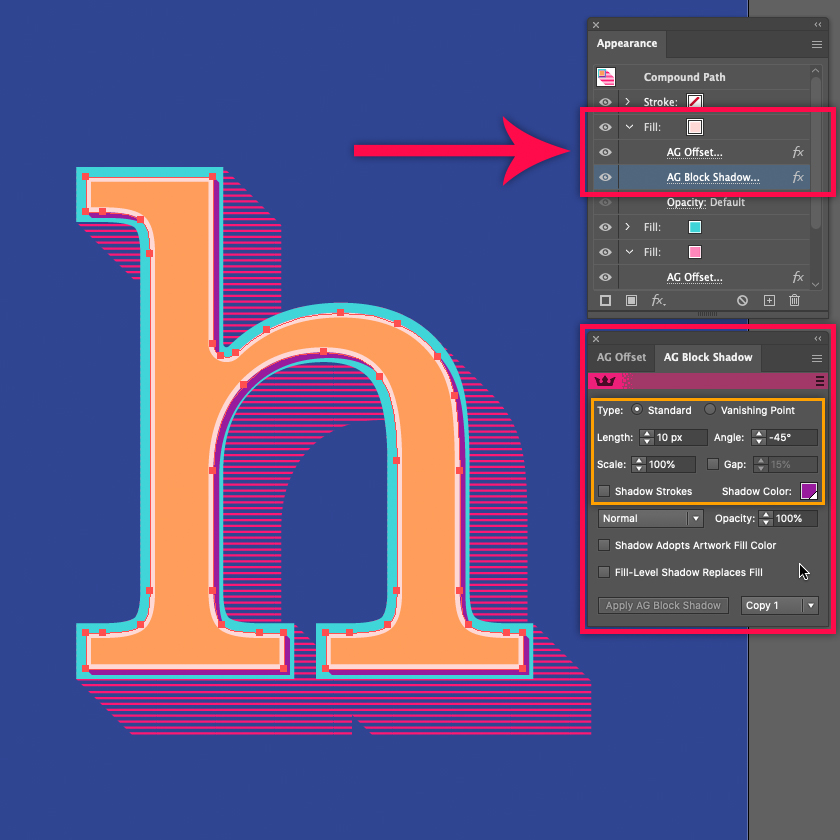
We added an AG Block Shadow, Length: 100 px, -45º angle, make sure the “Shadow Adopts Artwork Fill Color” is on.
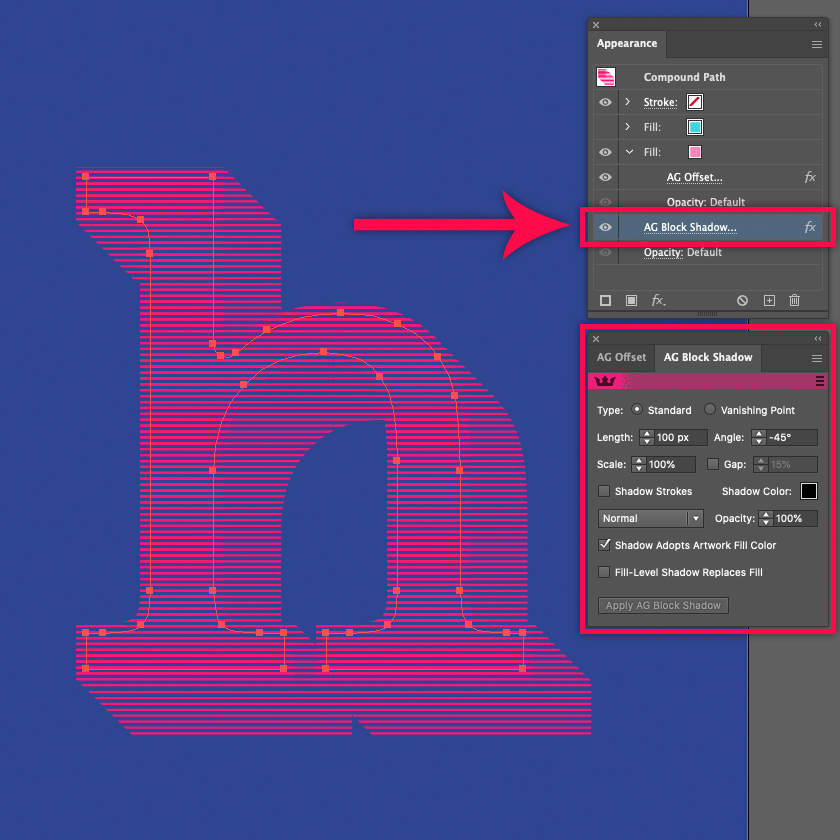
In the Appearance Panel, move the AG Offset effect inside the hatched fill.
Add a new fill to our object, #FED8D5 as a color. Duplicate the AG Offset of the previous fill and move the copy into the fill #FED8D5, then modify the parameters: Distance -6 px, Positioning: Above Original, 1 Step, Fill: Alter Color (Blend Original To) #FF9C5A. This creates that little line between the light blue background and the orange.
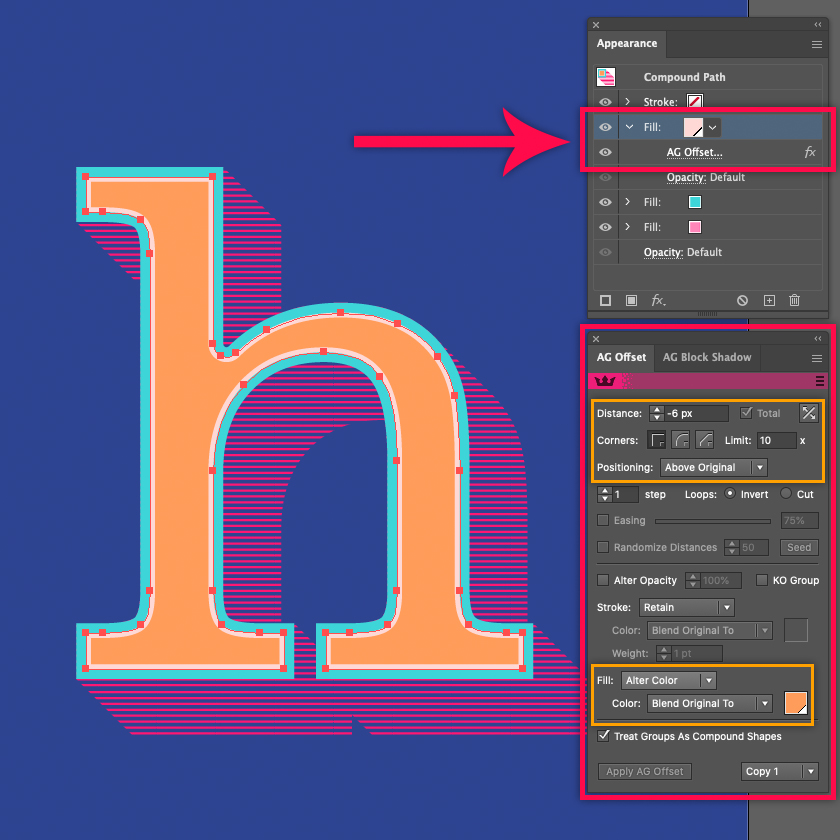
Apply a new AG Block Shadow: Length 10 px, -45º, # 971A9C in color, move it within the orange fill.
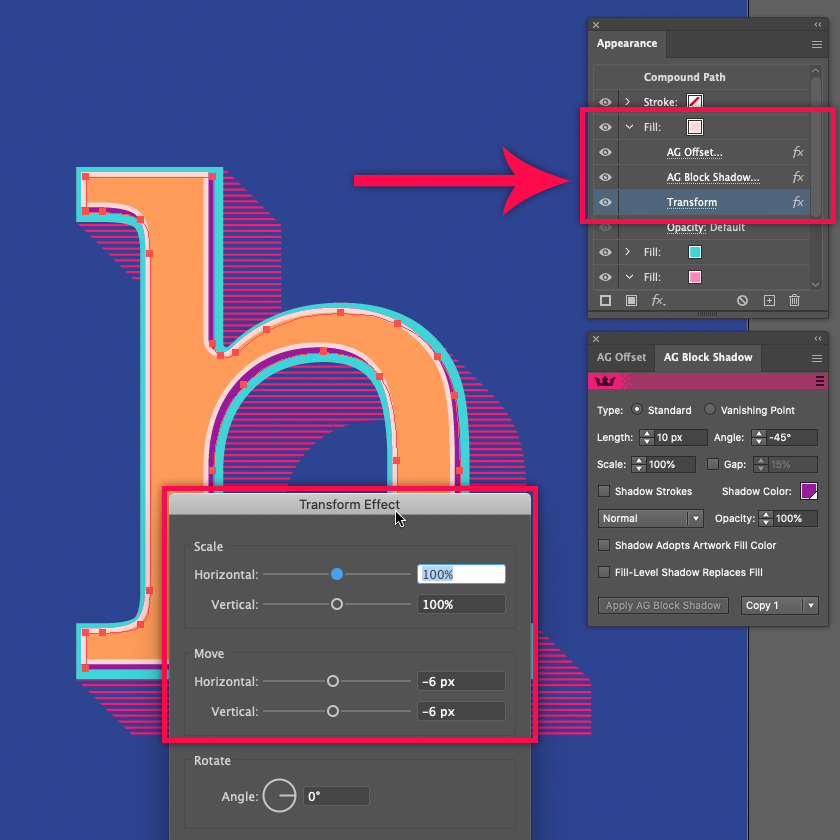
With the orange fill selected, apply a Transform effect.
Go to Menu Effect > Distort and Transform > Transform. With this, we move the orange fill up and to the left and simulate a emboss.
Remember to save the document.
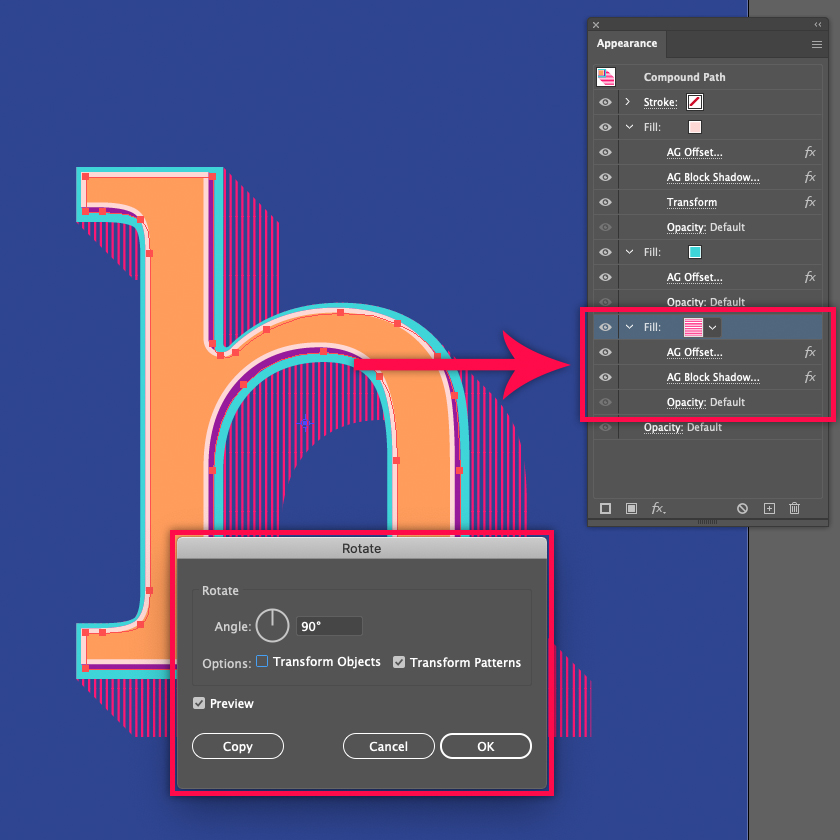
However, we require to change the angle of the Hatched Pattern. For this, select the fill in the appearance panel. Then in the Rotate tool, double-click to open the dialog box, only activate “Transform Patterns” and apply a 90º rotation.
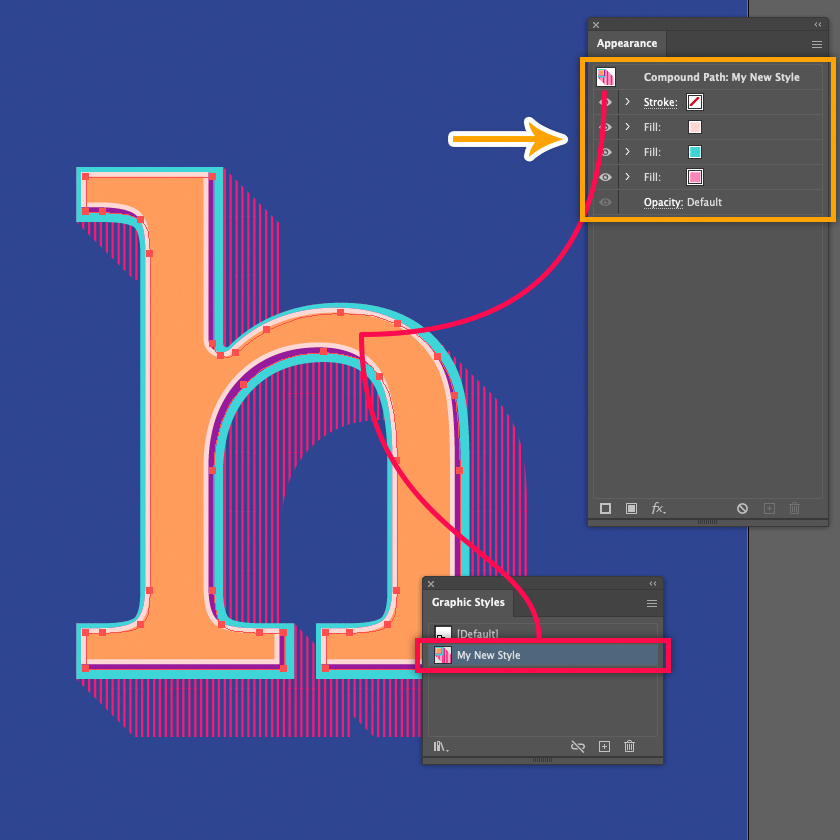
To save the appearance of the "H" as a graphic style, with the selected object we can either drag the object into the Graphic Styles panel or click the button [+]. This allows the same effect to be applied to multiple objects.
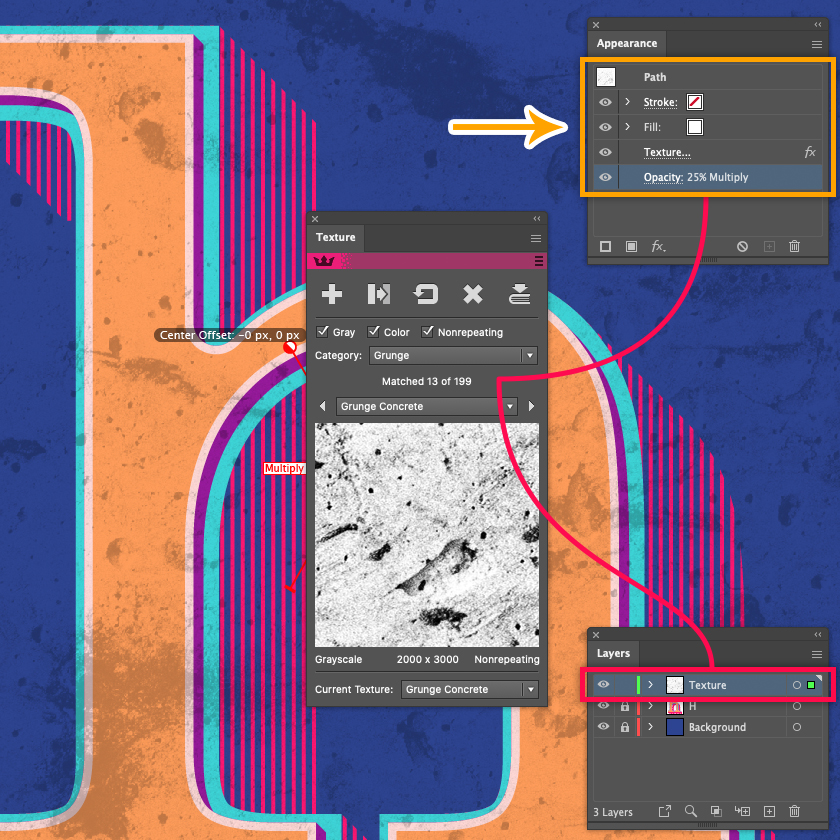
To conclude, we can add texture, either at the layer level or as in this case, a square with a Texture, blend modes, and varied opacity.
This is the final version applied to 2 objects.