How to with InkFlow - the plugin for Adobe Illustrator that feels like a real pen
2 minute readLet us show you how to draw better in Illustrator with InkFlow. Easy to access; a realistic Ballpoint Pen, Brush Pen, Calligraphic Pen and Marker defaults are built in, this is a plugin you cannot live with out! Read on to find out how we used InkFlow in this artwork.
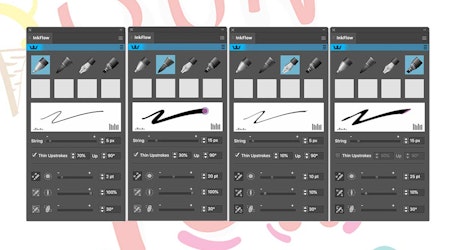
Open the InkFlow panel.
Click the preset pen you'd like to start drawing with.
Tweak all the settings to suit your style and then save your favourites by holding down the Alt/Opt key as you click inside a user-defined box.
InkFlow works with a mouse or your stylus device (Wacom, XP-Pen, Sidecar etc.) We use the #Xencelabs Pen Tablet with Quick Keys and Thin Pen.
You can now draw and sketch in Illustrator, and our smart point placement technology will clean up your paths to reduce points without losing detail.
If you want to tweak your pen strokes after drawing, make sure the items are selected and go back into the InkFlow panel to adjust the settings. You can overwrite your user-defined preset by holding the Alt/Opt key as you click in the user-defined box. Or you can save it as a new custom preset.


