Fix any stock asset so it’s actually usable
6 minute readOne of the most painful aspects of working with stock assets from various files and sources, is that often times, the files have been exported with the layers ungrouped and the method of exporting causes each layer to be given clipping masks. This can be a major speedbump when trying to add existing assets to a project quickly.
In this tutorial, you will learn how to use the VectorFirstAid plugin to automatically find and remove all unnecessary clipping masks from an object or file, and have it immediately usable. I will also explain how to clean up an existing asset in it's working format so you have one single clean object.
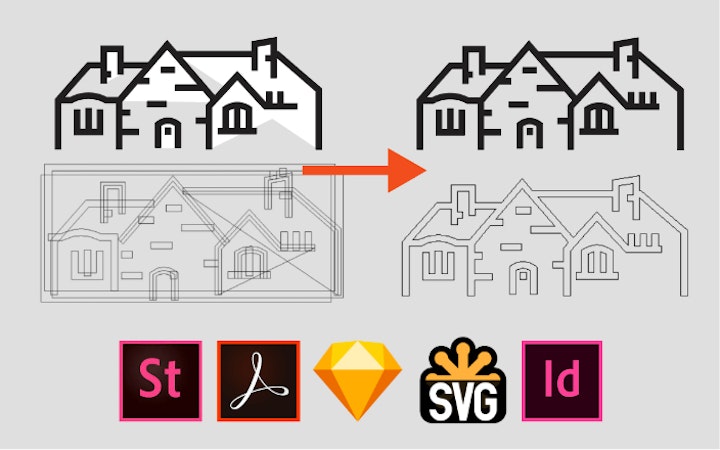
Before we get started, clipping mask problems are most common with the following types of files:
Stock Vectors
Vector Containing PDFs
SVGs
Vectors Imported from Indesign
Files imported from Sketch to Illustrator
DWG Drawing files
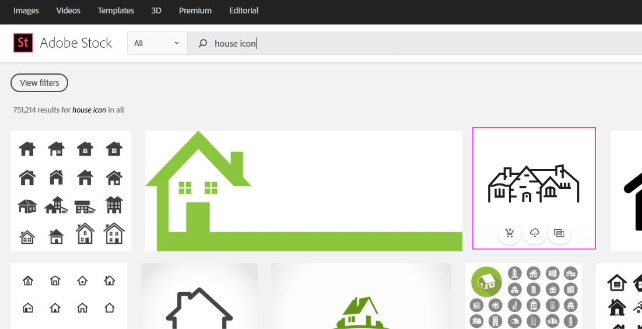
Downloading the stock asset
For this tutorial, we are going to be using a file from Adobe Stock. I searched "house icon" and downloaded the house in the highlighted image below:
Finding problems with the asset
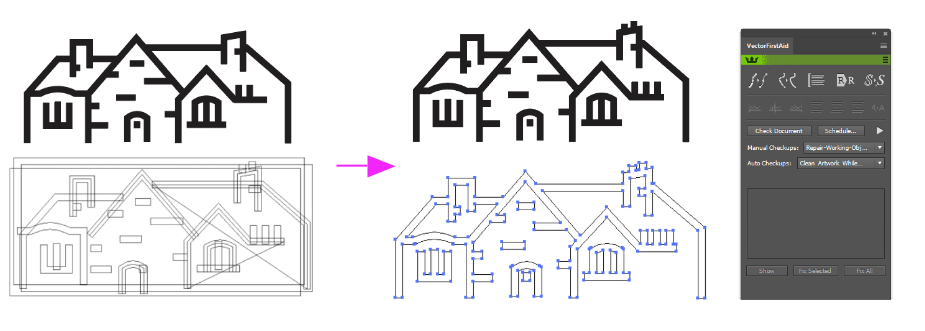
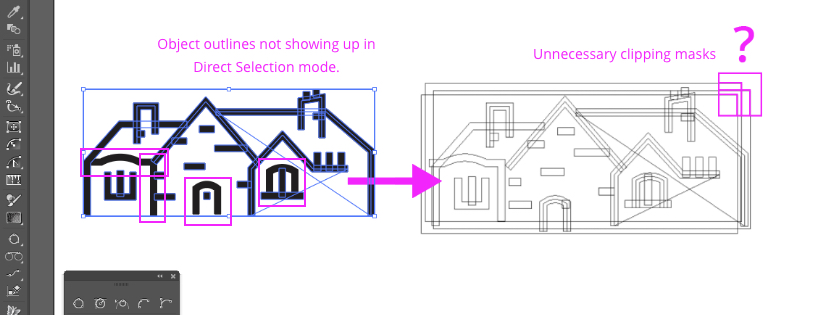
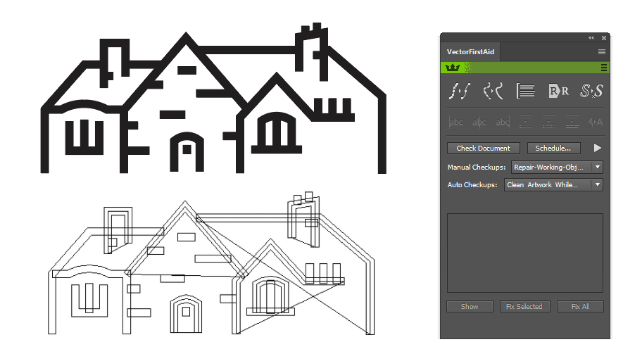
When downloading stock assets from an online source, you don't always know what you're going to get. Sometimes you will download a clean working file right out of the box. Alternatively, you may get an object that looks similar to the image below.
To determine if the asset you are working with needs to be repaired, you can click around and look for objects that don't seem to want to be clicked. The bounding box may be significantly larger than an object, or when using the direct selection tool ('A' on the keyboard) some objects may not show their anchor points. When you look a little deeper into what is going on with an object (go to outline mode by hitting Cmd+Y mac or Ctrl+Y Windows), you can see hidden bounding boxes that shouldn't be there.
Setting up the panel
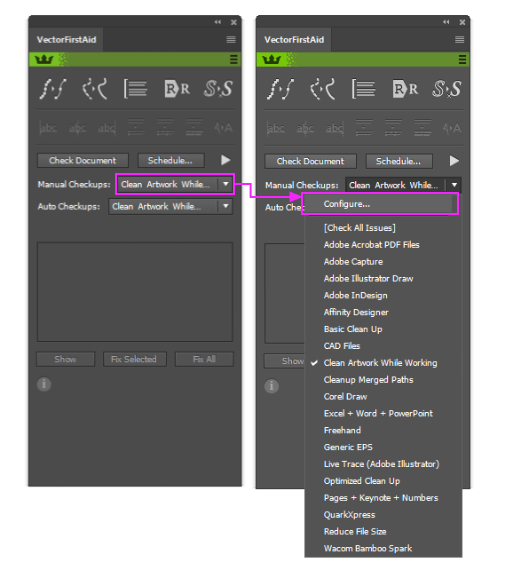
To clean up the artwork, open the VectorFirstAid plugin panel (Window > Vector First Aid> VectorFirstAid Panel). Before you just start clicking buttons, there are a few things to prepare in the settings.
To set up the panel go to (Manual Checkup > Configure).
I typically prefer to work without taking my artboards into consideration until I'm finished with a project. I'm also often working with symbols, swatches, graphic styles, and empty artboards. I usually don't want them removed even if none of them are in use at the time, so I can use them later if I need to.
I do, however, want to make sure that the 'Remove Unnecessary Clip Groups' is checked for the profile I create. This will make sure that those clipping masks are removed on my imported objects or stock file. Simply Shif-Click all the operations you prefer to have fixed in this profile, and add them to the right column.
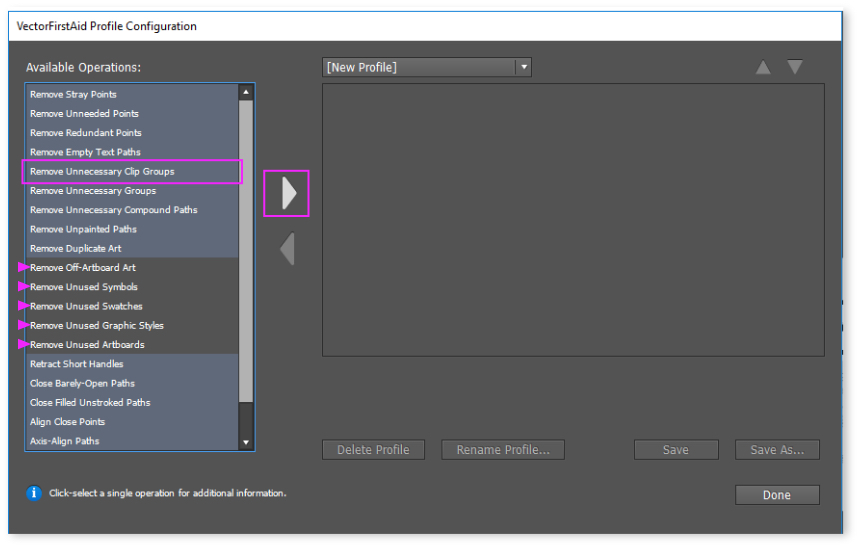
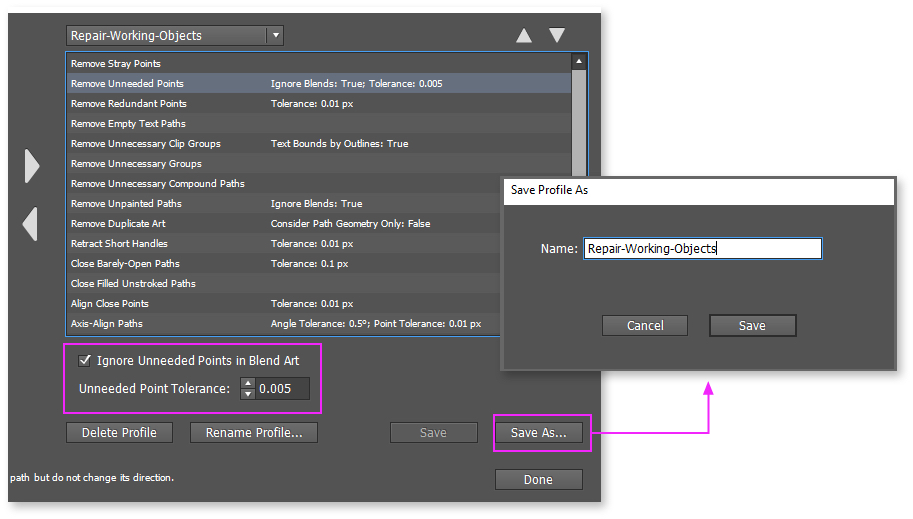
You can also edit the default tolerances for each item, by clicking it and modifying the tolerance at the bottom of the panel. I prefer to use the defaults unless I have a particular reason to modify them.
Click the 'Save As' button and give it a name that makes sense to you. I called this profile 'Repair-Working-Objects'. *You can always go back and delete, rename, or update settings for any profile.
Now that you have your profile set up, you can simply click the object you want repaired, and click 'Check Selection' on the VectorFirstAid panel. Make sure the profile you just created is selected though, Or it will check for the wrong parameters. At the bottom of the panel you can either fix selected errors, or all of them. I usually just 'Fix All' problems.

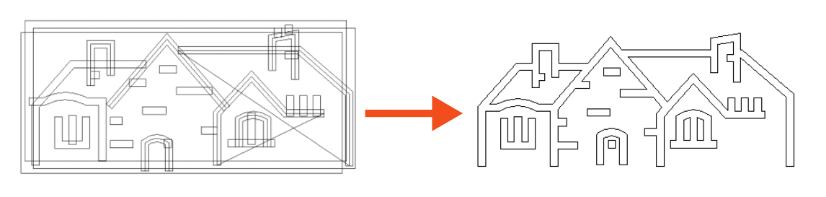
Finishing the cleanup
All the bounding boxes should now be removed, but that doesn't always solve problems with every object. In the object I'm working with, there are paths that have been automatically closed and filled with white. This isn't always apparent unless you are in outline mode.
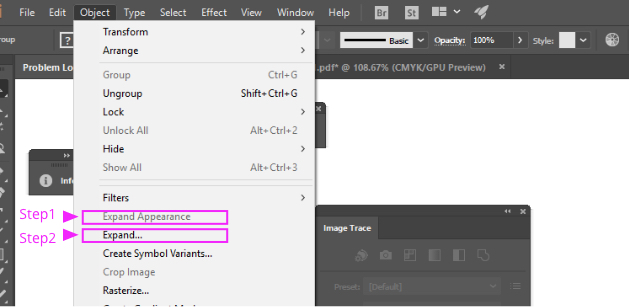
To get a flattened and clean object without any extra lines, go to (Object > Expand Appearance) and then (Object > Expand…) .
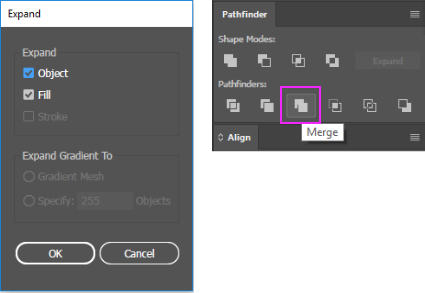
When using (Object > Expand…) sometimes the Expand panel will appear. Make sure 'Object' and 'Fill' are selected. Then using the pathfinder panel (Window > Pathfinder) merge all the objects together.
To remove the white objects use the Magic wand tool. If you have other objects on your document, make sure the object has been grouped and then Double-Click the object to enter isolation mode. This will prevent those white objects on the document from getting deleted.
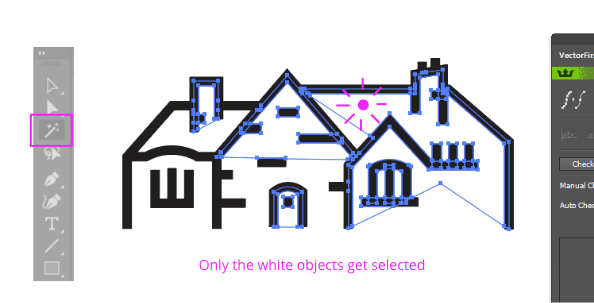
Click a white area on your object and all the white objects will get selected. You can then delete them.
Go back to the VectorFirstAid panel, and check the object for errors. There will likely be some unpainted paths. Make sure to 'Fix All' of these or the next step will give you grief.
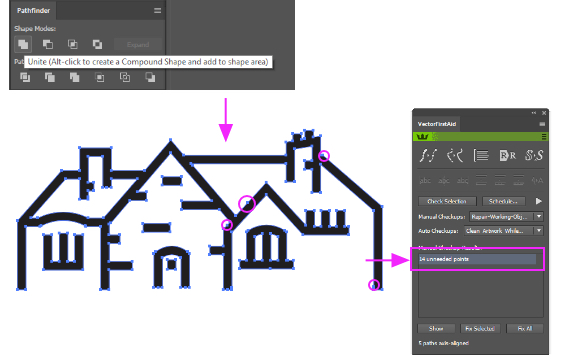
Go back to the pathfinder and 'Unite' all the objects. This will flatten everything together. There will be a few unneeded points created because of that. One last time, check the selection with the VectorFirstAid panel and it will remove all of them.