How to create leaves Space Fill with ColliderScribe
8 minute readIn this tutorial we will look at a combination of Space Fill, Dynamic Shapes, and Symbols features. We also use a little Phantasm. This technology will allow us to get at least three levels of dynamics in the artwork. This means that for the transformations and searching for the best solutions you will need to spend ten times less time. For example, a uniform filling of the shape with hundreds of Fill Art objects, you just need to press the button repeatedly.
Creating a container path and Fill Art objects
Step 1
Create a square with rounded corners using the Dynamic Shapes Tool of the VectorScribe plugin. Choose a dark green color as a fill color. Created shape is dynamic, that means that we can always change its settings, and even convert to another shape using the Dynamic Shapes panel (Window>VectorScribe> Dynamic Shape> Dynamic Shapes panel).
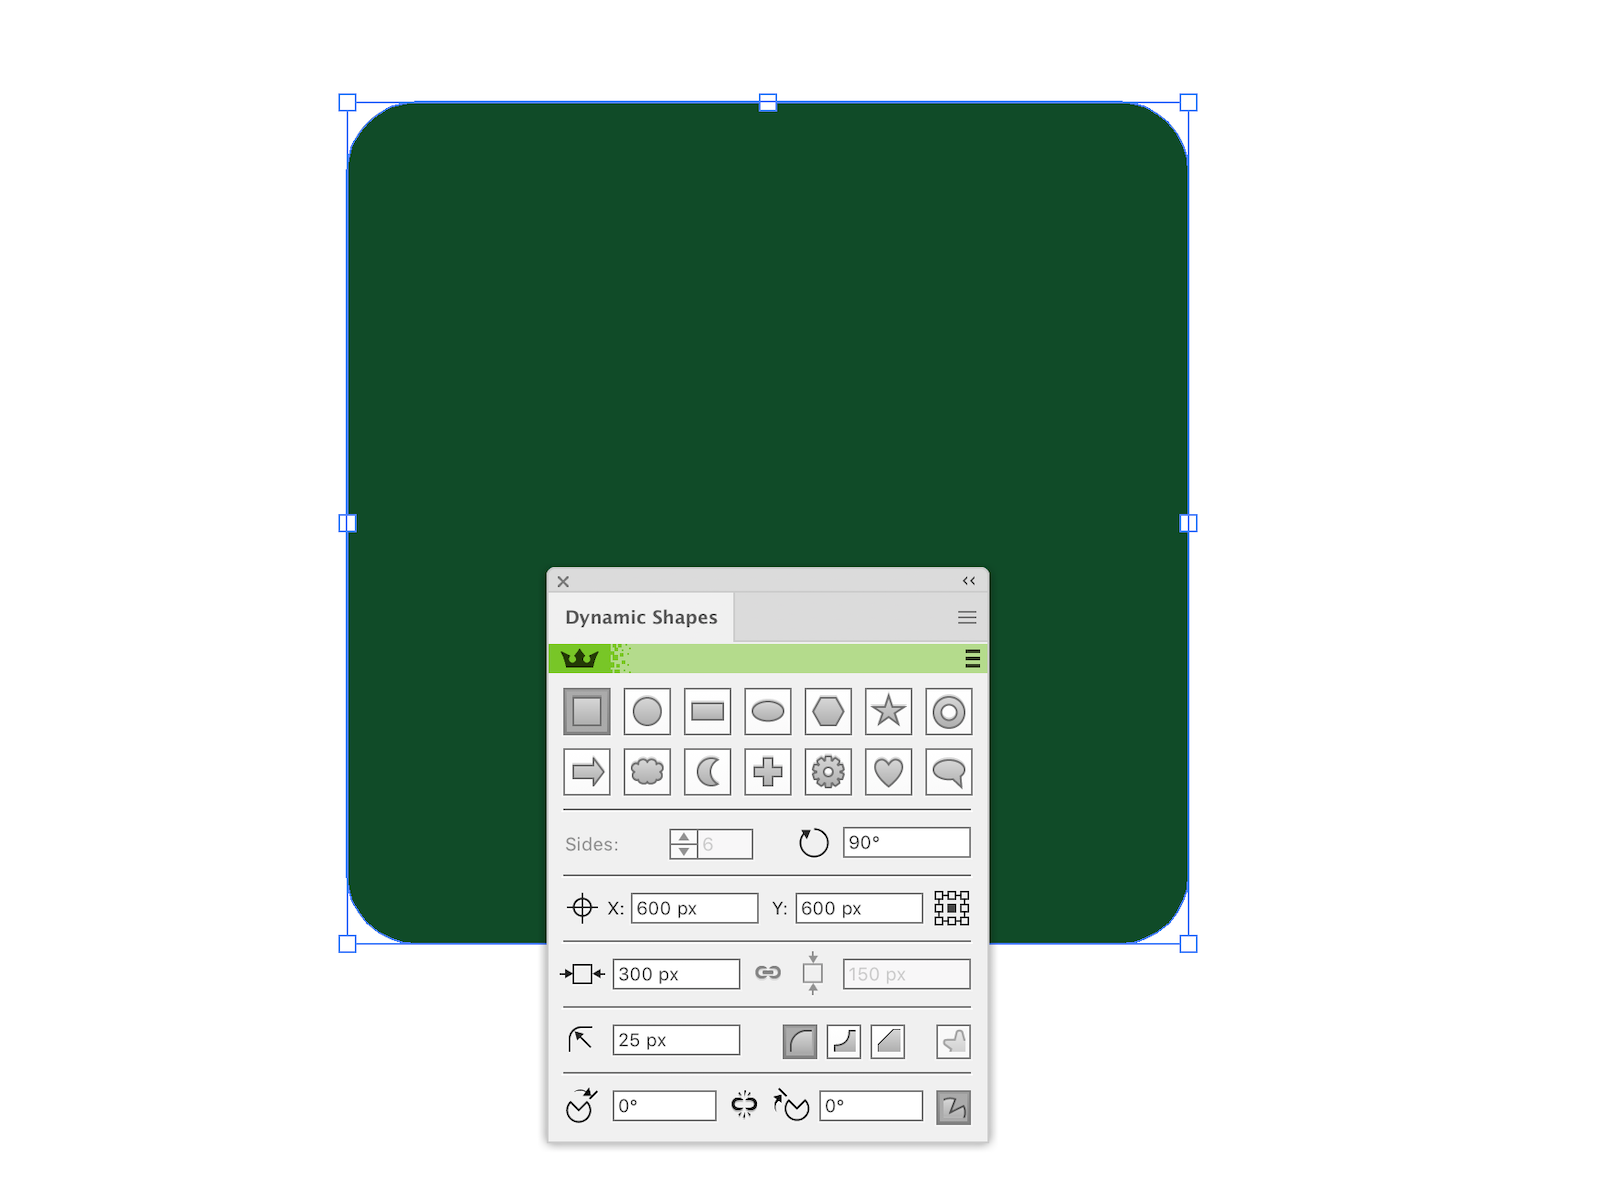
This square, we will use in the future as the Container Path, filling it with other smaller objects.
Step 2
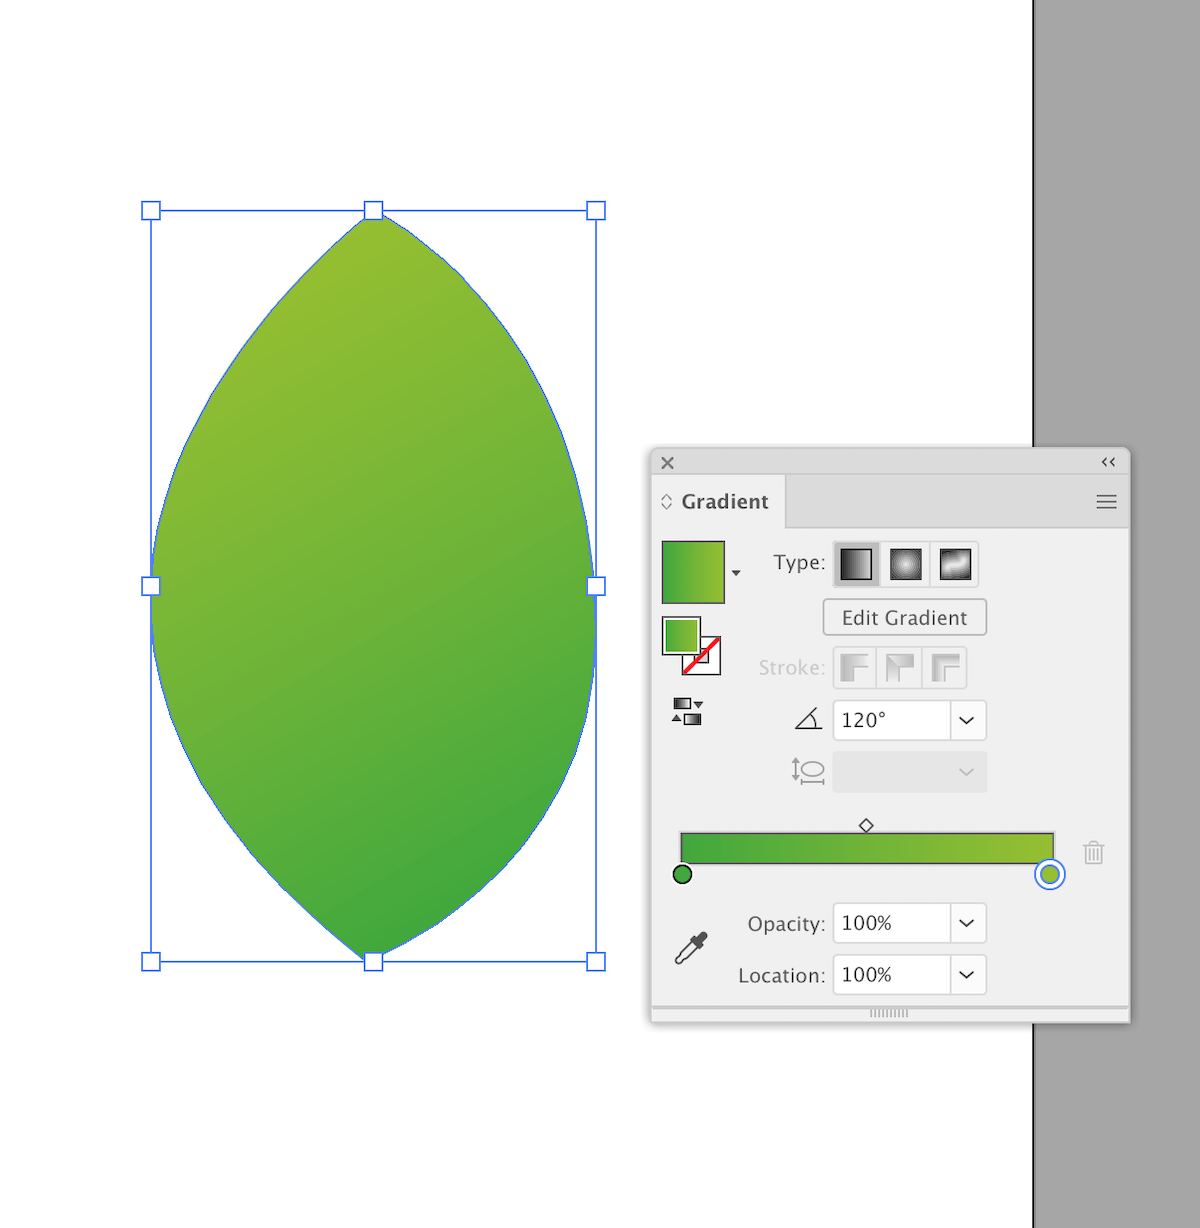
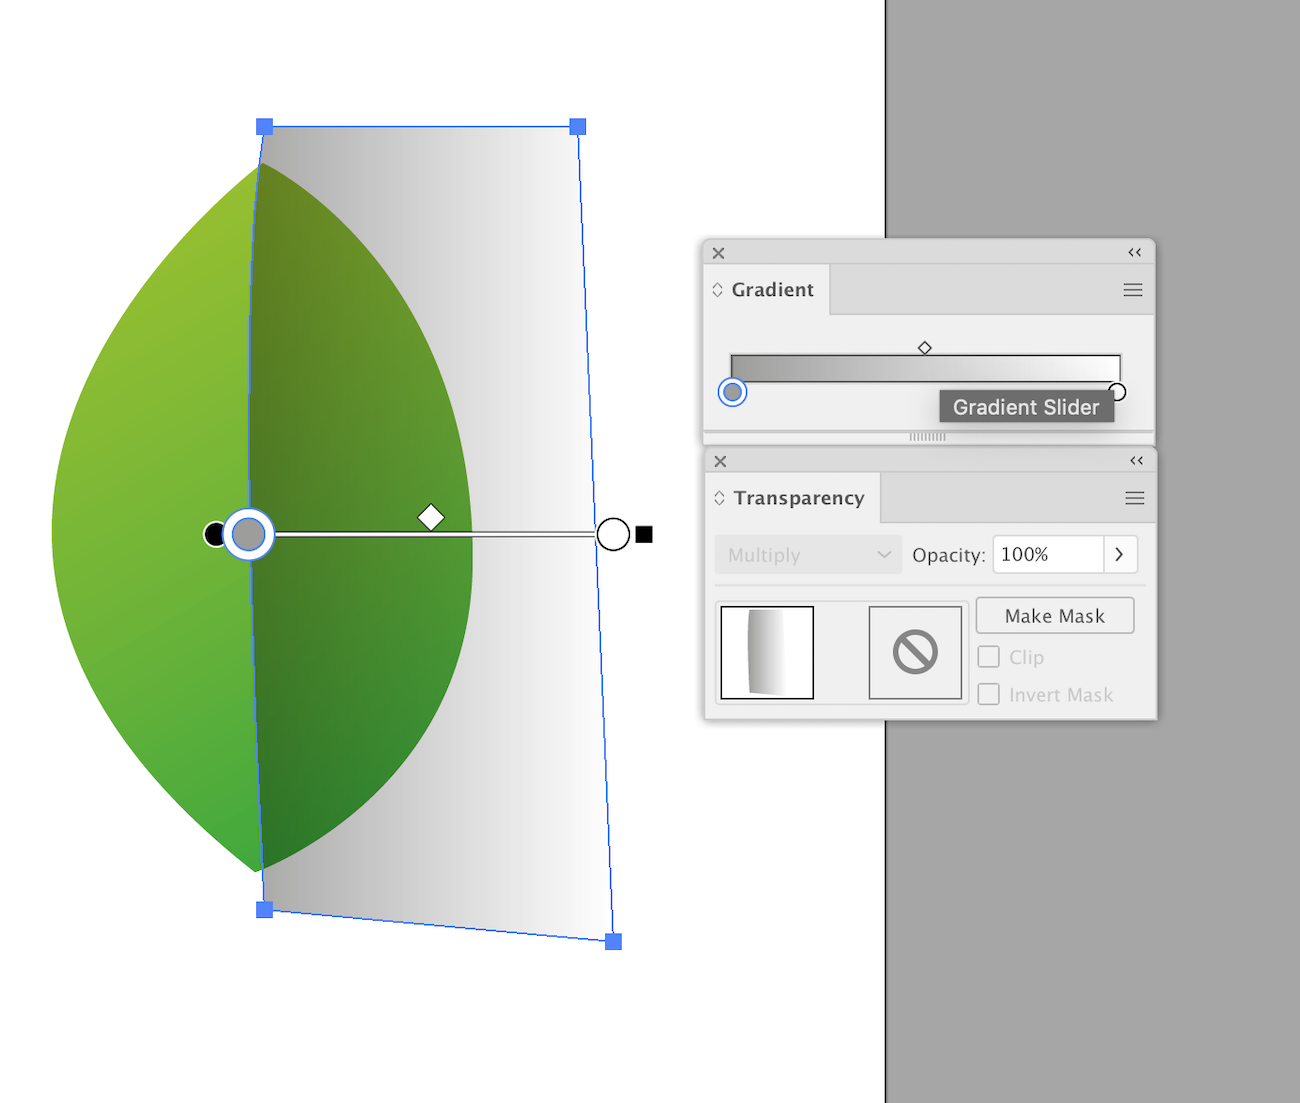
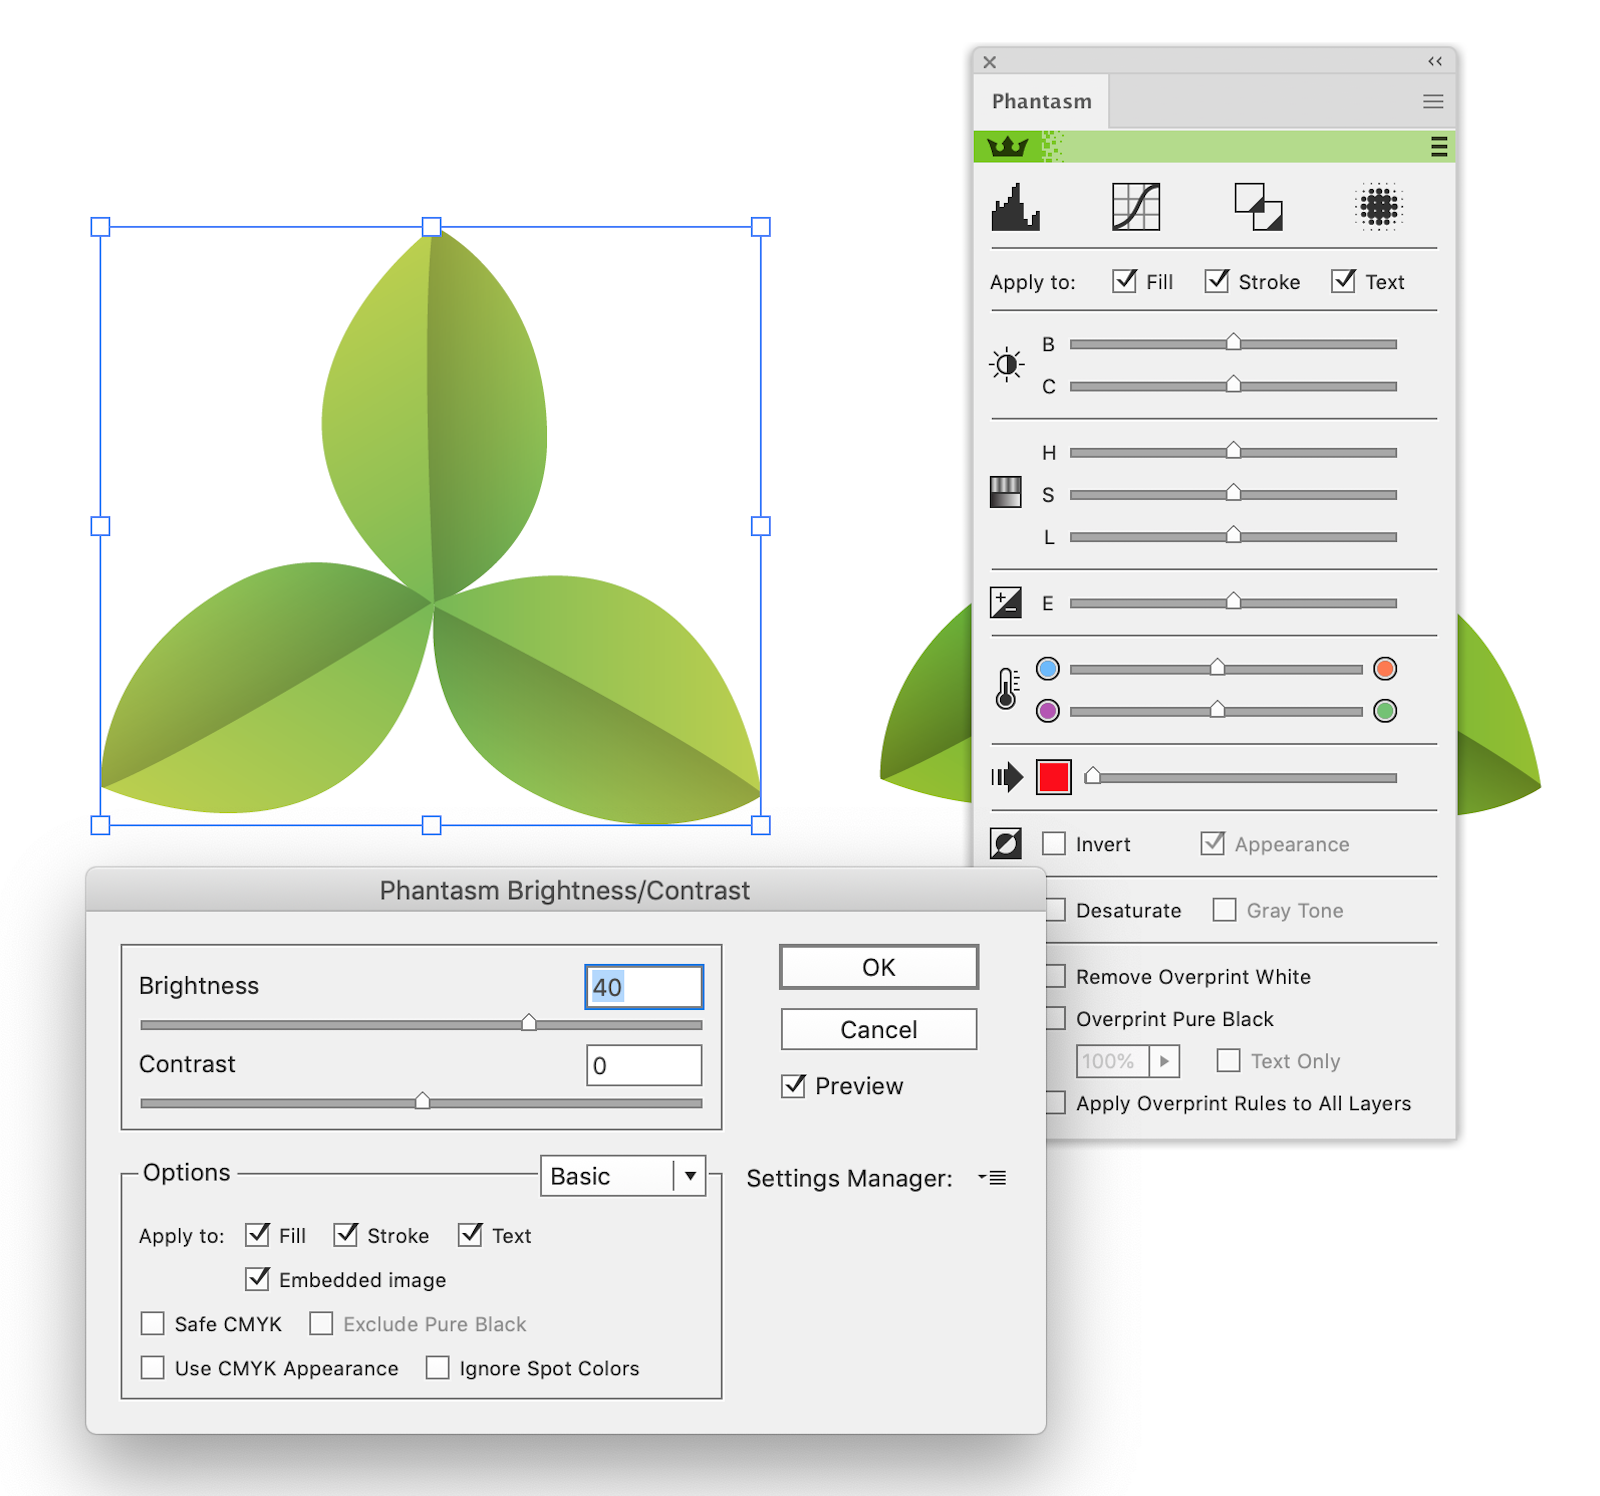
Create the shape of the leaf using the Pen Tool (P) or InkScribe Tool, as it is shown below. Fill the leaf with linear gradient which consists of two shades of green color.
Create a curved segment between the upper and lower leaf vertices, then extend the new shape beyond the shape of the leaf. Fill the created object with a linear gradient from white to light gray color. Apply the Multiply blending mode to this object and, if necessary, reduce the opacity in the Transparency panel.
Step 3
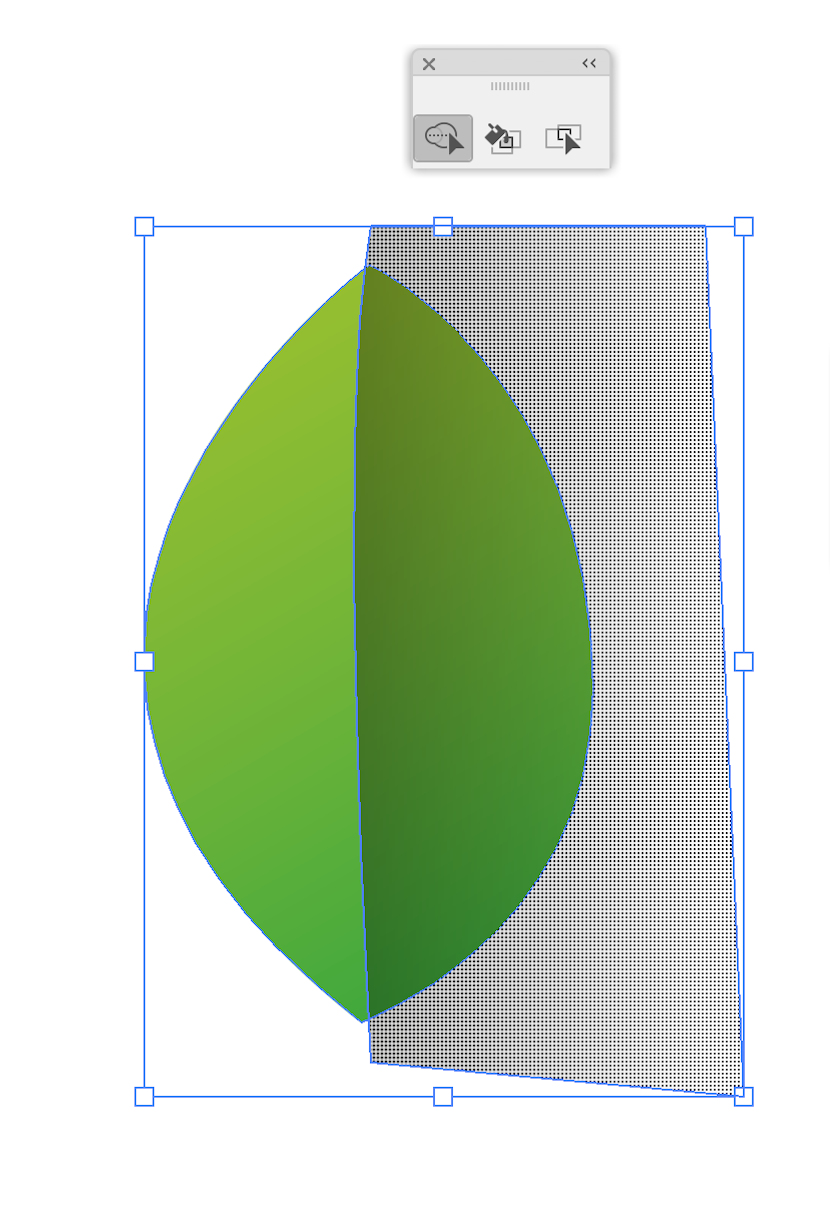
Select the leaf and the translucent shape, then remove the protruding part of the translucent shape using the Shape Builder Tool.
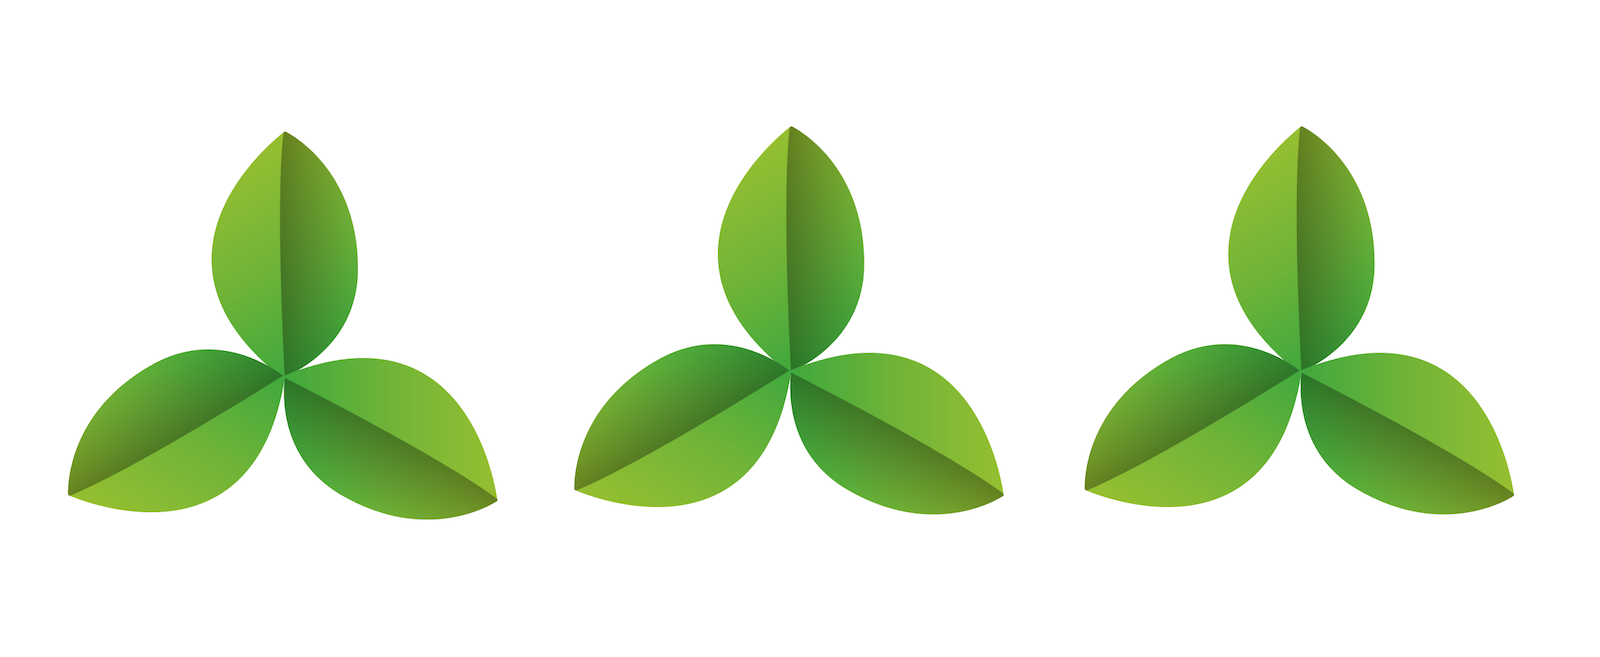
Group up both of the shapes (Cmd / Ctrl + G). Create two copies of the leaf using the Rotate Tool (R). Each new leaf is rotated relatively to the previous one at an angle of 120 degrees.

Group up the shamrock.
Step 4
Duplicate the shamrock twice.
Shamrocks will be located at different levels of our fill, so some of them will be darker than the others because of the shadow from the upper layers. Change the shades of leaves easily with the help of Phantasm. Select one of the shamrocks, then go to Effect > Phantasm > Brightness / Contrast, decrease the value of Brightness by 40 units.
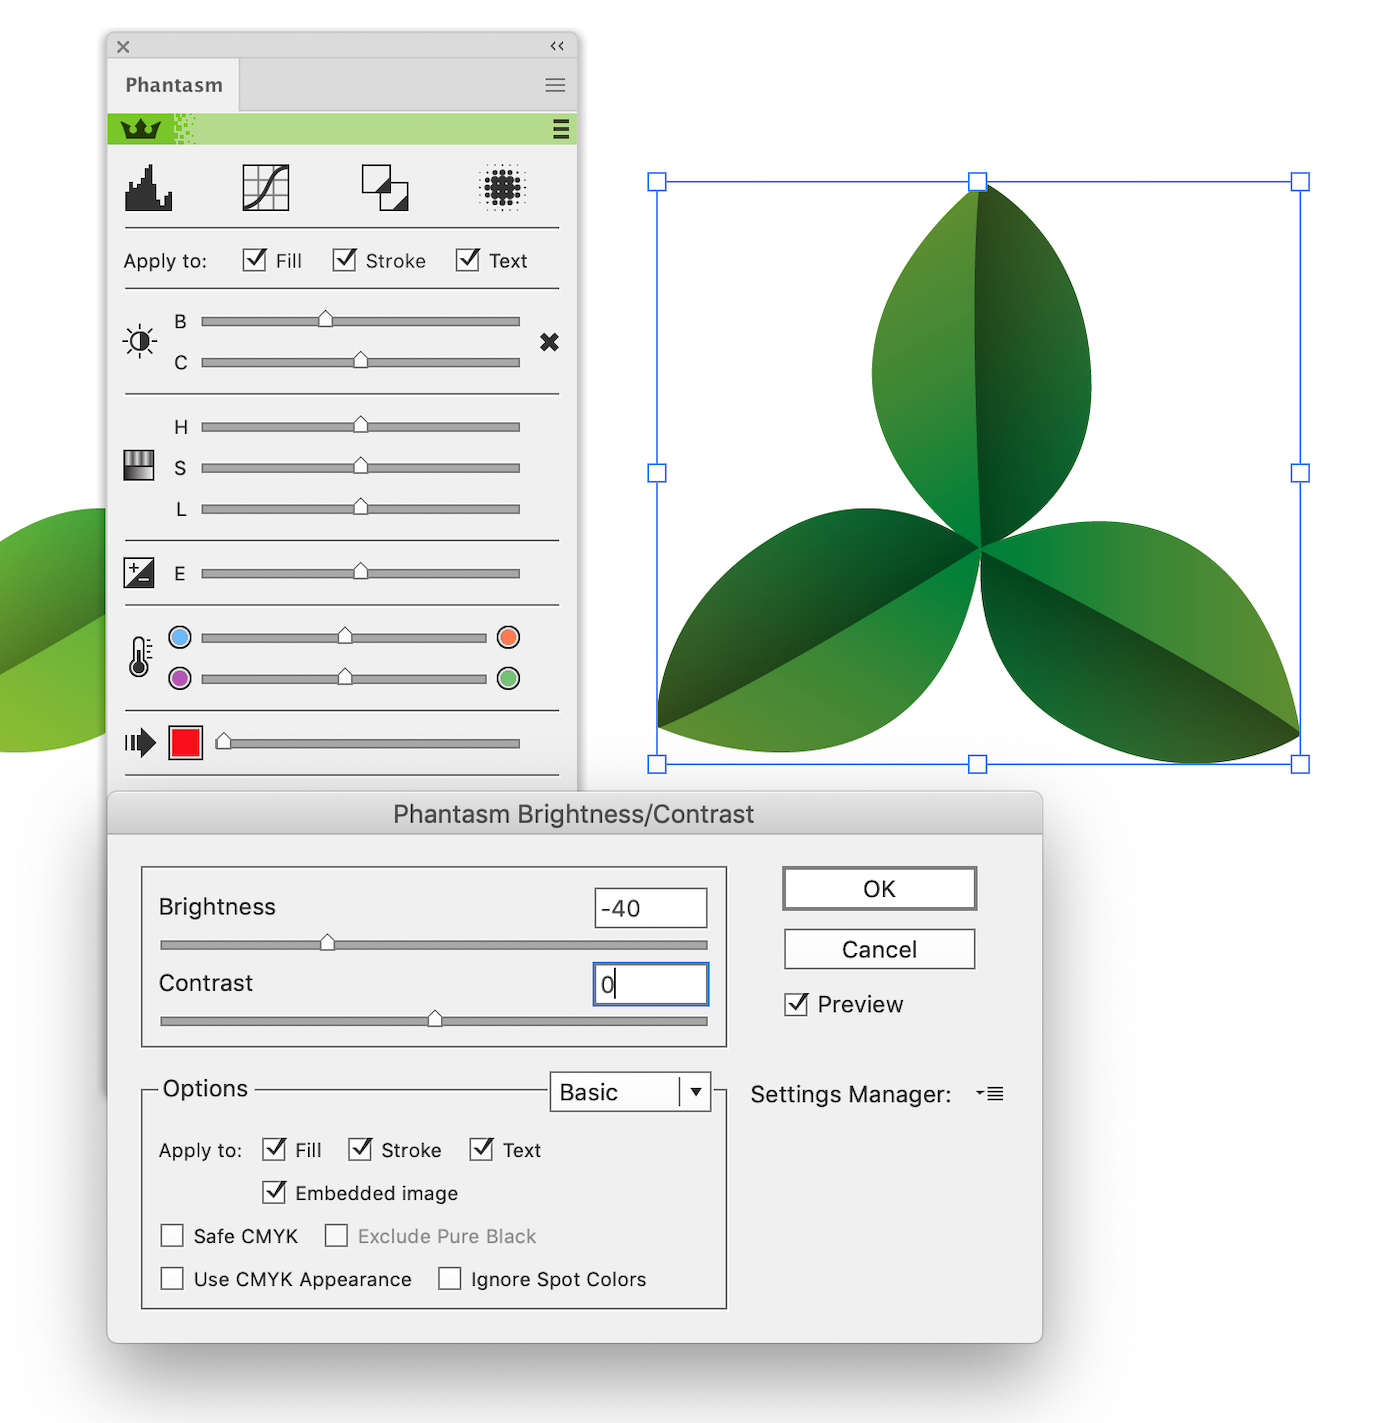
For another shamrock reduce Brightness value by 20 units.
Save each shamrock as a symbol in the Symbols panel.
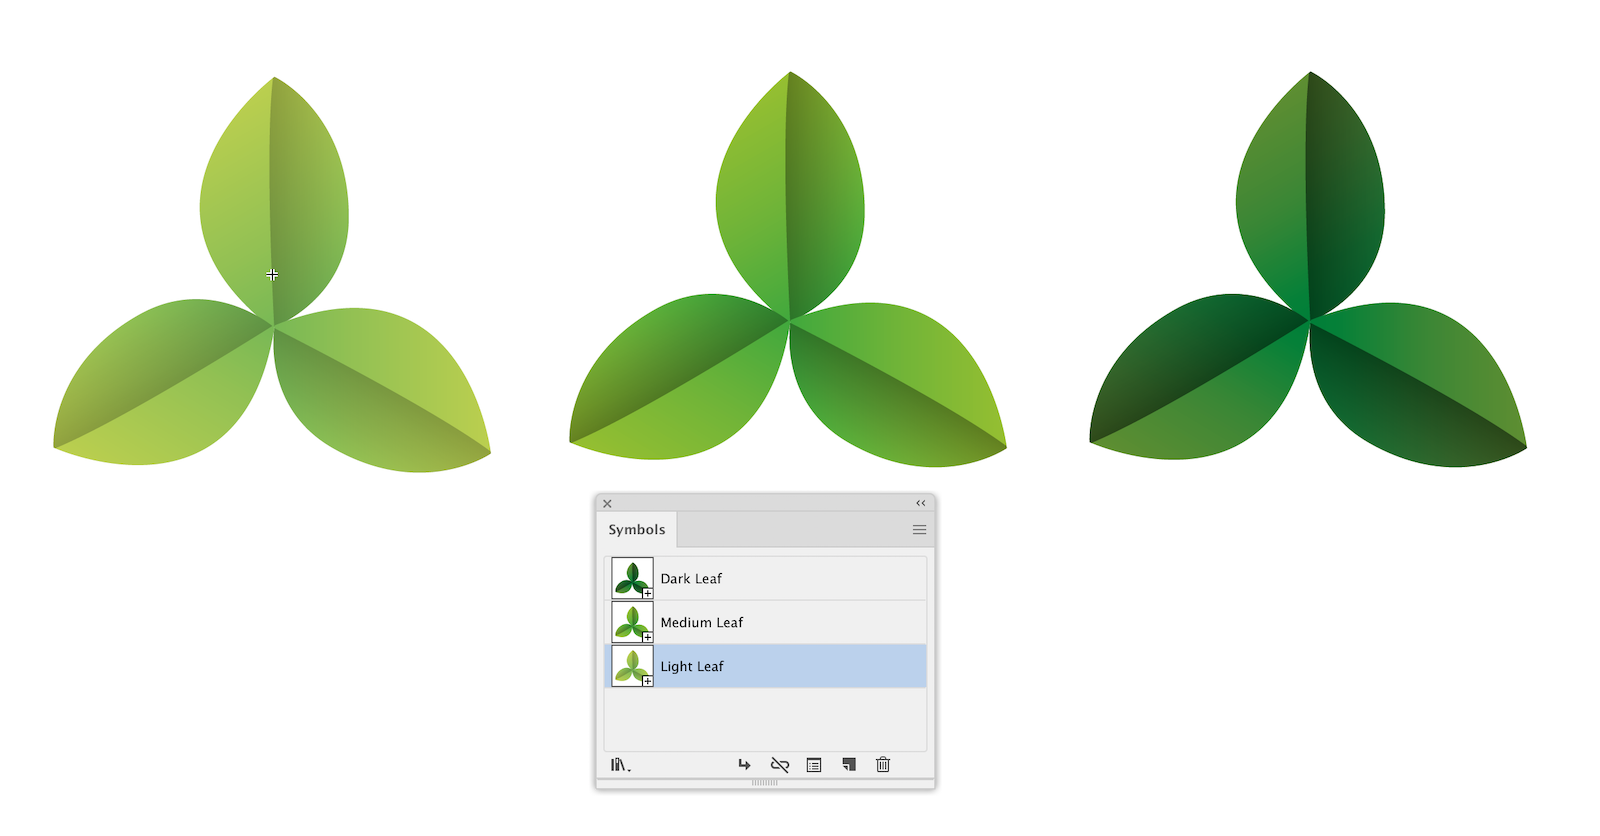
This will add flexibility in controlling Fill Art objects in the future.
Step 5
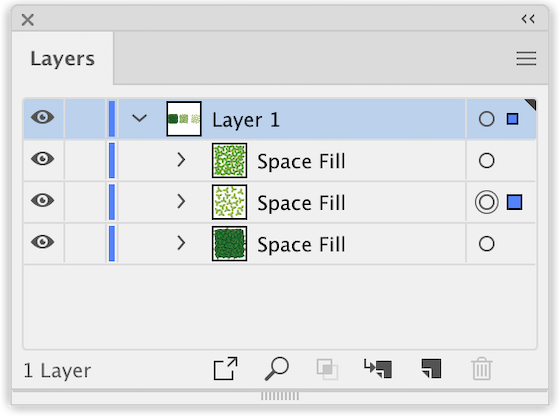
As I previously mentioned, we will create a fill which consists of several levels. Therefore, double duplicate the rounded rectangle, then disable the fill of the two upper copies.
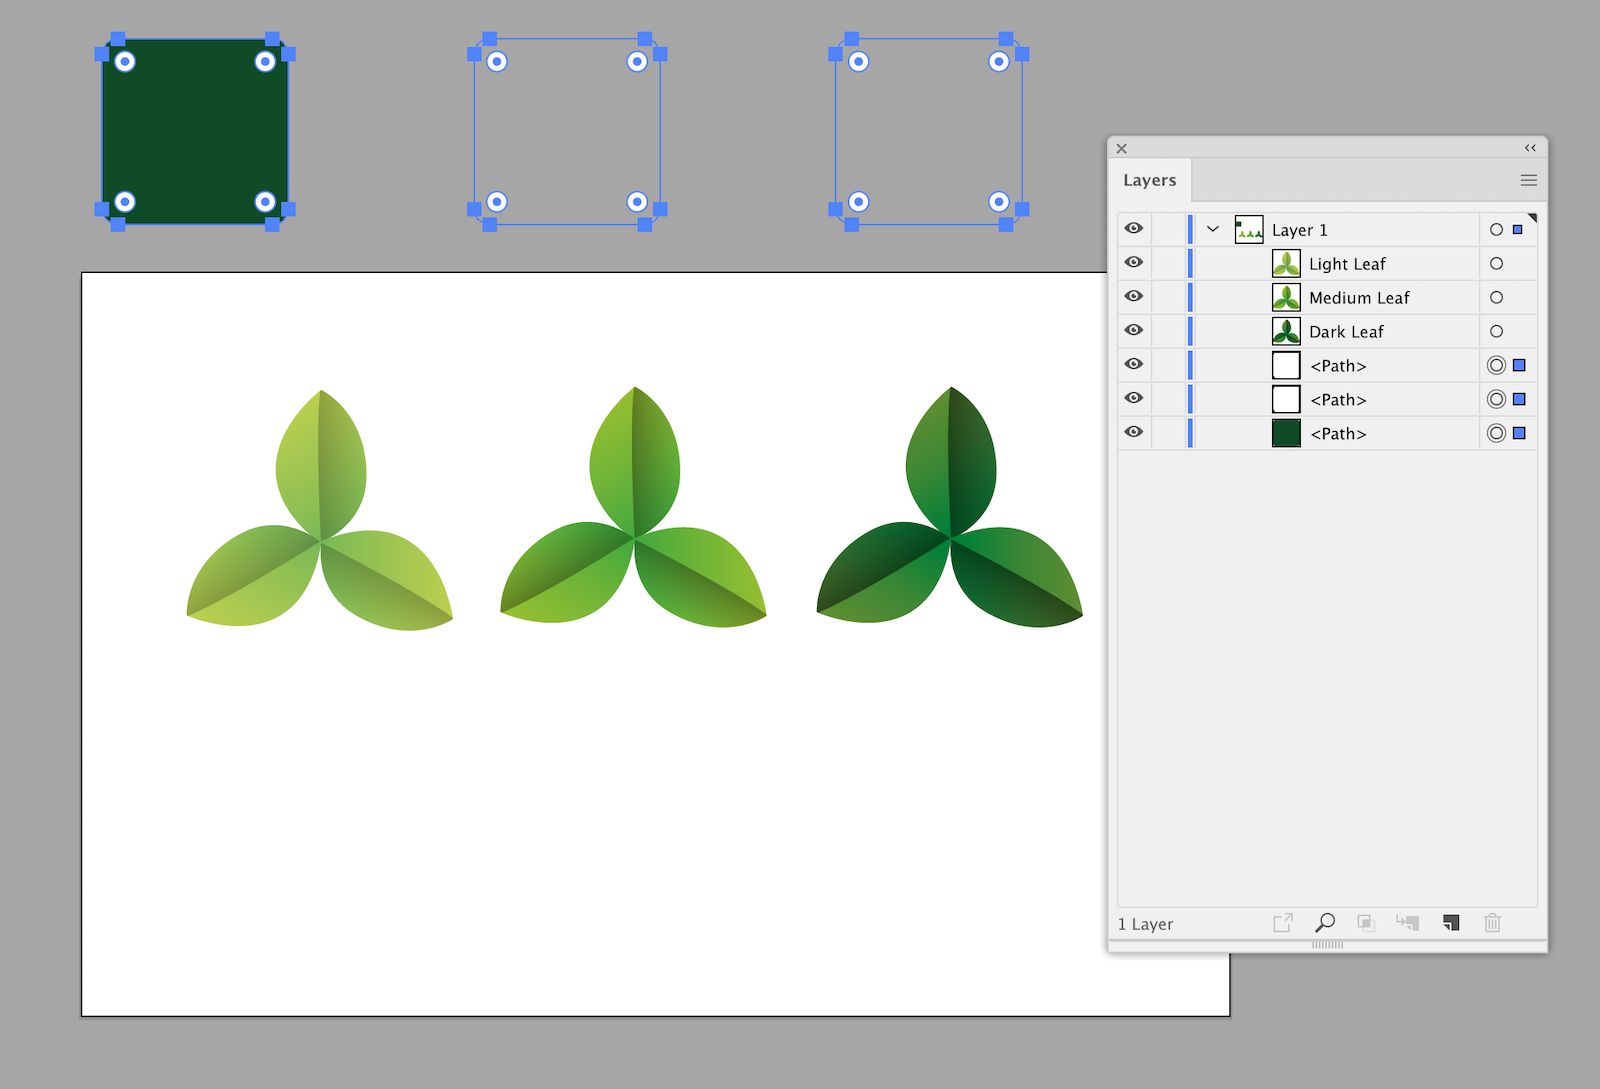
Thus, we have created two more container paths.
Fill container paths with Fill Art objects.
Step 6
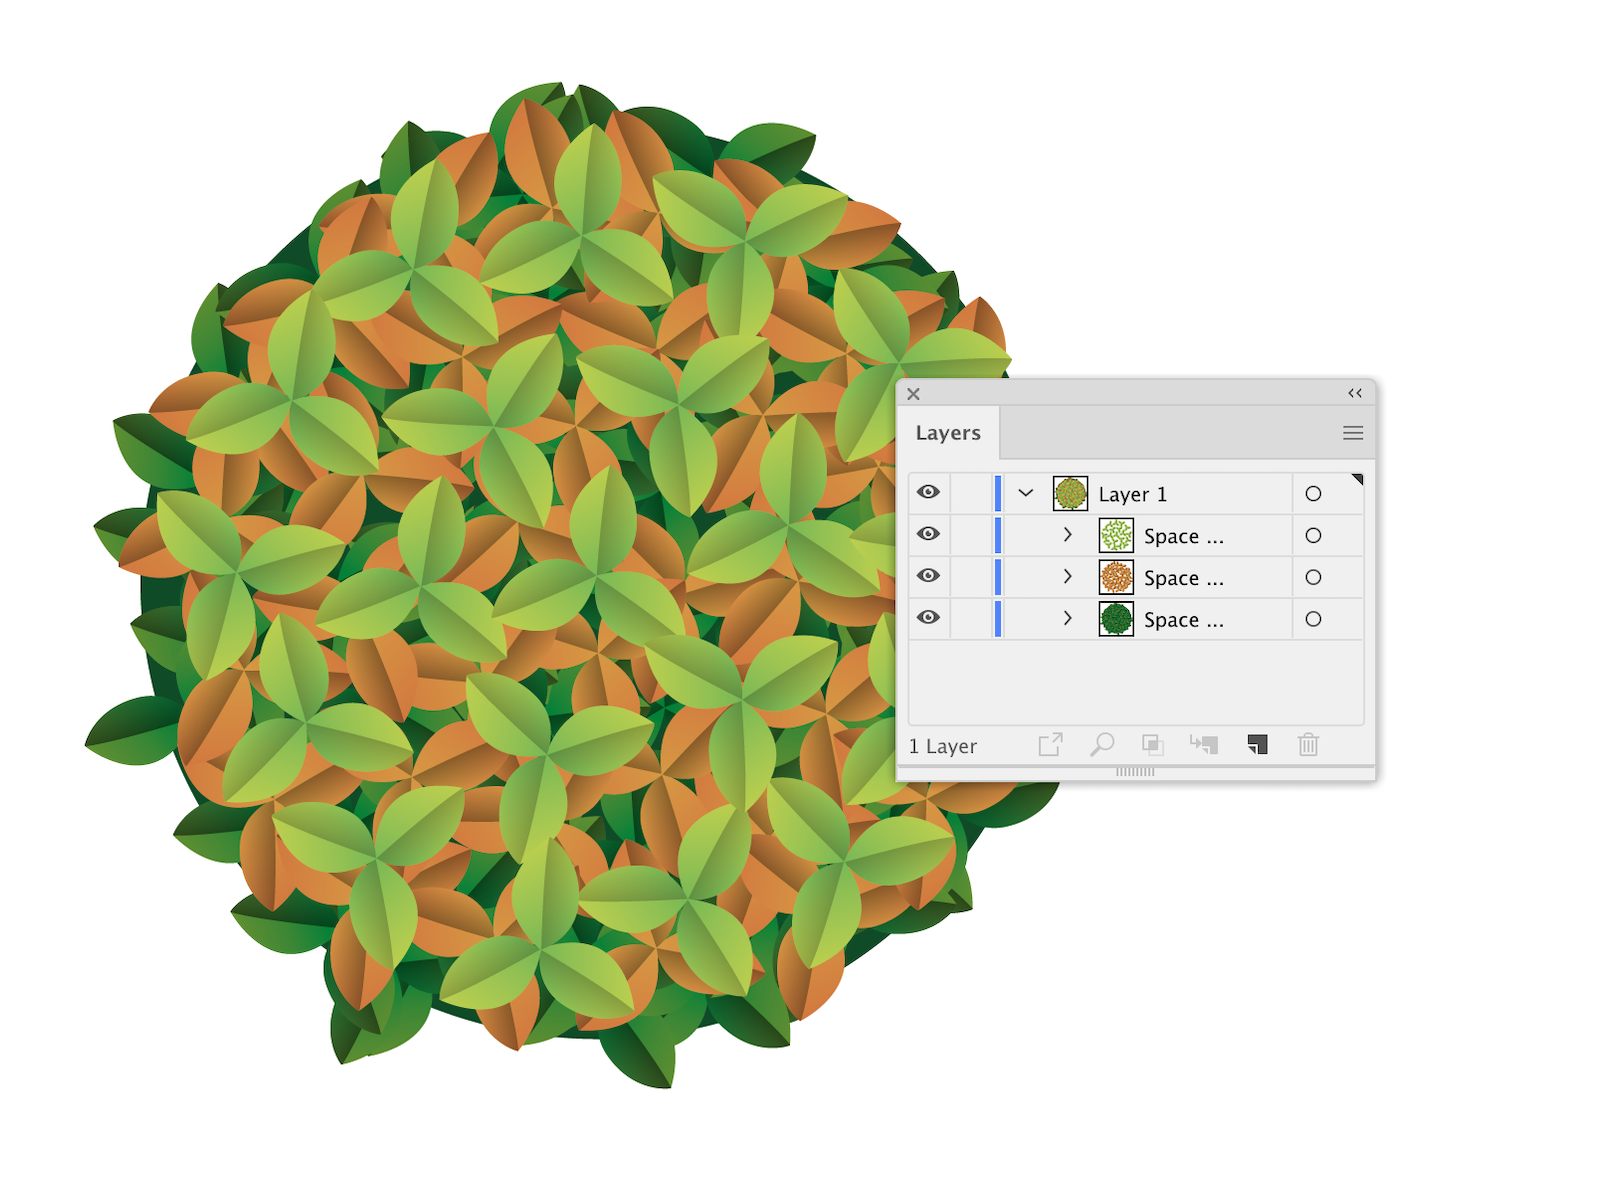
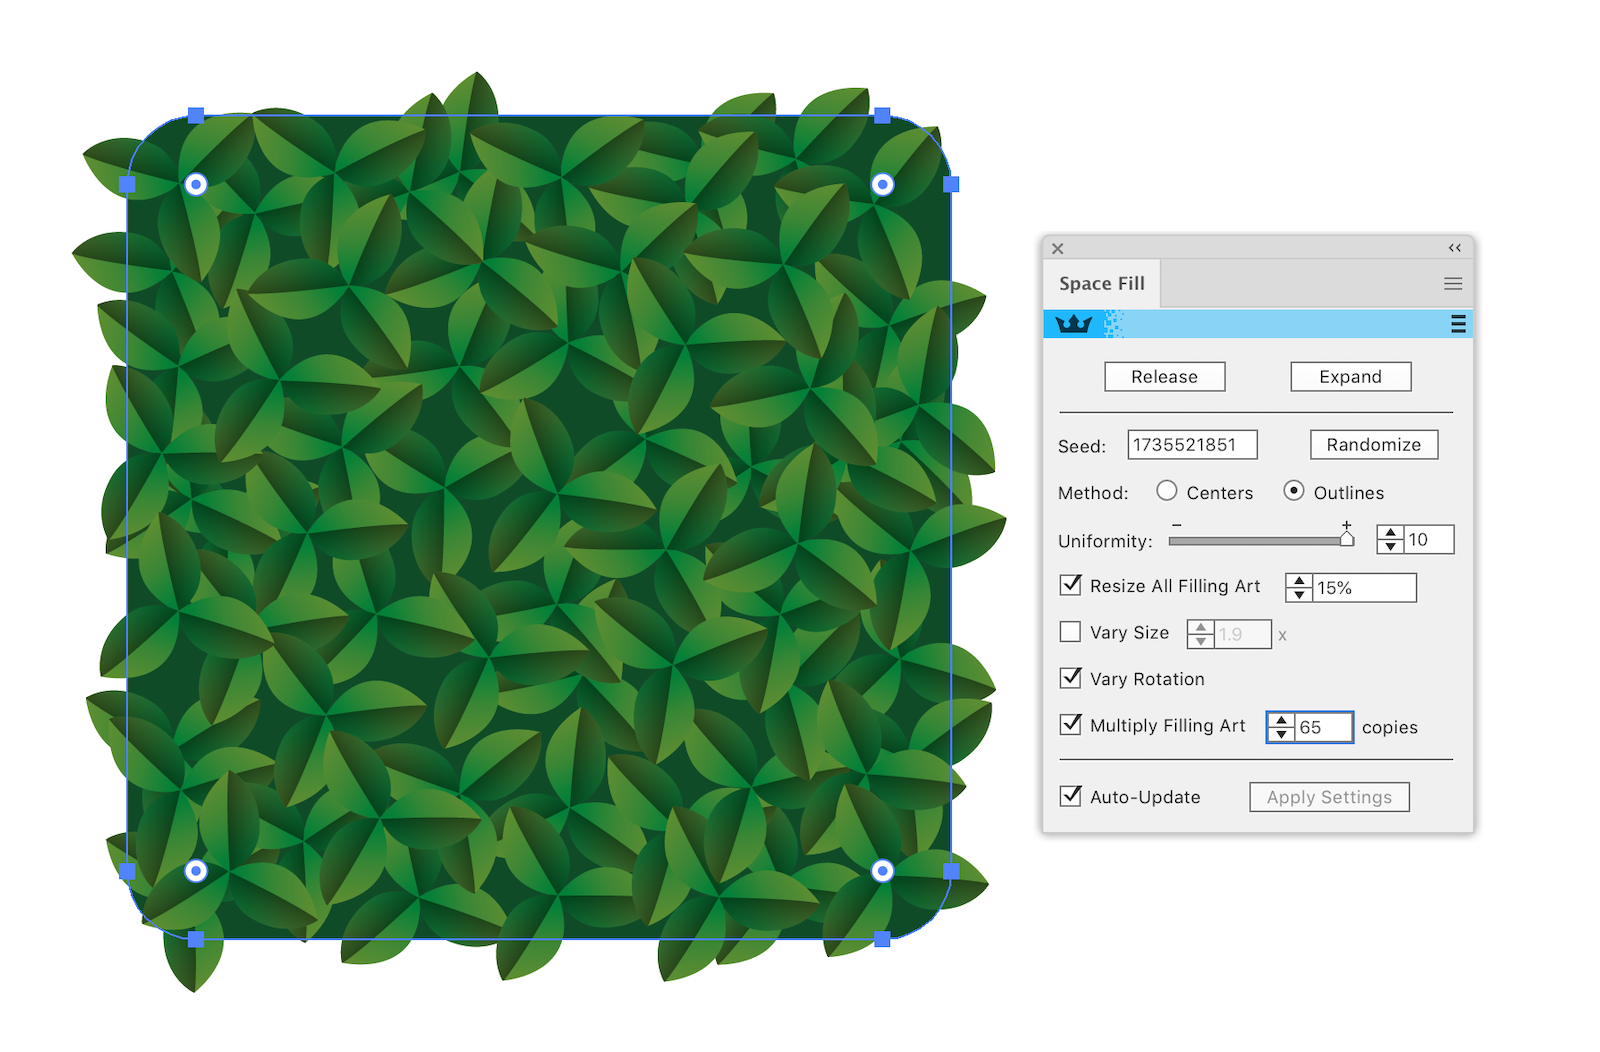
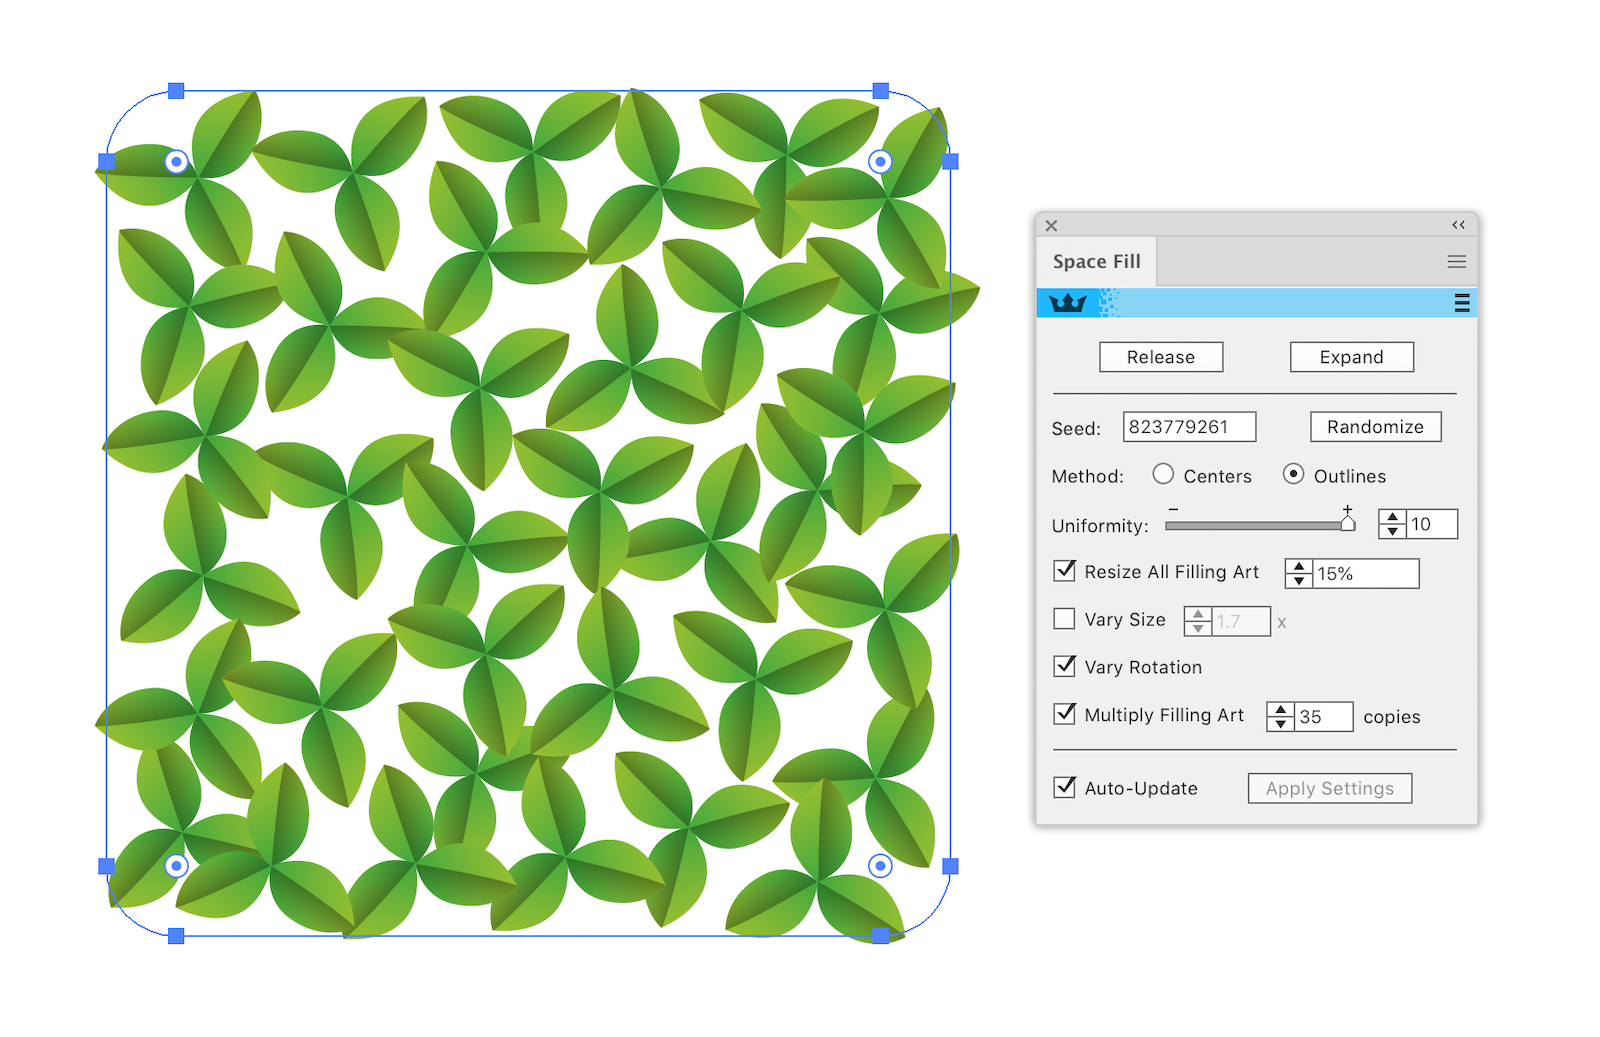
We will conduct filling of the containers with the help of the new and unique feature, Space Fill. You can learn more about it from the article Space Fill feature in ColliderScribe and by watching Product movies on our YouTube channel. Open Space Fill panel
(Window > ColliderScribe > Space Fill panel). Select the darkest
shamrock and a container with dark green fill, and then click on the
Make button in the panel.
We have got the Space Fill dynamic object. Play with its parameters in the Space Fill panel, to achieve something like this.
Step 7
Select the next container path without fill and stroke, and the darker shamrock from the remaining two.
Press Make in the Space Fill panel. This time, I reduced the number of copies. You can change the self position of Fill Art objects (shamrocks in our case) inside the container by pressing the Randomize button. This is how we can achieve the best option of filling from an aesthetic point of view.
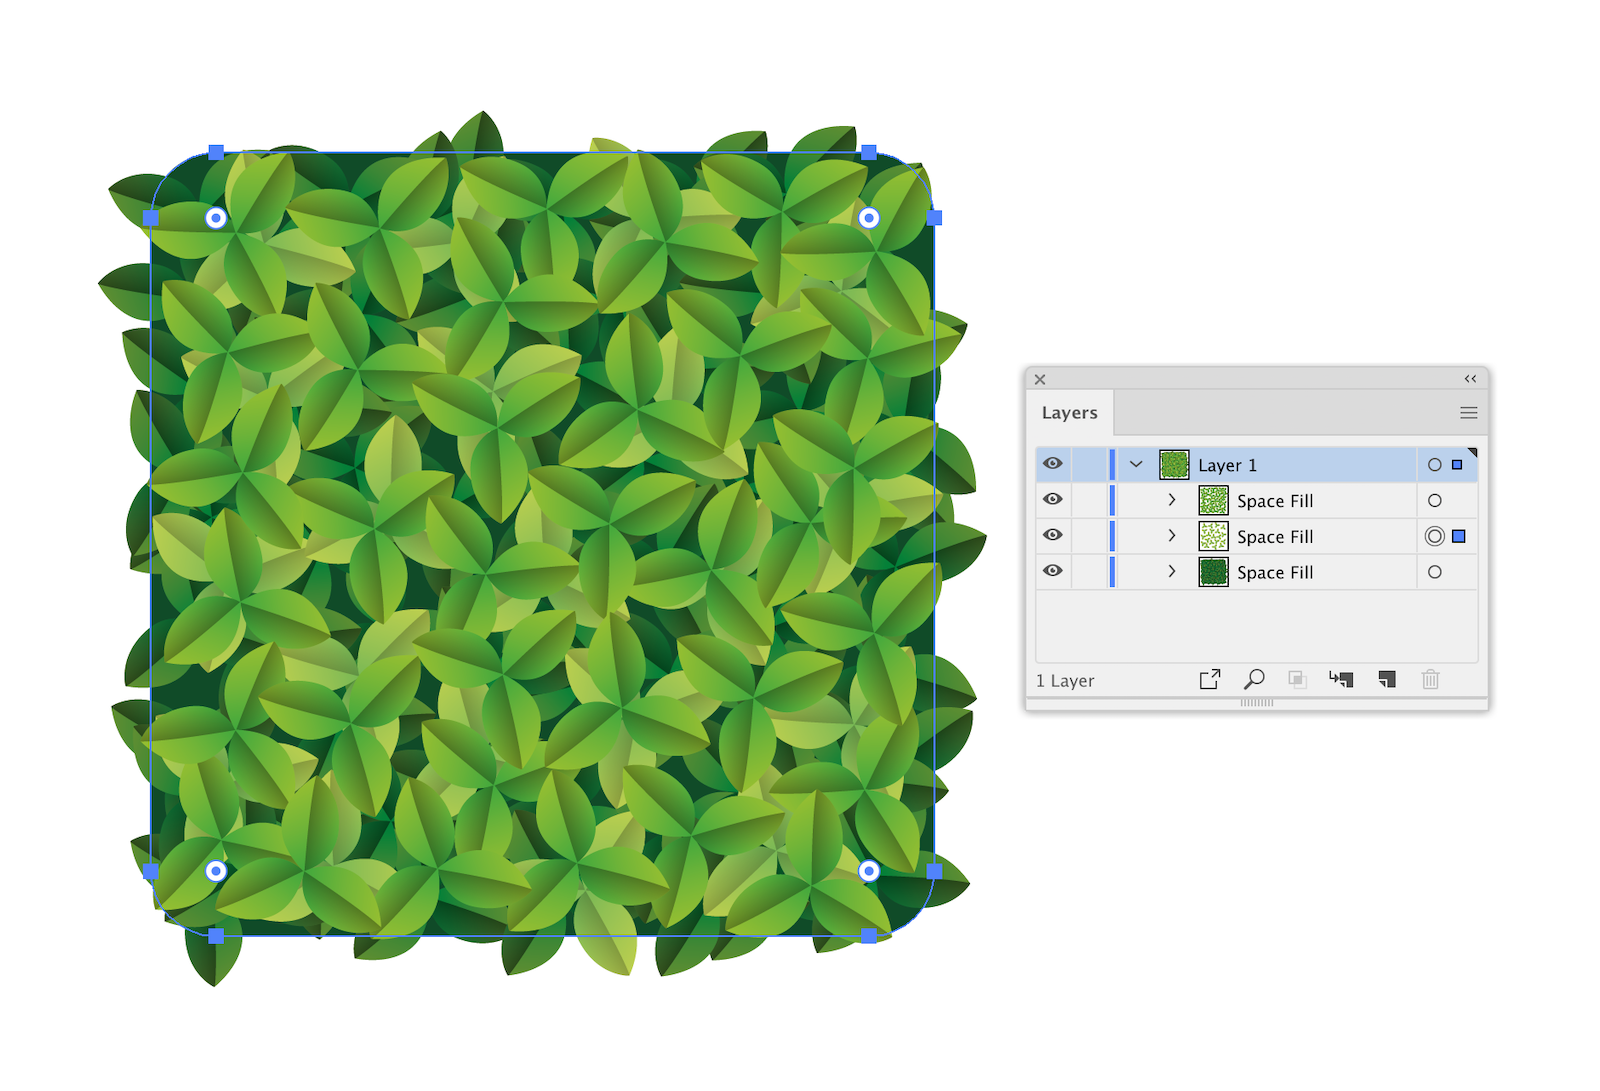
Step 8
Finally, select the last remaining container and shamrock, click Make in the Panel and then reduce the number of copies.
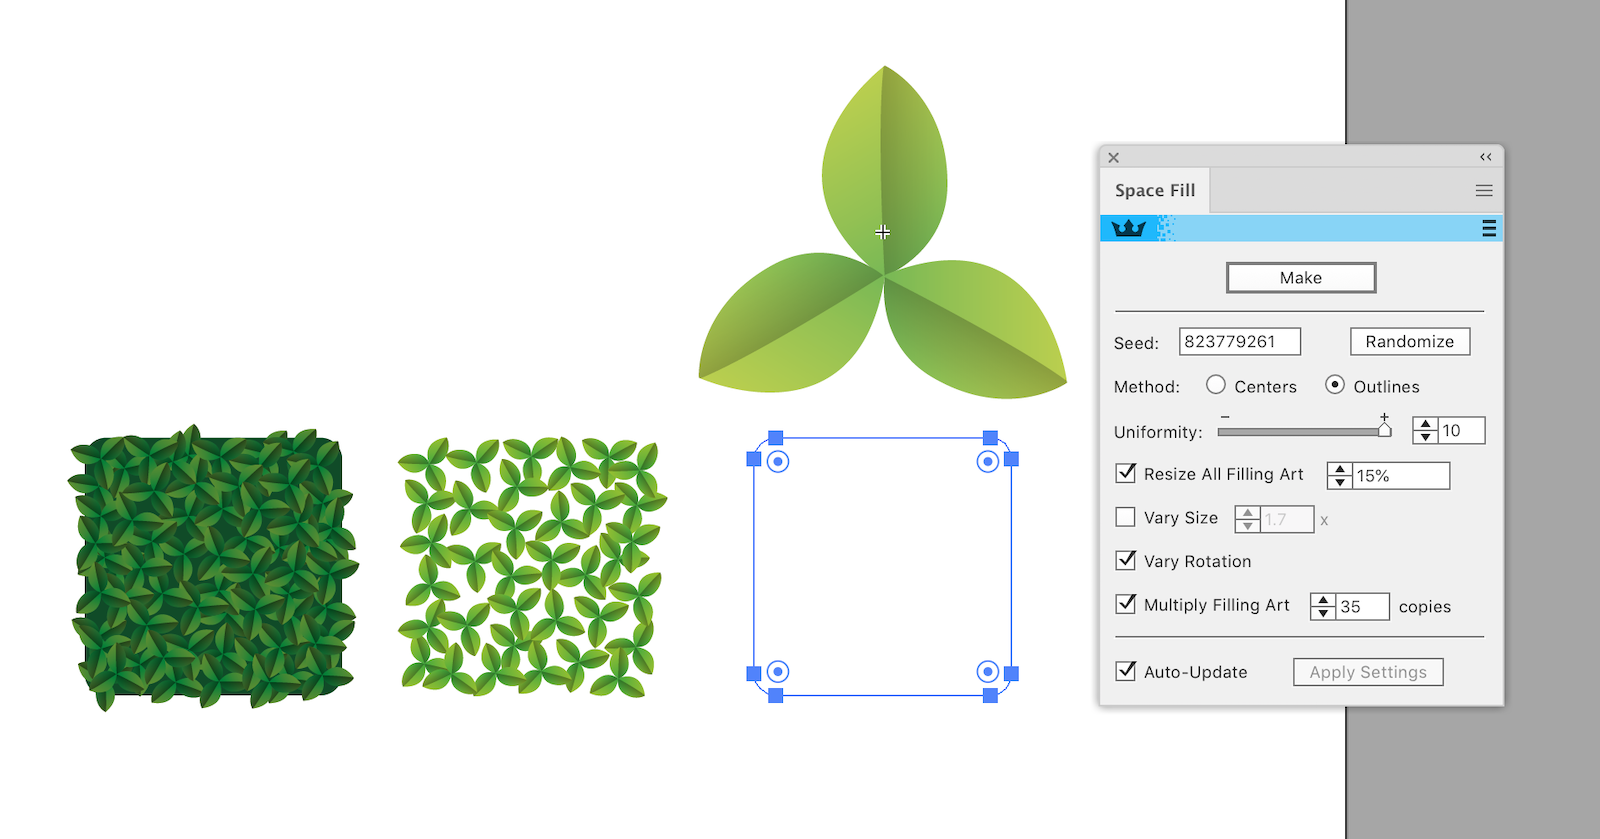
We now have a container filled with green leaves. We created multiple copies of shamrocks that evenly filled selected shapes. To do this, we just had to press the Make button three times and play a bit with the settings. I could hardly imagine how much time it would take to perform this artwork manually.
The dynamic properties of the container path and Fill Art objects.
Step 9
All the fills created in the previous steps are dynamic. This can be proved easily. Change the settings of one of the Space Fill objects and the leaves will become alive. But the dynamic properties of our artwork does not end here. All containers are Dynamic Shapes, so we can easily change their shape by setting the desired values in the Dynamic Shapes panel. For example, change the radius of rounding.
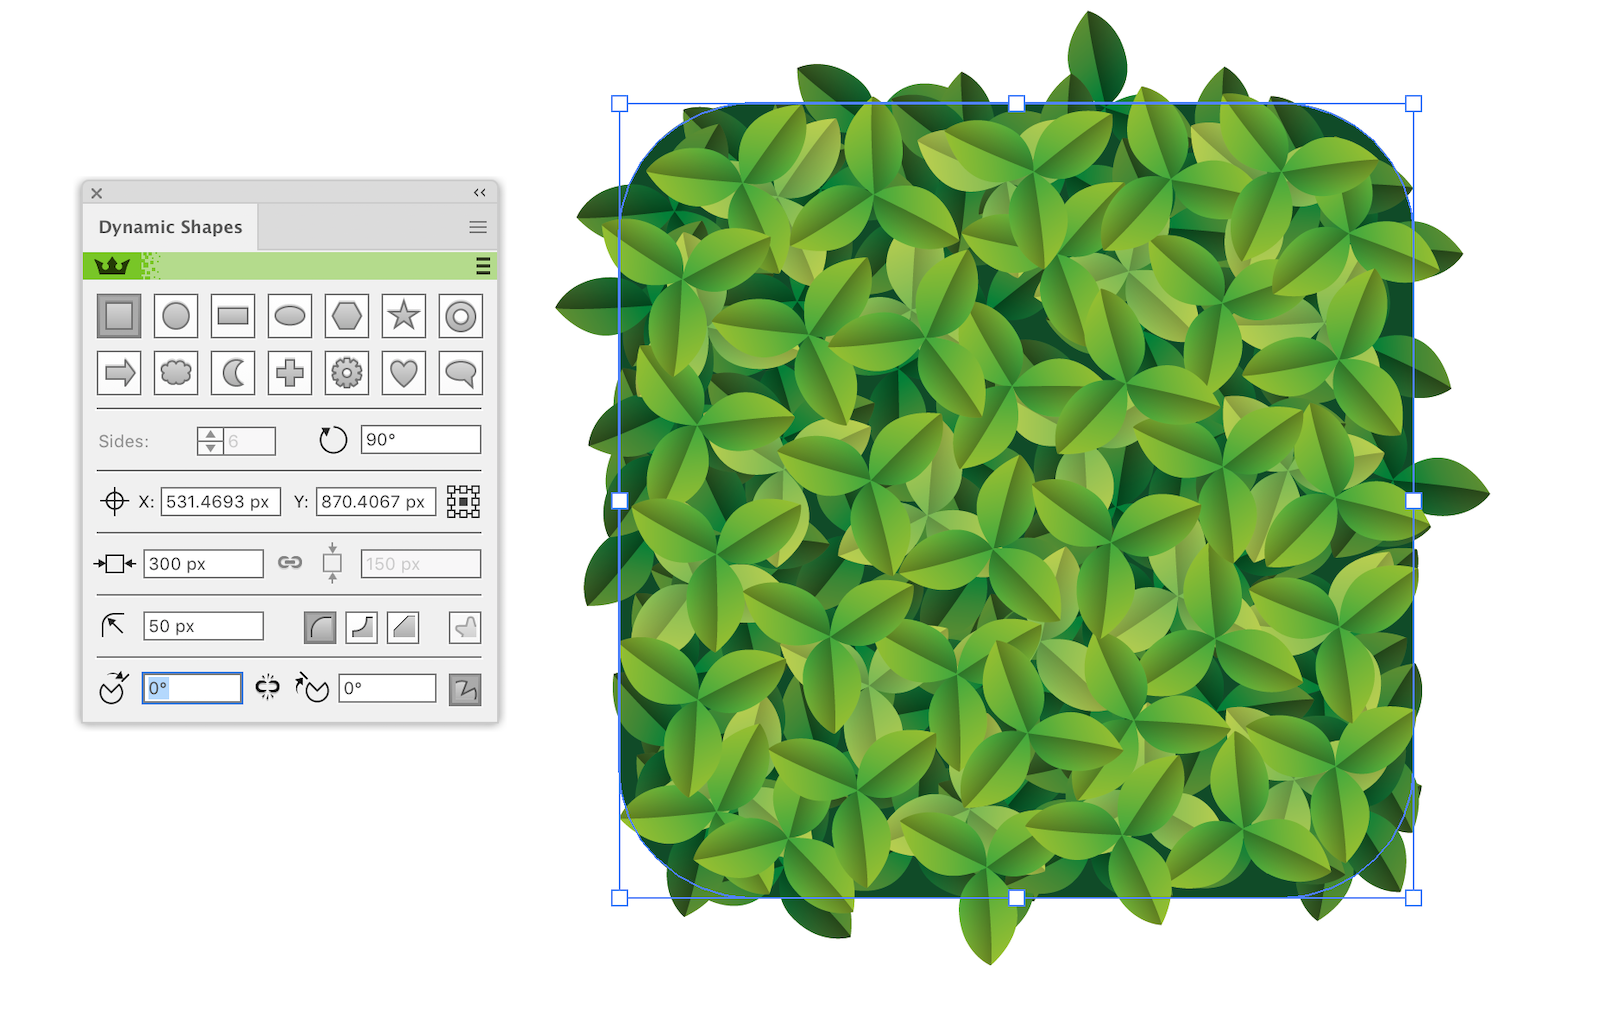
Or even completely change the shape. For example, click on the Dynamic Circle button in the Dynamic Shapes panel.
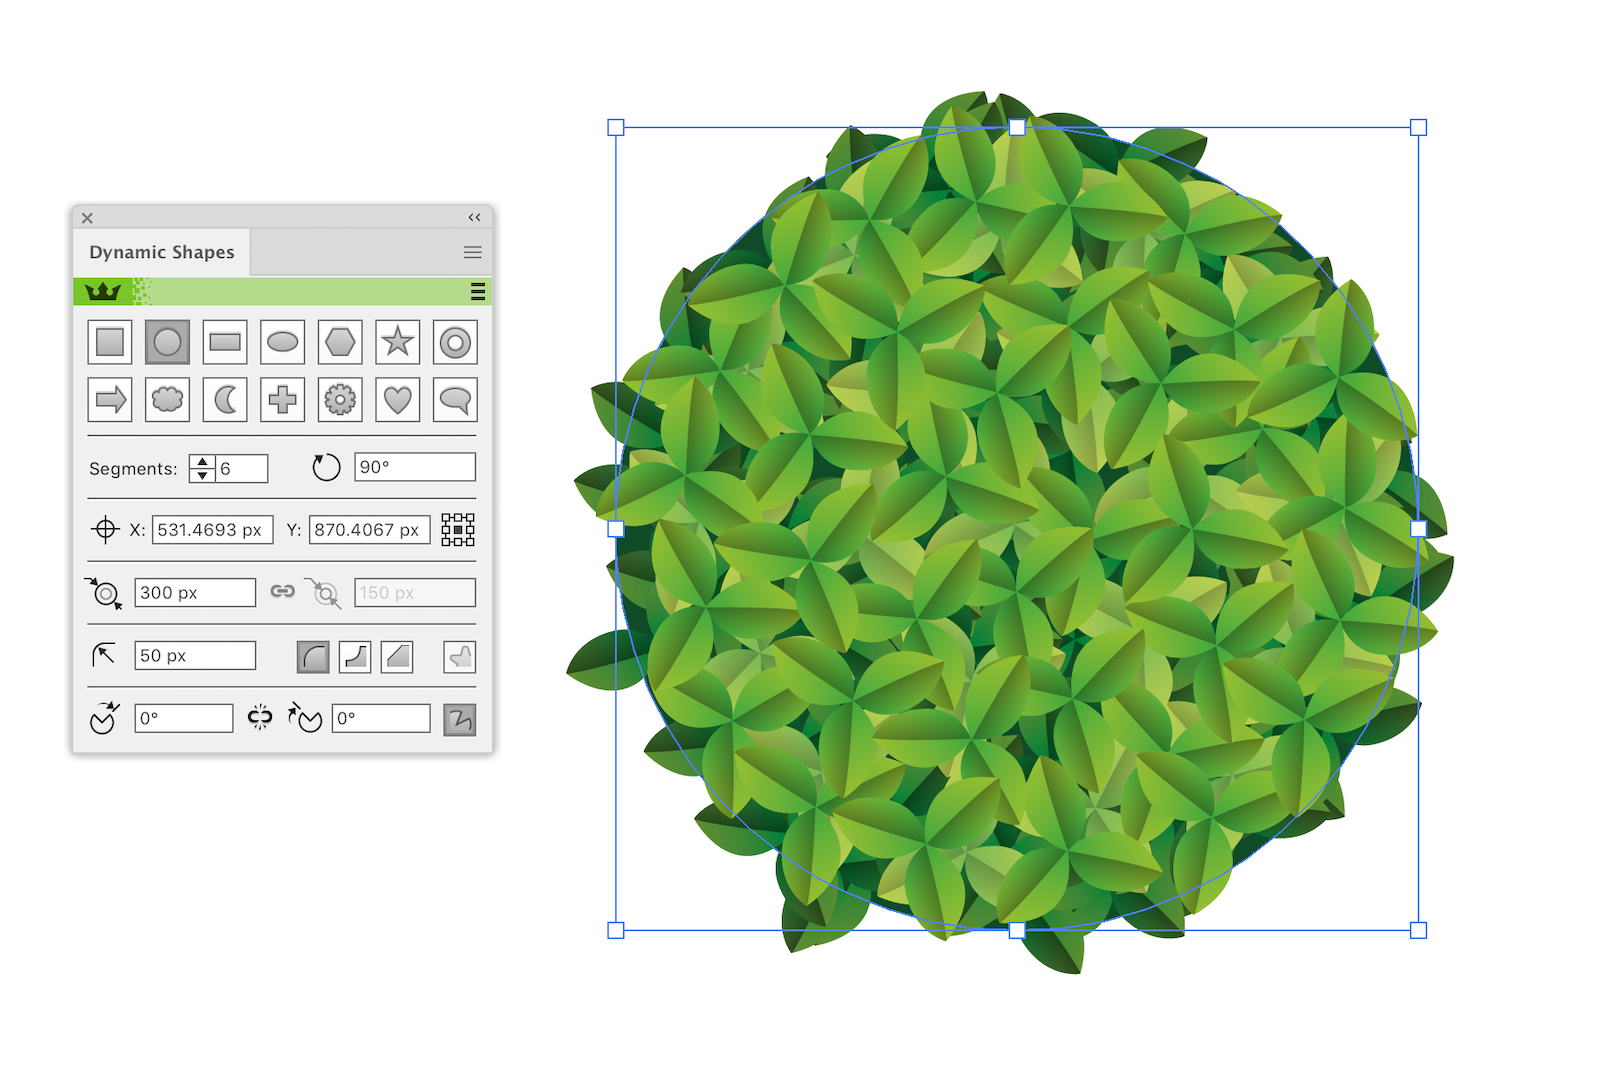
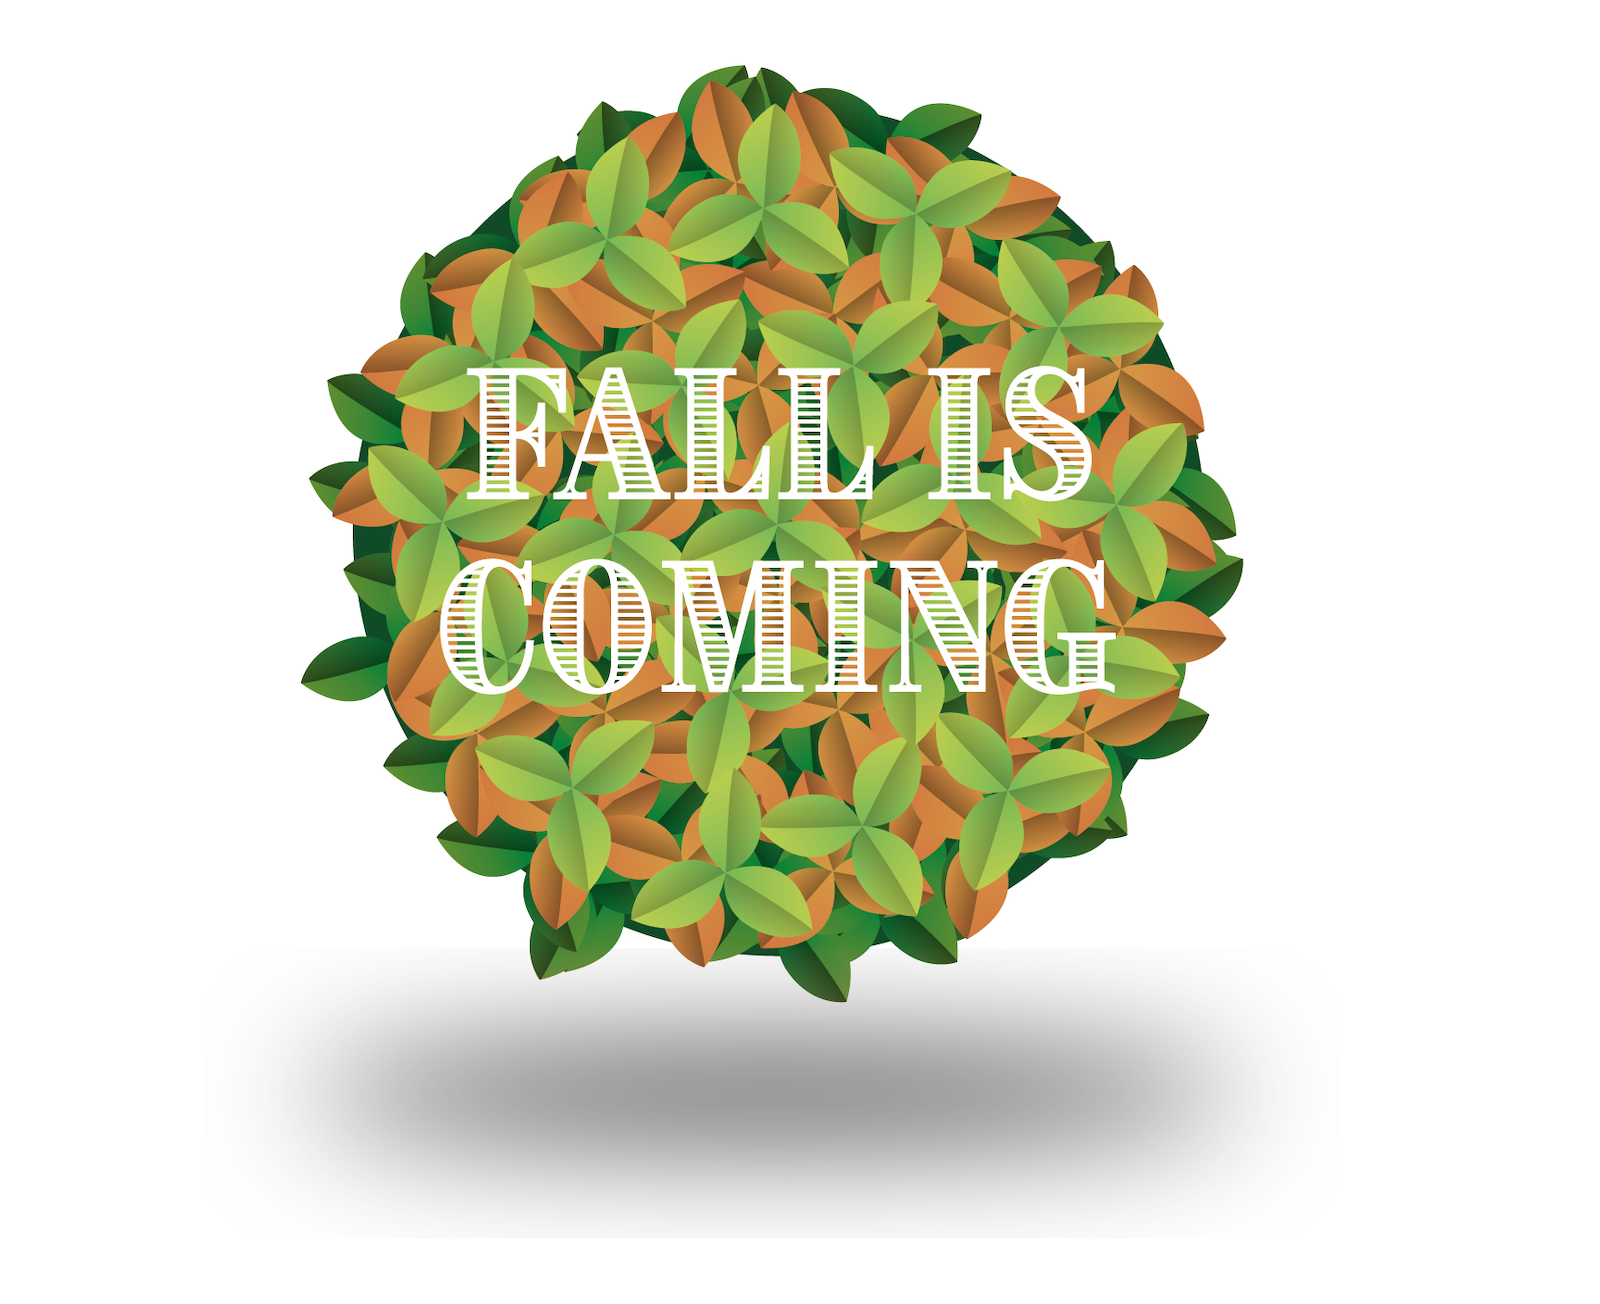
Leaves are obediently and evenly filling the new shape. This is double dynamics!
Step 10
In addition, we have access to Fill Art objects without release or
expand of the Space Fill object. This is possible through the use of
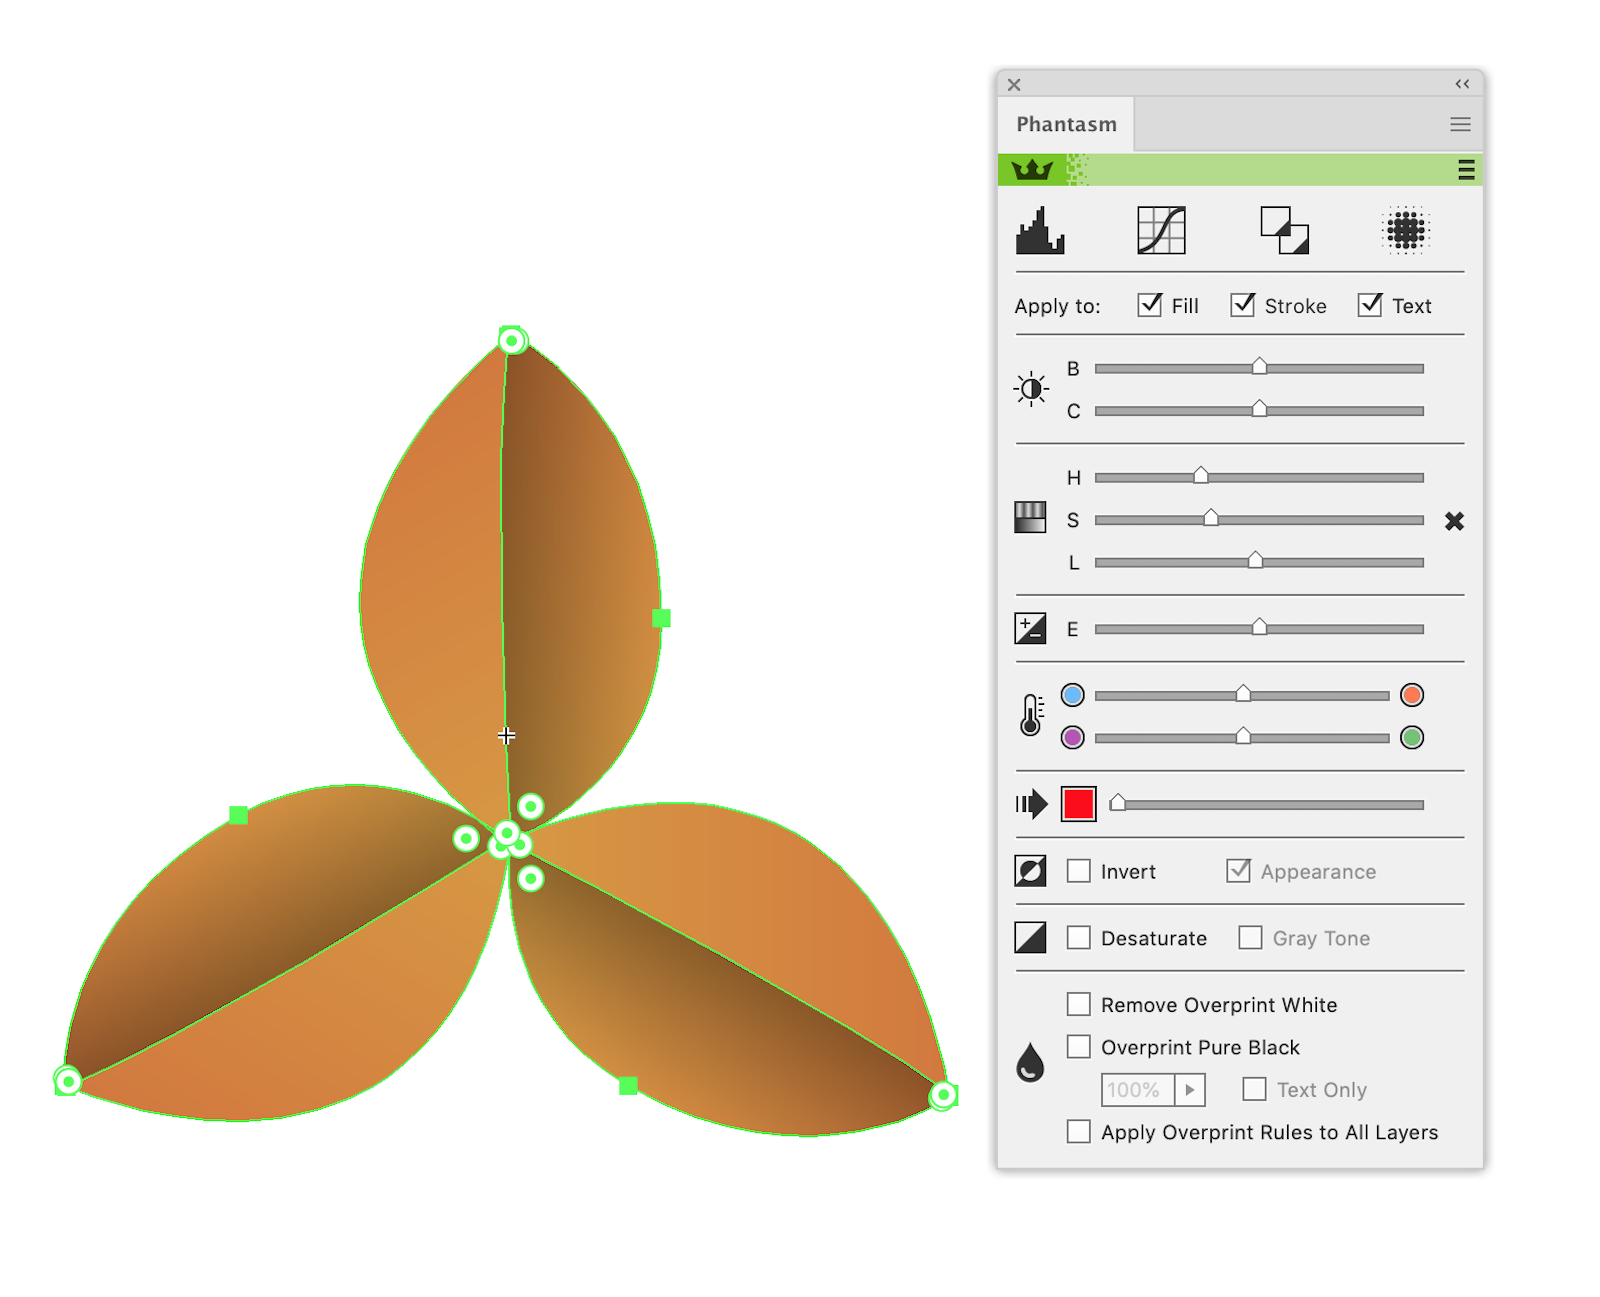
symbols. Double-click on the symbol that needs to be edited in the
Symbols panel. This will enter the edit mode. Here you can do with a
shamrock all that you need. For example, change the shape color or even
add new objects. By the way, we have not lost Phantasm Brightness /
Contrast effect which can be modified if needed.
For example, recolor a shamrock with the help of Phantasm Hue / Saturation effect (Effect > Phantasm > Hue / Saturation) into an Autumnal color.
Now exit the edit symbols mode.

As you can see the shamrocks that correspond to the edited symbol have also changed and are still where they are supposed to be inside the container. We have one more level of dynamics; triple dynamics is achieved!