How to design animated Google display ads
10 minute readWith attention spans getting shorter and shorter, how do you design your ads to stand out from the rest?
Making animated display ads is not as tricky as you may think, if you have access to the Creative Cloud, then with only Adobe Illustrator and Adobe Photoshop you can make simple and engaging animated social advertisements.
We are going to cover the 5 top things to consider when designing your ads. The key things to include, the layout you need to consider, and how to keep those file sizes down.
1. Store your favorites
Seen something that catches your eye? Keep a note. Also keep an eye on trending colors and themes. The themes you use in your designs will depend on what industry you’re in. Medical industries tend to have clean and crisp advertisements. Telecomm’s industries have become very bright in recent years, heavily inspired by Pop Art. The food, wine and hospitality industries exude luxury and opulence. And this is similar with the beauty and fragrance industries, they want to sell you a feeling about yourself. So be mindful of the industry you’re designing for, and what customers are going to recognise, trust, and expect. Creating a mood board of ideas will help guide your design process.
2. Brand and format
The essentials every ad needs:
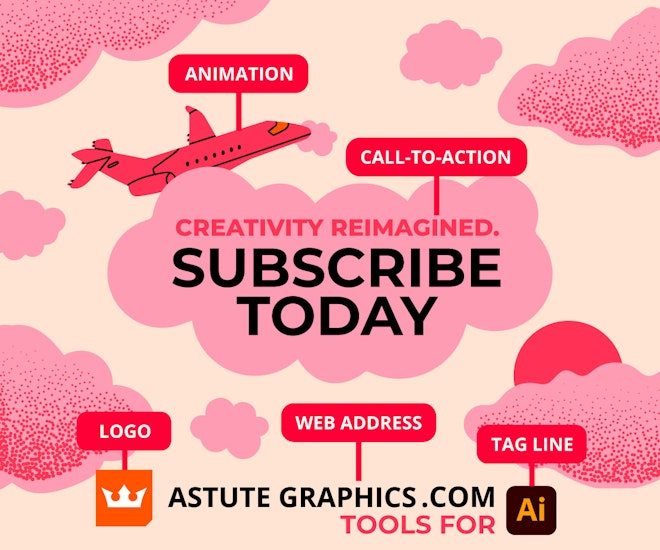
Logo - Push that brand awareness
Web address - we add .COM to the end of our company name just to save on space
Tagline - What does your company do? Does your company already have a clear tagline used across their marketing collateral?
Call-to-action - Subscribe, Register Now, Start your Free Trial or Buy Now? Make it clear and simple.

3. Values, trust + brand awareness
If you are part of the design and marketing team and you need to show the return on your advertisement investments, always factor in your brand awareness. Sometimes it’s not all about the clicks, but about building an image of the values of your company. If you make the right impression when your services are needed, or if you pop up again on another platform, then they are going to think of you.
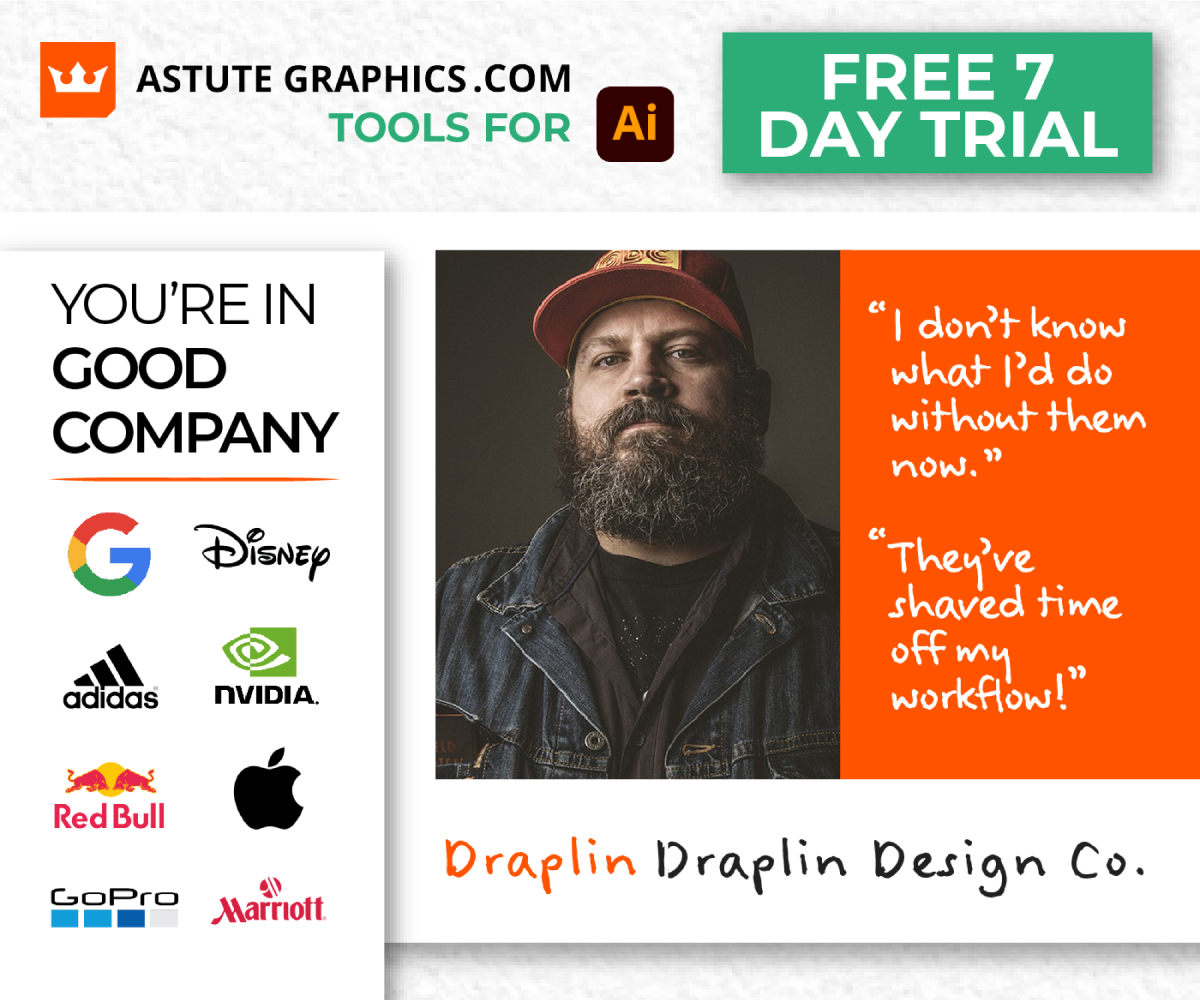
Do you have any recent customer reviews, a TrustPilot score, or a list of company clients? Consider adding these to your advertisement. Build trust with your potential customers and show them who trusts you already. Any star ratings that you add in should be near the logo or in a corner, so as not to distract from your main message. At Astute Graphics we created a range of display ads that included one main quote, a list of companies that already use our services, and a clear call-to-action. Having a 3rd party opinion can speak volumes about you.
4. Room to breathe
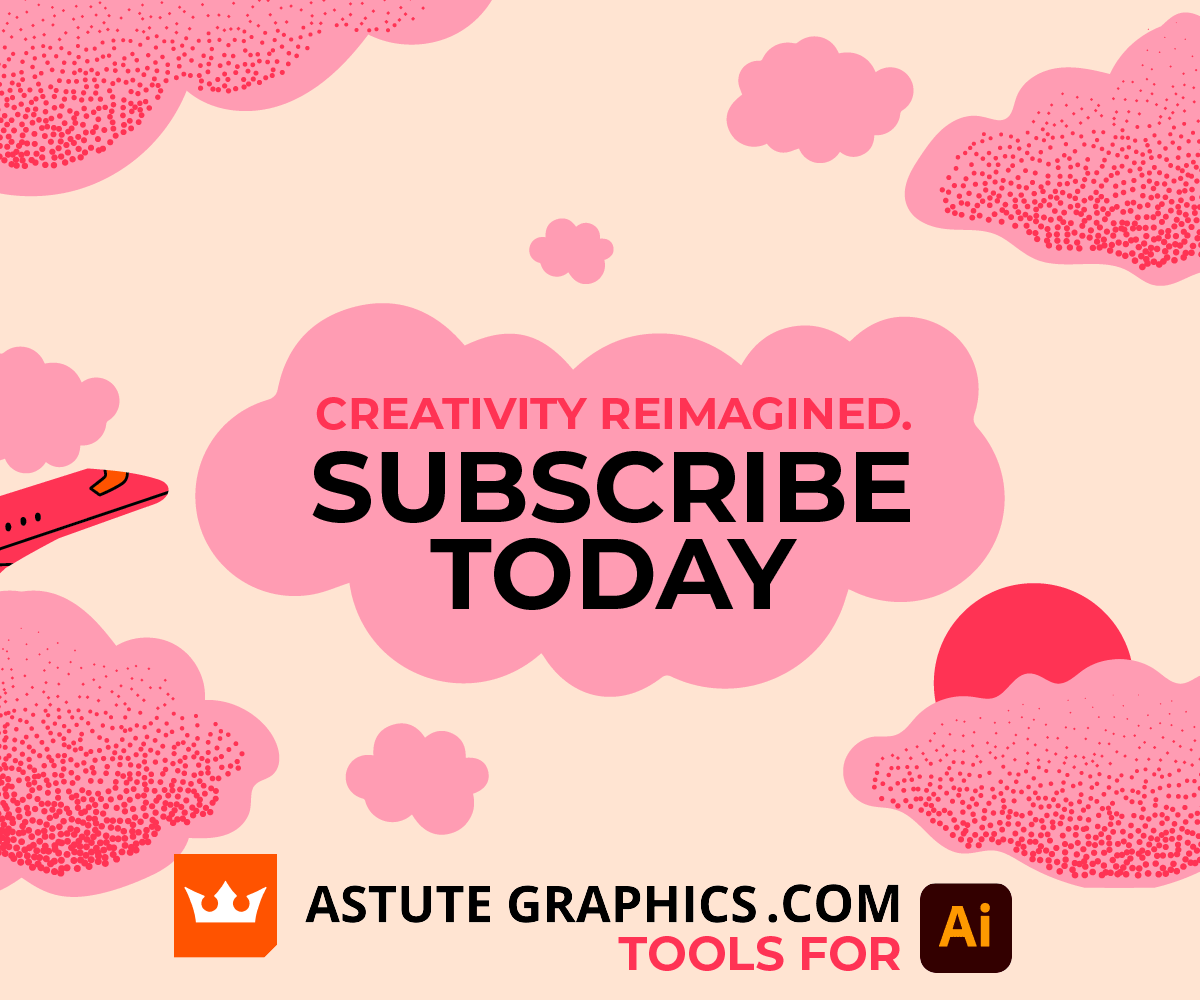
Negative space is a good thing! Display ads aren’t huge on a web page and people scroll so quickly, so your ad needs to be readable with a clear call-to-action button. Any animations you make should not detract from your main message. The aim is to capture and hold attention.
These Astute Graphics animated display ad GIFs are 10 frames each. The call-to-action is clear in the center and the company logo and web address are readable even for those smaller adverts. We have the tagline “Tools for Adobe Illustrator”, so customers know what we do, and there's also plenty of room around this for us to add a little animation to catch the eye. If you want to know how you can make animated ads, keep reading 👇
5. Display Ad Sizes
Having a template Ai file is always going to save you time in your workflow. Set up an Ai file with all the artboards of your display ads. Ensure that you place the logo on each artboard in vector format, this is not just for consistency but for image quality also.
Here is a list of the most popular display ad sizes:
300 x 250 px – Medium Rectangle
336 x 280 px – Large Rectangle
728 x 90 px – Leaderboard
300 x 600 px – Half Page (Large Skyscraper)
320 x 100 px – Large Mobile Banner

How to animate display ads
1. Set your Adobe Illustrator file up to have 10 artboards, all the right size for the display ad you are designing. Use the first artboard to set up your ad, with the clear logo, tagline and CTA (call-to-action) as explained above.
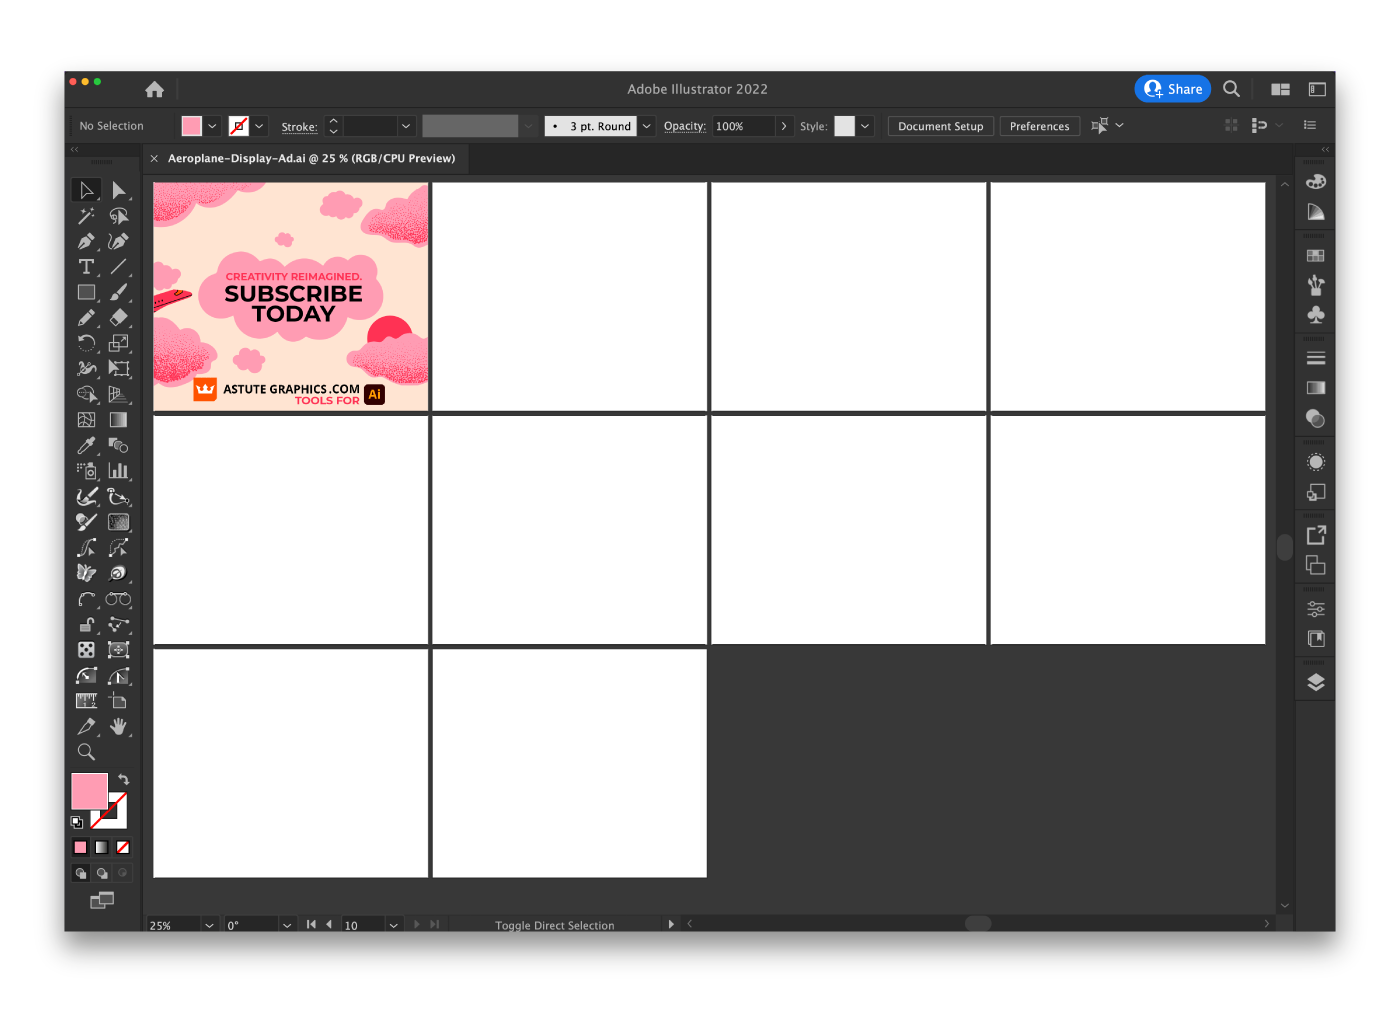
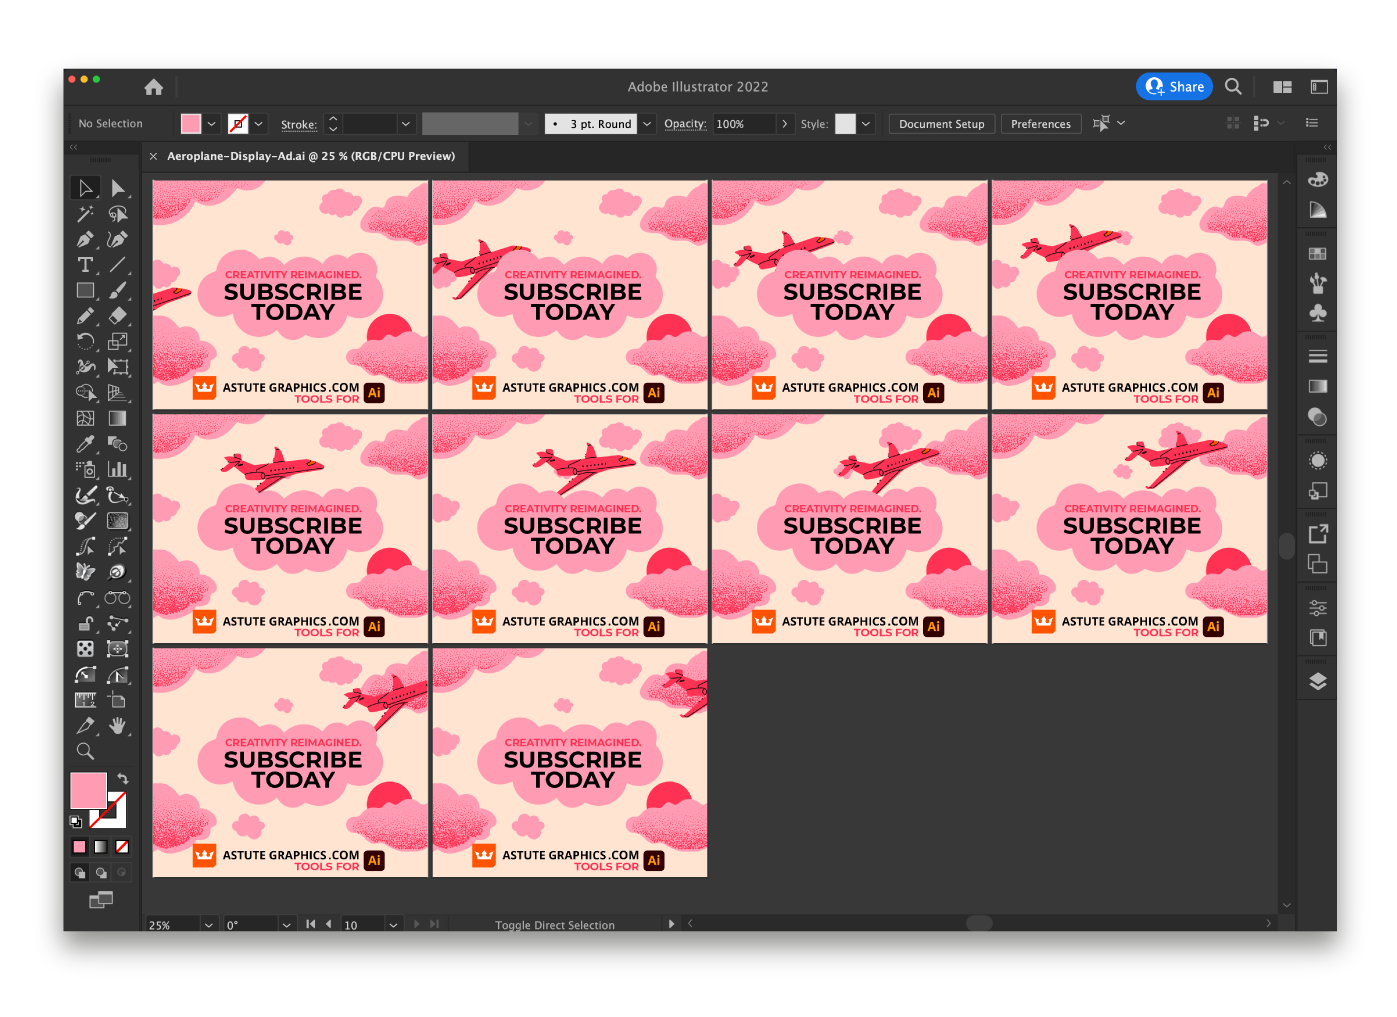
2. Ensure your artboard has all the elements stacked in the right order. You don’t want any animation to cover the CTA or company logo. Create a rectangle that matches your artboard size and select all then create a clipping mask. Next, head up to Edit > Copy, and then Edit > Paste on All Artboards. You will now have 10 artboards with exactly matching elements. Double-click to enter isolation mode and slowly move your animation along on each artboard. Be very careful not to nudge any other parts!
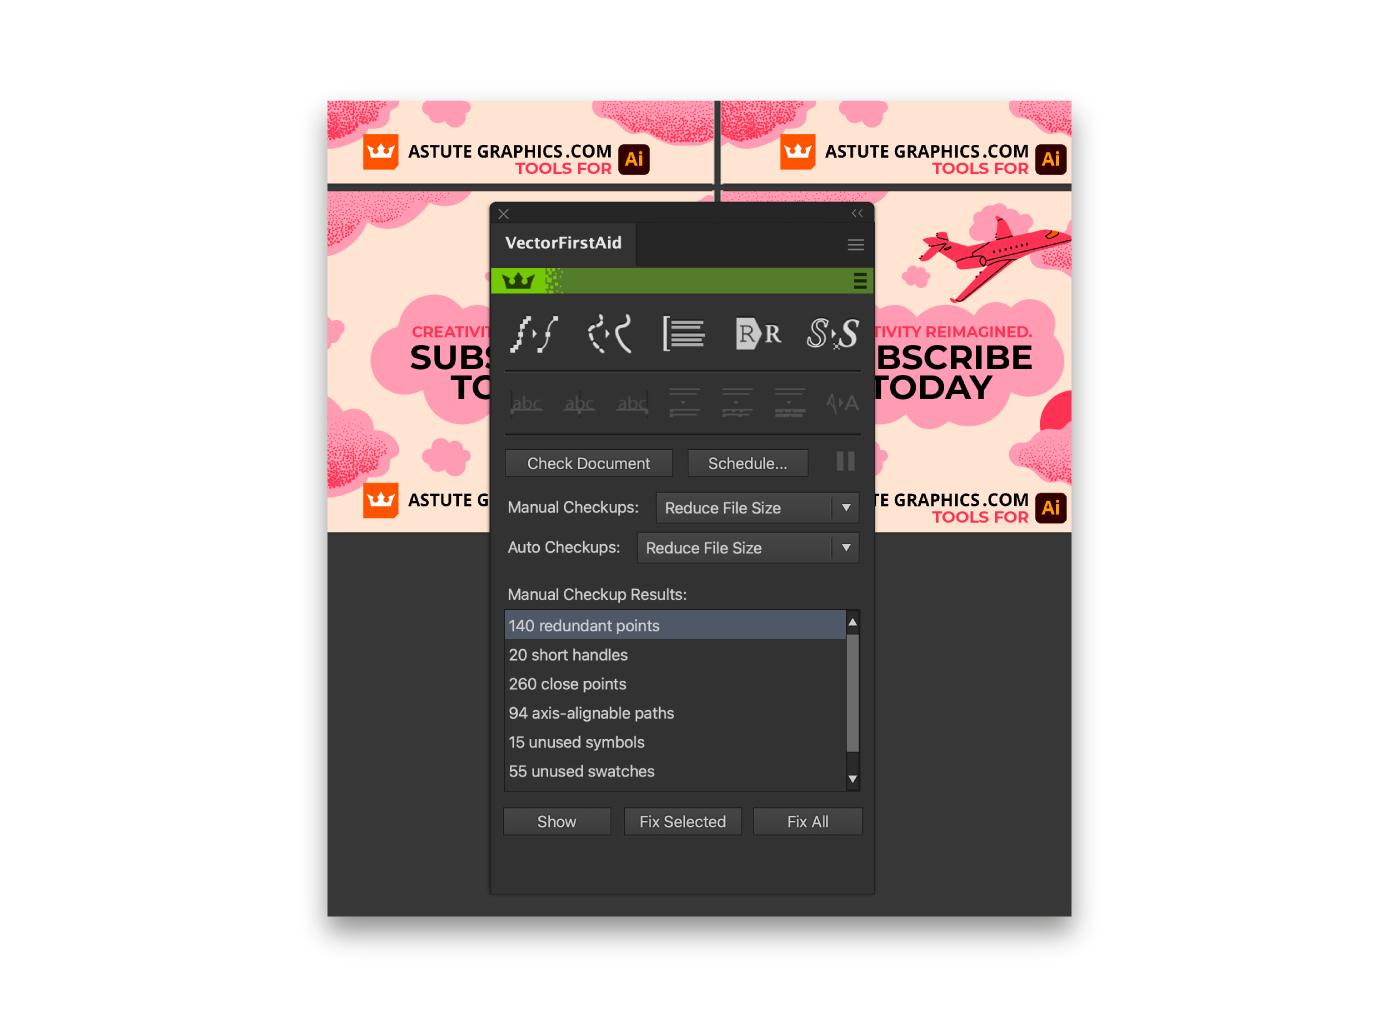
3. To ensure your file sizes are as small as possible, we suggest you use VectorFirstAid to check your whole document. Keeping file sizes small is going to help save you file size when it comes to making animated gifs. Google only allows a 150KB limit on each ad, and when you get to the next stages of making the animation in Photoshop, you need to be sure you're saving as much space as possible.
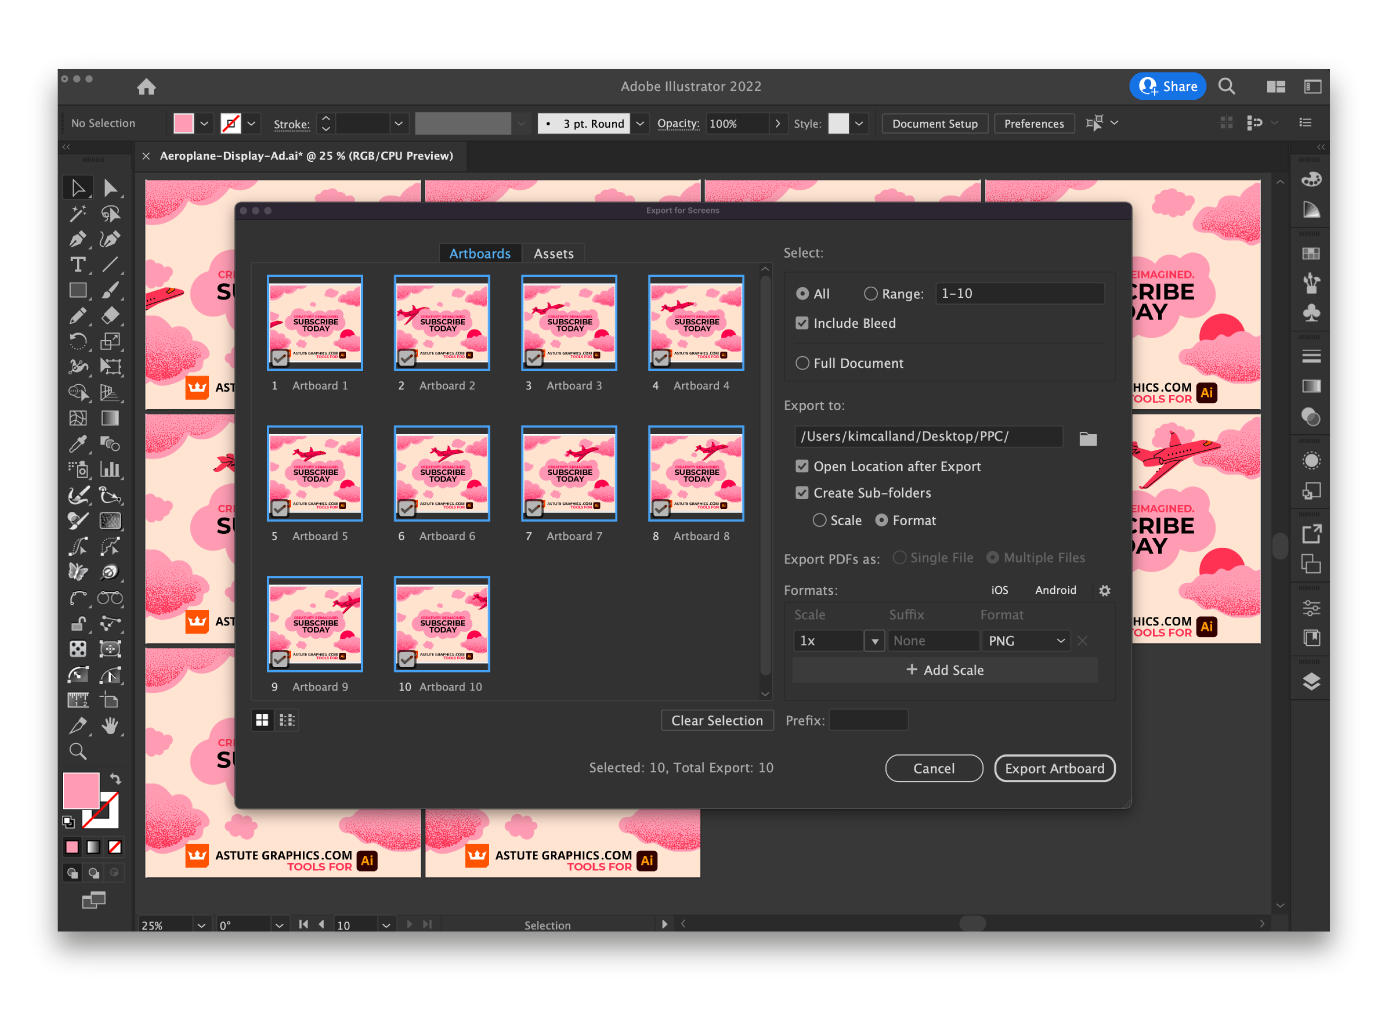
4. When you have completed this, you will need to export all artboards, you can do this via the Asset Export Panel or by heading up to File > Export > Export for Screens…
At this stage you can rename each artboard but it maybe best to keep the names as they are. This is because you need them to stay in the right order for the next stage.
Make sure you have all the artboards selected and that you have picked the right folder to export to. You can also choose to Create a sub-folder, this may help with your file management. Ensure the format is in 1x PNG and click Export Artboard.
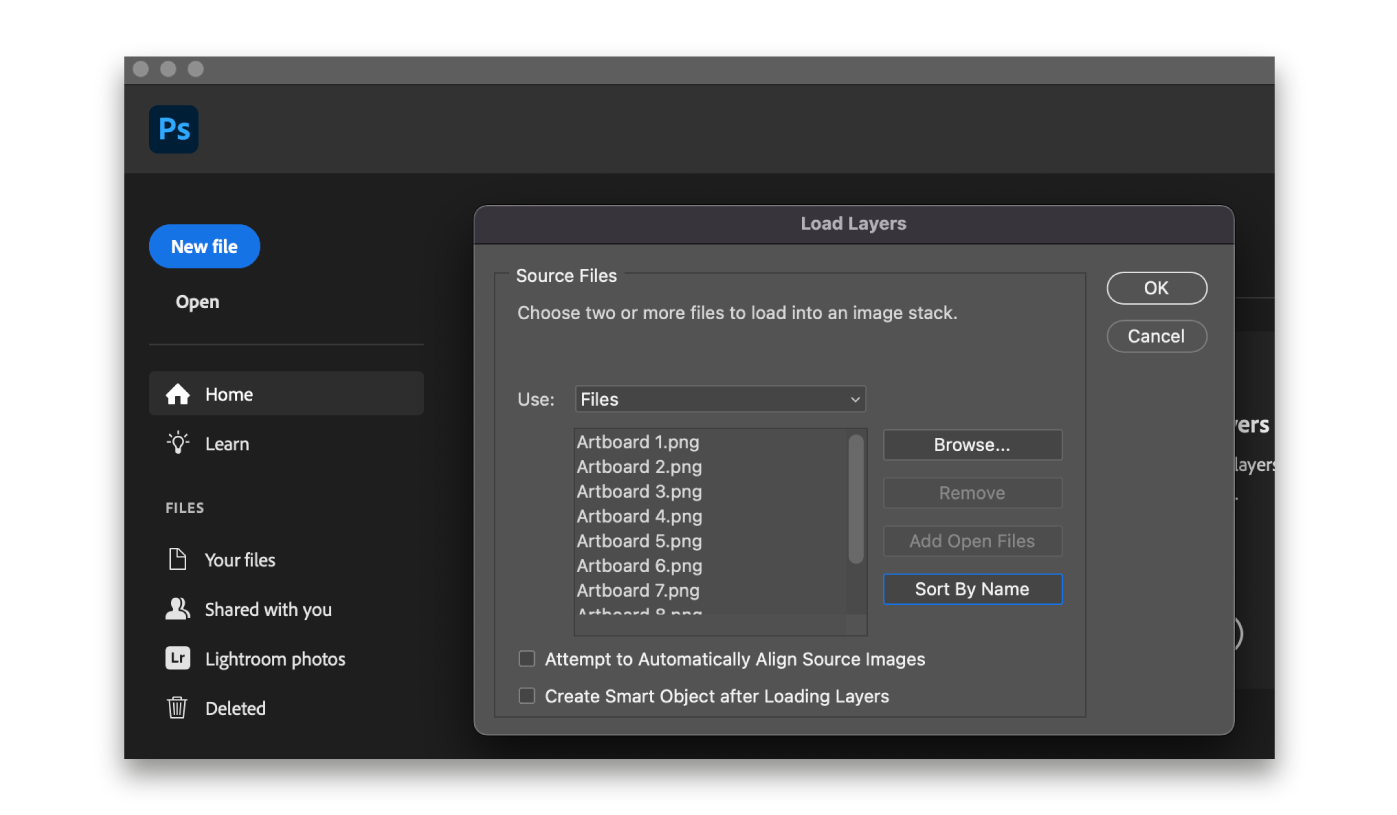
5. Now you will need to open Adobe Photoshop and head up to File > Scripts > Load Files into Stack…
Browse for the files you have just exported from Adobe Illustrator. Select all and click Open. If you have any files out of order, try clicking the Sort by Name button, and click OK. Now wait for Photoshop to sort and create the layers from each artboard, this can take a few seconds.
6. If you cannot see the Timeline panel at the bottom of Photoshop then head up to Window > Timeline. You will then see a Create Frame Animation button.
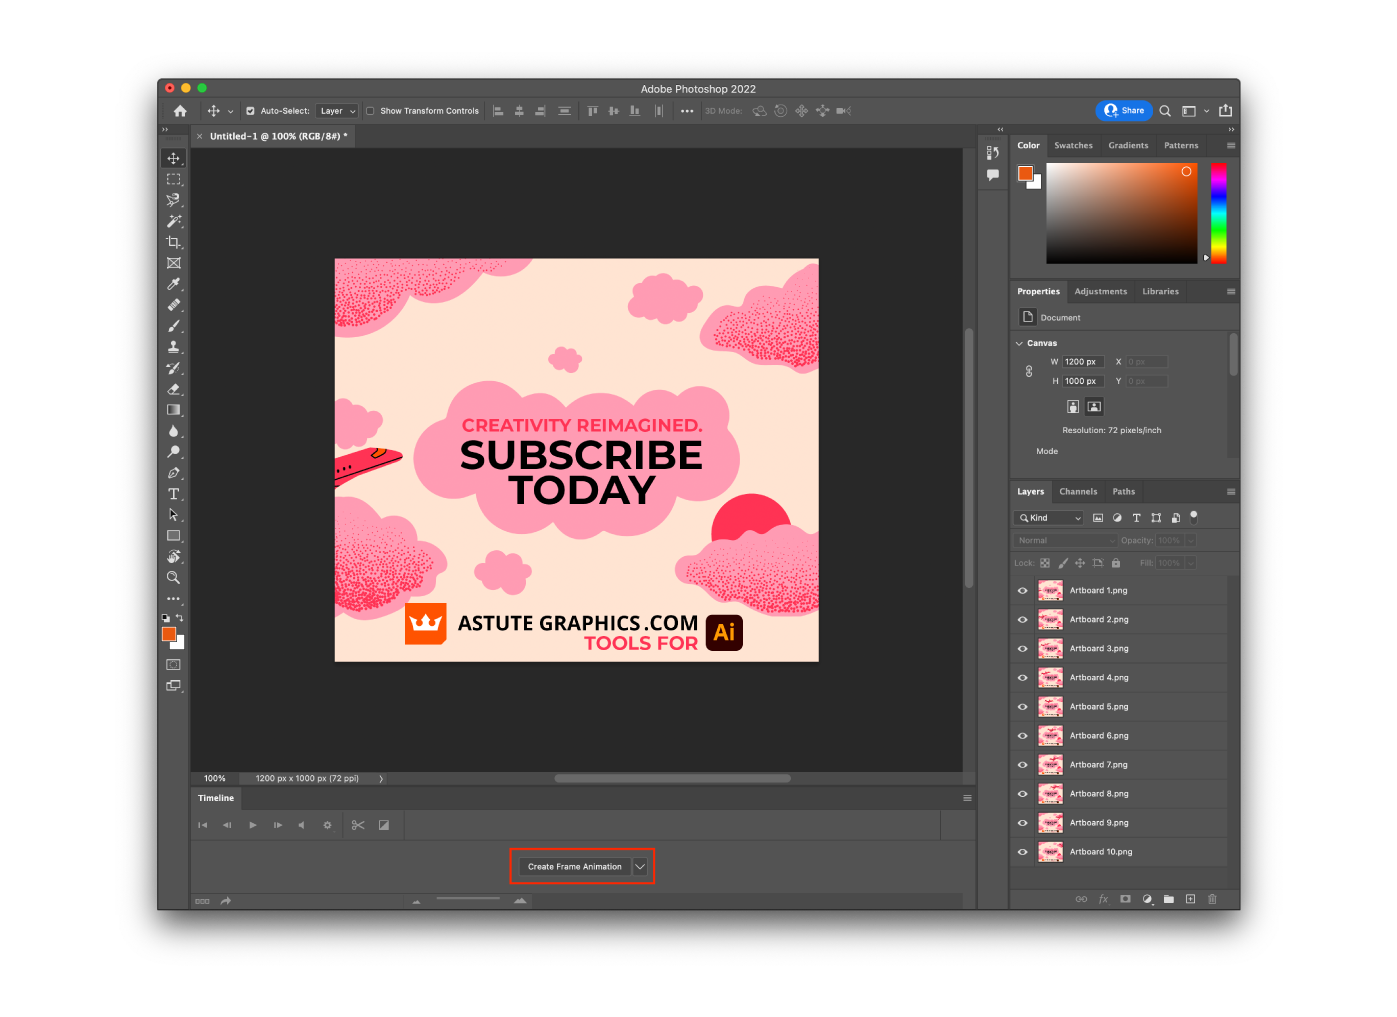
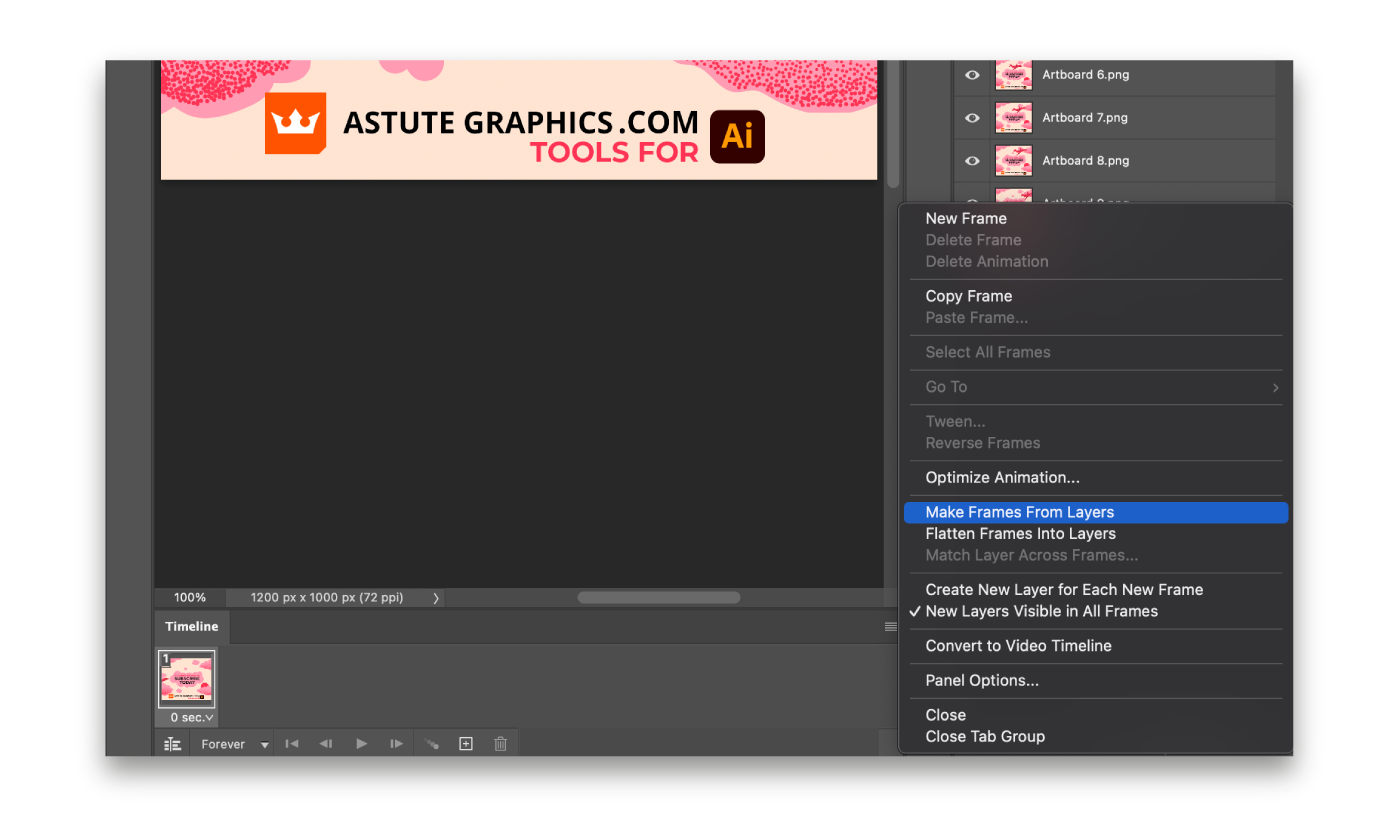
7. This will load Layer 1 into the frame animation. Using the 3 bar burger flyout menu on the timeline panel, click Make Frames from Layers.
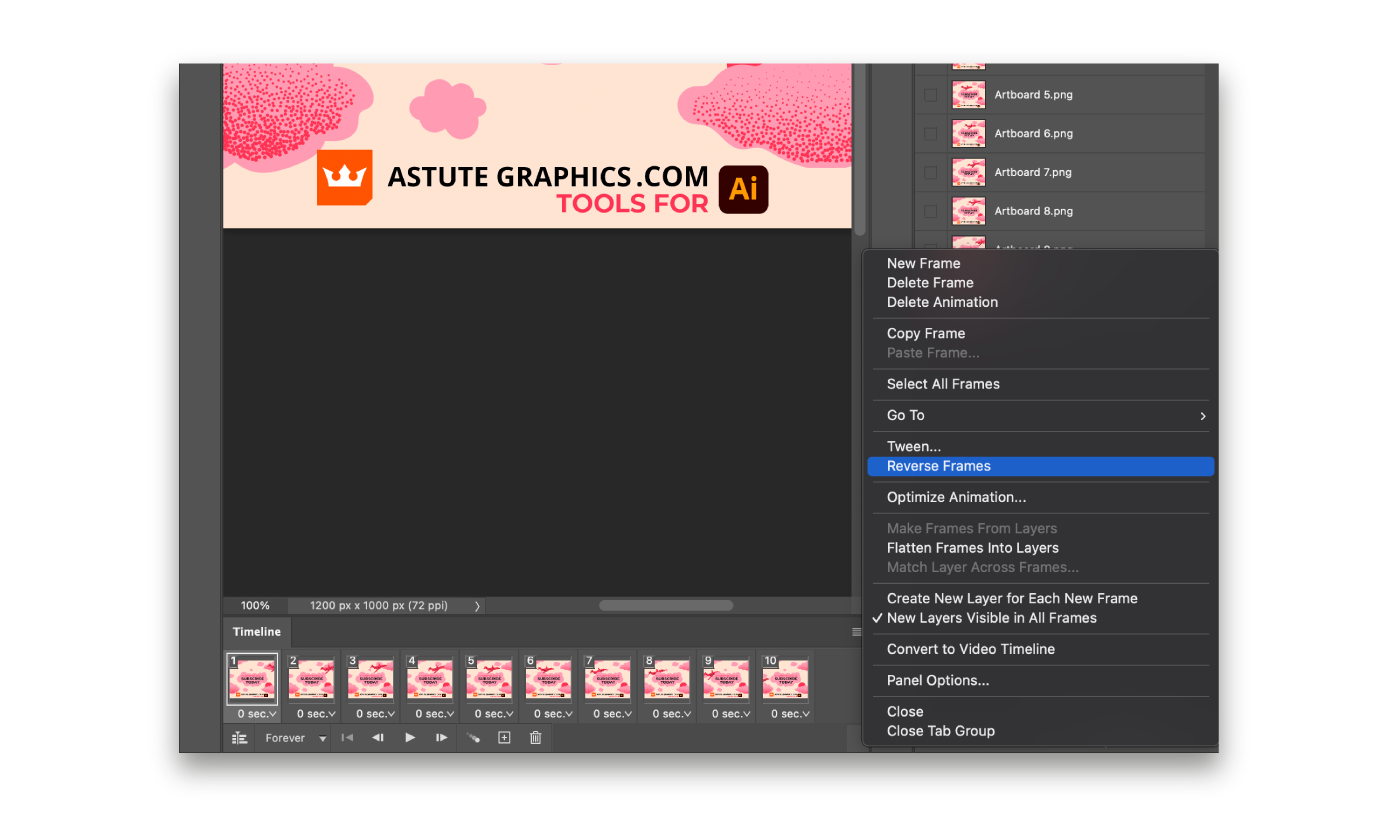
8. All of your artboards should now be in the timeline and you can use the Play button to run through your animation. If it has loaded them in the wrong direction then you may need to use the 3 bar flyout menu again to Reverse Frames
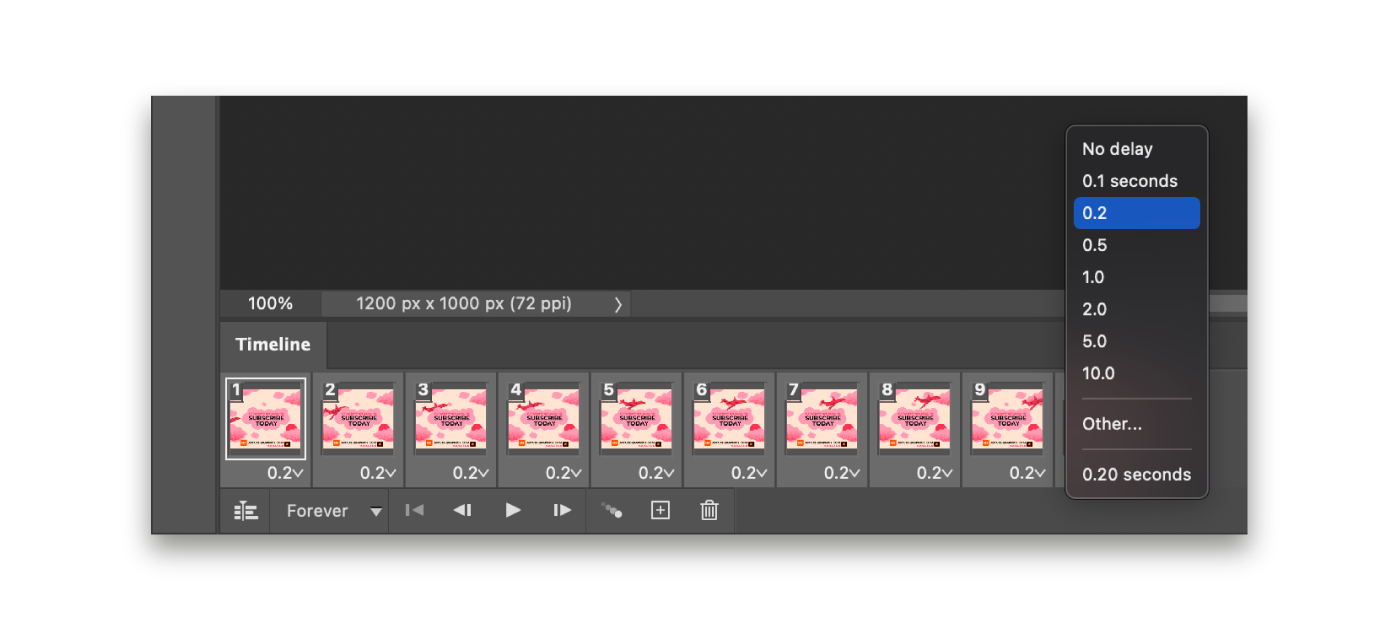
9. Select all the frames in the Timeline Panel and click the time to change the length from 0 seconds to 0.2 seconds. Be aware that the speed in the Photoshop preview will not be the same as the speed it will be shown when it’s exported. Photoshop will preview it slower.
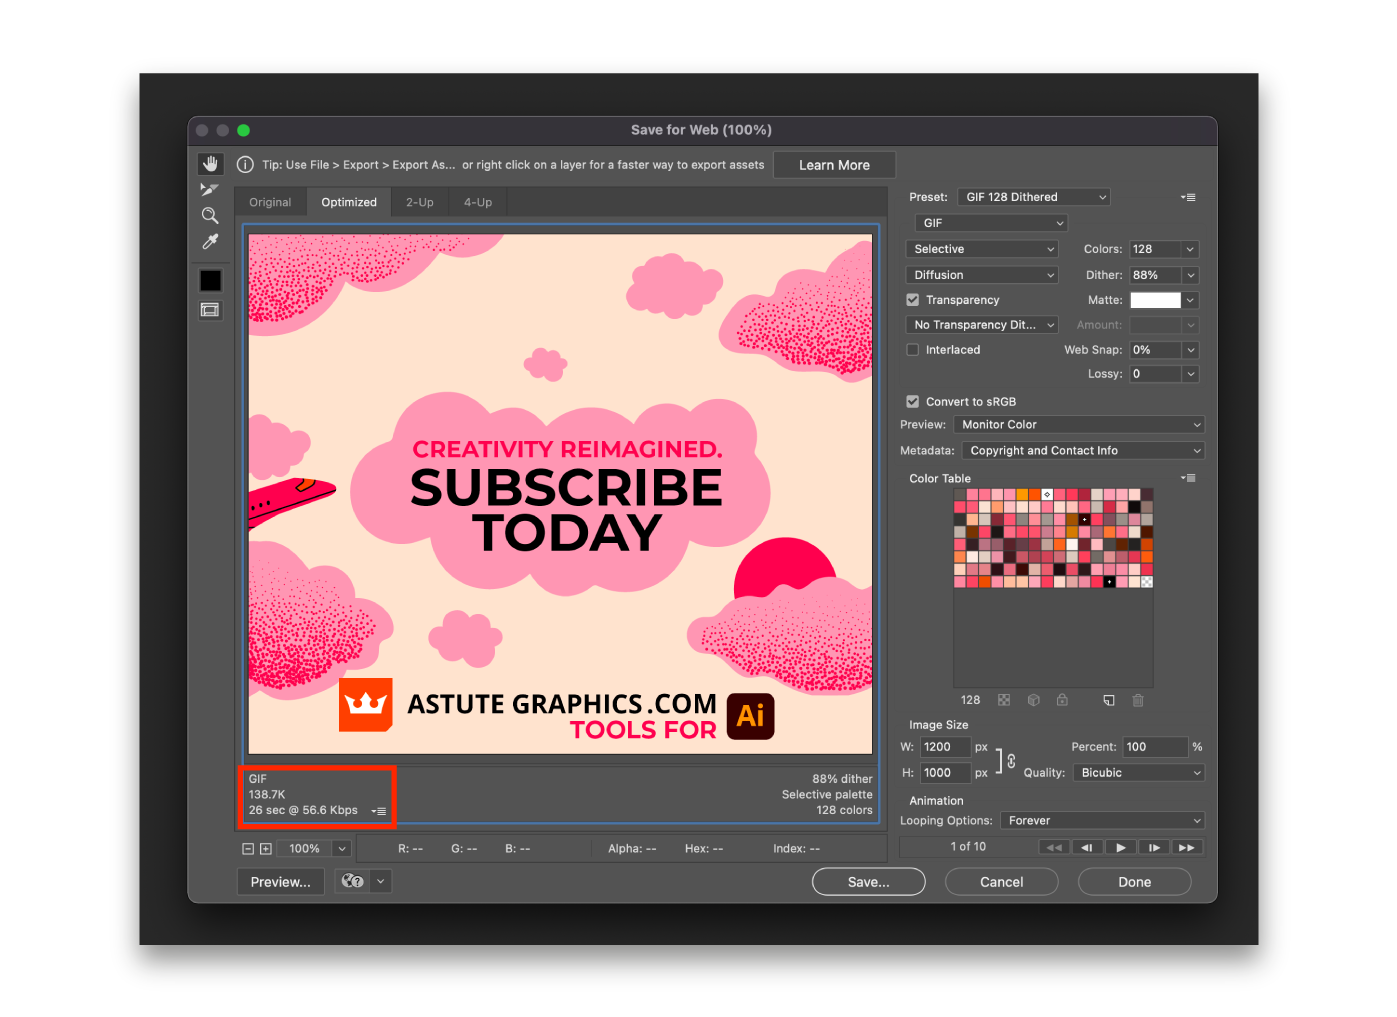
10. When you’re happy with the animation, head up to File > Export > Save for Web (Legacy)…
This will bring up the export window and you will need to change the Preset to GIF 128 Dithered. This next stage of making the gif size small enough to be used for display ads is trial and error. The Export window will give you a guide to the file size it will export in the bottom left corner. You need to be under 150KB for Google Display Ads. So you may have to reduce the number of colors you output, or adjust wether you use diffusion dither or have no dither at all.
Top tip: Save on full settings to start with, this will give you your fist GIF that you can view in a browser (right click your file and open with your internet browser), and then you can properly judge the speed and animation of your advert. You will then know if you need to swap or add frame layers into your Photoshop project.