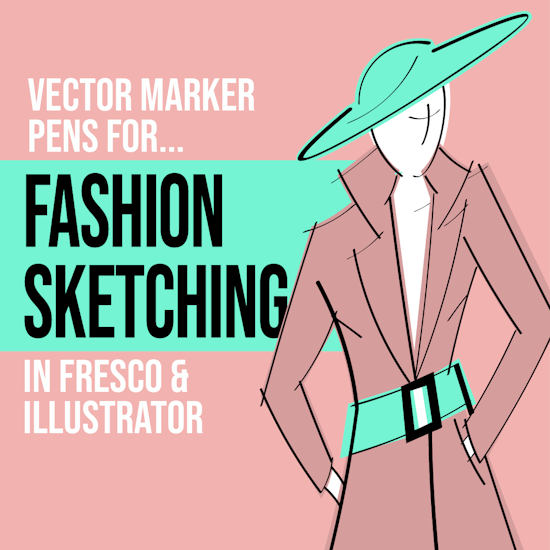
How you can draw a fashion sketch with vector marker pens in Adobe Illustrator
8 minute readIn the world of fashion, sketching has long been the foundation for bringing creative ideas to life, whether it’s for menswear, womenswear, or even specific eras like the iconic 1950s. From the initial pencil drawing of a model’s figure to the polished final illustration, the process of transforming a concept into a wearable design is both exciting and intricate. In this blog, we’re diving into the art of sketching fashion figures and how you can bring those hand-drawn sketches into the digital world.
We will start by using Adobe Fresco and vector brushes, before importing them into Adobe Illustrator to clean-up the paths using Astute Graphics' VectorFirstAid. Plus, we’ll take a look at how you can use Astute Graphics' InkFlow to redraw your sketches with vector marker pens, creating crisp, dynamic lines that breathe life into your fashion designs.
You can skip ahead to the following sections:
Fashion Sketching in Adobe Fresco
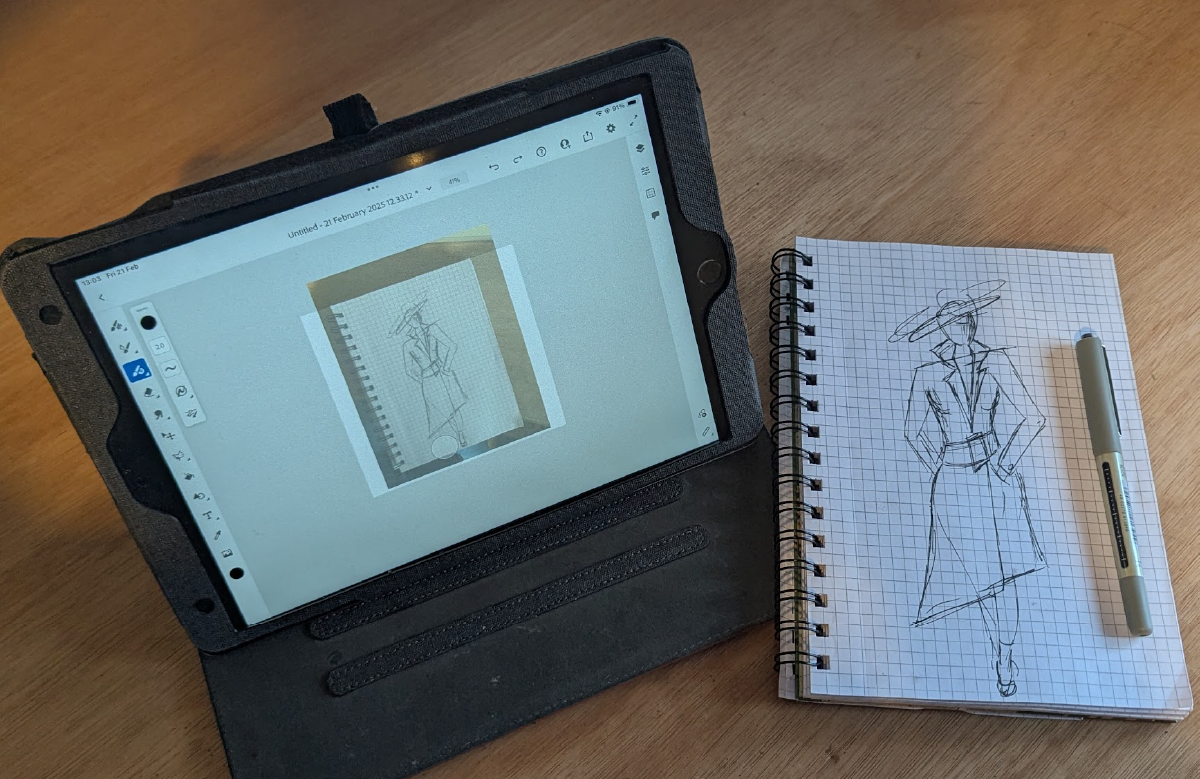
Start by launching Adobe Fresco on your iPad. Tap the "+" icon at the top left of the screen to create a new file. Select the appropriate canvas size based on your project needs. We imported a picture of our pencil sketch to trace over with vector pens. After placing the image on the artboard we changed the opacity of the layer down to 30%.
In the Brush Library, you’ll find different categories of brushes. Look for the Vector Brushes section (marked in red in the image below). Vector brushes are ideal for clean, scalable lines that won’t lose quality when resized.
Adjust Brush Size: After selecting a vector brush, you can adjust the size by sliding the brush size slider in the brush properties section (marked in red). This lets you choose a finer or broader stroke depending on your design.
Begin Drawing: Use your Apple Pencil or finger to start sketching on the canvas. As you draw, the vector brush will create smooth, scalable paths instead of pixel-based, meaning you can adjust the lines later without losing quality.
Smooth Out Your Lines: If your strokes appear a bit uneven, you can use the Smooth tool (found in the brush settings) to help smooth out your vector lines. This will help make your sketch look cleaner and more refined.
Adjust Stroke Width and Pressure Sensitivity: You can fine-tune the sensitivity and stroke width based on your preferred drawing style or the look you're going for.
Brush profile: Tapered vector brushes in Adobe Fresco have unique profiles that give your strokes a dynamic, fluid look by adjusting the width of the line based on pressure or tilt. These brushes are designed to create natural variations in stroke thickness, mimicking the effect of traditional drawing tools like pencils or pens, but with the added benefit of vector precision.

Tap the Layers icon on the right to create multiple layers for different elements of your drawing (marked in blue in the above image). This gives you more control and flexibility when refining or adjusting parts of the sketch.
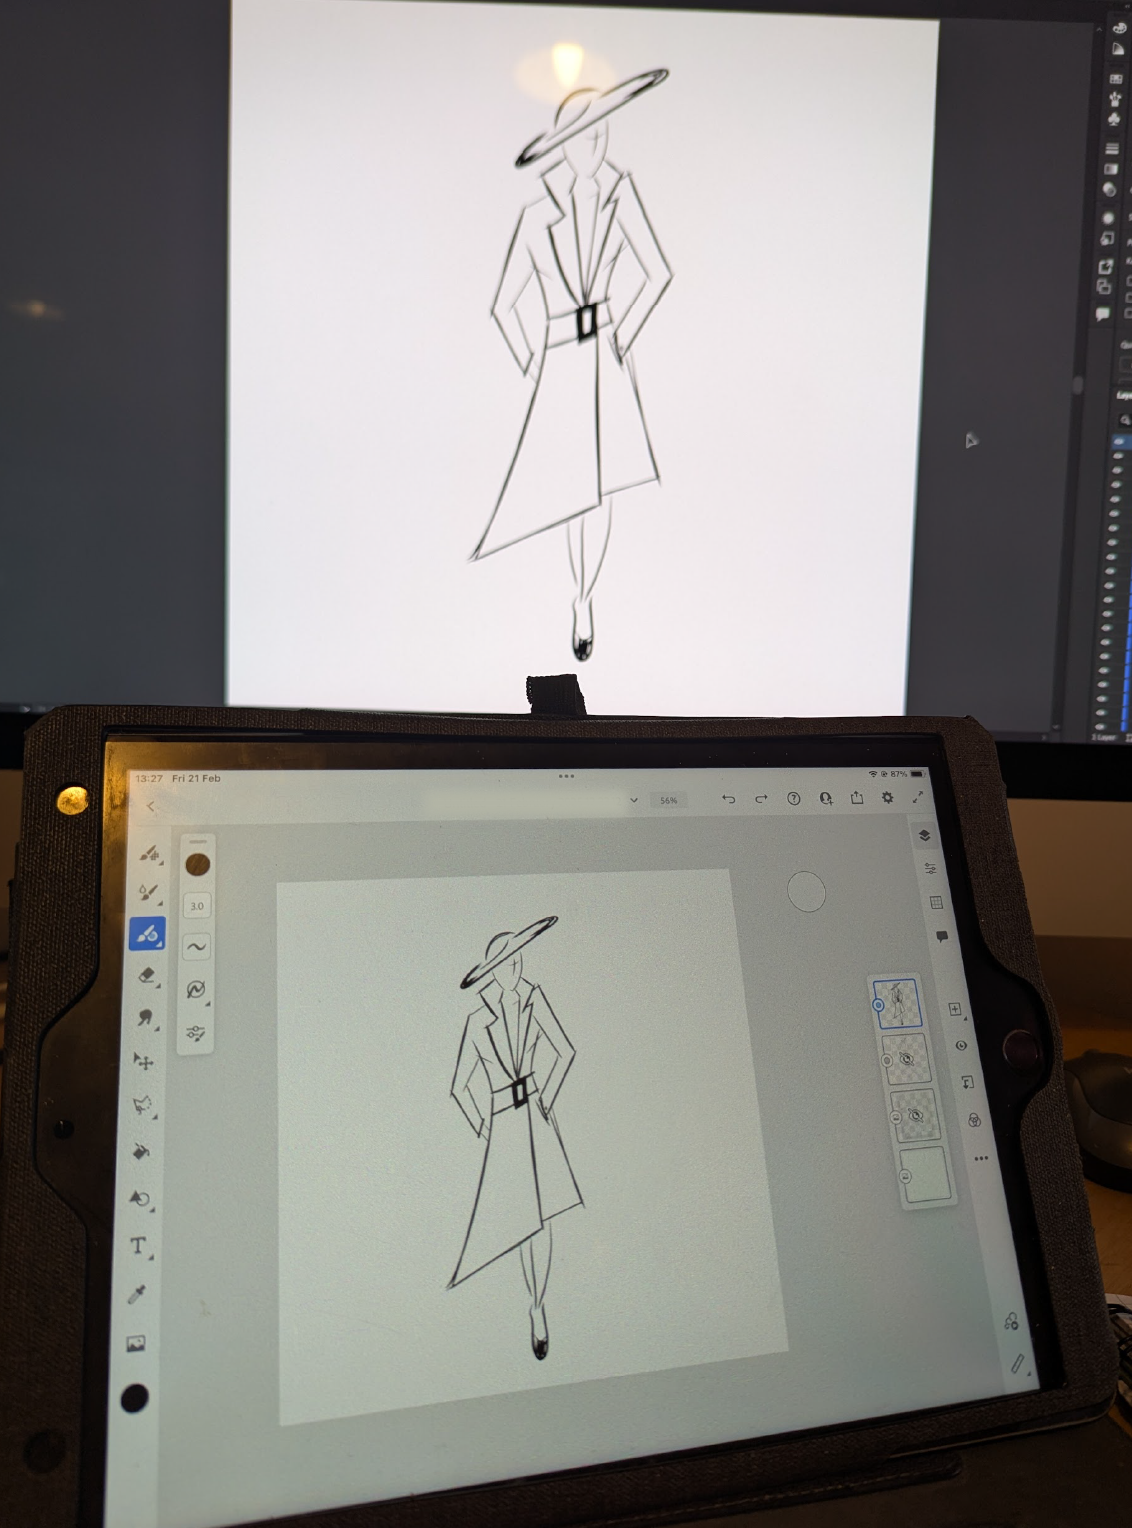
Once your design is complete, you can export it. Tap the Share icon at the top right of the screen (marked in pink), and choose your desired file format. We exported our sketch as a PDF so that it could be sent to the desktop, and loaded into our Adobe Illustrator to clean up.
Cleaning up our Fresco file in Adobe Illustrator
Astute Graphics’ VectorFirstAid is an incredibly useful plugin for cleaning up and optimizing vector artwork in Adobe Illustrator. It helps you fix unwanted points, simplify paths and resolve common vector issues, ensuring your designs are precise and clean.
Open the VectorFirstAid panel by going up to Window in the top menu and select Astute Graphics > VectorFirstAid.
How you can try VectorFirstAid for free for 7 days.
You can try VectorFirstAid for free for 7 days with just your email address. Find out more here…
Once you've opened your artwork in Adobe Illustrator and opened the VectorFirstAid panel click the Check Document button (#1 - marked in red in the image below). VectorFirstAid will highlight all the areas that could be cleaned up, like unused swatches, redundant points and unneeded points etc. Clicking the Fix All button will immediately clean up your artwork and reduce your file size (#2 - marked in red in the image below).
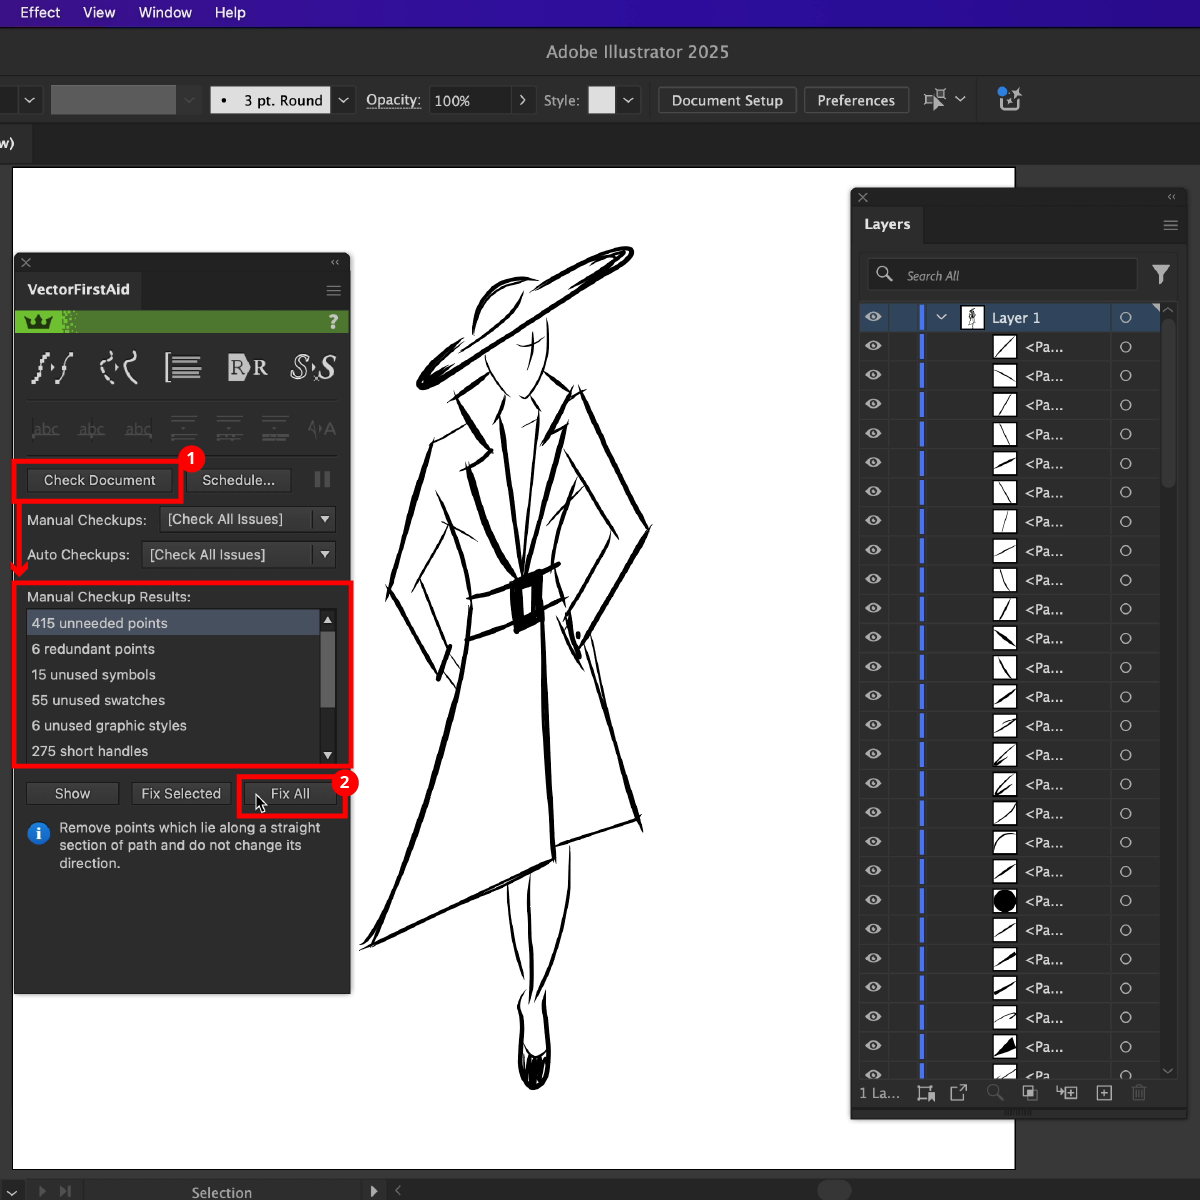
We also like to use the Super Smart Remove Points button to clean up our paths without altering the original path's geometry (#3 - marked in red in the image below). In our artwork, VectorFirstAid cleaned up an extra 1,242 anchor points with one-click.
"The Astute plugins for Adobe Illustrator are amazing time savers. I barely scratch the surface of what they can do but use them every time I open illustrator. My favorite is the VectorFirstAid. It cleans your vectors by getting rid of extra points and errors. It dramatically reduces the size of your vector files which is important for web performance."
Jim, Review on TrustPilot
How to use vector marker pens in Adobe Illustrator
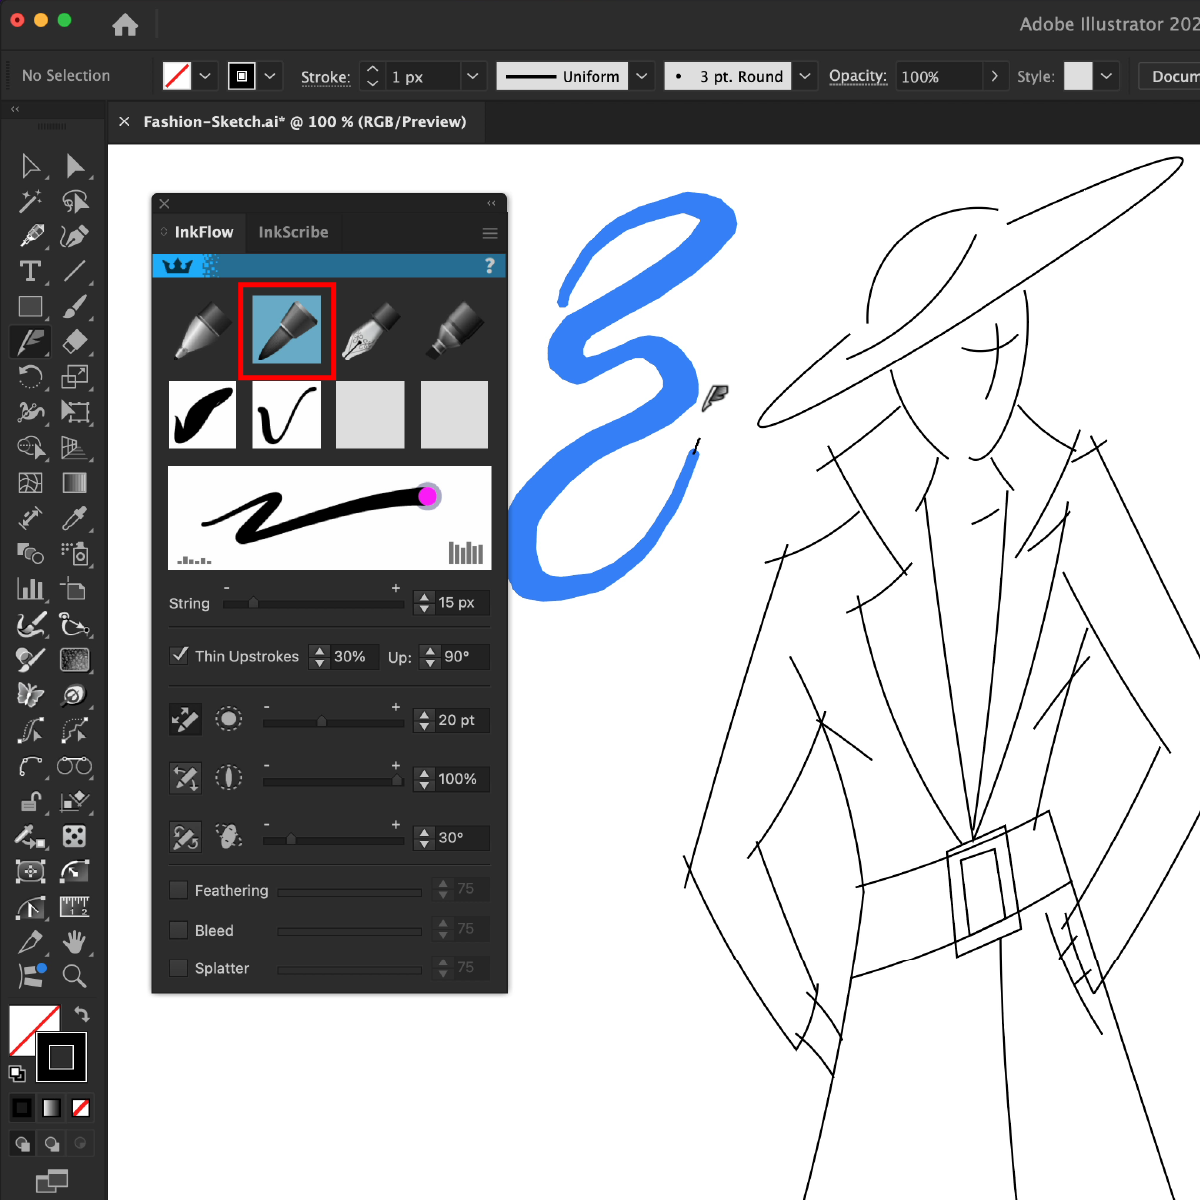
InkFlow is an Astute Graphics tool and panel for Adobe Illustrator which allows you to draw calligraphic style strokes with ink effects. InkFlow has multiple preset pens with realistic stroke effects, and has user-calibrated response and pen stabilization built-in.
We have sketched out our fashion poses with simple lines in Adobe Illustrator. Then, opening the InkFlow panel (Window > Astute Graphics > InkFlow), you can select from one of the preset pens available. By drawing out a path with the InkFlow tool, we can use the InkFlow panel to fine-tune our pen settings.
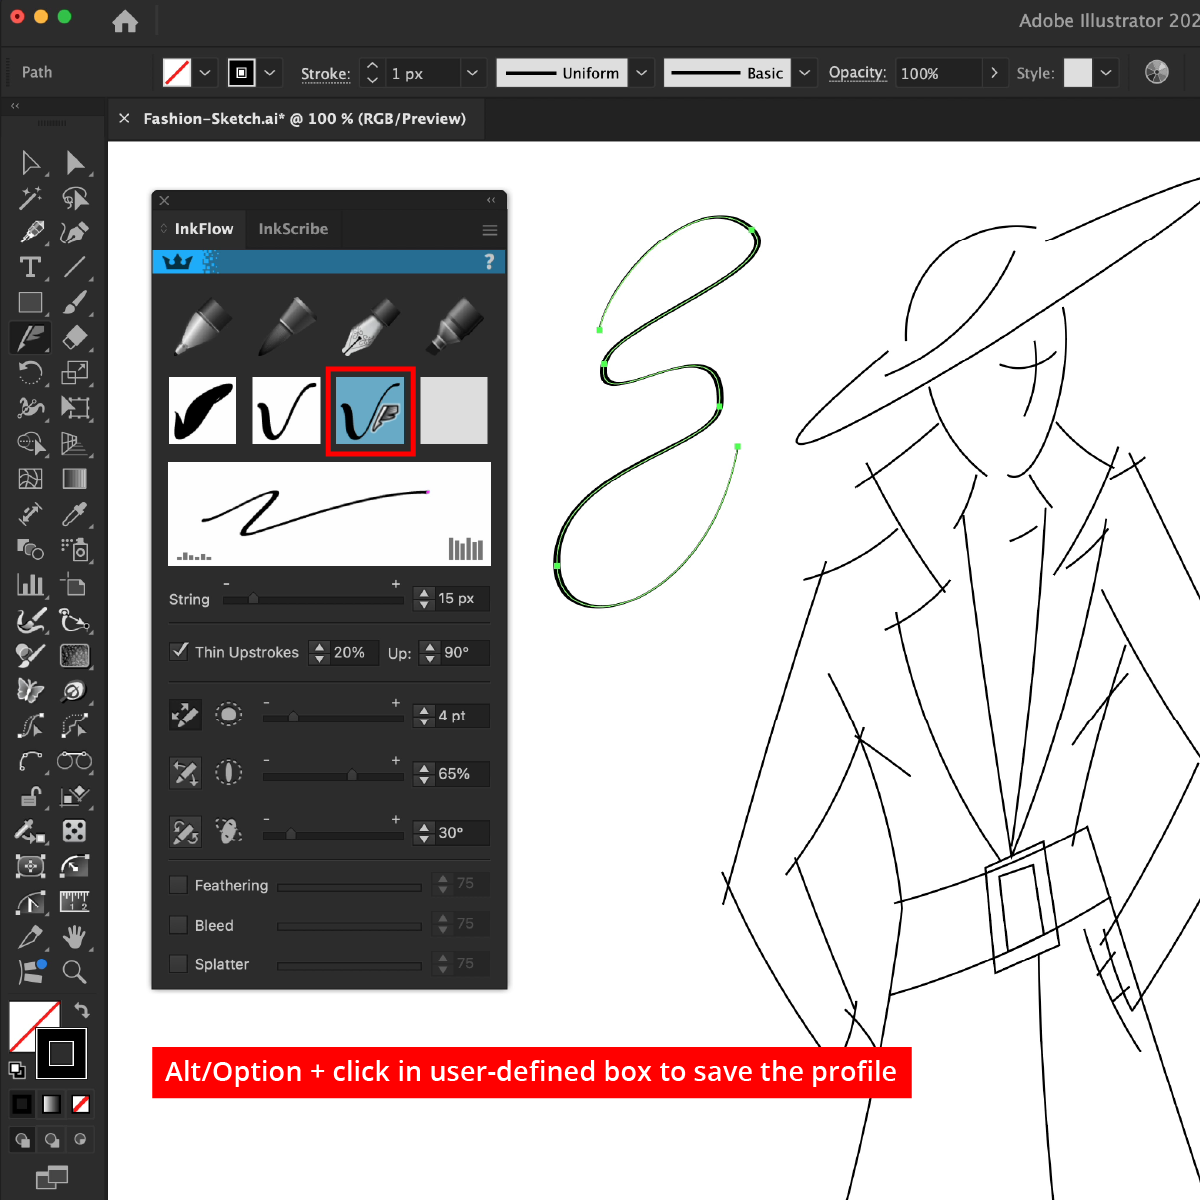
Once you’re happy, you can save this default pen style in the User-Defined squares by holding down the Alt/Option key and clicking in an empty user-defined box.
InkFlow strokes are implemented as live effects, which means they can have their parameters changed after they have been drawn. To save the InkFlow effect you have just personalized and to apply to any other path in Adobe Illustrator, we are going to save it as a Graphic Style (Window > Graphic Styles > Use the “+” icon to add a new Graphic Style).
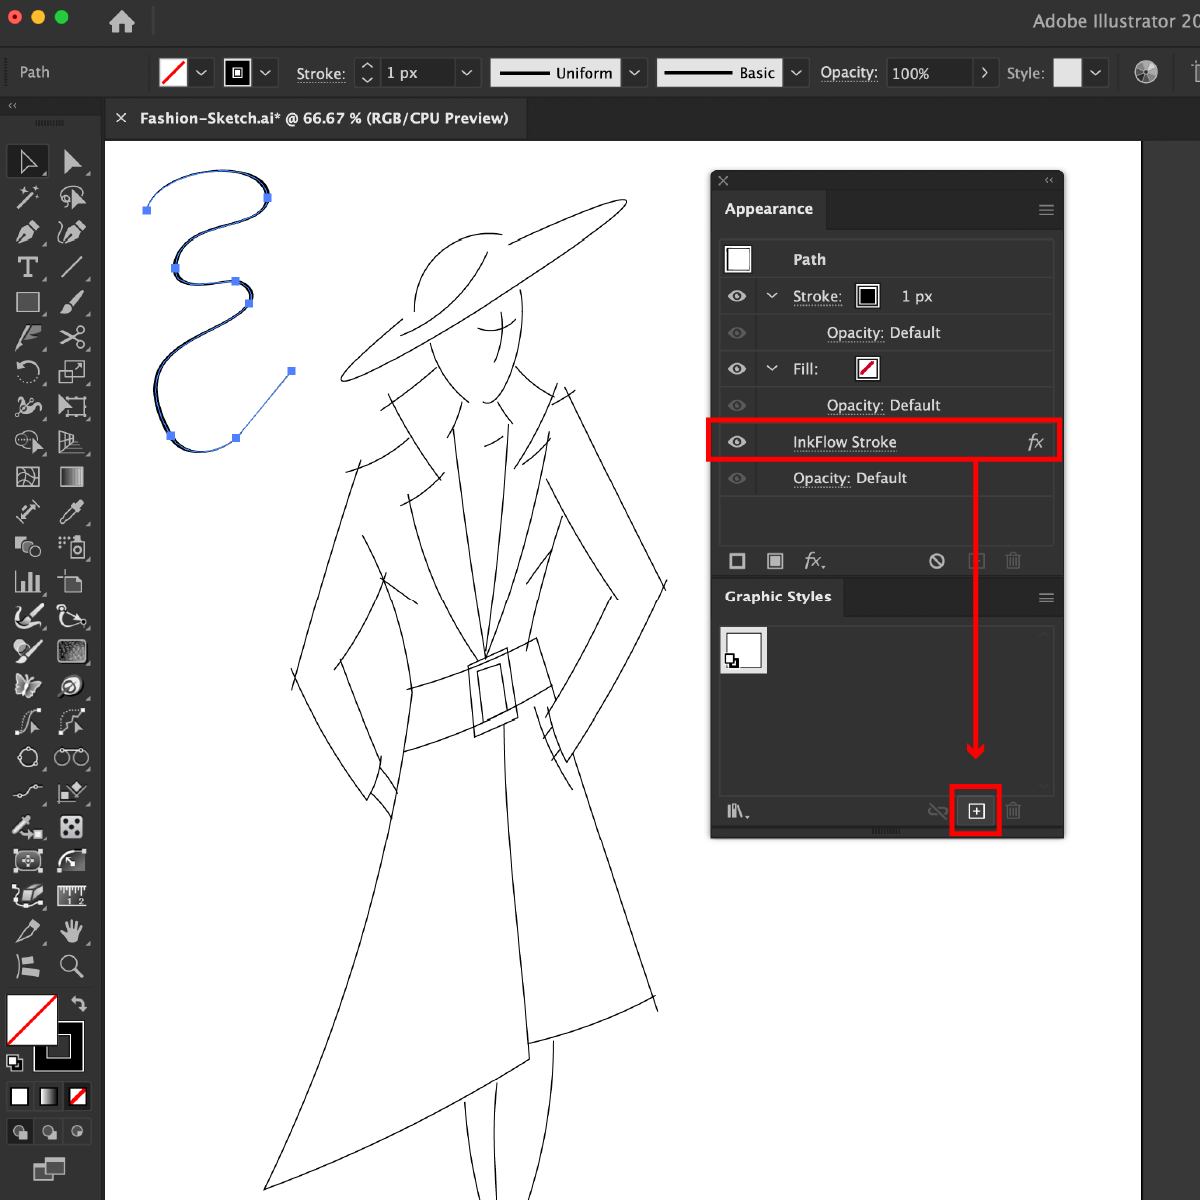
Select the other paths you wish to add this same style to and click the newly made Graphic Style from the panel.

You can continue to modify your path’s appearance using the InkFlow panel. Making further adjustments to the stroke weight, bearing of the pen, and much more.
InkFlow allows you to fully customize your vector marker pens in Adobe Illustrator. Sketching, doodling and even calligraphy has never been easier.
How you can try it for free for 7 days
You can try InkFlow for free for 7 days with just your email address. Find out more here…
Need more help on this tool? Here's the full documentation for InkFlow.