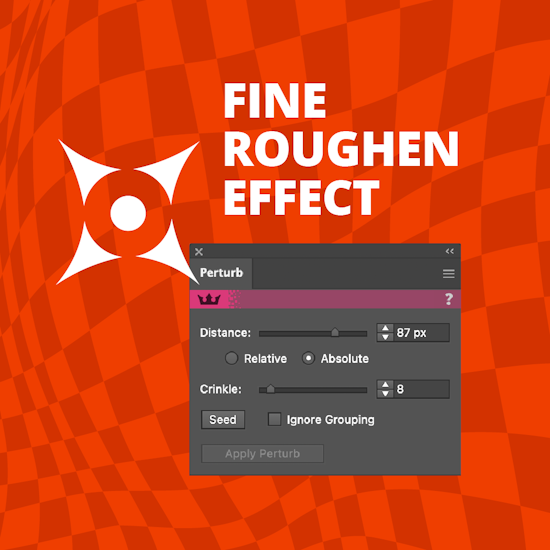
Add a super fine roughen effect in Adobe Illustrator
3 minute readDo you use the roughen effect in Adobe Illustrator? If so, you'll want to try the Astute Graphics perturb live effect for finer control!
Perturb in Illustrator is a live effect that allows you to independently move anchor points in selected art in a random manner. You can also distort vector shapes, paths and text non-destructively and flick through endless variations using the seed button.
You can start your 7 day FREE trial today (no card details required).
How to use the Perturb live Effect:
Perturb is part of the Astute Graphics collection and can be found in the Randomino Plugin. It’s easy to start a free trial, and you also get 100+ other tools and features to increase your speed and creativity.
To find the Perturb panel, make sure you have Randomino installed and head up to Window > Astute Graphics > Perturb.
Select your objects, this could be a single object or a group of objects.
Click the Apply Perturb button in the panel to start using the live Effect.
Groups of objects will change as one, unless you select the Ignore Grouping option, then Perturb will distort them individually.
Perturb has controls for adjusting the maximum distance, and each anchor point will be shifted from its original location.
Relative Percentage: Sets the maximum distance each anchor point will be shifted as a percentage of the size of the original object. This offers a proportional adjustment as it moves the anchor points in a random manner relative to the size of the object.
Absolute Amount: You choose the maximum value you want the anchor points to be randomly shifted by, regardless of the size of the object. The value is specified in the current document units, providing precise control over the amount of shift. You can adjust this setting either by using a slider or by typing a specific value into an input box within the Perturb panel.
The Crinkle parameter controls the extent to which points that are near each other have their movement linked. It’s determining the amount of detail in the distortion. A lower Crinkle value will result in anchor points moving more similarly, preserving fine details within the shape while higher values enable greater overall distortion.
Once you have chosen your parameters you can use the Seed button to cycle randomly through more options.
As this is a live Effect it is non destructive, so you can continue to make adjustments using the panel, or you can remove it entirely either with the Flyout menu option or by turning it off in the Appearance panel. Or you also have the option to expand the appearance to make your change permanent by selecting Object > Expand Appearance.


