How to create a stipple overlay in Adobe Illustrator
2 minute readInstantly apply a non-destructive stipple live effect to any new or old artwork including vector and text with the Stipplism plugin.
How to create a stipple overlay with Stipplism:
🍁 Select the object you’d like to add a stipple effect to.
🍁 Duplicate the object exactly on top of the other with ⌘ / Ctrl + C (copy) then ⌘ / Ctrl + F (Paste in Front).
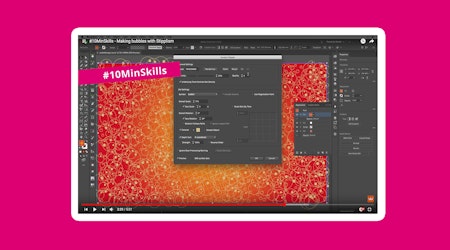
🍁 With the top object selected navigate up to Effect > Stipplism > Stipple…
🍁 In the Stipple popup window, change the color of the stipples by clicking inside the color picker box.
🍁 Reduce the size of the dots in the Size field.
🍁 Click on Preview check box to preview you Stipple Effect (this may take a little processing time if you’re making 1,000s of stipples).
🍁 Adjust the overall density in the top Density percentage field.
🍁 You can also reduce the Roundness of the Stipples (1 lowest, 100 roundest), and improve the level of Detail in the dropdown.
🍁 When you’re happy you can click OK to save the Effect.
🍁 To go back to the Stipple Window and adjust the settings, with your object selected, navigate to the Appearance Window and click on Stipple...