Patterns & polka dots with Space Fill in ColliderScribe
6 minute readSometimes you gotta fill a shape with some texture or pattern quickly without wanting to fuss over the Pattern Tool. This is a versatile solution and clever way to break up a solid flat shape using the Space Fill Tool in ColliderScribe.
Designing with ColliderScribe

There’s an ever-growing list of checkboxes I’m trying to mark off with every illustration. Things like value studies, extreme proportions (make sure you try out a GIANT head, Kirk.. Now try a TINY head), line for details, etc etc. Whatever your list is that you are always trying to remind yourself to practice I know that one big one for me that I often forget is pattern.
Pattern is a great way to break up a shape and either subdue it into the background, or bring it forward with a loud wacky pattern. For me and the style I work in, I enjoy a seemingly chaotic and quick approach to filling a shape with smaller shapes.

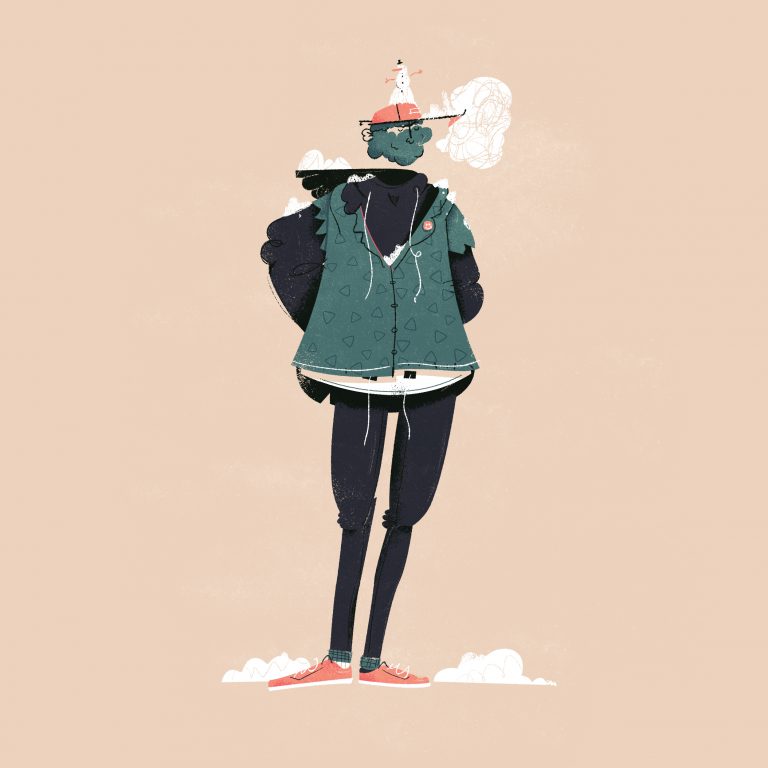
Here almost every circle, or dash was generated with Space Fill
Astute Graphics has made a tool inside of the ColliderScribe plugin called Space Fill. And I tend to think it’s overlooked too often as a powerful tool for patterns. While Adobe’s built in pattern tool and this Space Fill tool could step on one another’s toes, I find them to compliment wonderfully.
I’ll just quickly outline 3 ways I use the tool in my illustrations with some screenshots and videos. It’s a really easy tool to use and even easier to experiment with to get some cool weird results. Before we get into that, here’s a few illustrations that I’ve recently made that have in one way or another used the Space Fill tool.

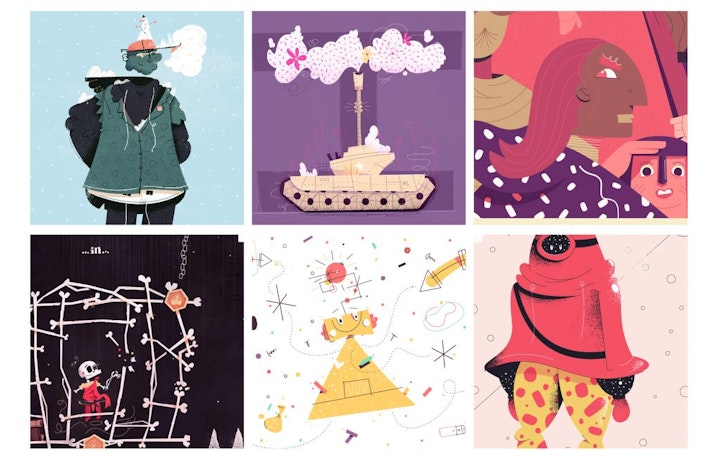
Some examples of my art using Space Fill
Tutorial – Space character
Screen recording is always much easier for demonstrating, so if you can watch the video below, I’d recommend it. For people that want to just see the screenshots and explanation, I’ll do my best here now.
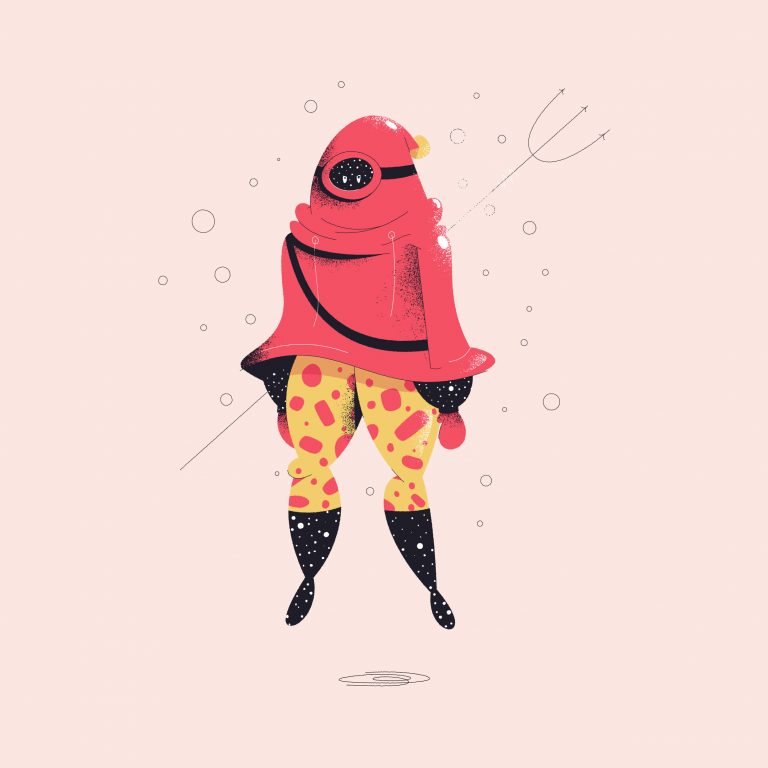
For this floaty character, I wanted a sense of cosmic makeup. Perhaps they are made of black holes, or who knows, maybe the character just has some nice polka dotted gloves on. Either way I wanted some 40 circles randomly sprinkled throughout some shapes, without looking repetitive, but I certainly didn’t want to take the time creating 40 circles.
First part of the video, creating the circles
So, I started with my base shape, made the shape I want to fill it with (white circle) and placed it nearby. Ultimately it doesn’t have to be in any particular spot, since it’ll get moved anyway.
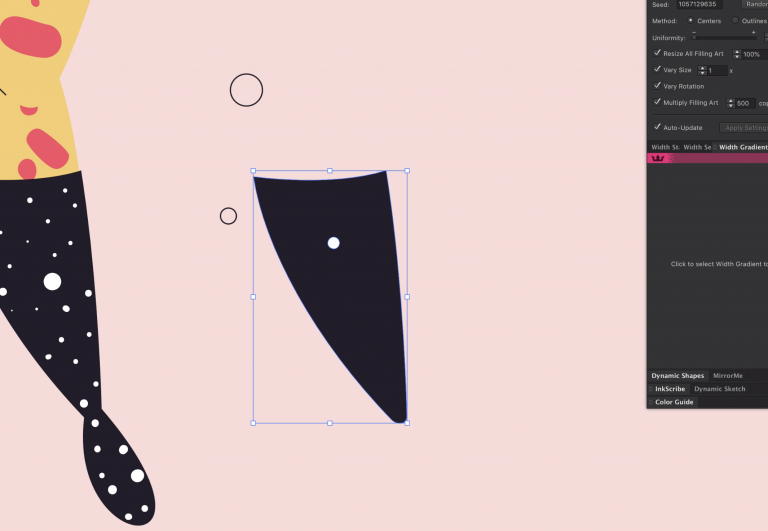
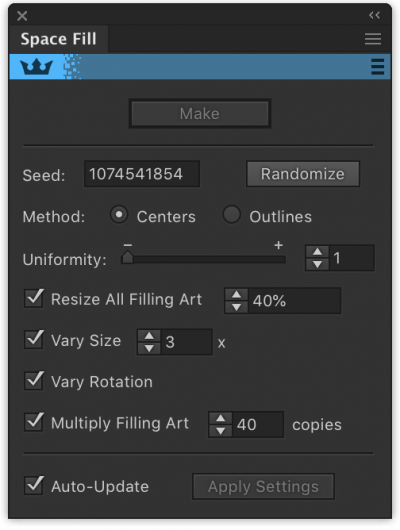
Select the two shapes and then open the Space Fill Panel (Window -> ColliderScribe -> Space Fill Panel). The fun part here for me is trying to guess the perfect numbers before clicking ‘make’ but for most I bet the fun will be watching it change as you update the parameters.
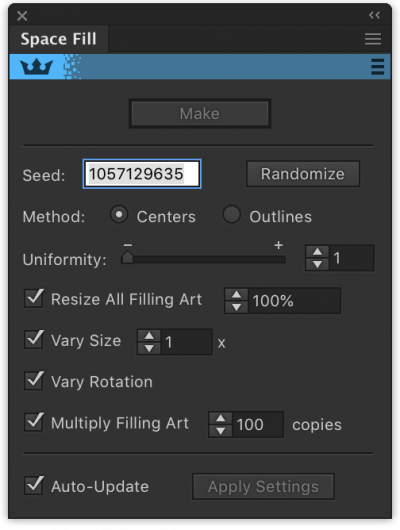
For this, like I said, I knew I wanted about 40 spots, and I wanted the size of each circle to vary considerably. So I typed in 40 for the number of copies, and 3 for the vary size, and gave it a whirl.
Cool, not bad. But I think these are all way too big. I want to operate on a much smaller scale. Now I could ‘release’ this space fill, make the source circle smaller, and then do it again, or I could just “Resize All Filling Art” to about 40%. This is easier all around.
Okay now I’m happy. This creates a complex shape that when moved, moves both the pattern and the base shape together. If I wanted to separate the two (perhaps to precisely change a dot or two that looks out of place) I could “Expand” the artwork and it would make all those shapes.
Pushing it further
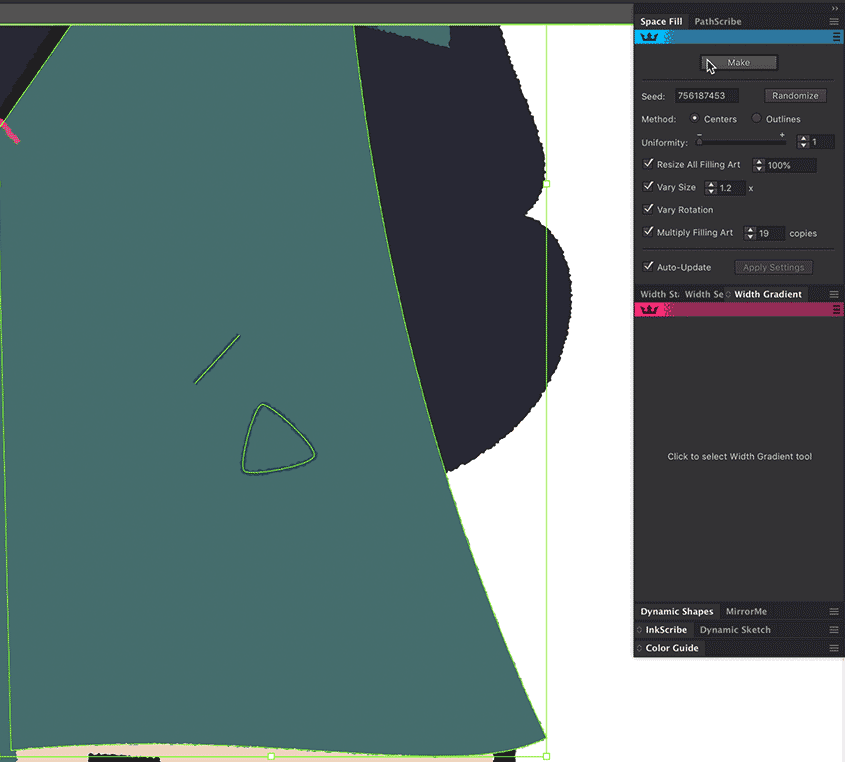
Alright, so we know how to do basic shapes inside a larger shape, what about if we wanted more than just one little circle to fill the boot with? Perhaps in this case with this jacket-wearing fella, I wanted his coat to have triangles and lines in it. Let’s see if we can’t get this all in one fell swoop.
What we can do is simply create two objects that we will want to fill the shape with, group those together, then select that and its holding shape together, and do the same process. The only thing we did differently is we made a group first, then used Space Fill on the group with the holding shape.
Shading
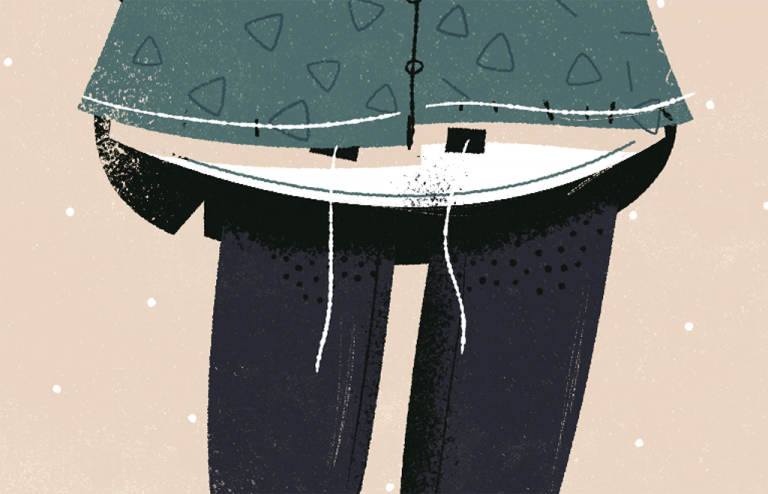
Okay. Lastly, for this jacket-wearing snowy character, I’d like to add some sort of stippled shadowing to the leg area. What I’ll do is create once again a holding shape, but this time make it have no stroke or fill, so it’s acting as a clipping mask I suppose. I’ll make a black dot (the color of my shadows) and then combine the two. Watch below:
The trick here is to pack in a lot of shapes if you want a dense (dark) stippled shadow, and lightly if you want it lighter in value — just like you would with a halftone screen, but this creates a more playful result, I think.