Adding vector textures to your art in Adobe Illustrator
4 minute readThe Reprofile tool (part of the Reform plugin) can add a vector ‘profile' or extra geometry to an entire path, or to a portion of a path. It quickly and easily allows you to add vector textures to your artwork without the need for brushes. In this quick tip tutorial we are going to show you how to get started with the Reprofile tool and panel from Astute Graphics.
How to find Reprofile
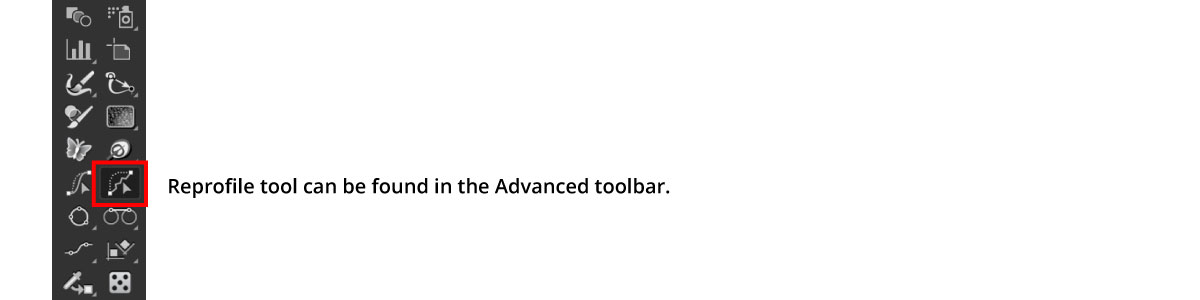
The Reprofile tool can be found in the Advanced Toolbar (Window > Toolbars > Advanced). Selecting the tool will automatically open the panel, but if you need to locate it you can find it under Window > Astute Graphics > Reprofile.
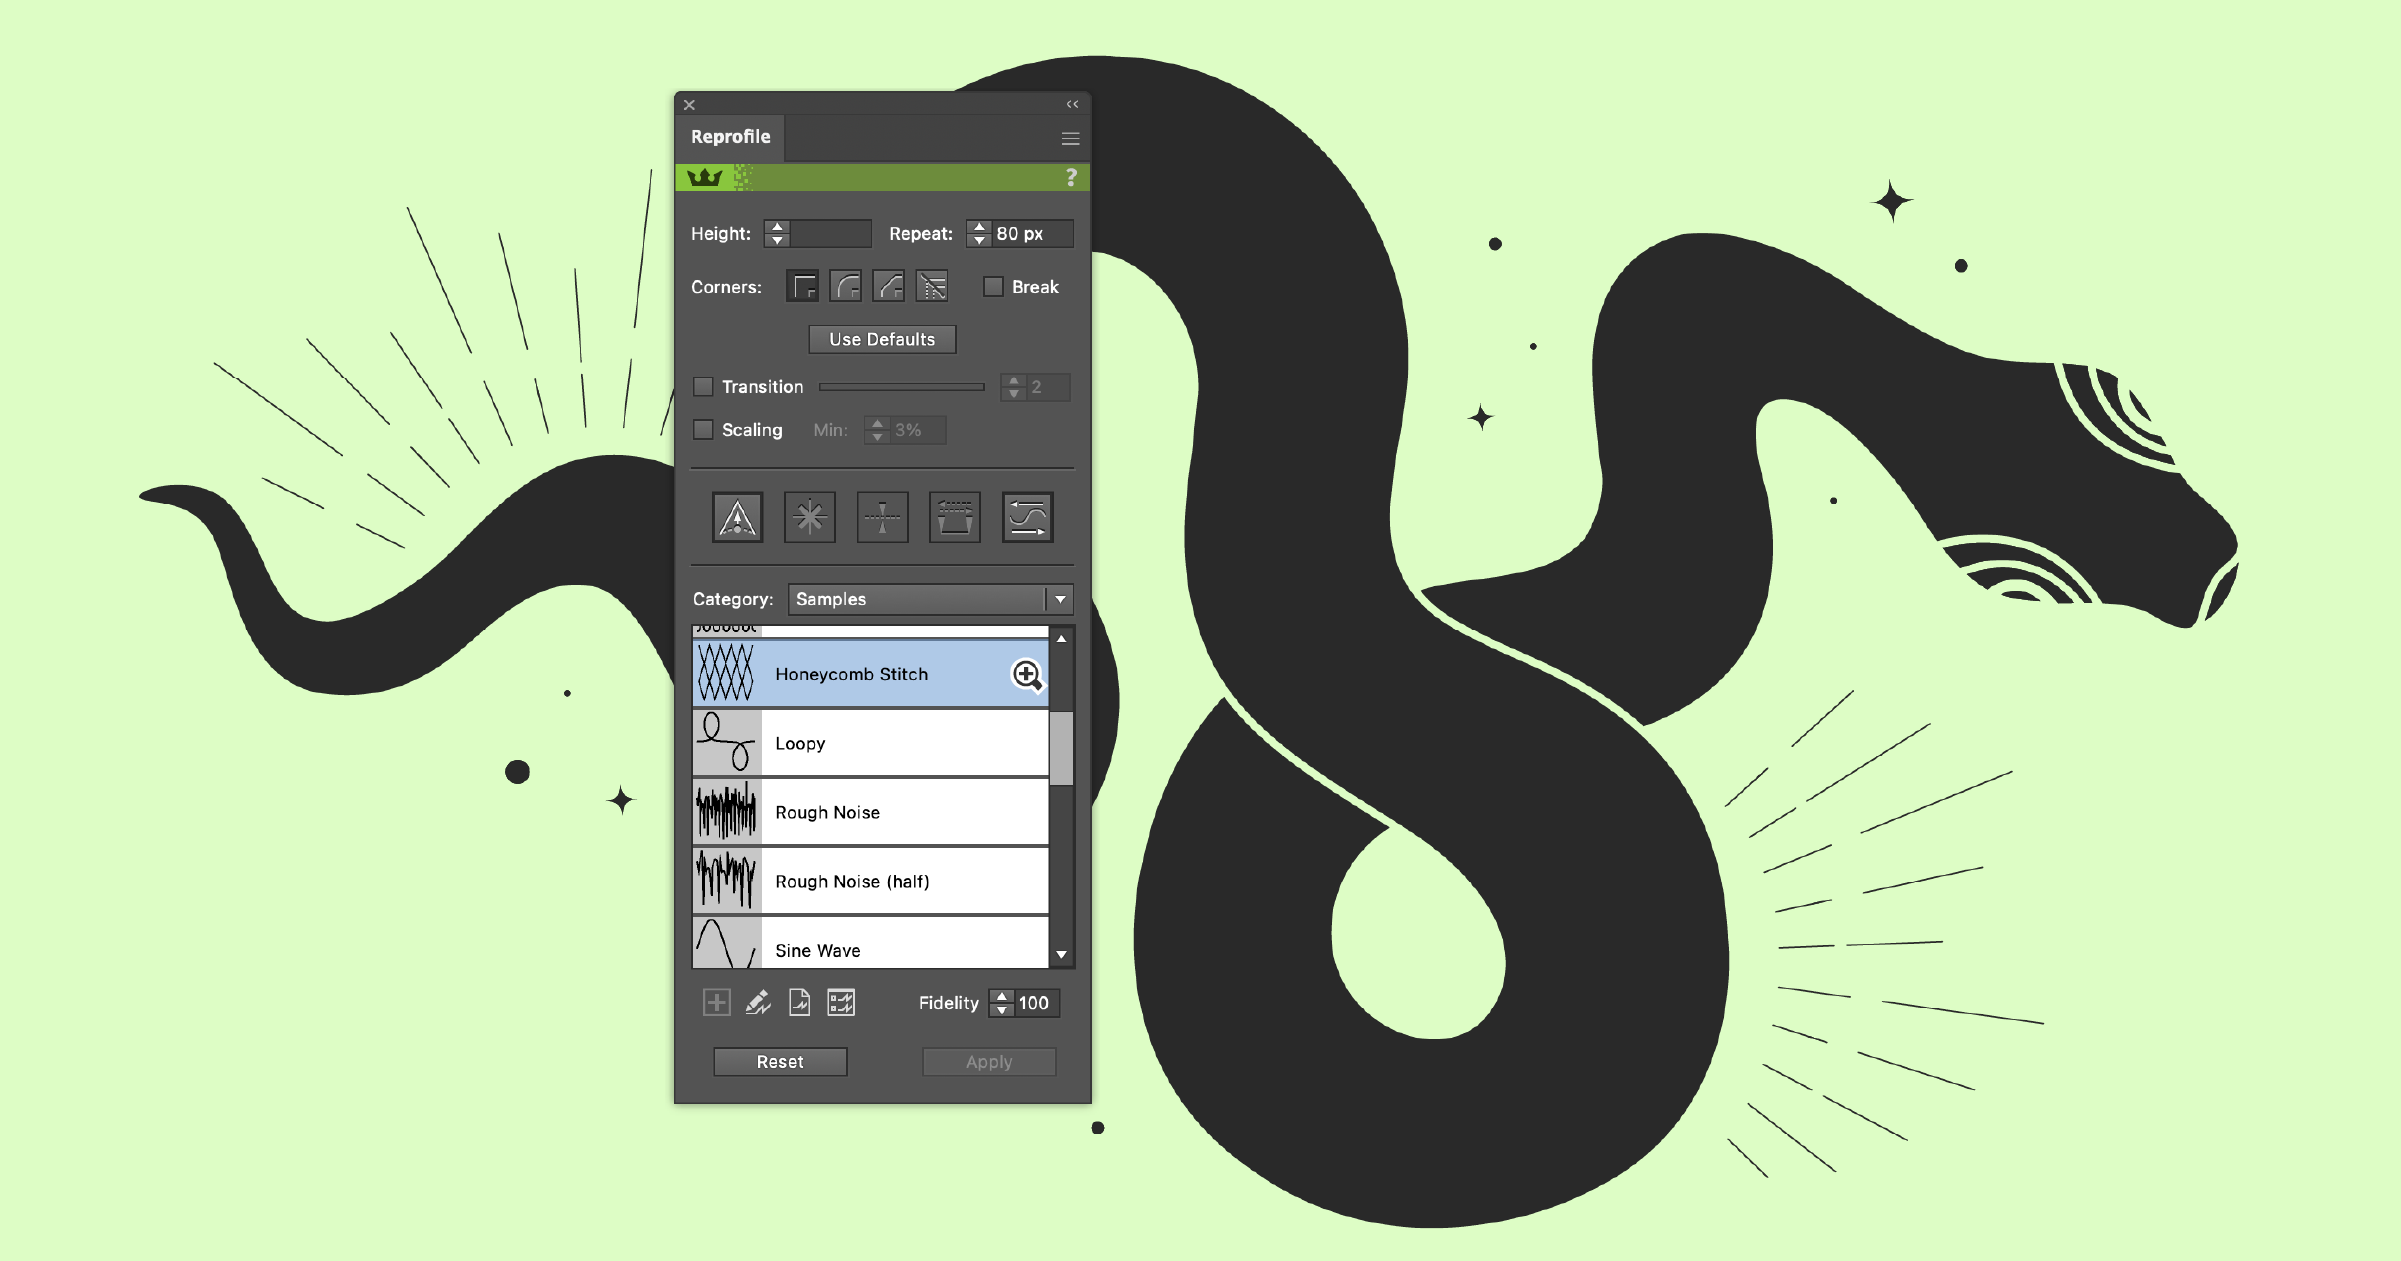
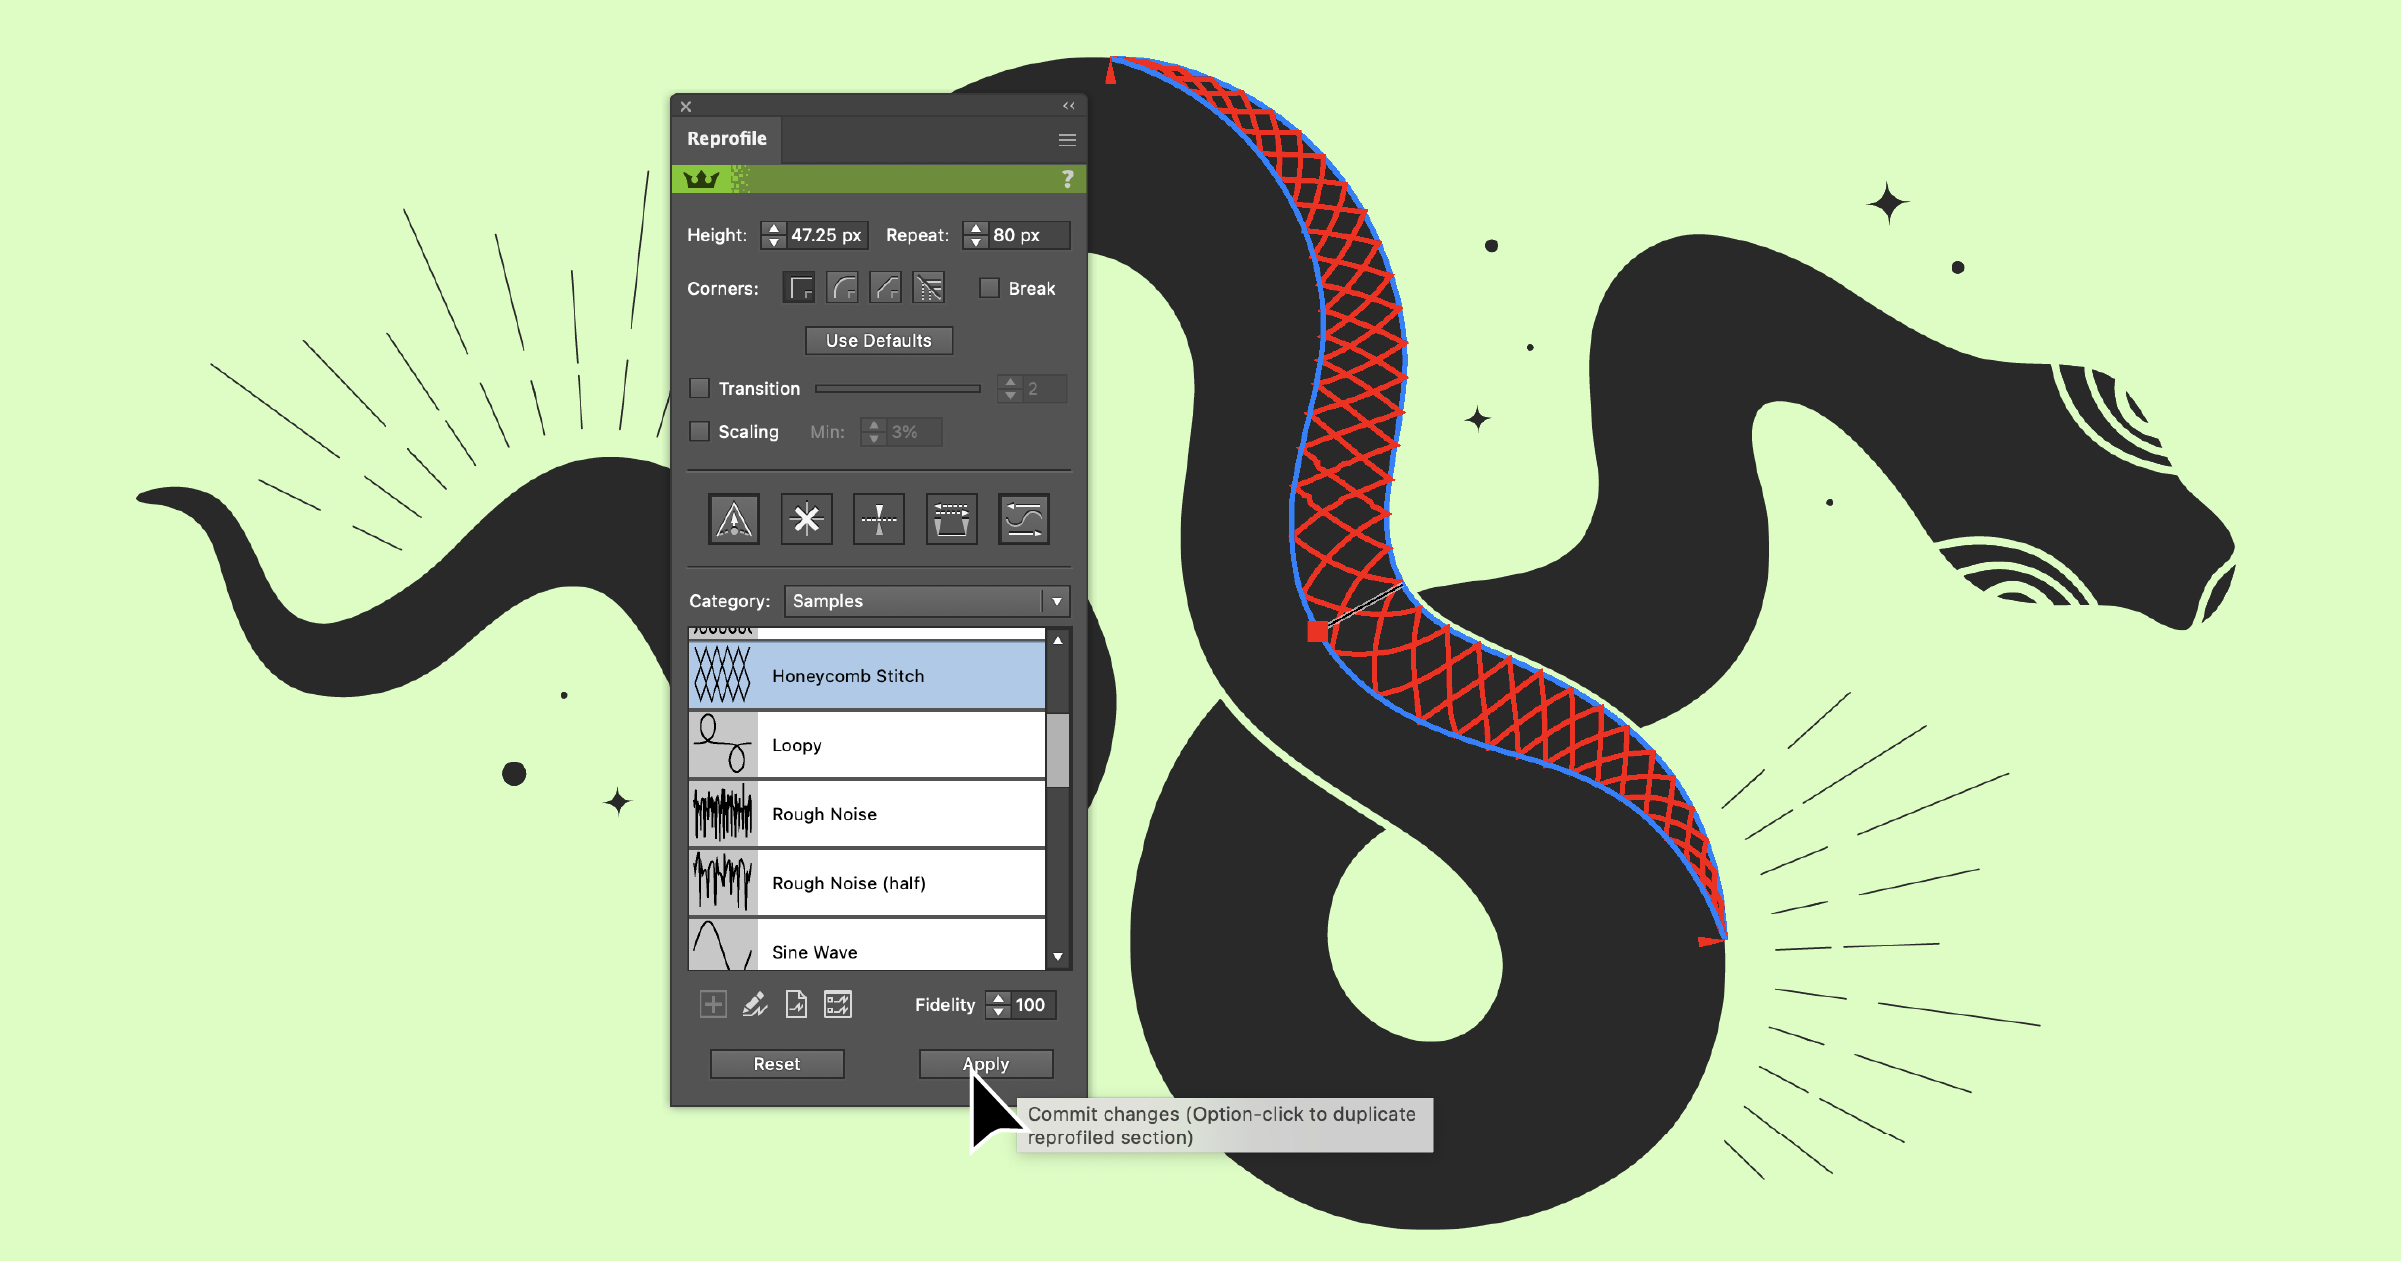
The Reprofile panel comes with a selection of sample profiles to get you started. We are going to use the Honeycomb Stitch profile to simulate scales along our snake.
Select your profile, click, drag
Once you have opened the Reprofile panel, use the category dropdown to select the Samples pack. You can use the preview window to explore the available profiles.
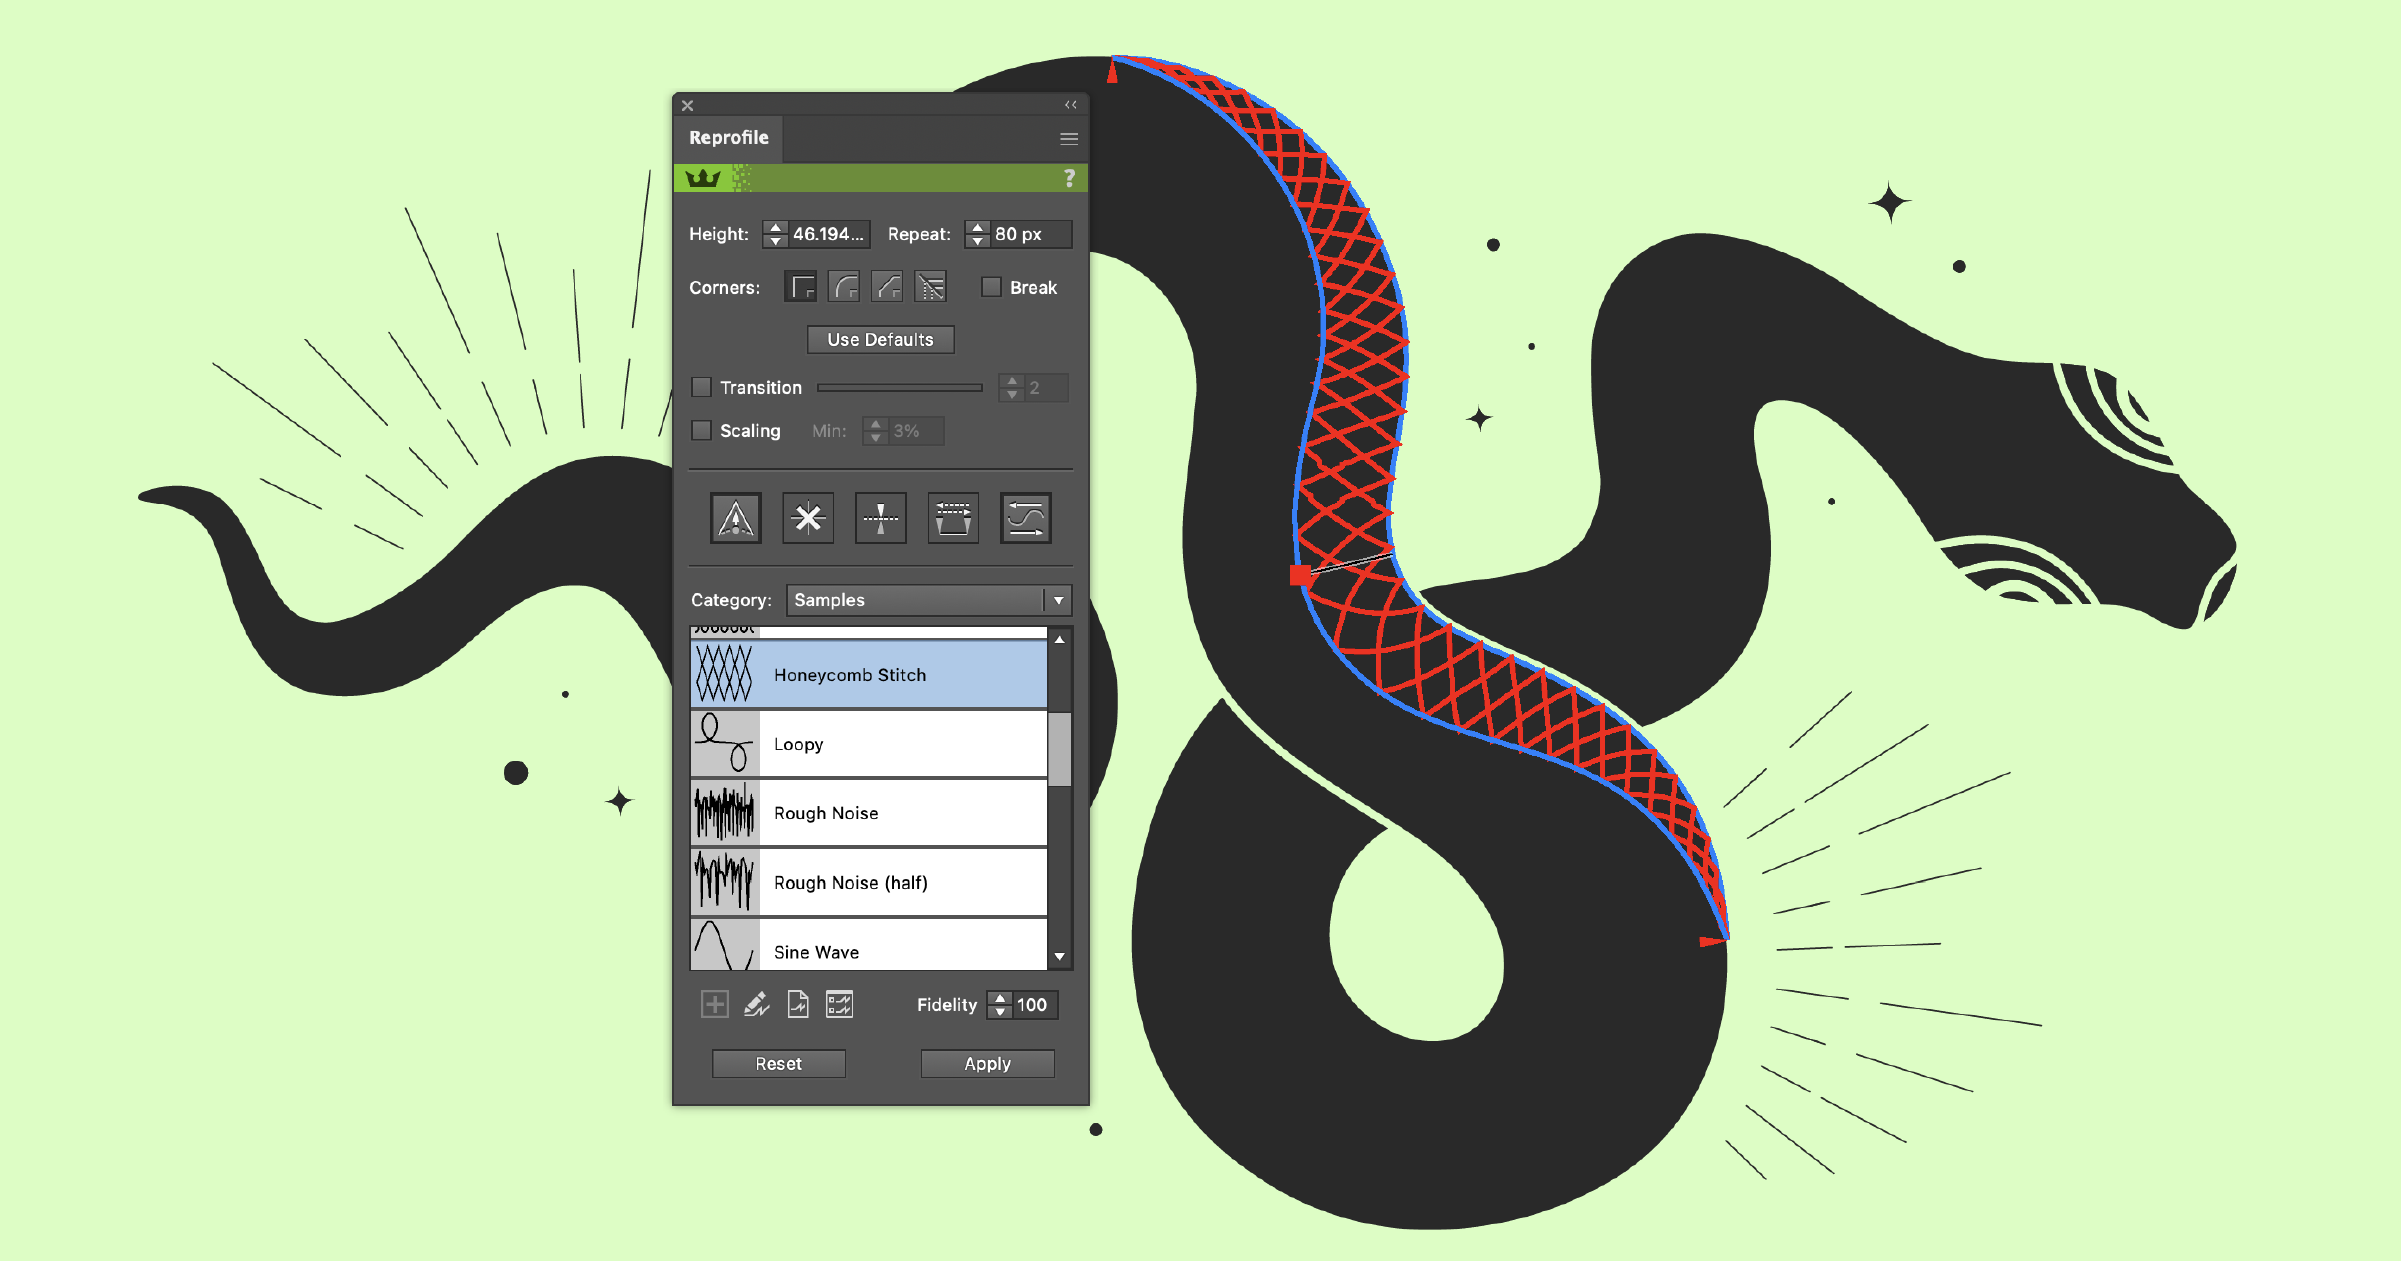
Select the Honeycomb Stitch, and as you start to hover over your path, Reprofile will annotate in blue and red* the portion of the path that you can reprofile.
Drag out your first marker to preview the profile over your artwork, no changes will be made to your artwork at this point. You can add more markers to manipulate the height of your profile. To adjust the repeat of the profile pattern, use the Repeat value field in the Reprofile panel.
To remove a marker simply double-click on it, or select it and use the Delete Selected Marker button in the panel.
The red delimiter triangles symbolise the start and end of the sculpting path, and you can drag these further or closer together to affect more or less of your path.
*The annotation colors can be changed in the Reprofile Preferences (Panel flyout menu > Reprofile Preferences).
Applying the profile
When you want to apply this new profile to your path, you can use the Enter/Return key on the keypad, or the Apply button in the panel.
If you want to add this profile as a completely new path while still keeping the original, you can use Option/Alt + Enter/Return key. Alternatively, you can hold down Option/Alt when clicking the Apply button. This will retain the original artwork, creating the reprofiled section above it.
Making changes
After you have applied your new vector path, you can select it and add a fill color, or adjust the stroke color and weight. To remove the path or make any changes to its position and height, you will need to use your Undo command (Ctrl/Cmd + Z) to undo the change, then repeat the process above.

Profiles you can access in your 7 day trial
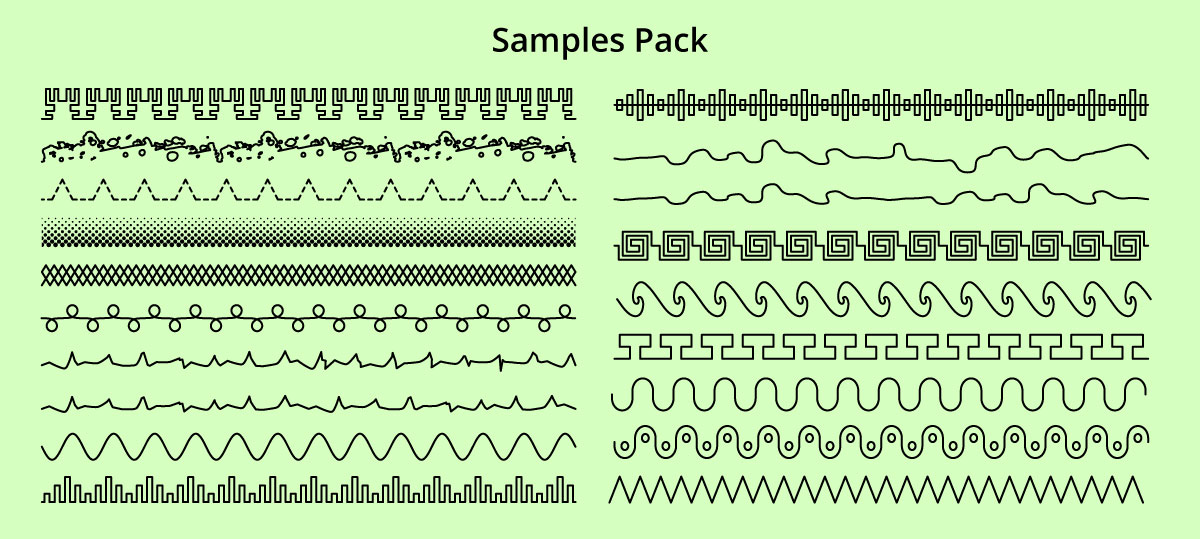
The 7 day free trial from Astute Graphics gives you access to the Samples Pack of reprofiles. This pack includes 19 profiles for you to test including different stitches, halftones, waves and swirls.
How you can try it for free for 7 days
Reprofile is part of the Reform plugin which you can try free for 7 days with just your email address. Find out more here…
Already a subscriber?
Ensure you have the Reform plugin installed through your Astute Manager, then you can find the Reprofile tool in the Advanced Toolbar (Window > Toolbars > Advanced).
Need more help on this tool? Here's the full documentation for Reprofile.


