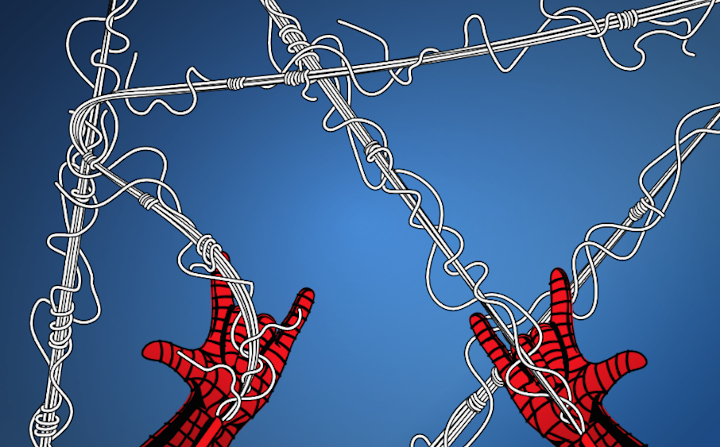
Create Spiderman’s web, just like in the comics
6 minute readIn this article, I’ll be showing you how to draw spider mans web, the way it looks in the comics.
The techniques I’ll be showing you are based on the techniques used by the original comic artists, but adapted to a digital workflow in adobe illustrator. We’ll also be going over the Astute Graphics Opacity Brush Tool (part of the Texturino Plugin) to make things go a bit more smoothly.
Setting up your workspace.
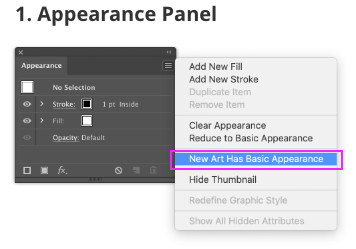
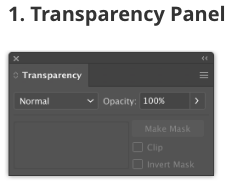
There are a couple things that you may want to do first. Open your appearance panel and make sure that ‘New Art Has Basic Appearance’ is unchecked. This will make it so when you are drawing Spidermans web, every stroke keeps the same appearance. If you don’t have access to the Opacity Brush in the Texturino Plugin, you’ll want to have your transparency panel available also.
Creating Your First Web Strokes
The first step is to create a simple stroke using the default illustrator settings. (You can hit D on the keyboard to reset the appearance). Once Your stroke is created, add an additional stroke and give it a white color. Make sure the white stroke is above the black stroke and that it has a smaller thickness. This will give the stroke that outlined look without having to actually outline it. Creating the stroke this way also helps your system run faster, and makes the strokes easier to edit later.
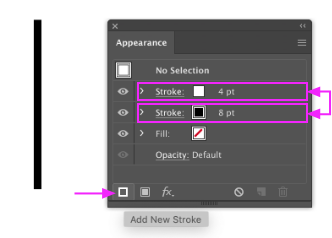
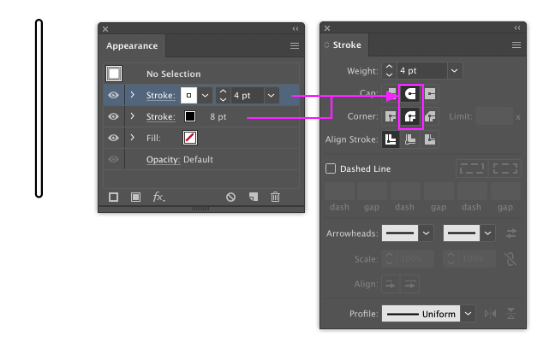
Also, make sure that the strokes have rounded caps and corners. You have select each stroke layer in the appearance panel separately and apply the rounded caps, or only one of the colors will have the rounded cap. Rounding caps and corners will make short strokes easier to deal with late
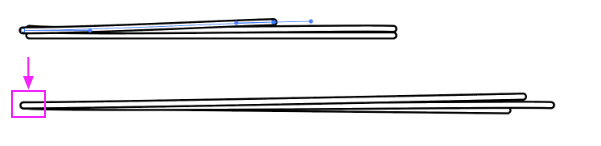
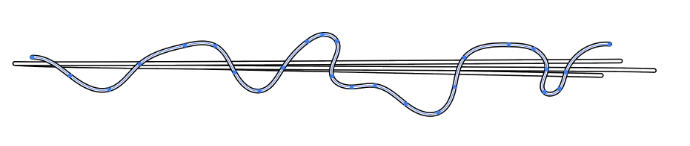
You will want to use the straight line and Pen Tools for the next steps. Create a single straight line first and then some slightly curved lines that will be the base of the spiderweb shooting from Spiderman's hand. Before you start drawing, make sure that the white outlined stroke was the last object you selected so all the strokes you draw have the same appearance. You can also draw the strokes to appear to be coming from the same origin, so it looks like Spiderman is shooting them.
Adding Random Web Strands
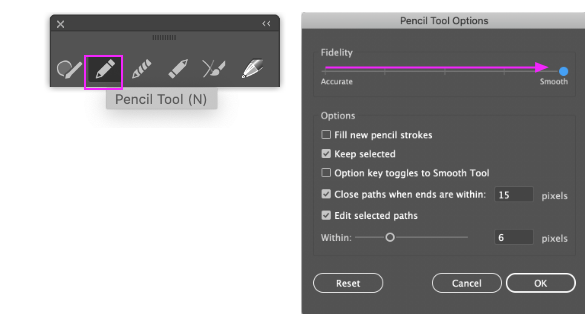
I find it easiest to use the pencil tool for the next steps. Click the pencil tool and hit enter on the keyboard to open the preferences. Make sure the smoothness is all the way up.
Create a randomly squiggly line throughout the web and make sure to cross over it a few times. Duplicate the line and send the copy behind all the other lines.
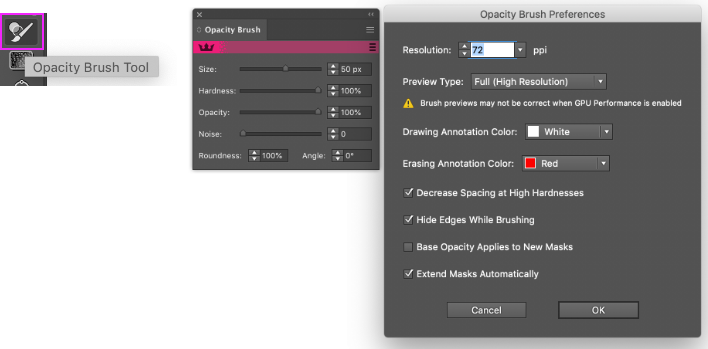
Use can use the Opacity Brush to erase the areas on the line where you want it to appear behind the main web lines. You can see below some of the preferences that I’m using. I prefer to have the hardness turned to 100% so I don’t have any accidental fades where the lines cross. I also have the opacity turned all the way up, so the areas where I brush will be completely hidden. I don’t worry much about the resolution or other default settings, because you won’t be able to see any low resolution artwork when the line is overlapping onto itself.
Now, simply brush out all the areas of the line that you want to appear behind the main web lines. Below, you can see all the areas I brushed with the opacity mask, so they appear behind.

Repeat these steps a few times to get a good number of squiggly lines throughout the web. It’s pretty easy to overdo, so have fun, but remember "sometimes, less is more". Erase areas where lines cross both each other, and the main web lines, so it looks like a random tangled mess. Some lines can even start and end or in the middle of the we

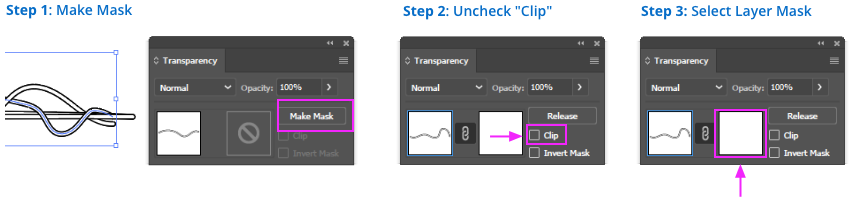
Note: You can create this same effect by using the transparency panel. Follow the same process of making a copy of the line and sending it to the back. Instead of using the Opacity tool, open the transparency panel, and with the forward-most line selected, click "Make Mask". Follow the steps below to hide the areas of the line that you want to appear in the back

Adding the last few details.
To make your web look complete, draw a few circular lines tightly wound around the web. Start with the back-most loop, and work your way forward and ensure that the foremost line crosses the main web completely. This way, you can erase the area that crosses and it will appear that it wraps around the main web line.

Additionally, since the lines are rounded, you can create simple curved lines like in the example below without having to erase any part of them.

Once you've followed and repeated the various steps above, you should have a nice Spiderman web. Have fun spinning!