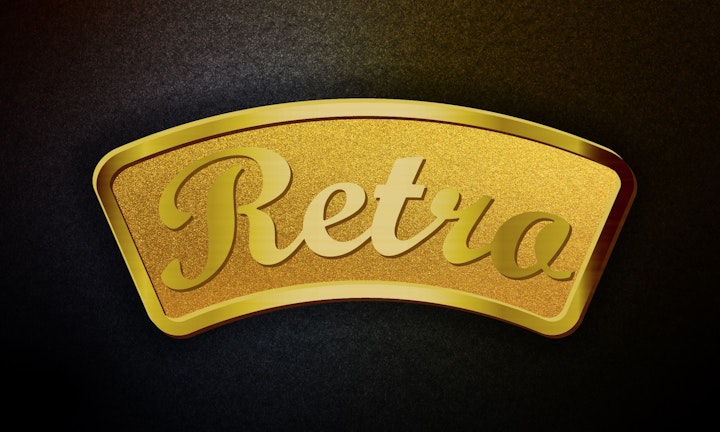
How to create a gold glitter texture in Adobe Illustrator
8 minute readTurning any artwork into a realistic gold effect is now only a small number of steps away thanks to Texturino for Adobe Illustrator. This technique can be applied to all artwork types in your Illustrator document; vectors, images, editable text, groups, clipping masks and more!
Note that for the ultimate realistic "glitter gold" end effect, we will have to resort to using a raster-based texture. This does ensure a very quick process, and with Texturino, I also means that the raster effect is automatically clipped to the applied artwork ensuring a very nice, sharp vector edge.
What you'll need
The artwork to apply the gold effect to
A high-quality gold texture image
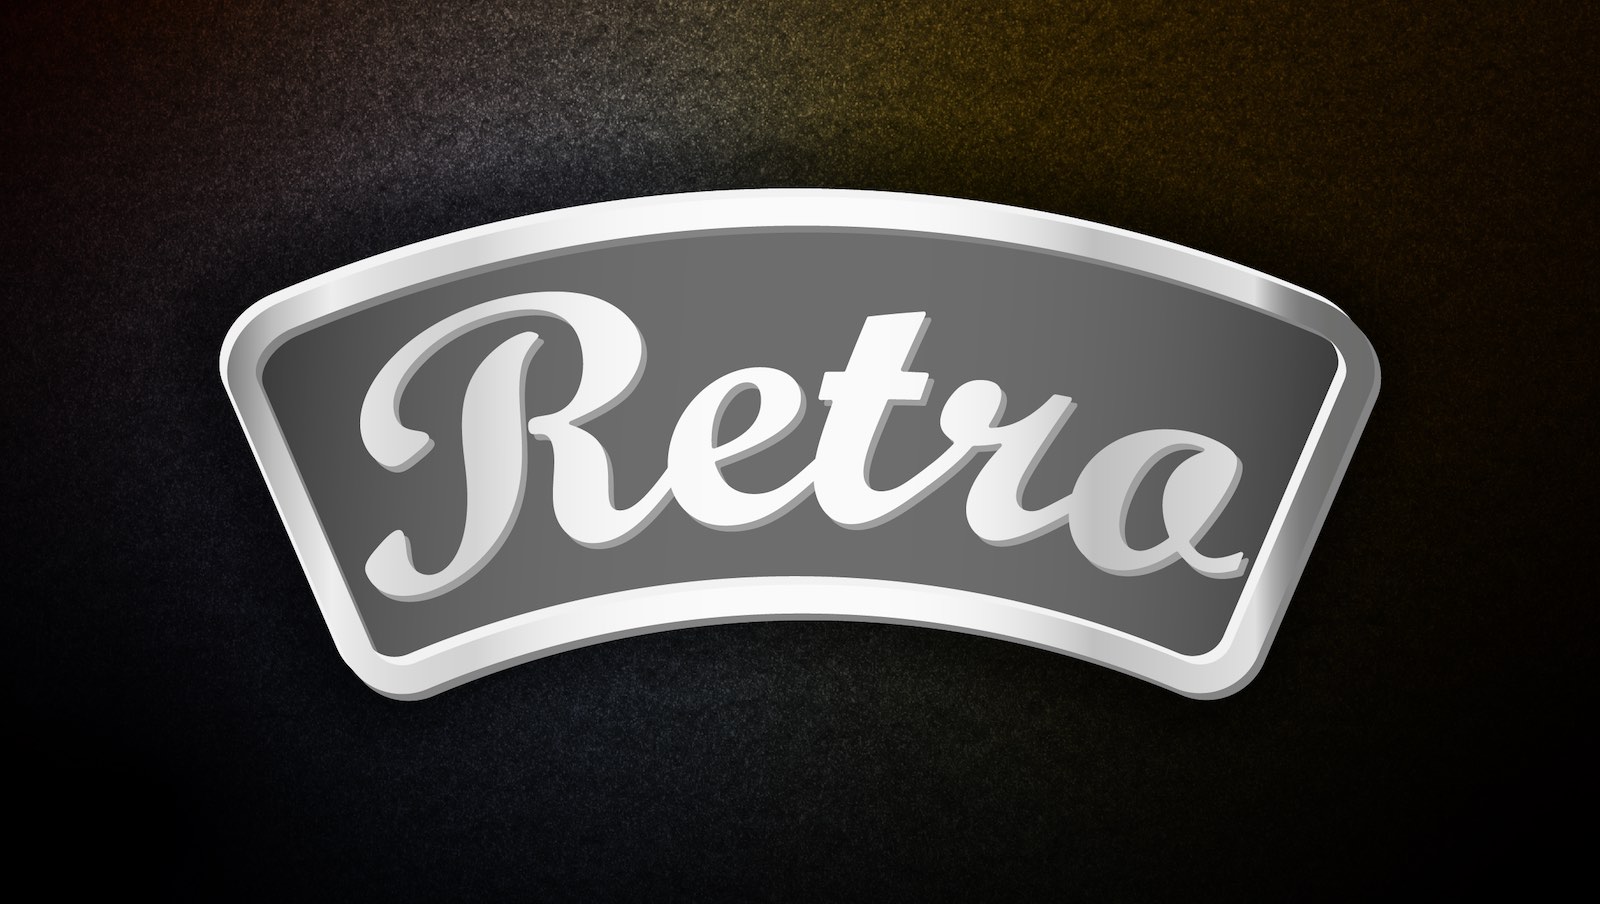
In this tutorial, we'll be making the following vector artwork glittery gold:
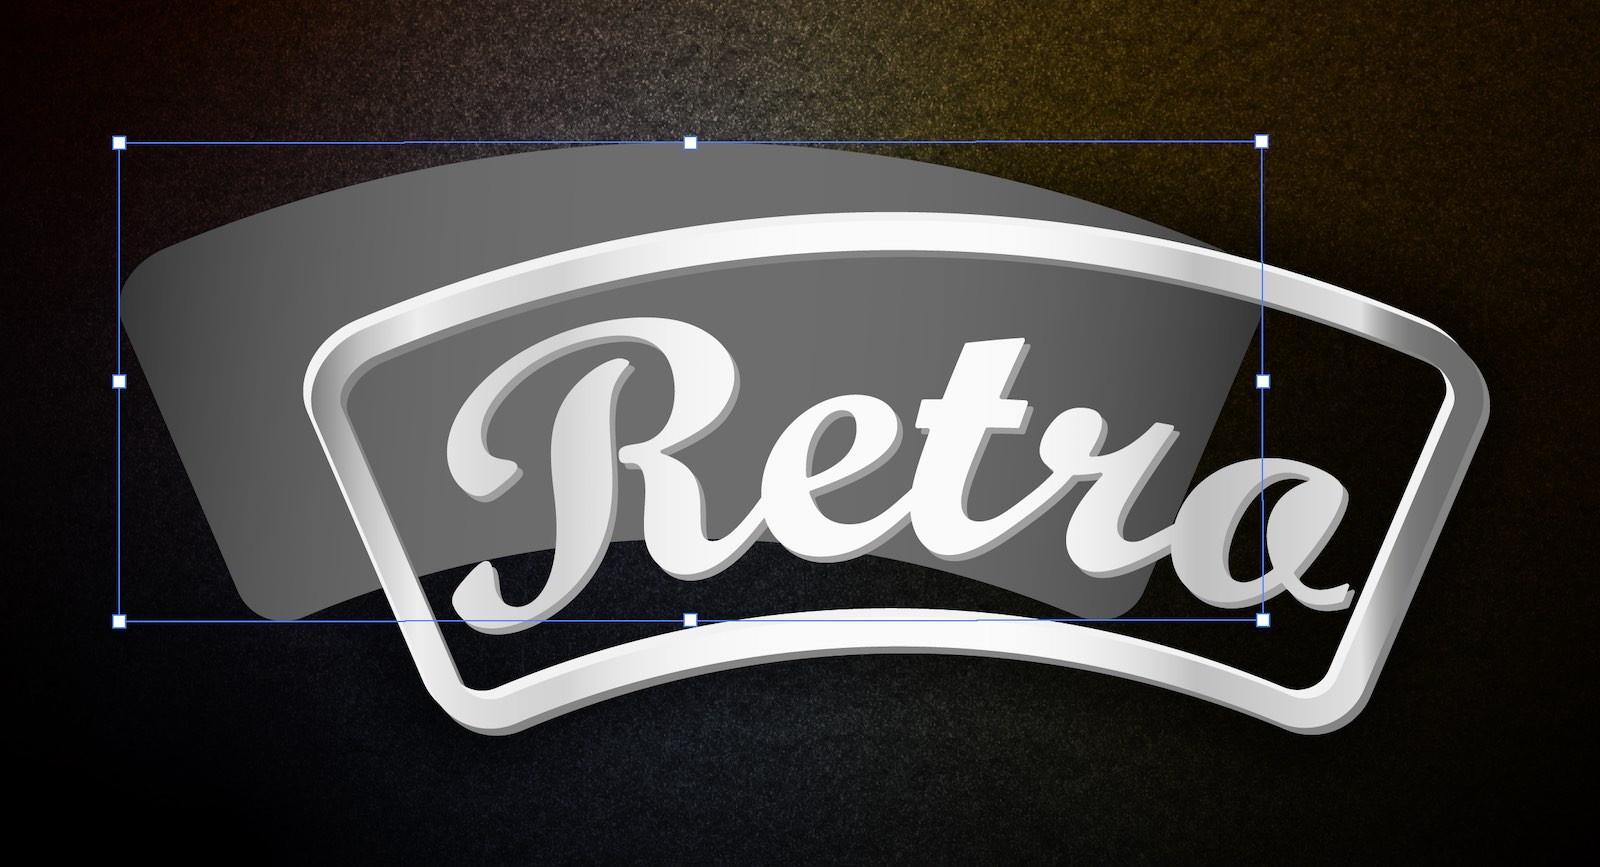
To make things a little more interesting, we're going to apply two styles of gold effect to the artwork. To do this, the artwork is broken into two elements; the foreground details and the background arc (selected) as shown here:
For the gold texture image, there are many resources on the internet to obtain a realistic gold effect. For this tutorial, a perfect high-resolution texture image was found in seconds on Adobe Stock. You can also find it here.
Loading the texture into Texturino's library
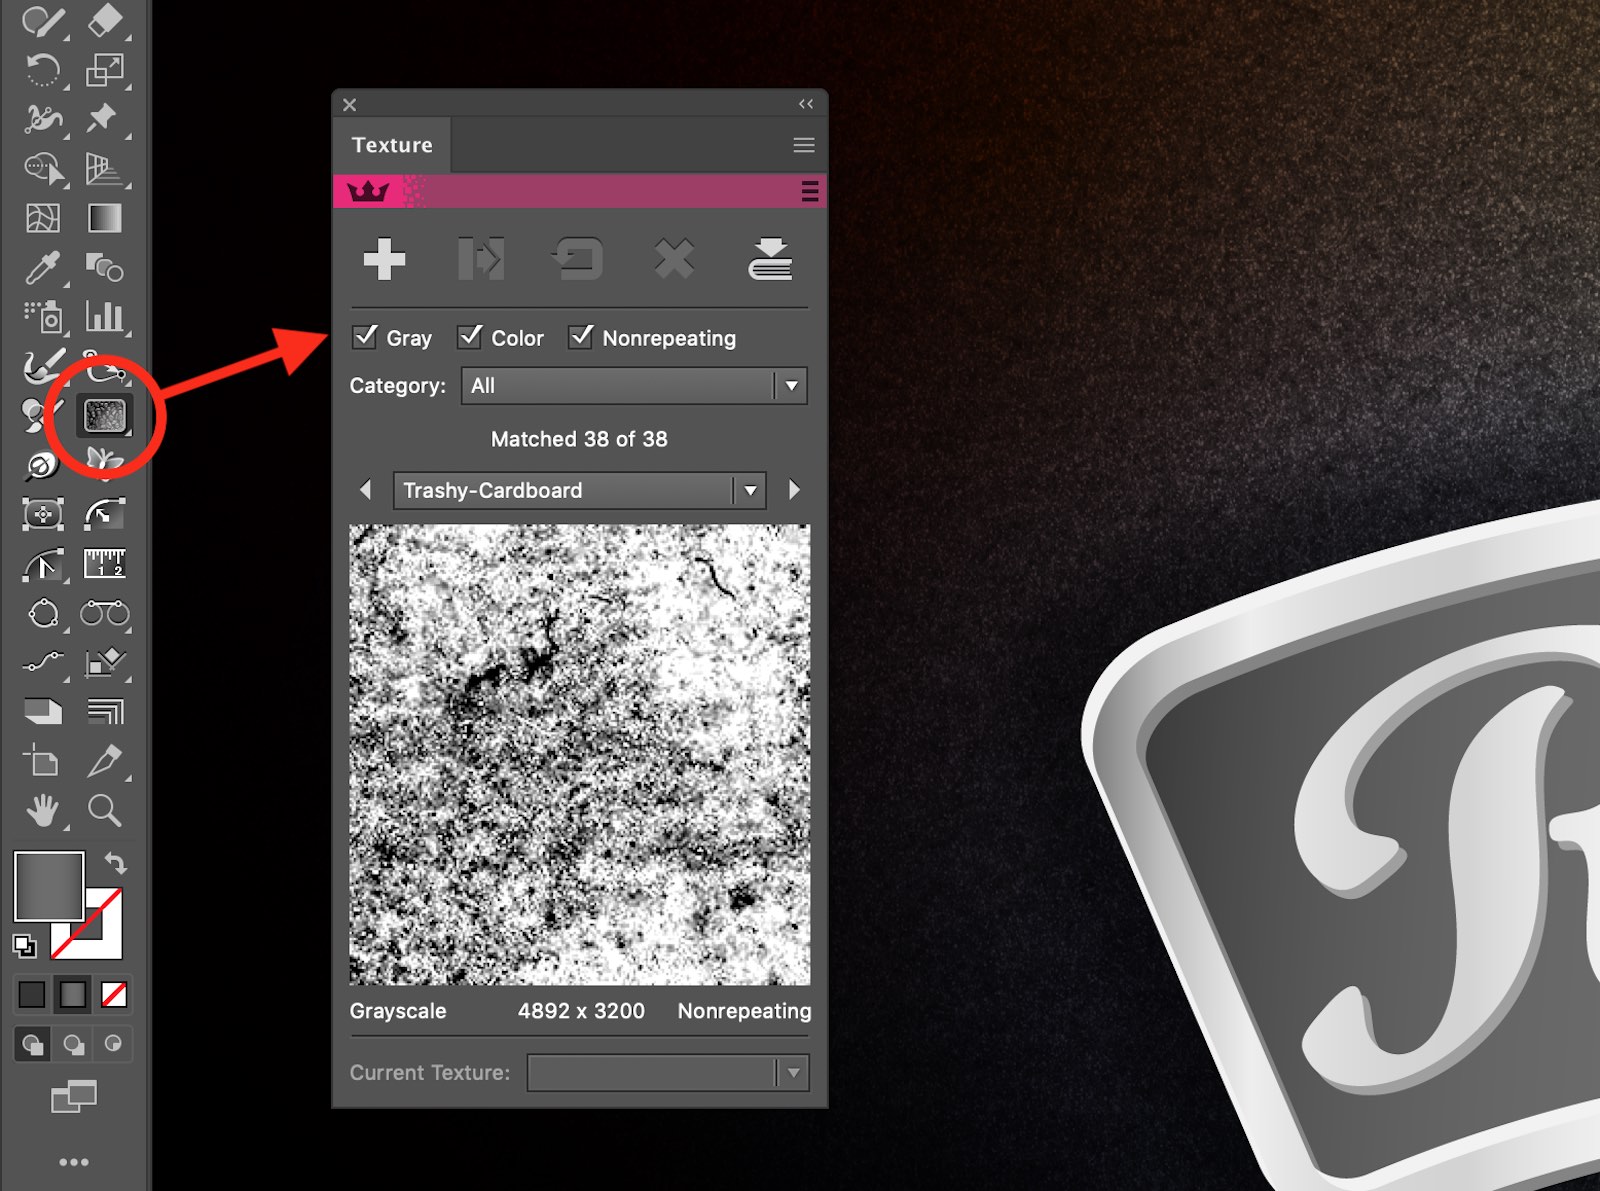
Locate and click on the Texturino icon in Illustrator's toolbox. This will automatically open the associated Texture panel if not already open:
There are two ways to import textures into Texturino's Texture Manager ("library"). For this article, we're going to opt to first drop the texture image into the Illustrator document (embedded, not linked) and then convert this to a texture library item. The advantage of this approach is that whatever raster format Illustrator can import can be added to Texturino.
With the raster image selected, click on the Texture panel fly-out menu icon (highlighted below) and opt for Convert Raster Art to Texture...
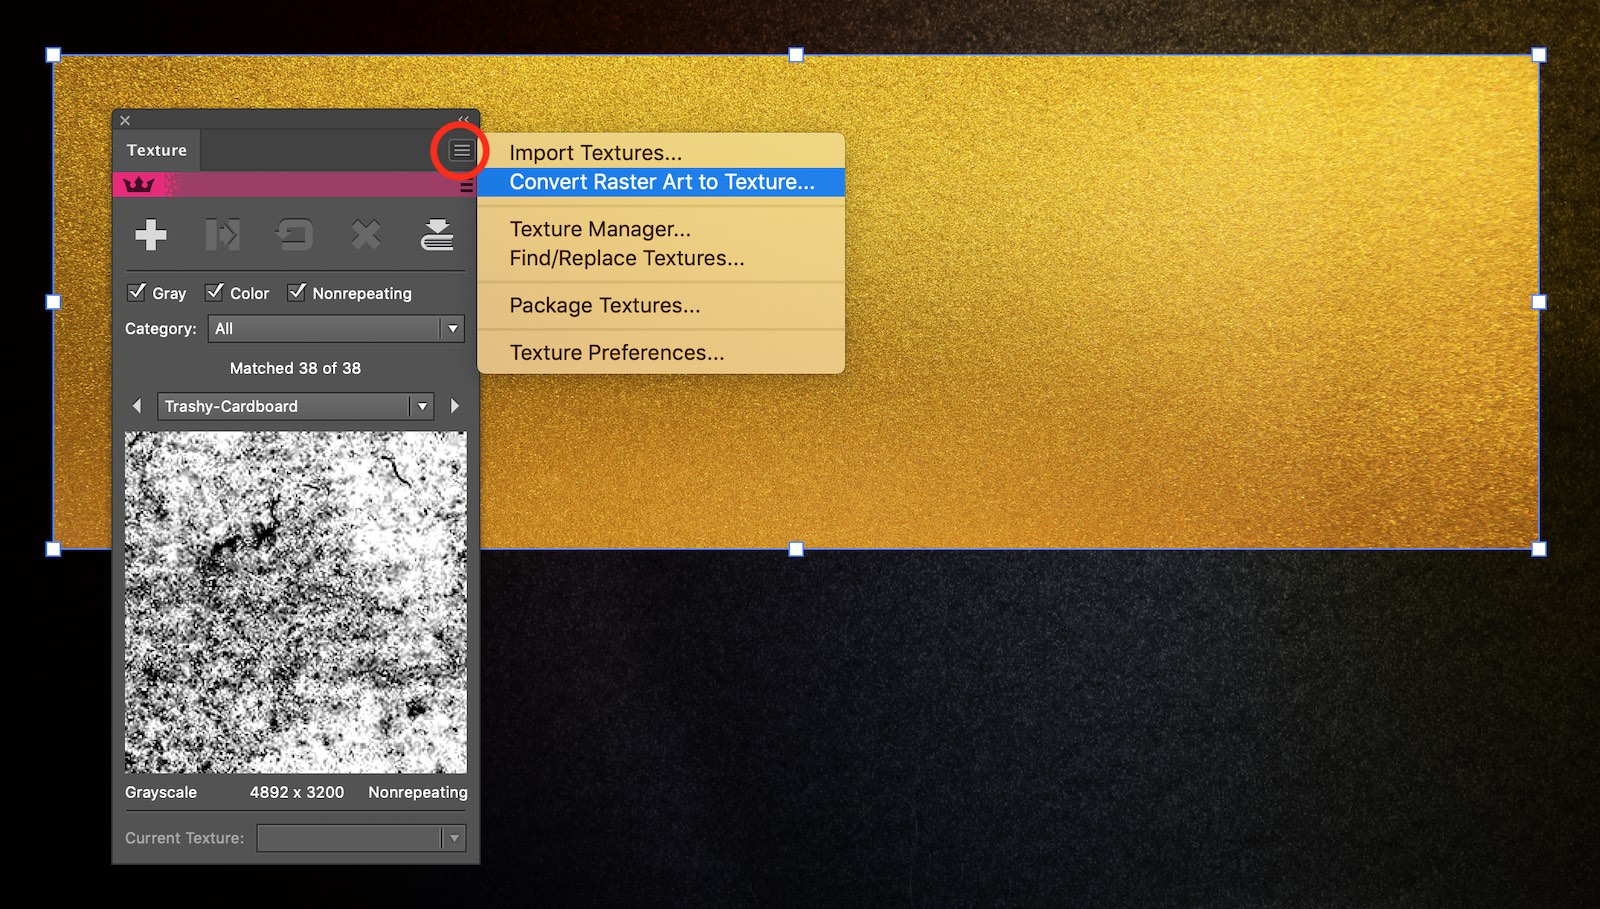
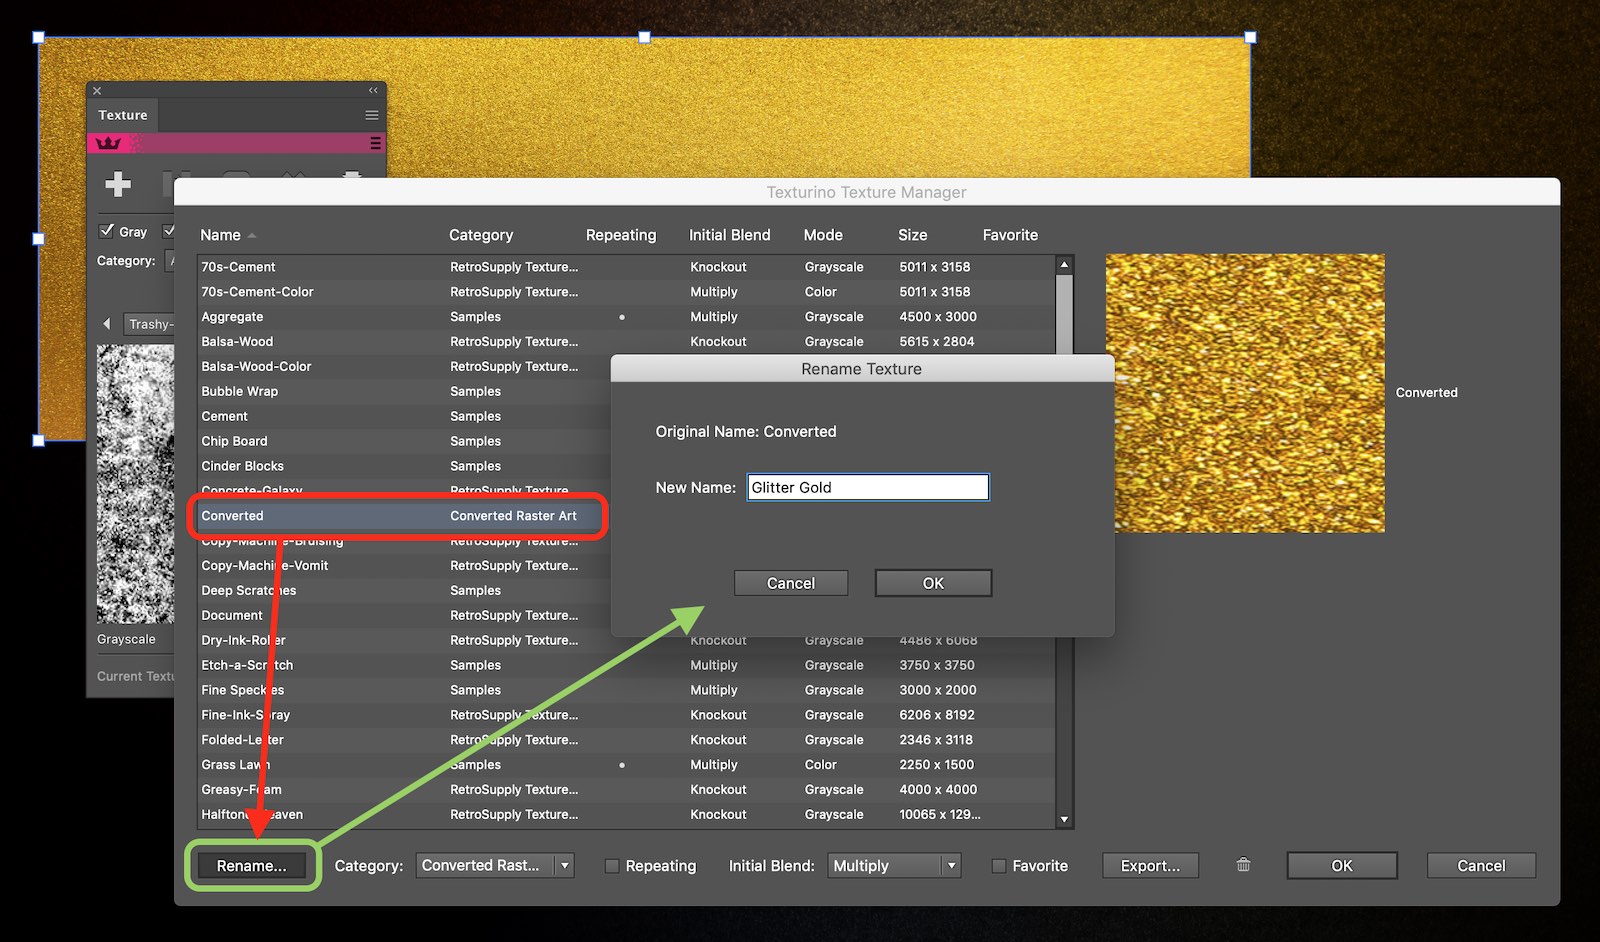
The previous step will result in the Texturino Texture Manager window automatically opening.
The new texture "Converted" will have been added and selected (red highlight below).
Click on the Rename button (green highlight below) and ensure the newly imported texture has an appropriate name.
OK this name.
Optionally, whilst the new texture is selected in the Texture Manager, add it to a category for easy future location in the Texture panel.
OK the Texture Manager window to apply and close.
The texture raster object is deleted from the document as it's now in the library. Once in Texturino's Texture Manager library, it's available to all future Illustrator documents.
Applying the texture
To apply the texture, sleeted the target artwork. In this case, we're going to select the background arc which is a simple vector shape.
Locate the newly imported glitter gold texture in the Texture panel (it should display in the preview to confirm it's the currently selected texture).
Then click on the "+" button (red highlight below) in the Texture panel to apply to the artwork.
Once applied, use the Texturino 3-legged control annotation to set the texture's transparency type and scale (green highlights below). In this example, there is no transparency by opting for Normal and the scale is vastly reduced to below 5% to ensure the best possible glitter effect.

With the first basic texture having been applied, this tutorial will enhance the remaining gold texture effect by importing a second gold texture image to apply to the detail area of the artwork.
In this example, the gold texture used previously was opened in Photoshop and a large Motion Blur effect was applied (2000px) to result in a brushed gold metal effect. This modified image was then copied into the Illustrator document and added to the texture manager library as before. The texture was given a different name to differentiate it.
Again, the texture raster object is deleted from the document as it's now in the library.
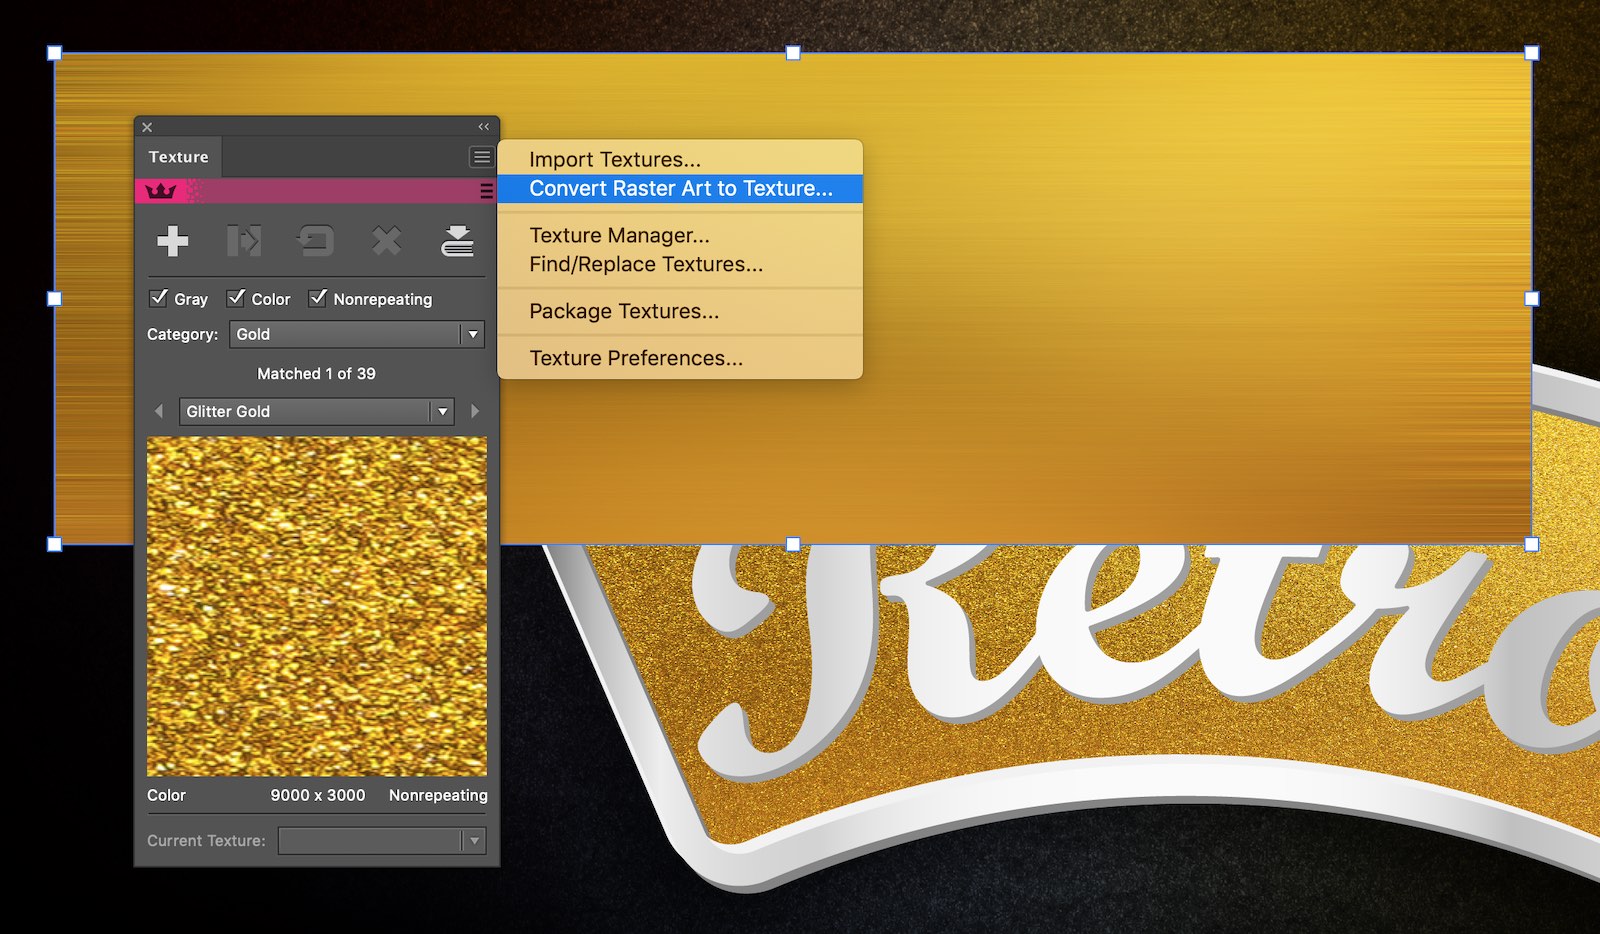
The upper detail artwork is selected. In this instance, the artwork is a group of vectors with monochrome shading applied in various ways.
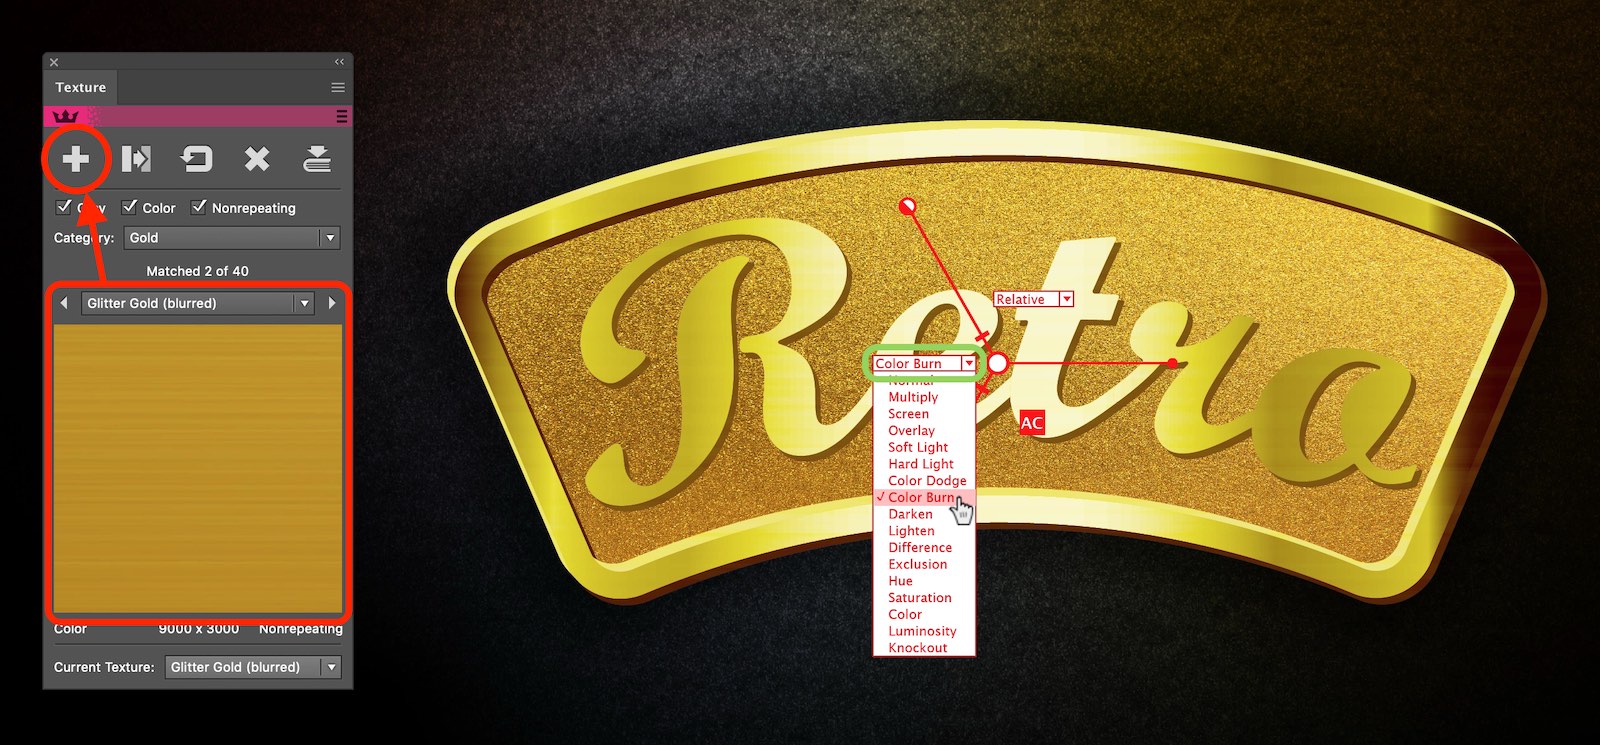
Selecting the newly imported brushed-effect gold texture in the Texture panel, this is applied to the group in the same way as before (see red highlight below).
This time, due to the underlying shading being desired in the final effect, the transparency type is changed to Color Burn using the annotation system (see green highlight below). The texture is also scaled to suit.
Whereas the previous result does give a good result, it's felt that it's too bright. At this stage, we could simply adjust the underlying artwork (see "Pro tips", below). However, another method would be to apply a second instance of the brushed gold texture to the same object.
As texture scaling has already taken place, in this case, it would be best that the second texture instance inherits this setting. To do this, Option-click on the "+" button (red highlight below) when applying the second instance of the texture.
Once applied, change the transparency type to Multiply and reduce the opacity until the desired level of brightness is achieved.
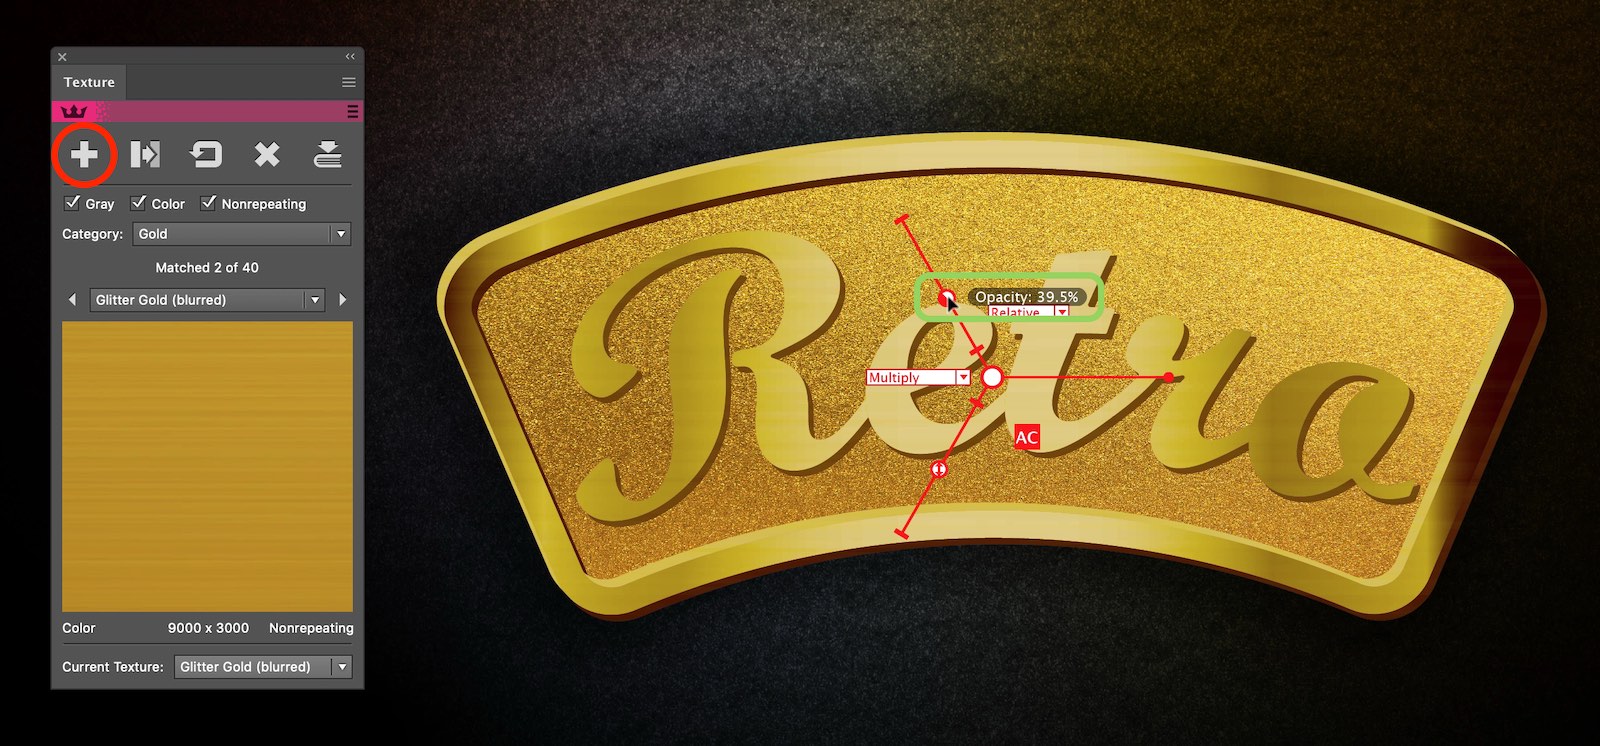
The realistic result has been achieved! The artwork remains completely editable, sharp and the textures applied as dynamic live Effects.
You can use this same technique to apply realistic textures including fashion materials such as denim or cotton.
Pro tips
Here are 6 great tips on how to take this further to improve results and enhance control over your masterpiece.
Live texture as you draw
By targeting a layer (click on the layer's "meatball" icon in the Layers panel) and adding a Texturino texture to that layer, anything drawn in that layer will have the texture automatically applied to it. Try this whilst sketching with DynamicSketch and a graphics tablet for an amazing experience!
It's non-destructive... tweak away
All Texturino textures are applied as live Effects (refer to the Appearance panel). You can remove, hide or re-order these textures effects at any stage without affecting the underlying artwork.
Don't fear sending textured artwork to others without plugins
We have you covered if the intended recipient of the artwork is not enlightened and struggles in Illustrator without Astute Graphics amazing tools! They will be able to load the artwork, print and output it, whilst Illustrator will simply warn them on loading it that they don't have Texturino to allow for live changes.
Adjusting the underlying artwork
You may find that the artwork better suits an applied texture if it's brighter, darker, features more or less contrast, etc. No problem with Phantasm! Simply select the artwork which has the texture applied and use the Phantasm filter controls to alter the tone, brightness, hue, etc. (Object > Filters > Phantasm > ...). This method means that any applied live Effect such as Texturino is automatically re-calculated and rendered based on the modified artwork.
Brushing textures in or out
Remember that the Texturino plugin also features the Texture Brush Tool. Especially when coupled with a graphics tablet and stylus, it's a very natural way to apply textures with greater control and realism.

