How to add textures in Adobe Illustrator
14 minute readIn this tutorial we are going to look at the different ways you can add textures to your Adobe Illustrator artwork.
How to Add Textures in Adobe Illustrator using Texture Effects
Prepare Your Document
Open Adobe Illustrator and create a new document or open an existing one where you want to add textures.
Create or Select Your Shape
Draw or select the object(s) you want to apply the texture to. This could be anything from a simple shape to a complex graphic.
Apply Photoshop Texture Effects in Illustrator
Some Photoshop Effects are available within Adobe Illustrator. To find them, navigate to the Window > Effects > Photoshop Effects … sub-menu.
There are multiple texture effects available including Grain, Mosaic Tiles to Texturizer.

Applying the "Grain" Texture Effect
In this tutorial example we will be looking at the Grain Texture options.
With your object selected navigate to Effect > Texture > Grain…. The Grain dialog window will open and preview your texture. From here you can adjust the Intensity, Contrast, and the Grain Type.

Click OK to apply the texture.
Adjusting Texture Properties
As this is a live effect, it will now appear in the Appearance panel (Window > Appearance). In this panel you can hide it, bin it, or click on the Grain Effect to reopen the dialog and make any further adjustments.

You can also adjust the texture's opacity and blending mode by selecting the object and adjusting settings in the Transparency panel (Window > Transparency). This will effect the combined underlying artwork and applied transparency.

Expanding the Texture (optional)
If you need to apply additional effects, or want the texture to be more integrated with the design, you can expand the grain appearance. Warning: once you do this, you can’t make any further changes to the grain texture, and would have to repeatedly Undo, or revert back using the History panel (Window > History)..
Select the textured object and choose Object > Expand Appearance.
Combining with other live Effects
You can combine textures with other Illustrator Effects for more complex results. For example, applying a gradient before or after a texture can create interesting visual effects.

How to vector image trace a PNG image and use it as a texture with opacity masks in Adobe Illustrator
How to import the PNG File
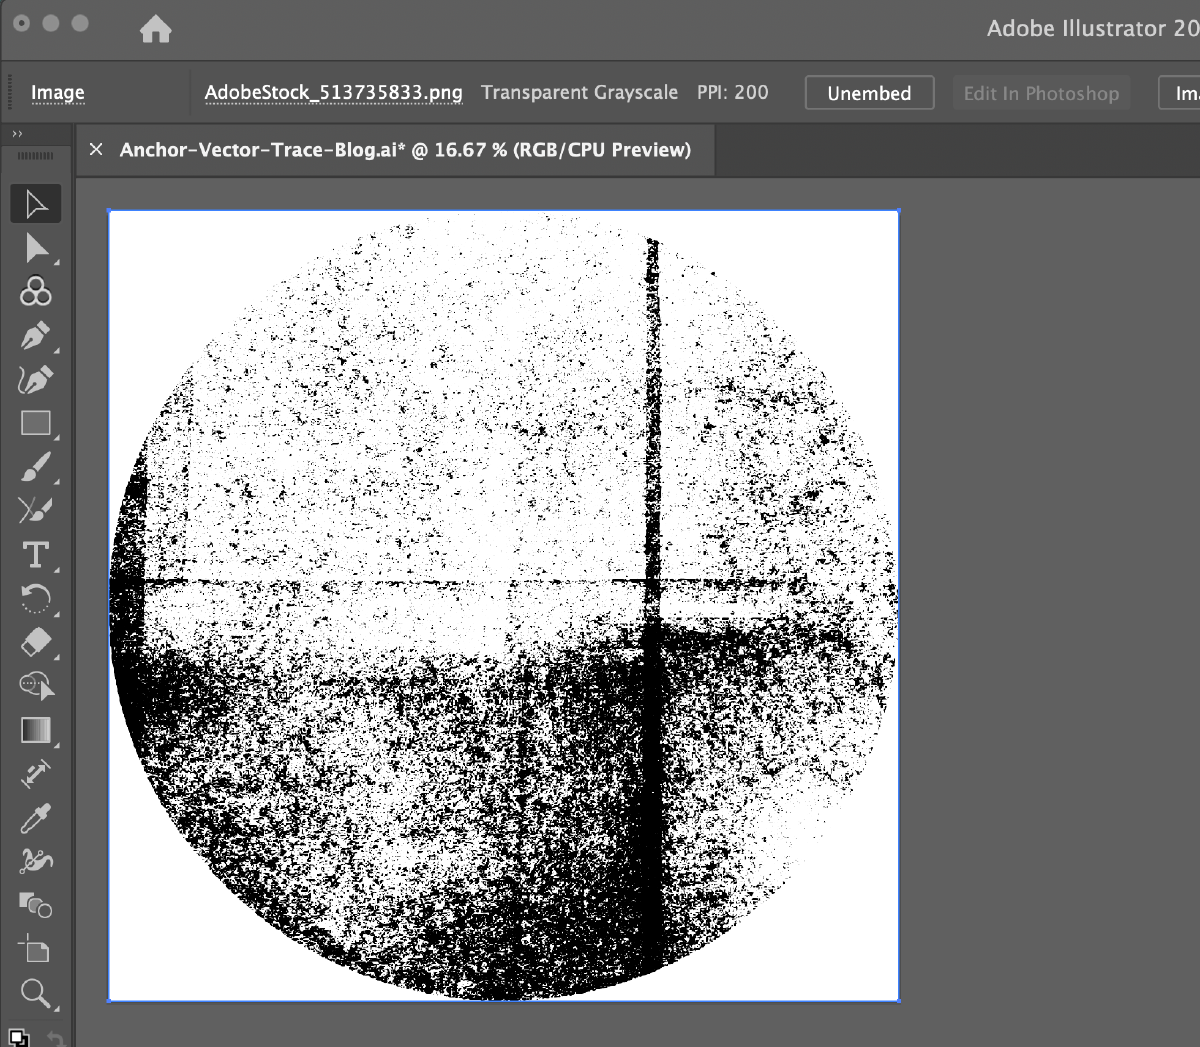
Make sure you have a high-resolution PNG file that you want to vectorize. Free textures are available from Adobe Stock. In our example we’ve used this abstract circle texture.
To import your image go to File > Place, select your PNG file, and click Place. Click on your document to place the image or click and drag to define its size.
How to image trace your PNG texture
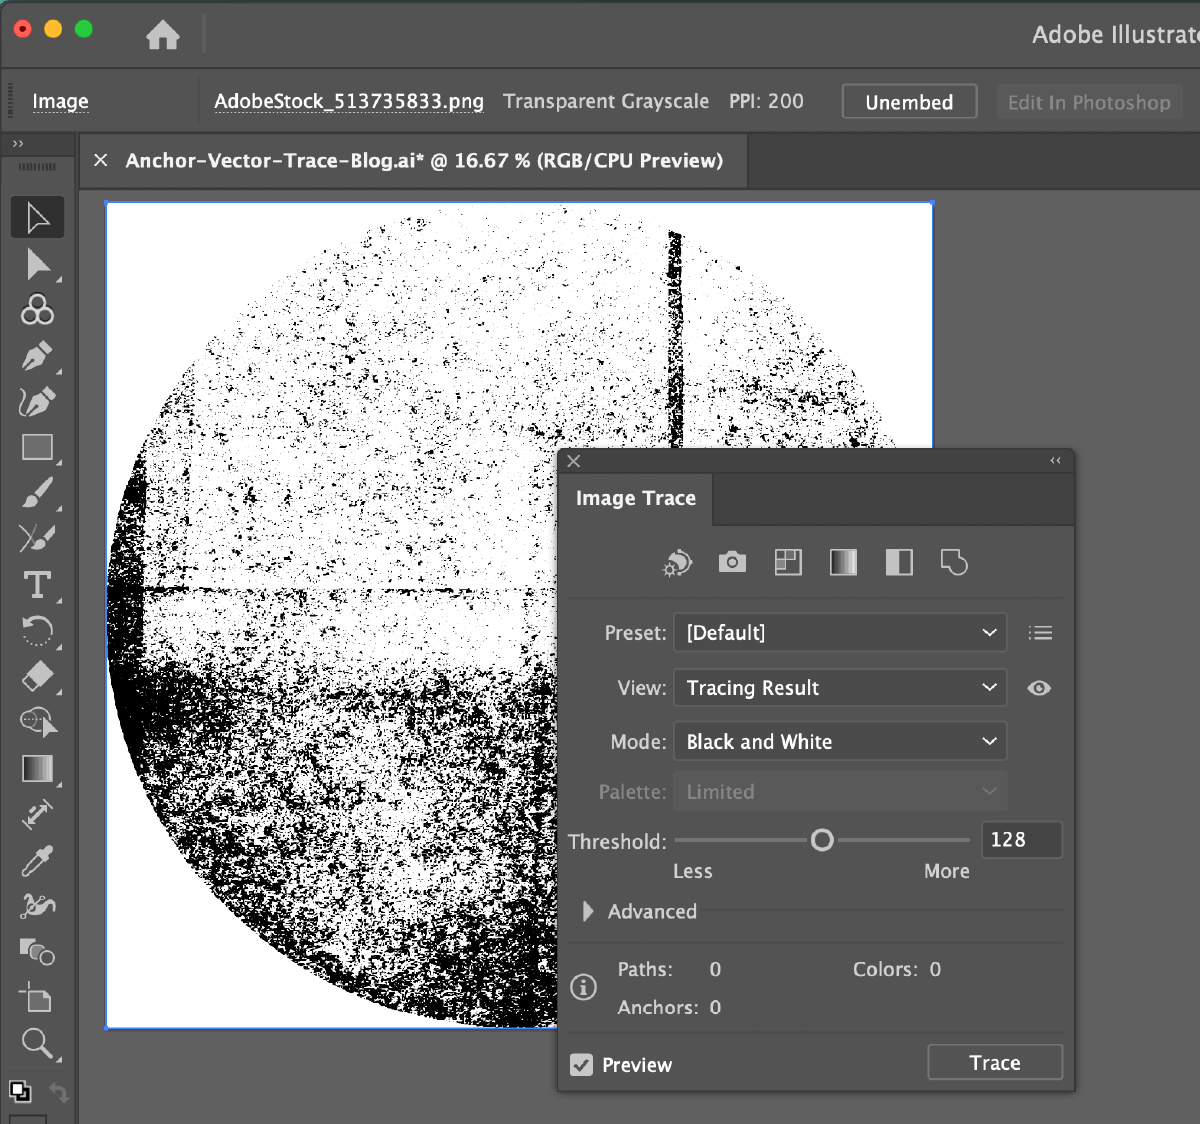
Select your image and open the Image Trace panel (Window > Image Trace).
When enabling the Preview option, Illustrator may display a warning dialog that tracing may take some time on a larger image. To reduce your file size for tracing, you can re-rasterize your image to a lower resolution (Object > Rasterize).

Choose Preset and Settings
Choose a preset that best fits your texture. We recommend choosing the Black and White default option. Expanding the Advanced section of the panel offers further adjustments to refine the trace.
Use the Threshold slider to adjust the level of detail and the Paths, Corners, and Noise sliders to fine-tune the vectorization.
Image Trace also has an option to ignore a color. Enabling this option and choosing White will remove all the white paths and leave you with just the black paths.

Simplifying your texture
The Image Trace panel displays the current number of paths and anchor points of your tracing results. A very high number of paths and anchor points in a document can slow down your Illustrator.
To reduce your file size, try changing the threshold, noise, and anchors sliders, observing the effect these adjustments have on the resultant Anchors value. You can also enable the Simplify option and control the associated Anchors slider within the Image Trace panel.

Expanding your image trace
Once satisfied with the image trace, click the Expand button in the Properties panel (Window > Properties) or Control bar (Window > Control), or choose Object > Expand to convert the tracing object into editable vector paths.

Tip: If you are an Astute Graphics user, we highly recommend using the VectorFirstAid Super Smart Remove Points features to clean up your vector texture. More information on this can be found here: https://docs.astutegraphics.com/vectorfirstaid/vectorfirstaid-panel#convenience-operation-buttons
Apply the vector texture to your design using an Opacity Mask
Have the artwork you want to apply a texture to ready. Place your texture (typically an embedded texture image, but it can be any artwork type) over it, ensuring it covers the artwork fully from edge to edge. Scale and/or rotate as necessary. Select both the artwork and the texture and open the Transparency panel (Window > Transparency).

Click the Make Mask button in the Transparency panel. If the texture isn’t showing as expected, try disabling the Clip option. You may also use the Invert Mask option which switches the dark elements previously resulting in transparency, to resulting in opaque (and vice versa).

Adjust the Opacity Texture Mask
To adjust the texture, select the texture part of the mask and move or scale it as needed. Adjust the opacity of the vector texture or the object to refine the effect.

To remove the opacity mask entirely, click the Release button in the Transparency panel.

Top tips:
High contrast PNGs: for better results, use a high-contrast PNG file to make the tracing process more effective and the texture clearer.
Refine image tracing settings: spend time adjusting the Image Trace panel settings to get the most accurate vector representation of your texture.
Use layers: work with layers to keep your texture and object separate and easily adjustable.
Blend with colors: you can blend the texture with colors by changing the fill color of the shape or object to see how it interacts with the texture.
Adjust transparency: to blend the texture with your design, adjust its opacity using the option in the Transparency panel.
Astute Graphics Texture Packs and How to Add Them
In this next section we are going to show you how to find and download the textures from your Astute Manager, then how to import them into Adobe Illustrator using the Texturino Texture panel so that you can use them in your design work.
If you haven’t yet tried out the Texturino plugin, you can start a free trial using this link, and you’ll have 7 days to download and try out this amazing tool, plus 100’s of other tools with just an email address.
Note: Astute Graphics trial users can only access the 12 sample textures provided within the plugin, not all the professional texture packs available to subscribers. However, it’s possible to add your own textures to experiment further even when in a trial period.
How to find and download Astute Graphics textures
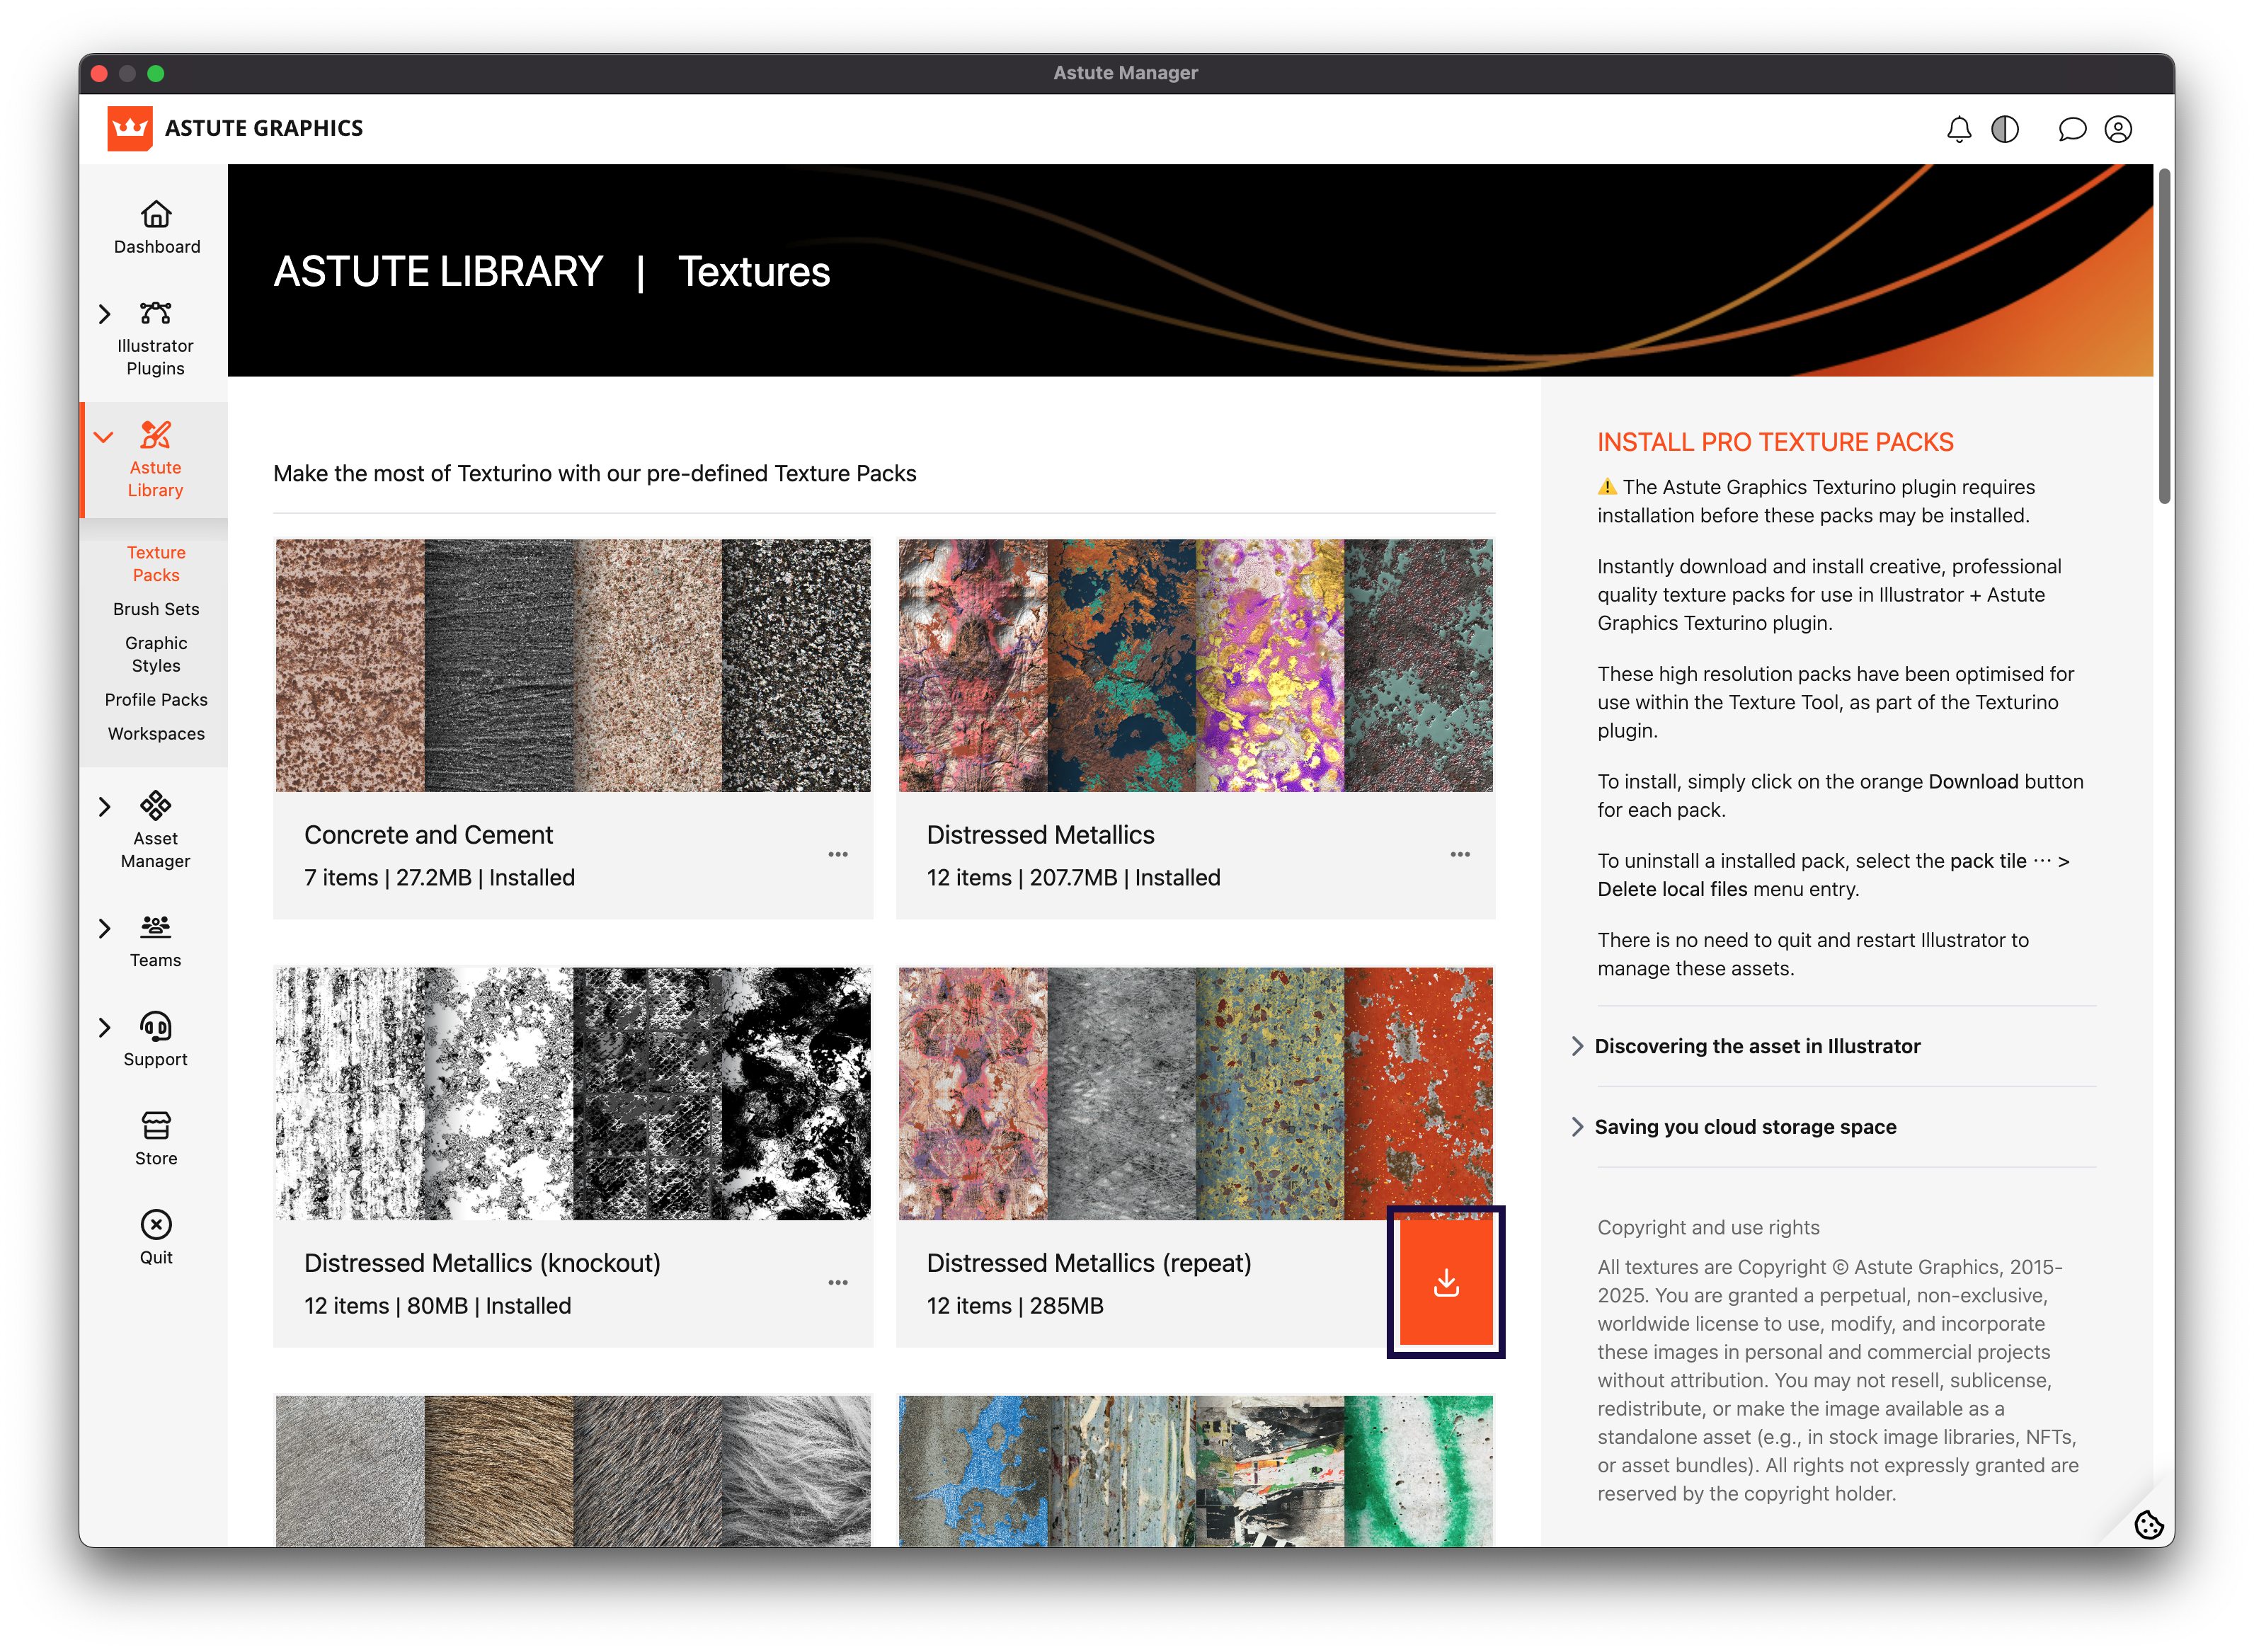
Once you’ve set up your Astute Graphics account and installed the Texturino plugin (click here for more help on that), open up your Astute Manager navigate to the Astute Library > Texture packs section. From there, you have access to all Texturino texture packs. We’ll be using the “Retro Supply Snack Pack” texture pack in our example which comes with 23 incredible color and grayscale textures.
Other Astute Graphics texture packs available:
Wood Textures
Paper Textures
Distressed Metallic Textures
Grunge Textures
Fur Textures
plus much more
Once you have pressed the download and install button the file will begin to download directly into your Texture panel inside Adobe Illustrator.
How to import the textures into Adobe Illustrator
Open up your Astute Manager application.
In the sidebar menu go to Astute Library > Textures.
Click the orange Download & Install button to add these textures directly into your Texture Panel.
How to use your textures
Use the category dropdown in the Texture panel to find the Retro Supple Snack Pack, and select the one you wish to apply to your artwork.

Select your artwork and press the big “+” (Plus) button to add the texture.
The Texture Tool annotation widget will then appear, allowing you to easily change the scale, opacity and rotation of the texture.

Use the transparency blend mode dropdown menu (in the image above, it’s set to Multiply) to experiment with overlaying the textures in different ways.

Top tip: doubleclicking any one one of the annotation slider controls will open a dialog box that allows you to enter an exact value. For example, this is especially helpful if you doubleclick on the Scale slider control if you wish to ensure your textures are exactly 300dpi for a high print quality.

Reapplying the texture settings to another object
If you want to apply the same texture with the same settings that you have just applied to another object, you can hold the Option/Alt key while pressing the add texture button.

Swapping out textures
You can swap textures by using the Replace button. First select your object, then select the new texture in the panel and use the Swap button.

Reset or remove a texture
To reset the texture to its default values, use the top center Return button.
To remove the targeted texture entirely use the Cross button.

Stacking textures
To stack textures on top of one another, all you need to do is choose the next texture to apply in the Texture panel and press the “+” (Plus) icon again.
When more than one texture is applied, the Current Texture dropdown at the bottom of the panel becomes available, allowing you to target each texture in turn.
If your texture annotation widget has disappeared, click inside the preview window to reactivate it.

Adding textures to groups
You can apply textures to a single object, live type, embedded images, or even groups and layers. In fact, you can add a texture to almost any artwork in Illustrator with the Texture panel.
If you need any more help with the Texture Tool and associated Texture panel, don’t forget to check out our documentation site: https://docs.astutegraphics.com/texturino/texture-overview
If you don't already have the plugins, it takes less than 5 minutes to create a free trial account. No credit card details are required, only your email address. Visit https://astutegraphics.com/freetrial to sign up and install these Adobe Illustrator Plugins on a 7 day trial.
Watch how to add textures in Illustrator on YouTube
Find more great quick tips and tutorial videos on our YouTube Channel.